
Updated 2024 Approved Ready To Dive Into Photo Talking Videos? Heres What You Need To Know
Ready To Dive Into Photo Talking Videos? Here’s What You Need To Know
Pictures and videos are crucial for preserving memories; companies also use them for promotional purposes. However, technology has now created an innovative and engaging way to use pictures. For example, you can now put life into your photos and make them a talking video.
If you are wonderinghow to make a photo-talking video , this article presents a complete guide. We will share some of the best tools for creating photo-talking videos. Simply follow it to the end to learn about it in detail.
Part 1. What Is a Photo Talking Video?
Atalking-photo video is like a magic trick for making pictures engaging. You can take still pictures and make them move or talk like they are alive. It represents a captivating merge of photography and animation for an interactive experience. Moreover, new and creative ideas are always invented to make photo-talking videos even better.
No doubt this creativity takes your entertainment to the next level, but there’s more to it. These photos also change how companies talk to us about their products. It is like giving a voice to photos and using them to tell stories in a way that grabs customers’ attention. That’s why photo-talking videos are becoming a big deal in today’s market dynamics.
Innovations in Picture-to-Talking Video
People use various tools and techniques to convert images to talking videos. These techniques may include mobile applications or computer software, which keep getting innovations:
- Integration of artificial intelligence for more realistic movements.
- Use of facial recognition technology for accurate lip-syncing.
- Implementation of voice synthesis to generate lifelike speech.
- Introduction of interactive features allowing user engagement.
Part 2. How To Create Talking Video With Reliable Desktop Tool—Wondershare Virbo
In the above sections, we have introduced the concept and importance oftalking photo videos . Let’s head to the part where you will know how you can create them with tools. One of the most straightforward methods to generate such talking photos isWondershare Virbo . Whether you want to market a product or deliver a presentation, using this tool is a good idea.
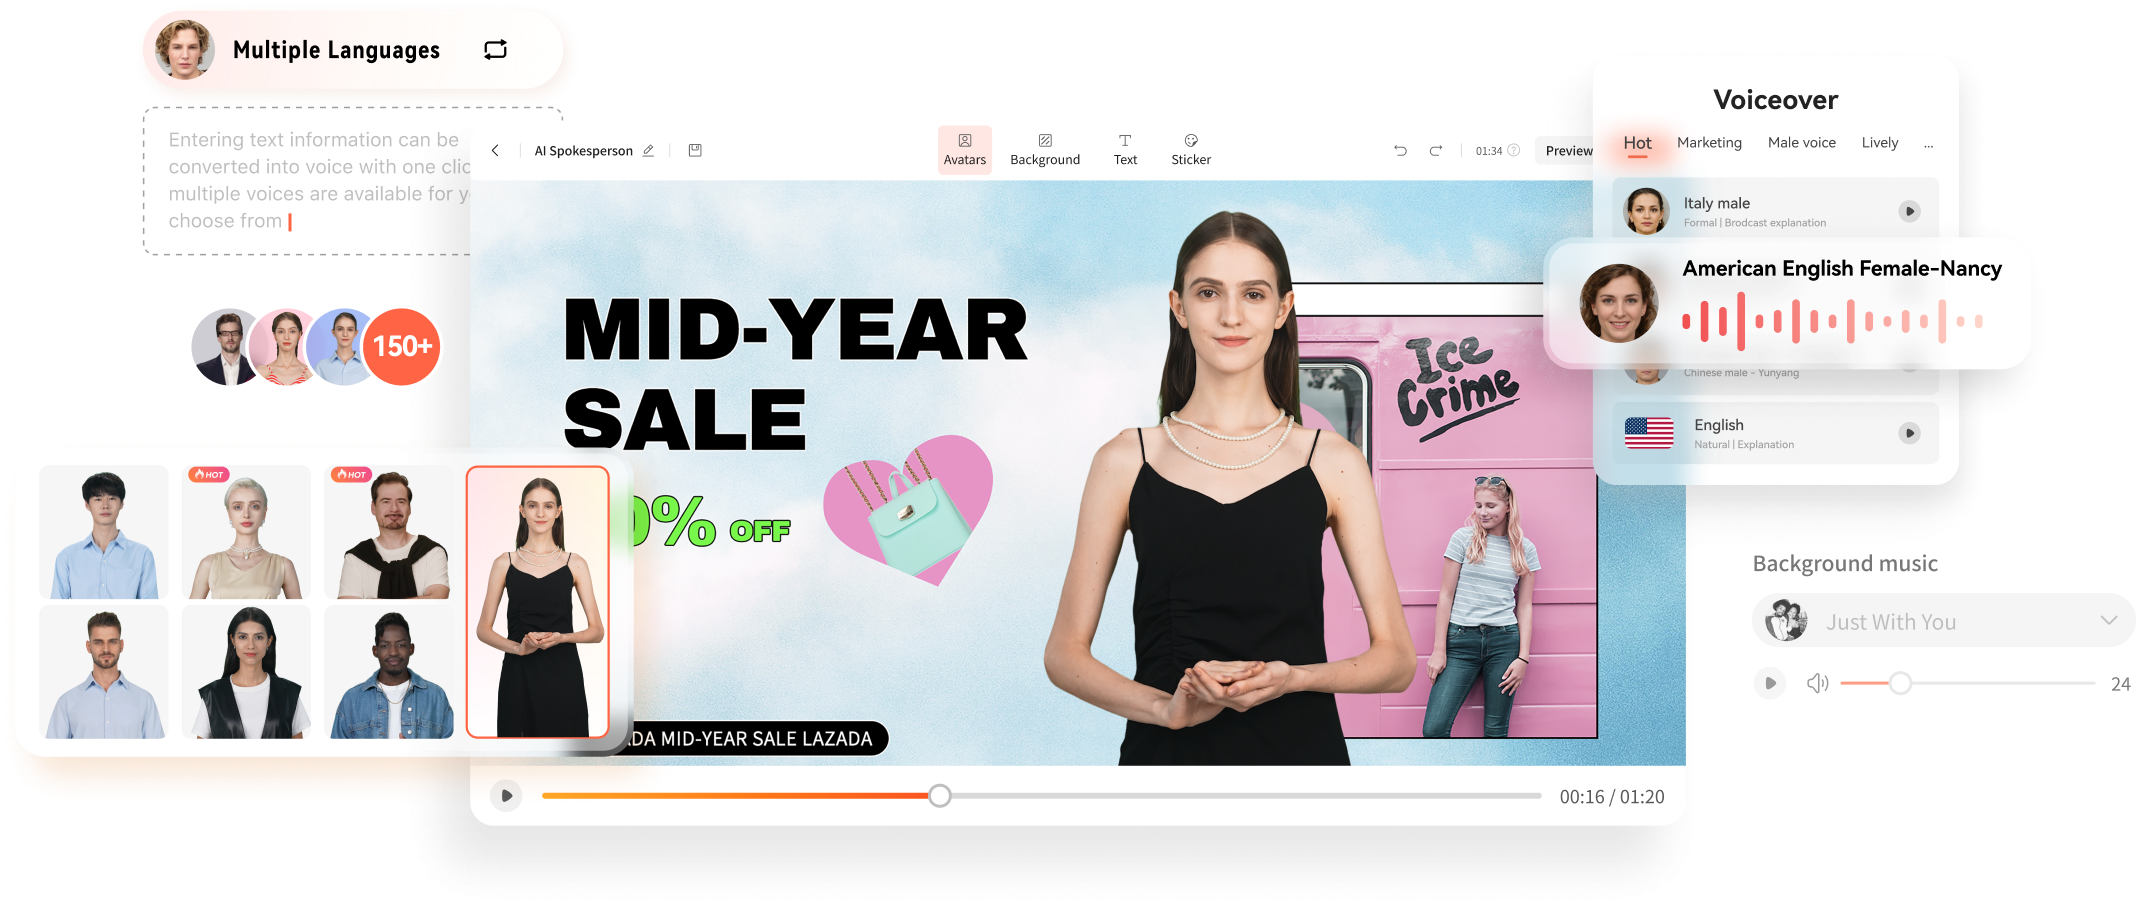
With its AI-powered Talking Photo feature, you can bring life to your pictures. Not only can you make them move, but you can also add voice clips for a better and more engaging experience. You can count on this diversified tool with variating compatibility for integrating your pics with social media platforms. It even allows users to create such content online and offline.
Top-Rated Features of Wondershare Virbo
- Wondershare Virbo can convert the text you provided to speech for use in your talking photos.
- You can customize your uploaded voice in talking pictures to make it more interesting.
- Using the versatile AI avatars of this tool, you can attract and engage a broader audience.
- This tool allows users to add background music to their content for personalization.
Step-by-Step Guideline To Create Talking Photo Videos Using Virbo
Wondershare Virbo provides a smooth and simple process for creating such art. This section will explain how to make a photo-talking video with the help of this tool:
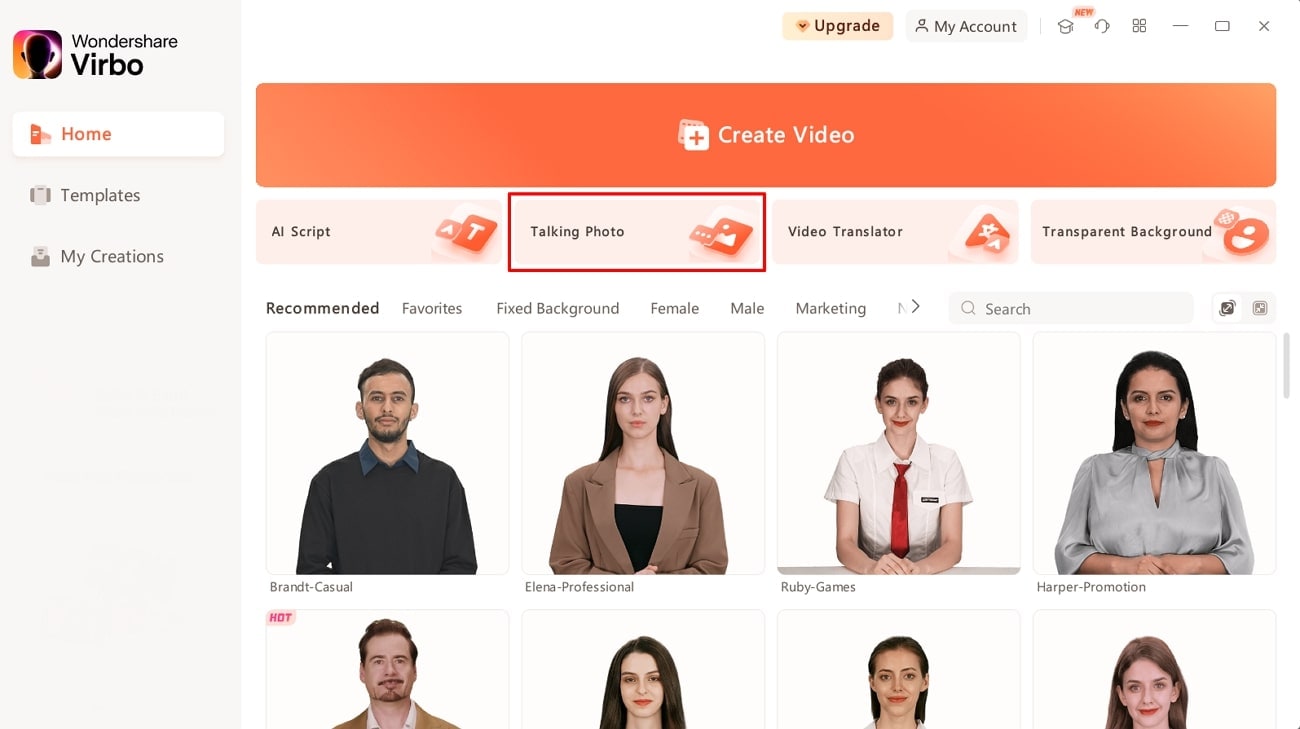
Step 1. Initiate the Creation Process With Virbo
First, download and launch the Wondershare Virbo application on your system. From its main interface, tap the “Talking Photo” feature from its home screen.
Get Started Online Free Download
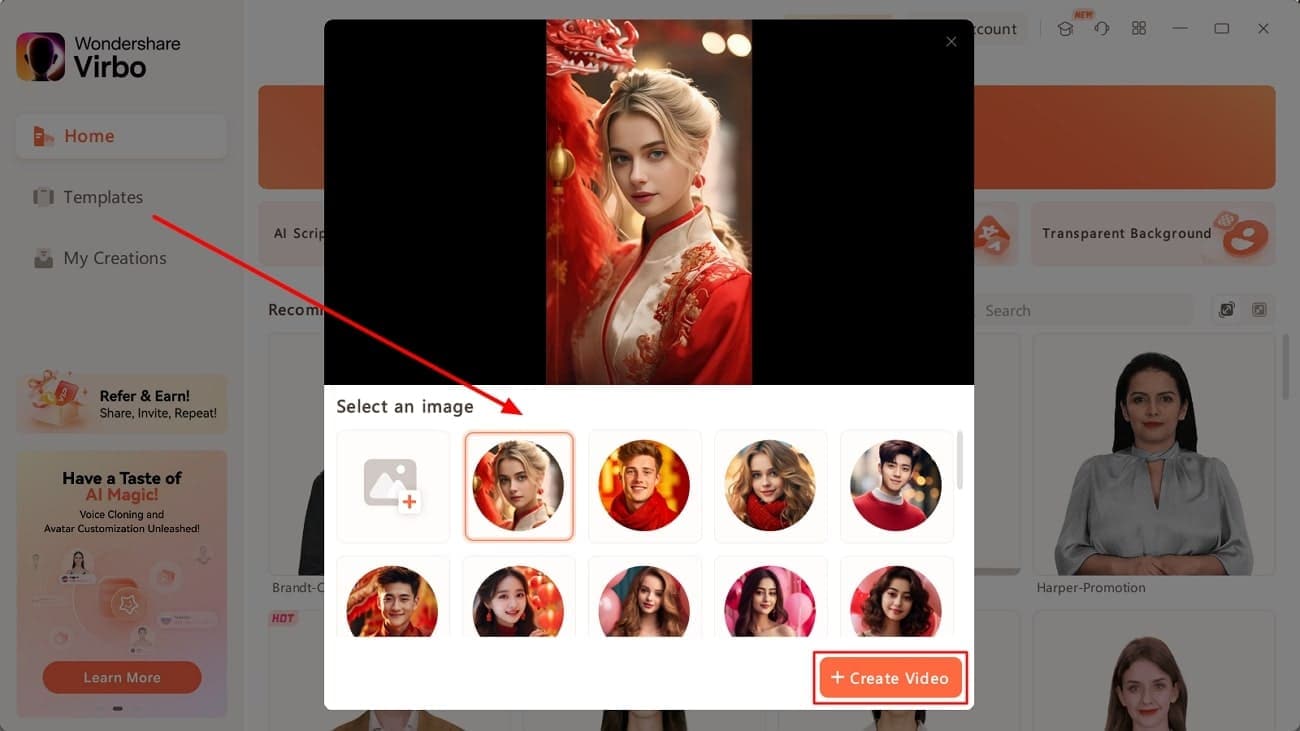
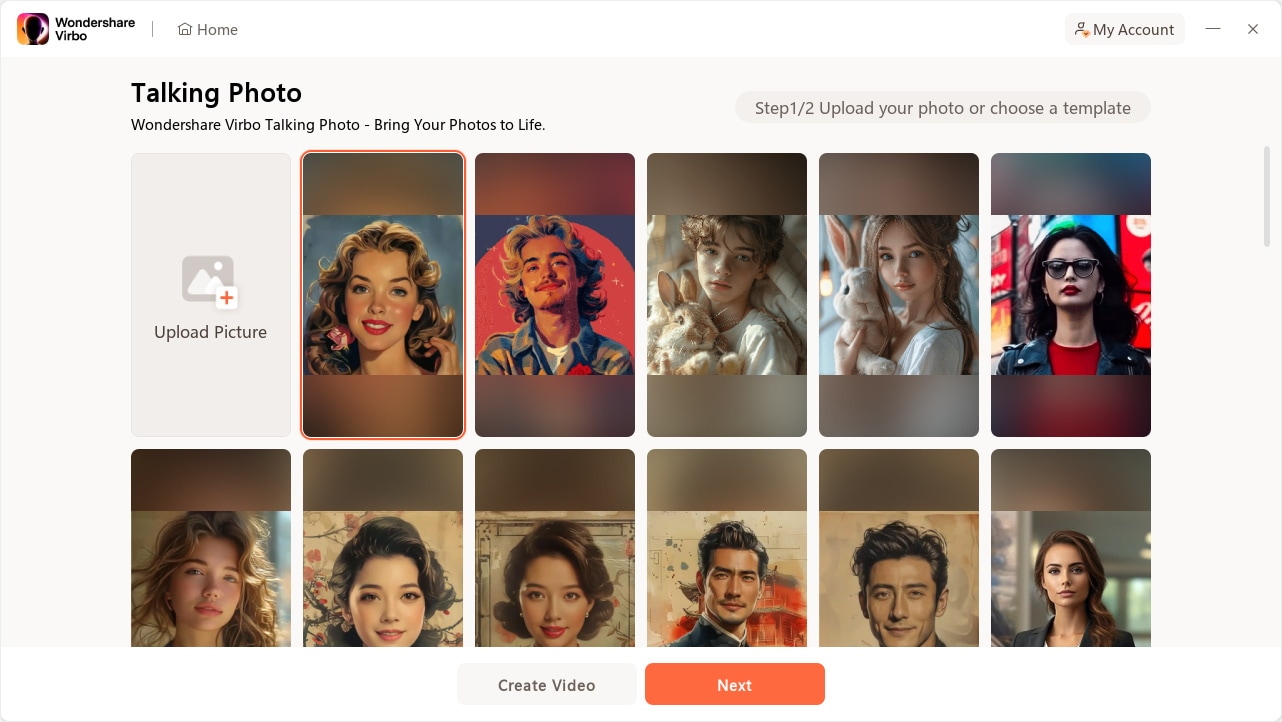
Step 2. Choose an Image To Create Talking-Photo Video
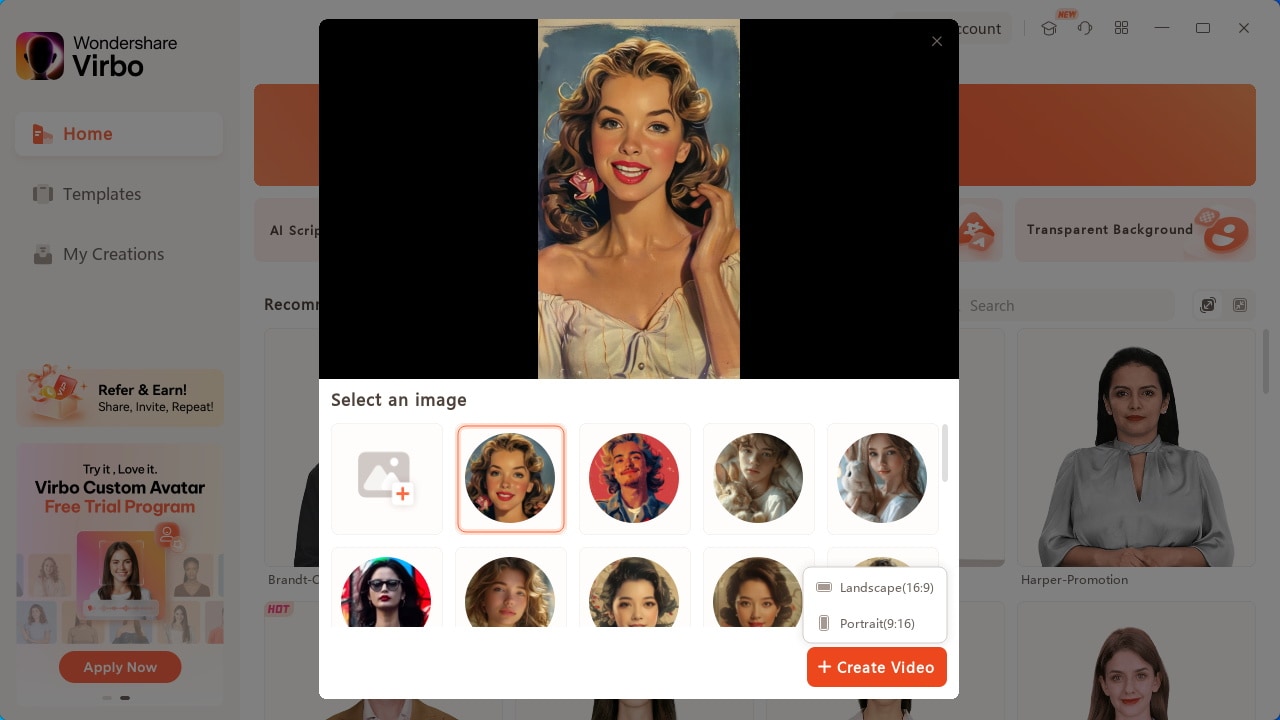
You will access a new pop-up window with different preset image avatars by clicking on this feature. Select your desired avatar and click the “Create Video” button to initiate the process.
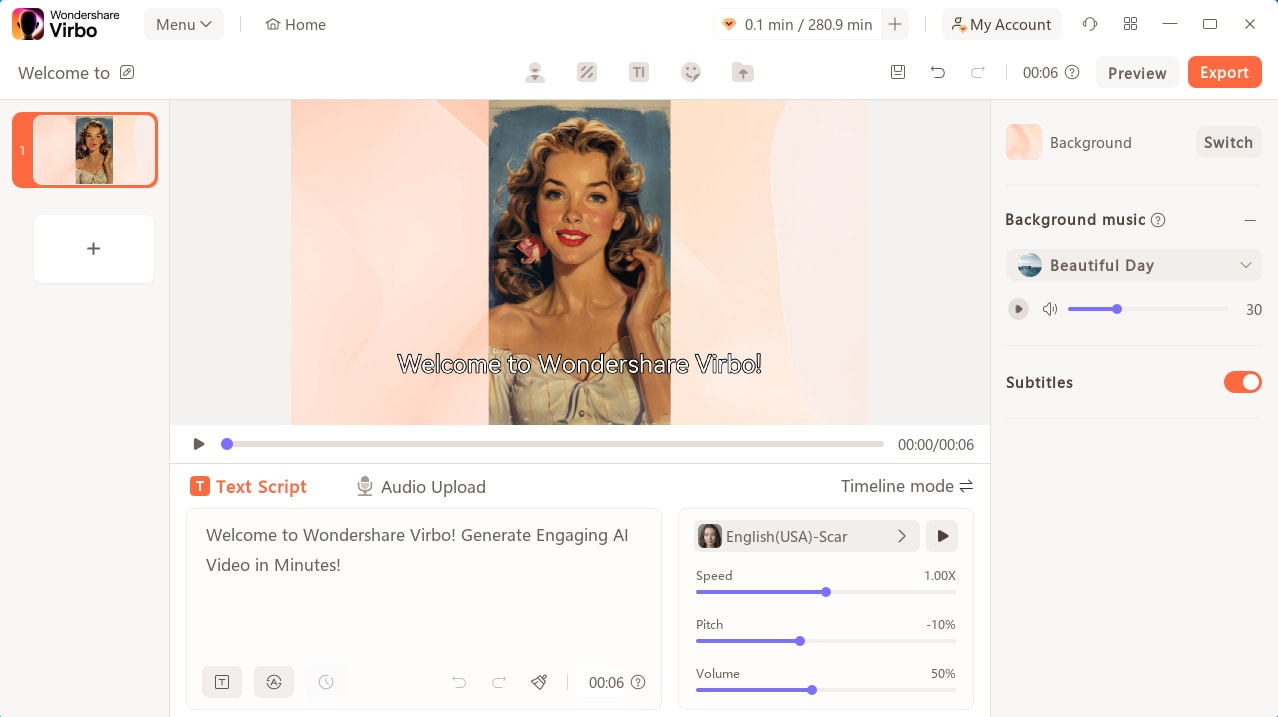
Step 3. Input the Text or Recorded Audio for AI Speech
Enter the text you want to use in your talking photo. You also have the option to shift to the “Audio Script” tab to upload your audio to convert your picture to a talking video.
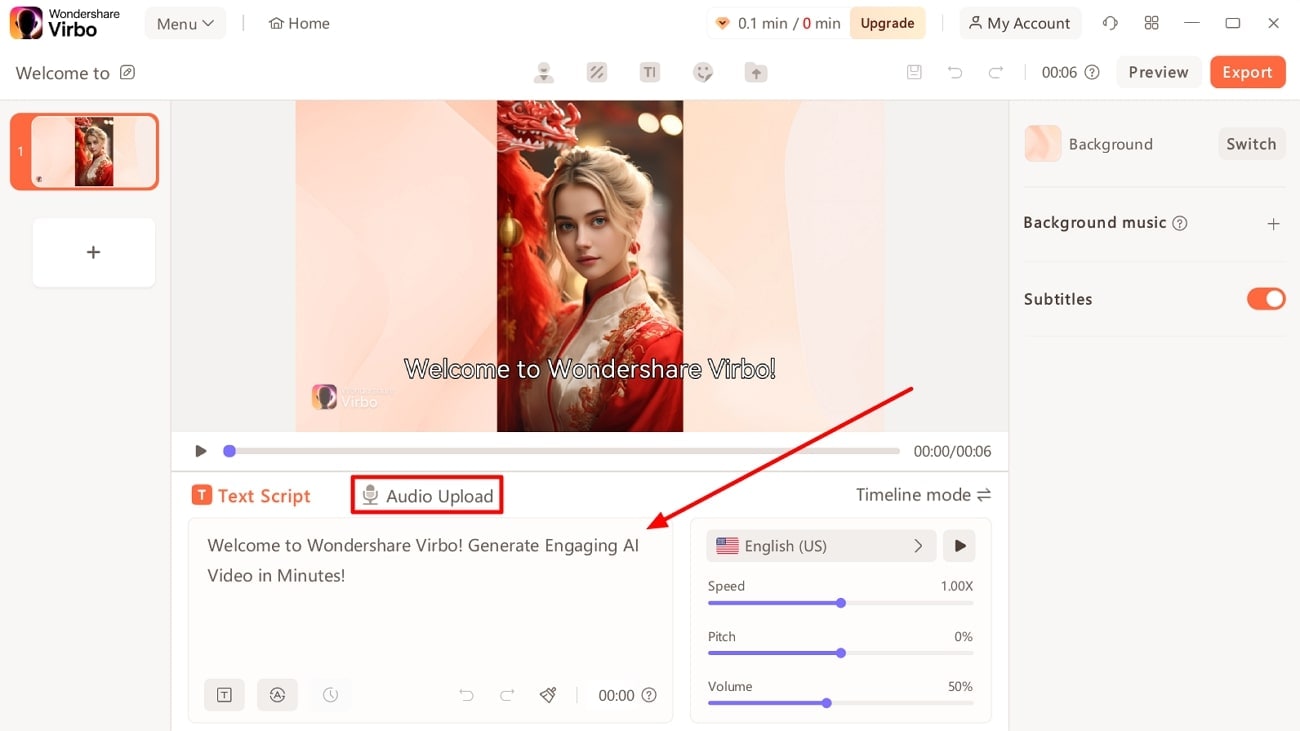
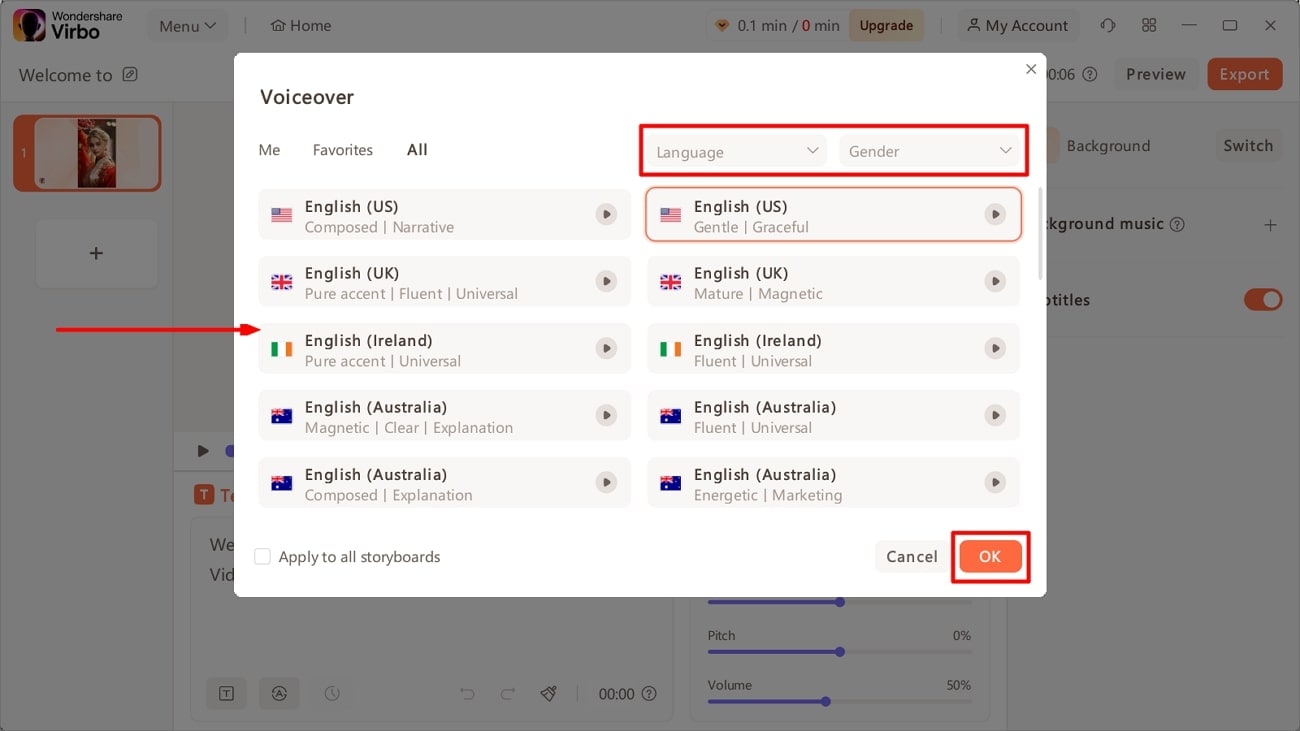
Step 4. Select the Language and Accent for Your Video
After that, scroll to the “Language” portion and click on it. A new pop-up window will appear where you can choose any language and accent. Hit the “Gender” dropdown menu to select your desired gender, and finally, tap the “OK” button.
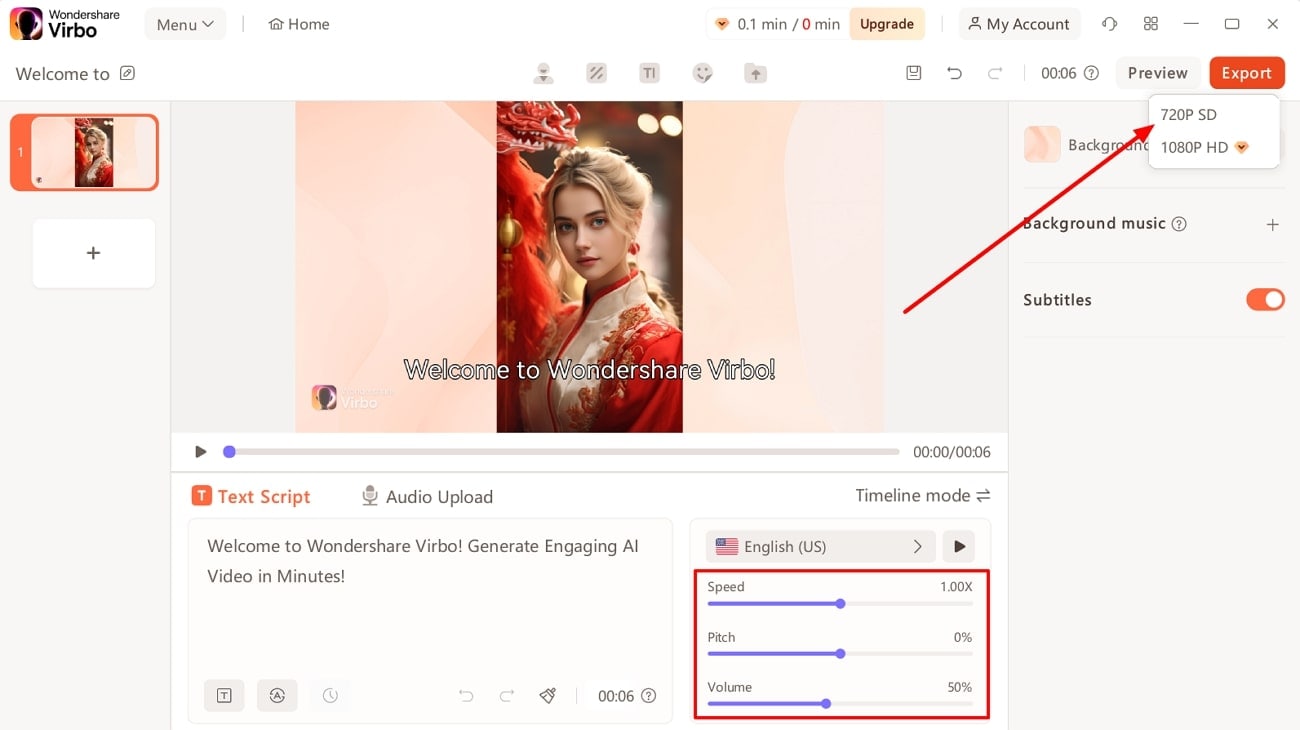
Step 5. Customize Voice Features and Export Talking Photo
Now, set the speed of delivery voice as per your requirement. You can also customize the volume and pitch of it. Finally, click the “Export” button in the upper right corner. After selecting the resolution for the output file, you will be redirected to the “My Creations” section with saved files.
Part 3. How To Create Photo Talking Videos With Some Top Online Tools
Wondershare Virbo is the ultimate choice for making your photo into a talking video. However, we will mention alternative online tools if you are still looking for them. Go through this section to learnhow to make a talking picture video using the top online tools besides Virbo:
1.Vidnoz
Vidnoz is an online AI-powered tool that can create talking photos within minutes. It can convert your still picture into a realistic talking avatar that you can use for various purposes. You can also choose between built-in avatars for this creativity. Additionally, Vidnoz allows users to perform a face swap operation, where you can swap the face in a picture with any other face. If you intend to use this tool to convert images to talking videos, walk through these steps.
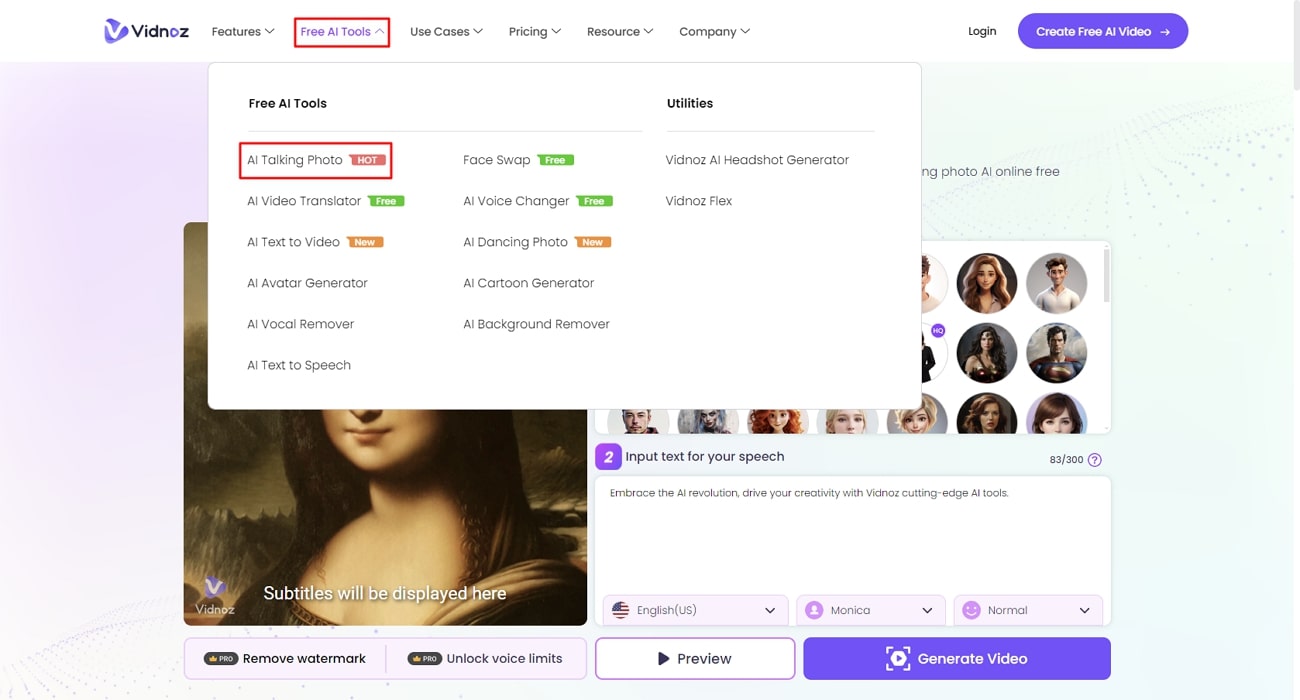
Step 1. First, access the official site of the Vidnoz tool and scroll to the “Free AI Tools” section. In the list of features, look for the “AI Talking Photo” feature from there to get started.
Step 2. After that, select the avatar from pre-available options. You can also upload your own desired picture for this purpose.
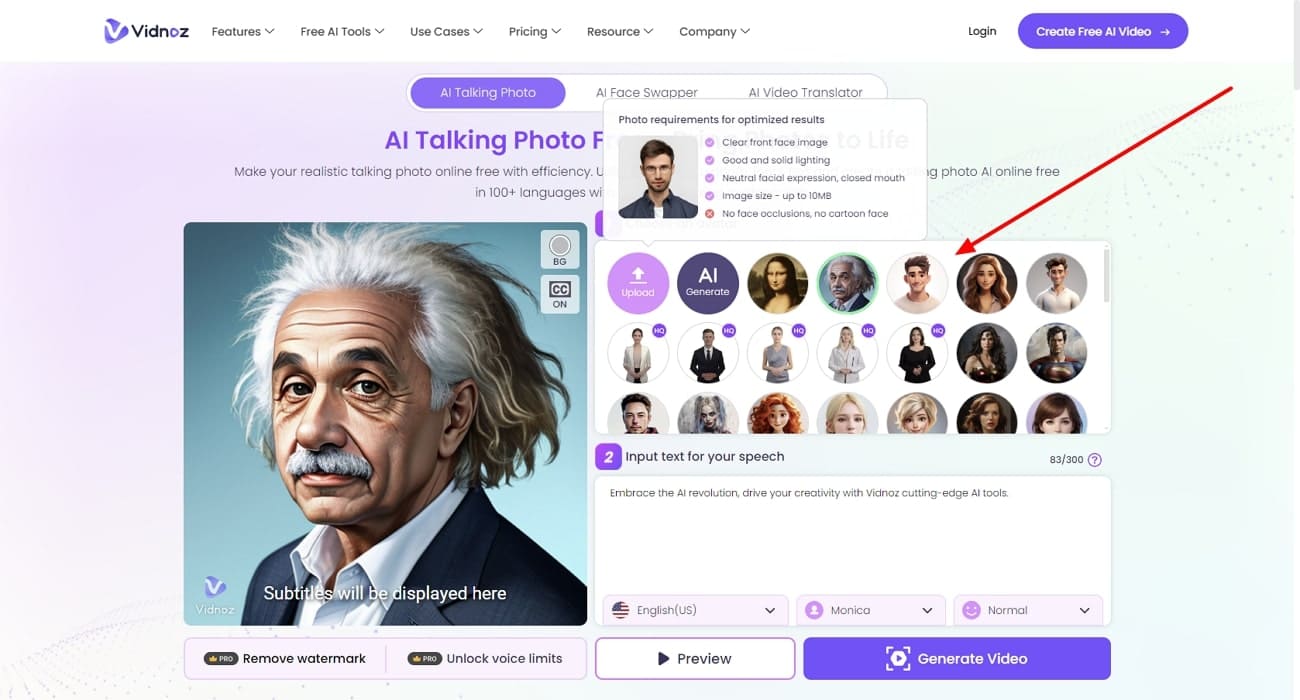
Step 3. Then, go to the text box section and input any text you want to convert to speech. Also, select any preferred language, voice, or mood from the below dropdown menus.
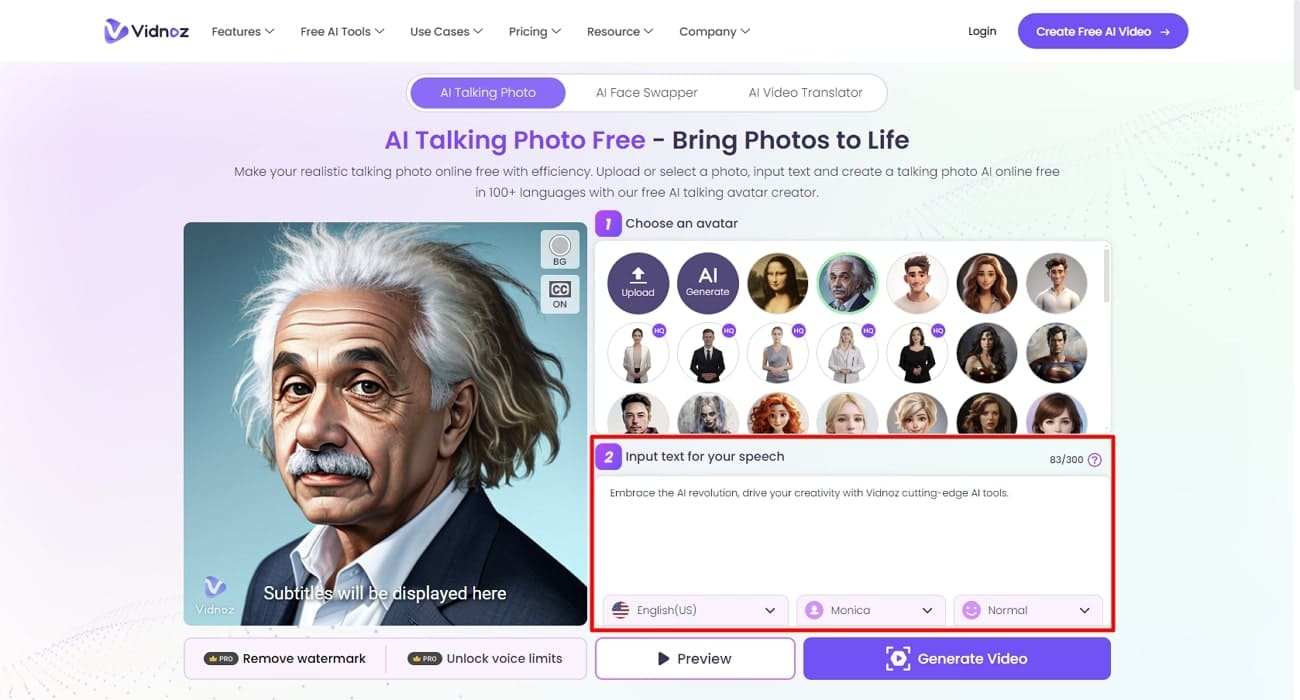
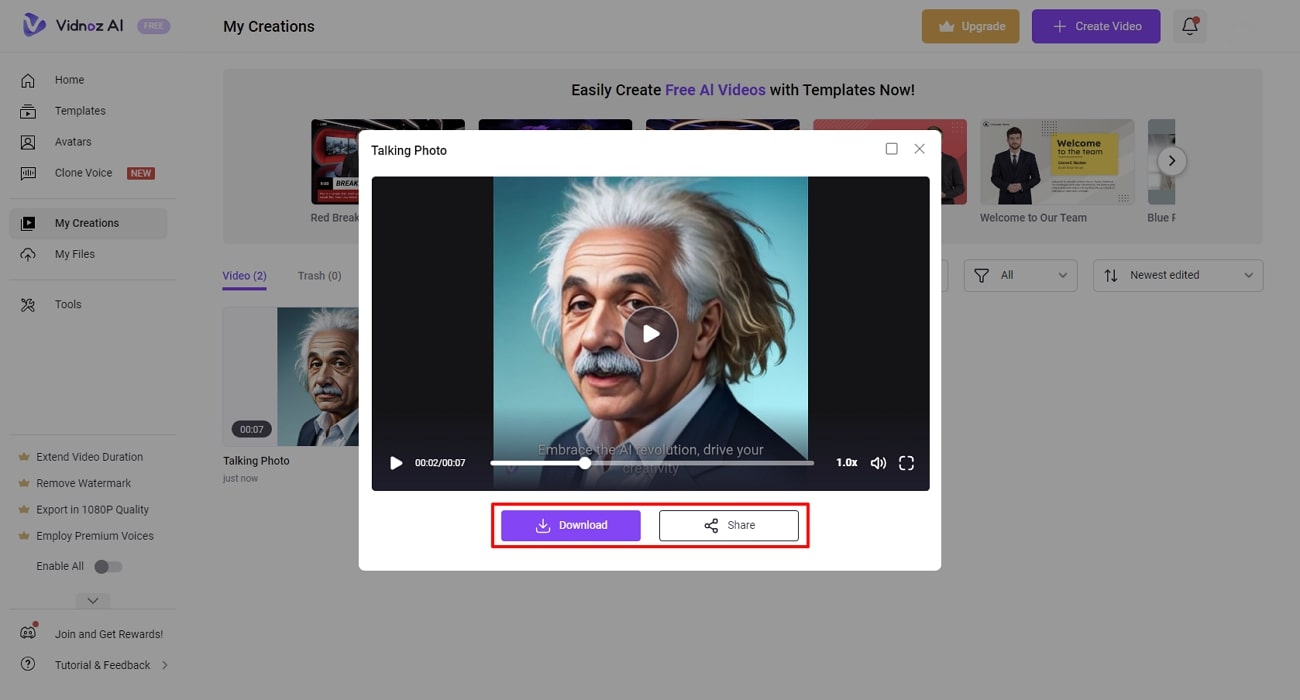
Step 4. Once everything is set, click on the “Generate Video” button to finalize the creation of a talking-photo video. A pop-up window then appears on the “My Creations” page. You can download it to your device or share it directly on social media platforms from that window.
2.Feedeo
Feedeo is also an online talking photo creator that enables users to make interactive content. With its wide range of AI avatars and voices, you can have a customizable and versatile experience. In addition, you can also use your pic to showcase yourself in the talking photo. To convert your photo to a talking video with Feedeo, apply this guide below:
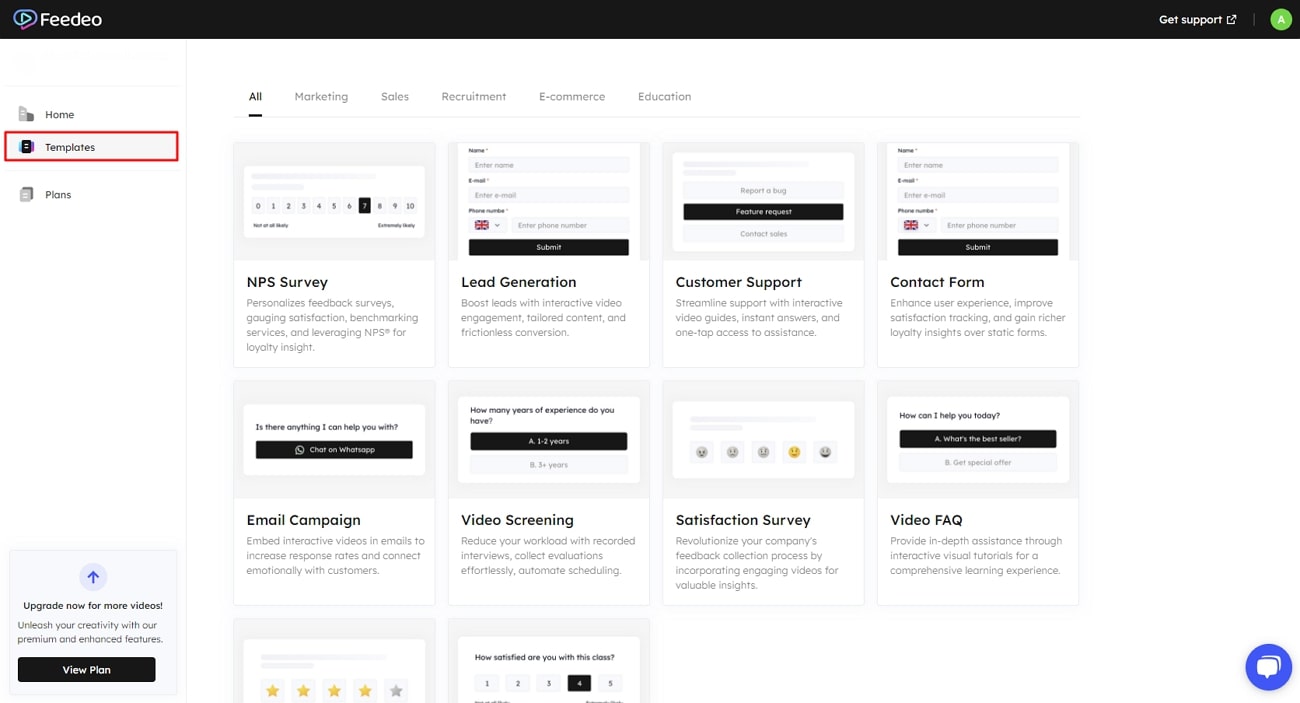
Step 1. Go to the Feedeo website and log in through your account. Once done, you will be shifted to the dashboard page. Then, select the “Templates” section from the left sidebar and choose any template you want.
Step 2. After that, you will reach the editing interface of this tool. Select a virtual avatar you want to use for your talking photo or upload your photo.
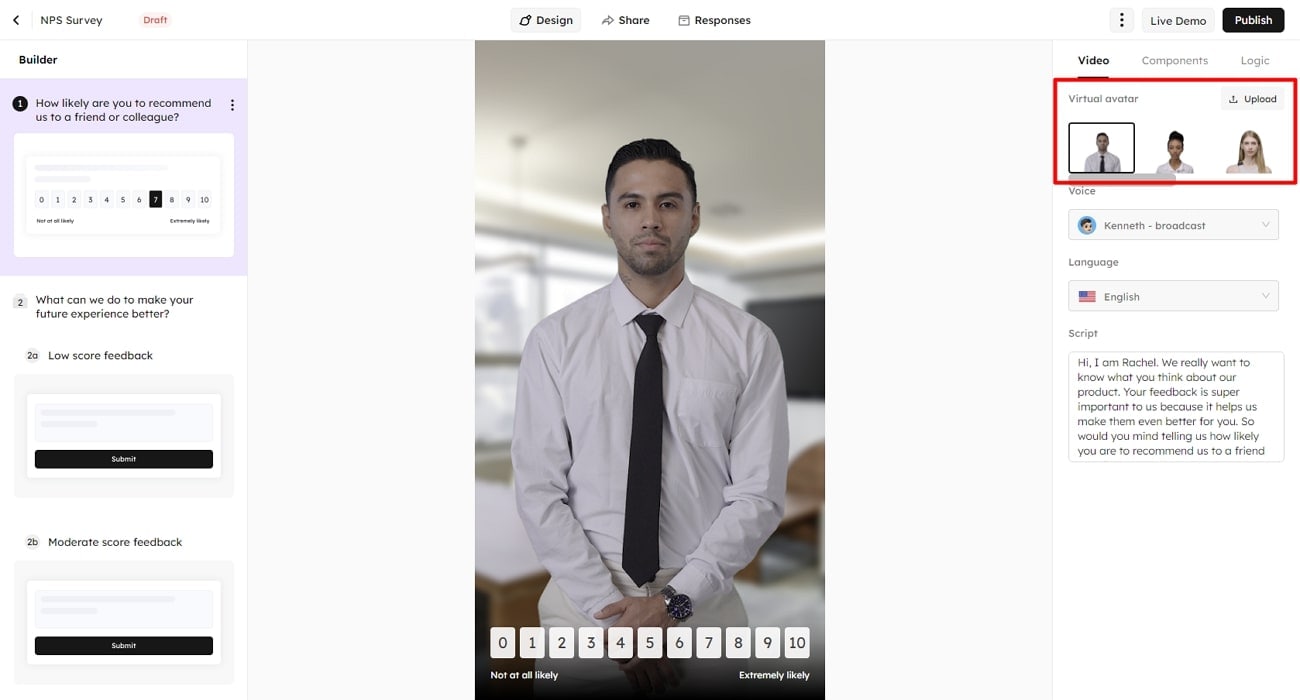
Step 3. Go to the “Voice” dropdown menu and choose any voice and its tone. Afterward, select your desired language from the “Language” dropdown menu. In the section below, you can type any text as the script of your talking photo.
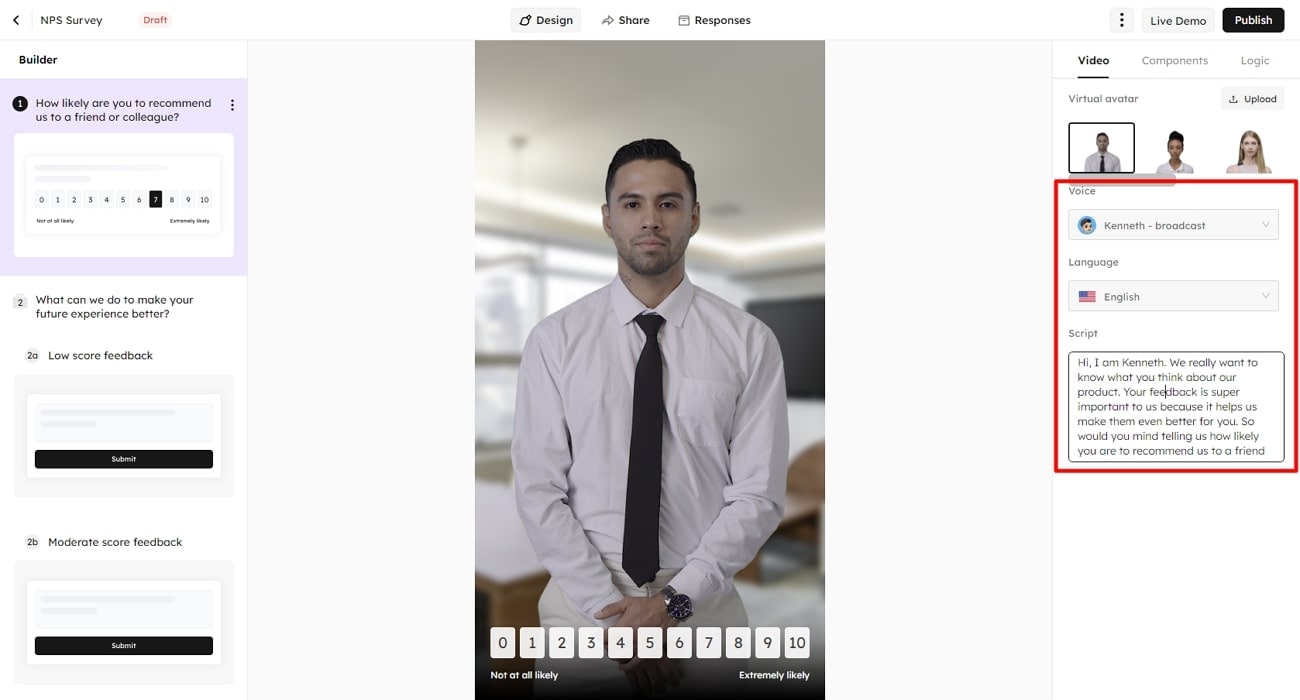
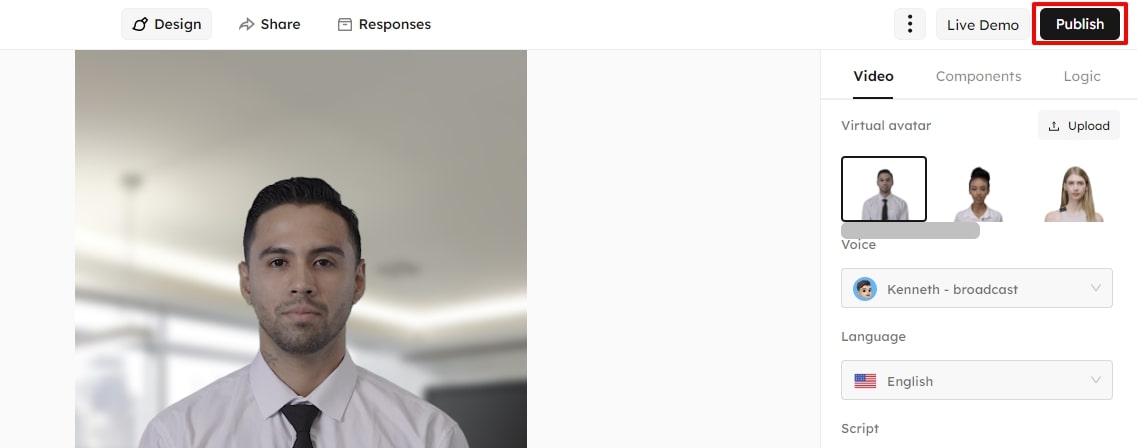
Step 4. Now, hit the “Publish” button, and it will start processing in a new pop-up window. A message will then appear for successful publishing, from where you can share the output file to multi-platforms.
Conclusion
It is incredible how AI-powered tools can transformimages into talking video s. We have shared information on some of the best tools to create such art. However, if you are confused about choosing the best one, Wondershare Virbo is the clear choice. With multiple AI avatars and different language dialects, Wondershare Virbo can surely make your talking photos more fun.
Get Started Online Free Download
Top 6 Free Talking Stock Photo Sites
Ever heard oftalking stock photo s? If you have seen magic/sorcery/ wizardry-themed movies, you might have come across the idea of moving photos or motion photos where photo frames are shown to have motion pictures. In real life, you have what’s called Live Photos by Apple, a technology that captures a couple of seconds’ worth of motion. These are essentially just GIFs. But this is 2024, and today, we introduce you to talking photos or talking stock images. Literally, photos that speak. What! Read more about it below!
Part 1: What Are Talking Stock Photos and What Can You Do With Them?
Let’s answer the most pressing question on your mind first. What are talking photos? Talking photos, simply put, are photos brought to life with video and voice. No longer are your photos just images – they can now include voice along with motion. That is one of the several uses of generative artificial intelligence that’s taking the world by storm. With talking photos, not only do you have a memory as image, but you can have the memory with voice and video to make it more life-like. In some uses, this can be deeply comforting to us.
1.1: Uses of Talking Photos
What can talking photos be used for? Talking photos can be used for fun as well as for interactive education. Here are some uses of talking photos, in a gist:
- An interactive and more engaging learning experience for children.
- Convey emotions better.
- Send personalized messages with voice!
- Capture viewer attention right from the start.
- Create memories by adding voice to photos for a more vivid memory experience!
- Your social media shares can become that much more interesting and engaging.
- Presentations and financial charts and graphs could be made easier to understand.
Part 2: Where Can You Download Talking Stock Photos For Free?
“Okay, I’m sold on talking photos! Where can I get them?”
Glad you asked! We have collated a repository of 6 portals that offer quality talking stock photos and talking stock images that you can choose and use!
Difference Between Talking Stock Photos and Talking Stock Images
What is the difference between talking stock photos and talking stock images? Photos are images taken from a camera system. Images could be anything – from actual photos to graphics created on a computer.
2.1: Getty Images
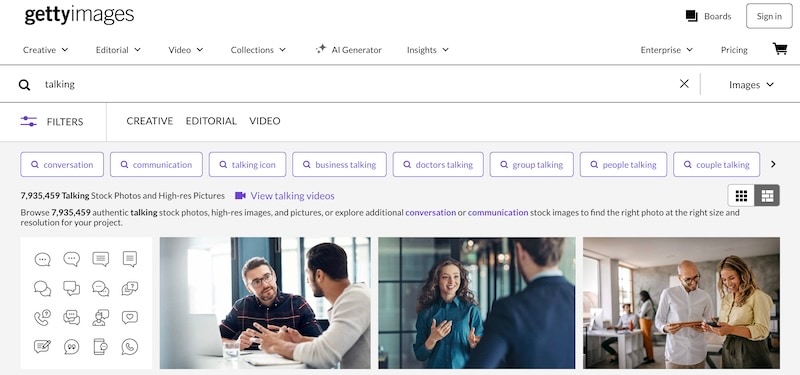
What self-respecting journalist or newsreader does not know about Getty Images? Getty has a repertoire of over 7,935,000 high-quality talking photos for you to choose from. That all but guarantees that you will be able to find the ones you want and like.
2.2: Shutterstock
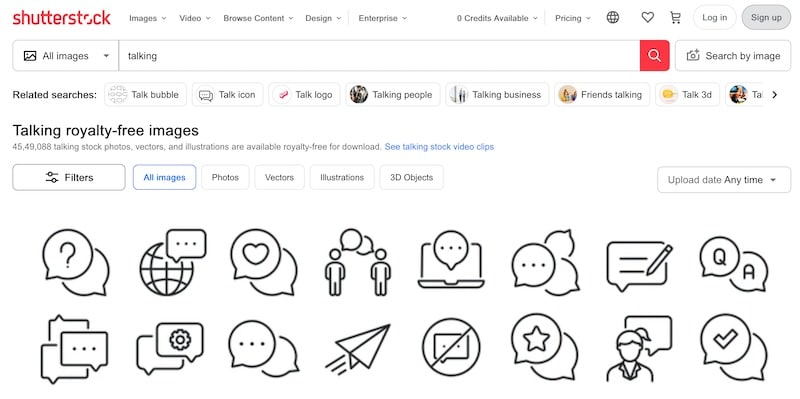
If Getty’s 7,935,000 talking photos didn’t fit the bill, maybe Shutterstock is for you. You can search from a database of over 4,549,000 talking photos. Certainly, something will catch your fancy with Shutterstock!
2.3: Unsplash
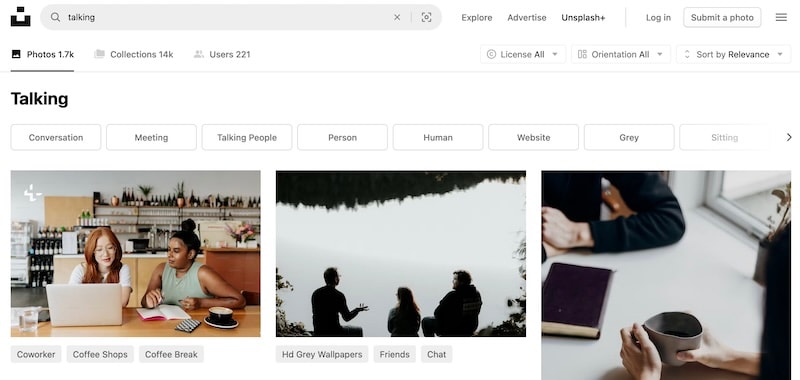
Unsplash has been making a splash since 2013 with high-quality stock imagery for everyone. So much so, that in 2021, it was acquired by Getty Images. Unsplash users will not have a lot to work with in terms of talking photos, though. The repository seems to be somewhat small at the moment at over 1700 talking photos only.
2.4: Pexels
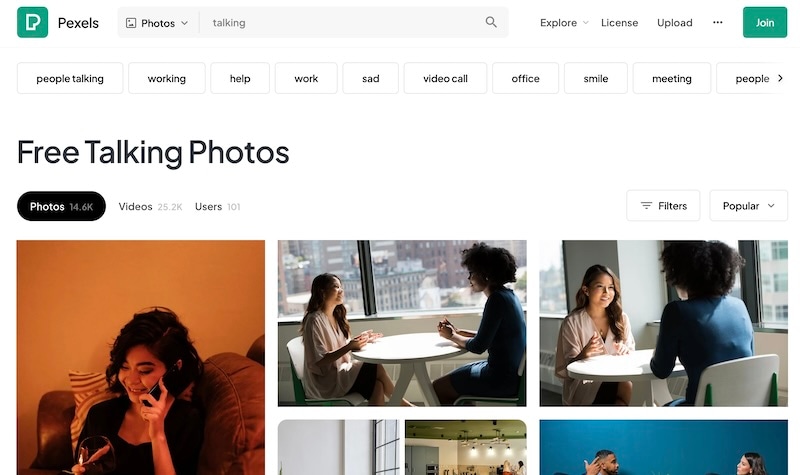
Pexels was founded in Germany just about a decade ago in 2014 and has since grown to house over 3.2 million free stock photos and videos. The platform features over 411,000 talking photos for you to choose from. Pexels is part of Canva since 2018, just 4 years since its release. Must be doing something great, right?
2.5: Pixabay
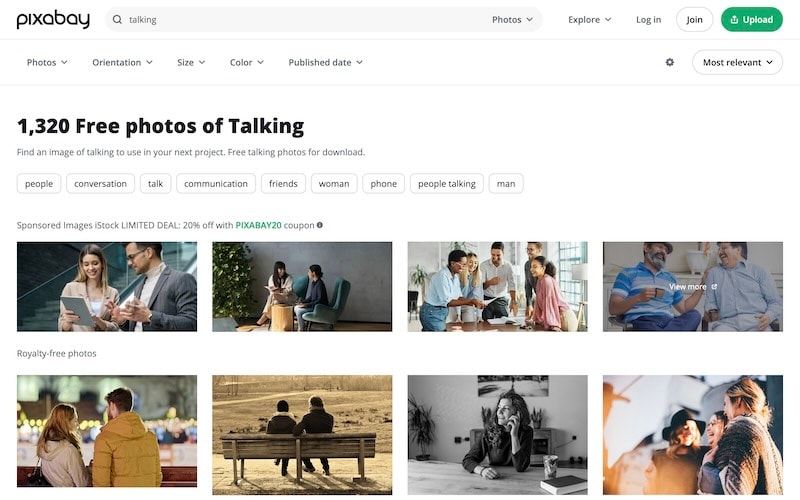
Pixabay is another German startup that has been serving the internet community since 2010. Pixabay houses over 4.4 million photos and stock imagery, out of which over 3000 are talking photos. Not a great database, admittedly, but still worth a look if you are not satisfied with the others! Pixabay, like Pexels in 2018, was acquired by Canva in 2019.
2.6: Freepik
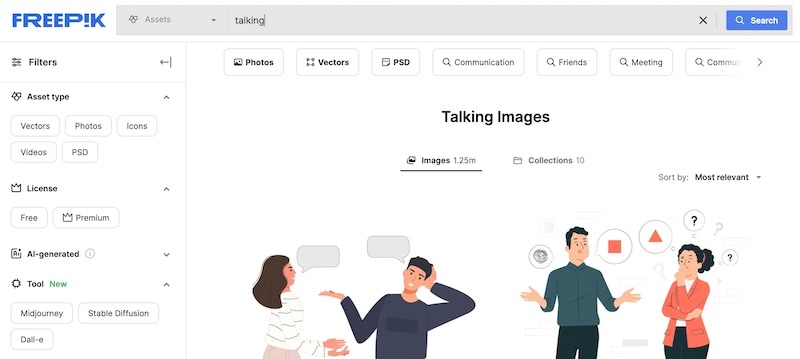
Freepik has been around since 2010 and is part of the Freepik Company that features other brands such as Flaticon, Slidesgo and Wepik. Freepik has over 1,052,000 talking photos for you to choose from.
Part 3: Learn How To Create Talking Photos Yourself
And now, let’s get to the fun part – creating a talking photo yourself! We could tell you of a few tools to do so, but how about we save you some time and get right to the best talking photo creator we could find on the internet?
Creating Talking Photos With Wondershare Virbo
Wondershare Virbo is the ultimate talking photo creator tool you could find on the internet today. It is the easiest and the fastest way to create talking photos that are ultra-realistic.
VERSATILITY
Wondershare Virbo is the most flexible and versatile talking photo creator tool available on the internet. There are so many ways you can create talking photos with. You can choose a voiceover, record your own audio online or upload a recording yourself to create a unique, fully customized talking photo unlike any other in the world! What’s more, using Wondershare Virbo, you can not only create talking photos but add subtitles to videos, translate videos, and do so much more with just one single app!
Generate Video Online Download APP Now Free Download
Step 1: We start with creating a project. Simply download Wondershare Virbo to your computer and click Talking Photo.
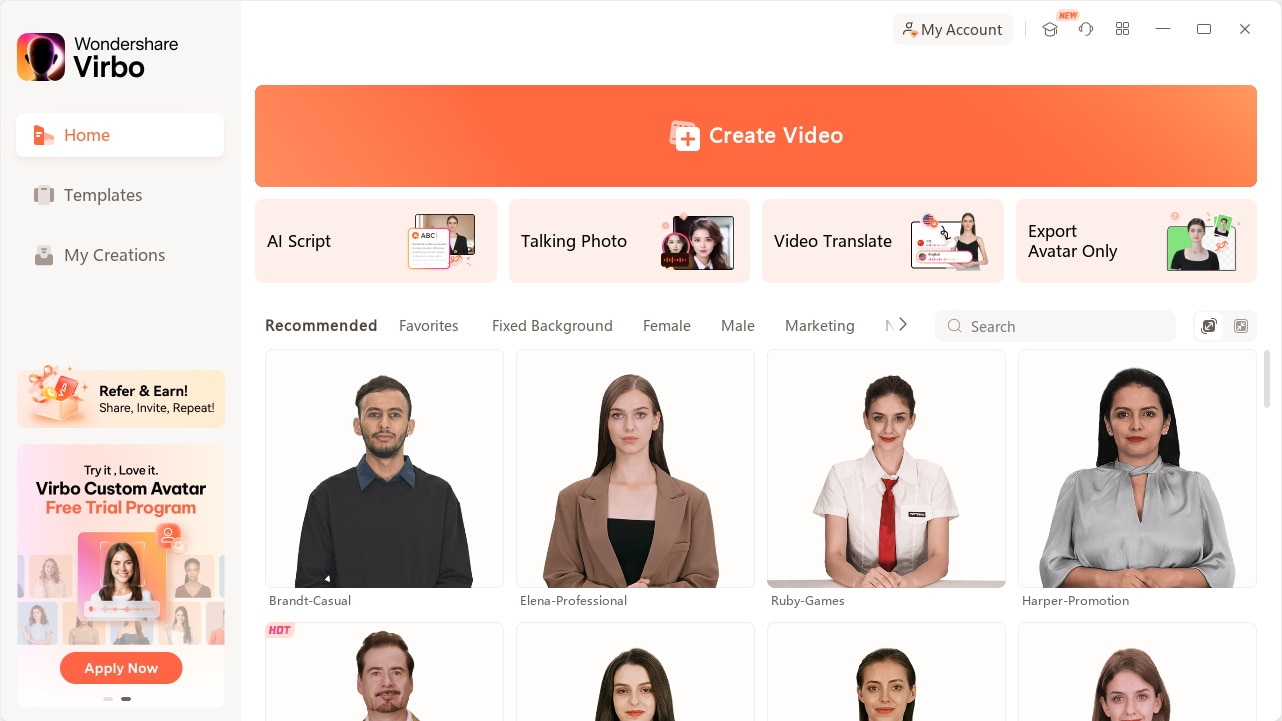
You can use the add button (with the plus symbol) to upload an image or choose from one of the several options within the software and click Create Video.
Step 2: Now, we edit the video to add our audio. Click Audio Upload to record your own audio/ upload your own audio as video script, or type/ paste a video script in the Text Script pane.
There are options you can use to customize your output. Choose from several languages, change the speed of speech, even adjust pitch and volume, right here, easily! You can even add subtitles, change background music or switch the background!
Step 3: It is now time to preview the video and export it! Click the Preview button to view the magic of Wondershare Virbo. If everything is to your liking, simply click Export.
The talking photo will be saved under My Creations.
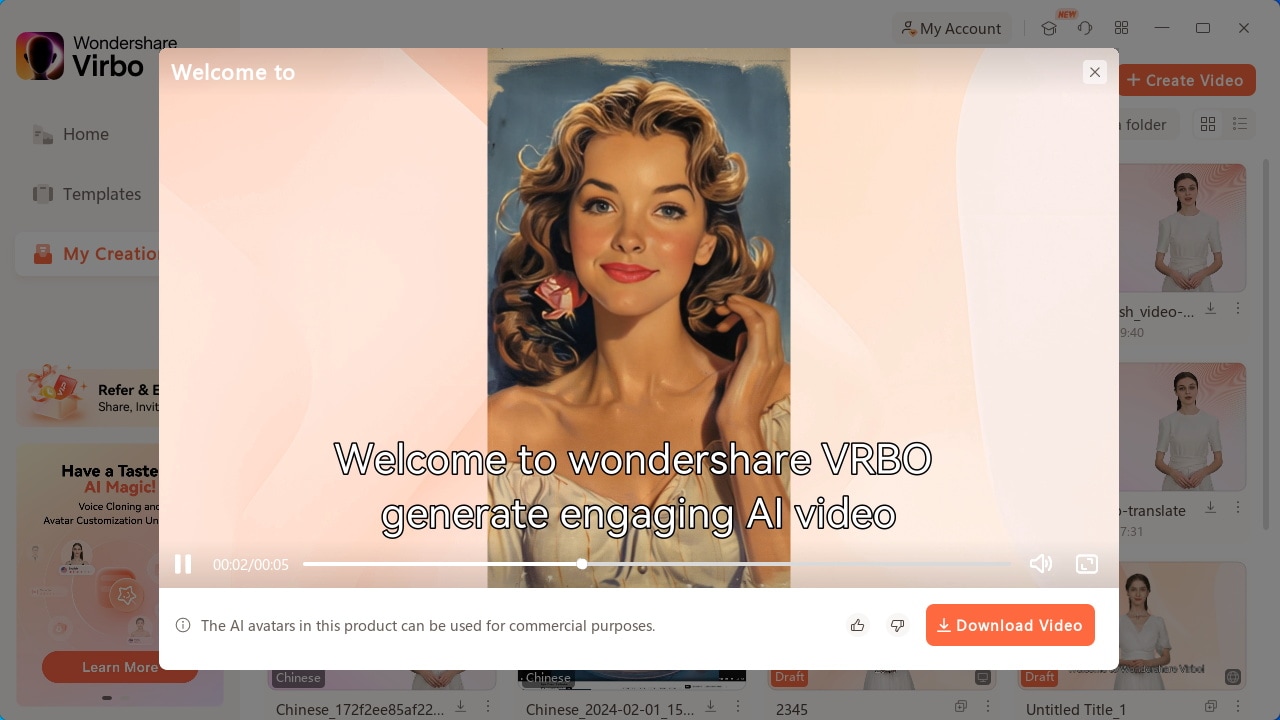
You can view it there and download to your disk by clicking Download Video.
Generate Video Online Download APP Now Free Download
Closing Words
Talking photos are the next frontier in digital communication and expression. Harnessing the power of generative artificial intelligence, talking photos present never-before opportunities to not only engage people but engage with people. The education sector can use talking photos to make comprehension easier for children by making interactive, expressive talking photos that can explain complex concepts in a fun new way while corporates and businesses can use the power of talking photos to better engage with their audiences in a new way that captures and retains their interest. Inter-personally, talking photos can be used to have fun with friends and family in a completely new way! No more drab images, talking photos are the fun new way to express!
Top 8 Live Selling Platforms & Beginner’s Tool Suggestion
Live selling platforms are widely considered as the future of commerce. As morelive selling platforms emerge, it can be confusing to figure out which one is best for your needs. You will likely want to work with alive stream shopping platform that allows you to create an interactive and engaging shopping experience for your viewers. Such a platform will allow your viewers to watch live product demonstrations, ask questions, and make purchases directly. In this article, we review our top 8 handpickedlivestream shopping platforms and recommend a tool to help in making the right choice for your brand.
Part 1: Choosing from 8 Major Live Selling Platforms
When choosing the best live shopping platforms, you will want to consider the ability to host real-time video streams where you showcase and sell your products. A good live commerce platform will combine the immediacy of live video with online shopping convenience that allows viewers to make purchases on the spot. The following is an overview of our handpicked best live shopping platforms:
1. Smartzer
Being one of the leading live shopping and interactive video platforms, Smartzer works well with international brands. It helps customers discover products more easily and instantly add them to their cart for a seamless shopping experience. Brands such as Adidas, Mini, and Jo Malone have used Smartzer to boost their view engagement rate to an average of 55% and a click-through rate of 25%.

Integrations : Shopify, Magento, WooCommerce, BigCommerce, and Salesforce
Pricing : Pricing upon request. Subscription is based on product features, usage levels, and integration.
Standout Features :
- Real-time comments and likes
- Catalog integration
- Detailed video performance data
Limitations :
- Higher pricing compares to other service providers
- Limited platform integrations
- Some advanced features have a steeper learning curve
2. NTWRK
NTWK blends entertainment, pop culture, and commerce. The live stream selling platform is designed to create a unique experience for viewers by combining live-streamed content with limited-time product drops. It also often features hard-to-find and exclusive items from various artists and brands.

Integrations : Connect to most social media platforms
Pricing : Pricing upon request
Standout Features :
- Virtual festival feature where users can participate in immersive online events with experiential content, exclusive drops, and interactive experiences
- Display of exclusive and highly-coveted product releases from brands and artists
- Users can purchase limited-editing items available only during the festival
Limitations :
- Does not embed on other platforms
- Does not provide customer activity data
3. Amazon Live
The live shopping platform is found within Amazon, allowing US Amazon vendors, US Professional Sellers, and Amazon influencers with storefronts to promote and sell their products during livestream shopping events. Store owners can create shoppable live streams where they educate and interact with shoppers in real-time. They can also partner with influencers to promote their products.

Integrations : Integrates with other Amazon systems quickly
Pricing : Free to Use
Standout Features :
- Product highlighting feature that allows store owners and users to showcase their products during live streams
- A metrics feature where users can measure their performance and improve their next live stream
- Channel Analytics dashboard within the Amazon Live Creator app provides a snapshot of total views, product clicks, and unmuted views
Limitations :
- Can only promote Amazon products
- Users cannot redirect traffic to their own websites
4. Facebook Live Shopping
This live shopping feature within Facebook combines live video streaming with ecommerce. Businesses can sell their products using live video broadcasts on Facebook. With Facebook having a huge user base, the live shopping platform is ideal for businesses of all shapes and sizes. Local businesses and craftsmen can use the platform to reach a broader audience while fashion and beauty industry businesses can leverage the platform to demonstrate makeup techniques or provide styling tips.

Integrations : Integrates with other META platforms
Pricing : Free to Use
Standout Features :
- Live stream notifications reminding users when the event is about to begin
- Brands and creators can collaborate on shows seamlessly
- Live streaming directly from a Facebook page
Limitations :
- Limited features
- Not scalable
5.TikTok Live Shop
The live shopping feature of TikTok offers a great opportunity for sellers to reach a large audience. With over 1 billion users and about 50 million daily active users in the United States, TikTok is one of the most popular social media channels. Users can increase their brand exposure, especially among millennials and Gen-Z.

Integrations : Prestashop, Square, Base, BigCommerce, Ecwid, OpenCart, and Shopline
Pricing : Free to start using, but charges from 2% for a commission fee
Standout Features :
- Effects and filters that improve the quality of live-stream videos
- Users can co-host, which allows collaboration with influencers
- In-app checkout
Limitations :
- Analytics data is only available for 28 days
- Limited functionalities
6. YouTube Live Shopping
The live shopping feature by YouTube allows creators with more than 1,000 subscribers to conduct live stream events. You can showcase your products on live streams and take advantage of live redirects. This means redirecting viewers from the premier or live stream to another one on a different channel. With the YouTube-Shopify partnership, you have the option for onsite checkout and syncing of inventory.

Integrations : Although not listed on the Website, YouTube has partnered with Shopify to enhance live shopping experience
Pricing : Free to use
Standout Features :
- Live chat moderation tools that enhance audience engagement while preventing online harassment
- Shopify integration that enables on-site checkout
Limitations :
- Users require at least 1,000 subscribers
- Available in limited countries
7. Channelize.io
Channelize.io is an end-to-end solution that enables ecommerce brands to add live shopping experiences to their apps and websites. It offers a wide range of features that allow sellers to interact live with customers. These include product demonstrations and live chat for enhanced live shopping experience.

Integrations : Shopify, Magento, WooCommerce, Wix, PrestaShop, and Shoplazza
Pricing : Free plan + demo available, with pricing starting from $49/month
Standout Features :
- Live chat and a floating video player for buyers to check the product page without leaving the live shopping experience
- In-show product promotion, spotlight, show analytics, and custom RTMP support
- Audience analytics that include unique insights about user behaviors and preferences
Limitations :
- Multi-streaming is only available in top plans
- Additional add-ons can be expensive
8. ShopShops
ShopShops was founded in 2016 as an international shopping app to replicate the fun of in-person shopping through a livestream video. The app allows sellers to grow their followers and shoppers to browse through products they are interested in.

Integrations : PayPal, Stripe, Shopify, Instagram, Meta for Business, Square for Retail, TikTok, Shippo, Intercom, and Avalara
Pricing : 30-day free trial, with pricing starting from $134/month plus 5% of sales
Standout Features :
- Real-time inventory and a waitlist where e-commerce businesses can manage inventory across channels from a single dashboard
- Updates inventory in real-time, allowing users to keep track of stock levels and avoid overselling
Limitations :
- Limited customizations
- Limited customer support
Part 2: Future Trends of AI-Powered Live Selling
Live selling is redefining e-commerce and how people buy products online. However, setting up an account and live streaming your products can be time-consuming and a costly affair. That’s why Virbo Live aims to automate the process and give you more time to focus on your products while still making sales.
01 Leveraging Virbo Live for effective live selling

Virbo Live allows users to create AI streamers that keep live shoppers engaged. The realistic AI-powered avatars will provide your viewers will all the information they need to make a purchase decision. With multi-lingual capabilities and the ability to interact with the audience in real-time, you can boost your sales even without being directly involved.
02 Simplified live selling experience with Virbo
Starting with Virbo Live is quite easy and straightforward. You only need to choose an avatar and provide information about your product, and AI will handle the rest. Here is astep-by-step guide :
Step 1 Create a Live Shopping Rooms
Log in to your account on theofficial Virbo Live website , and click “Create a Black Livestream Room” to get started. You may also select a template of choice to start your livestream room.

Step 2 Choose AI Streamers and Background
Choose an AI avatar from the virtual host library to become your virtual streamer. Add the avatar to your livestream room and make appropriate customizations.

Step 3 Enter Text or Voice
Upload your audio or enter a script for the AI avatar. You may choose to effortlessly generate a script using the AI smart scriptwriter or AI translator by Virbo Love.

Step 4 Start Live Streaming
Click Start Live Streaming in the top right corner and choose the OBS software. This will allow you to integrate the Avatar to your live shopping platform that you are using.

Step 5 Interact With the Audience
Turn on Interact with the Audience feature once your avatar has gone live. This will allow the AI streamer to freely interact with your audience by responding to their questions.

FAQs about Live Selling Platforms
- What is live selling?
Also known as live streaming shopping, live selling is engaging with shoppers online given the same experience they would in an in-person shopping scenario.
- How do you use live selling platforms?
To use live selling platforms effectively, interact with your viewers, demonstrating your products and encouraging them to make a purchase.
- Can you use Virbo Live AI avatars for commercial purposes?
Yes, you can use theVirbo Live AI avatars commercially by taking a paid subscription. All in-built assets on Virbo Live are copyrighted by Wondershare ad all subscription users can use these resources commercially. However, commercial use is not supported for free users.
Conclusion
Live shopping platforms are a great choice when you want to engage with your viewers in real-time and boost your sales. Although it can feel overwhelming when looking for the right live shopping platform, your goals and target audience should be our major consideration. Once you have established the platform that works well for your brand, we recommend usingVirbo Live to create content for your live event. With the AI streamer, you can automate your live events, ensuring your audience is catered for at all times.
Talking Photo | Wondershare Virbo
Talking Photo
Have you ever wanted to create a video using your favorite photos to express your ideas? Virbo’s Talking Photo can fulfill your wish! This feature allows you to make photos speaking or even generate videos using preset images or photos uploaded from your device. By following our instructions, you will quickly learn how to operate.
02Use Your Still Photos to Create Videos
Way 1: Simply Bring Your Photos to Life with 2 Steps
Simply input your script (or use Virbo’s AI feature to generate one), choose the voice-over, and export the video to achieve the desired effect! You can also record audio online or upload your own recordings to make your photos speak.
Step 1. Choose Talking Photo
Download and install Wondershare Virbo on your computer and click “Talking Photo” to bring photos to life.
Make Photos Speak Make Photos Speak
Click Talking Photo
Pick a template or click “Upload Picture” to upload your own picture and tap “Next”.
Create Next Button
Step 2. Input Text and Set A Voiceover
Enter your voiceover script or click the ‘Audio Upload’ to import an audio file as the voiceover.
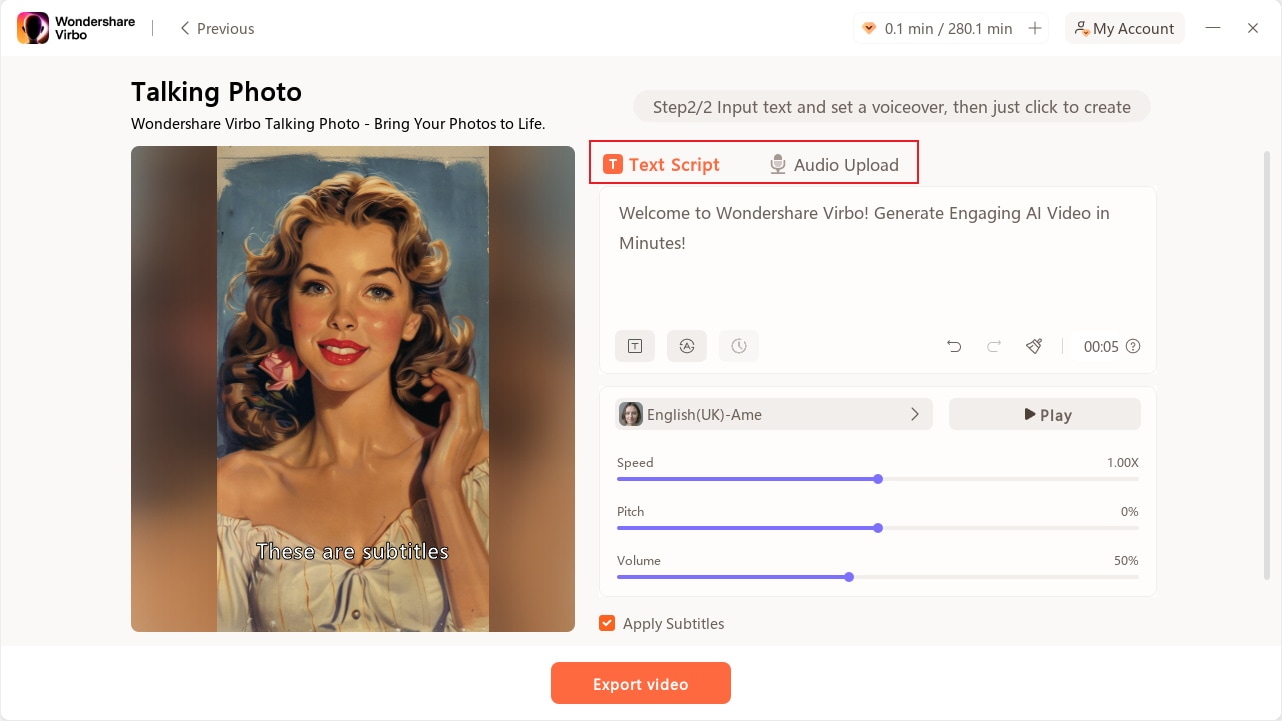
Input Script
After entering your voiceover script, you can customize the language, and adjust playback speed, pitch, and volume.
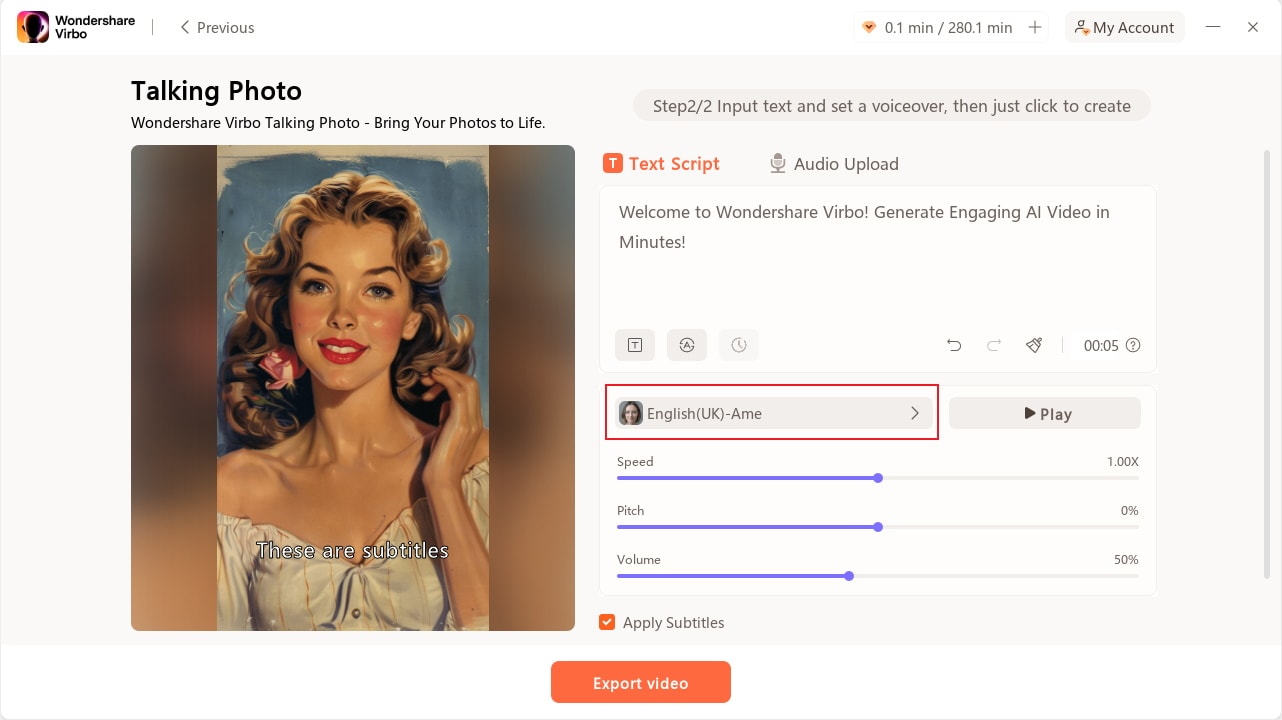
Edit Voiceover
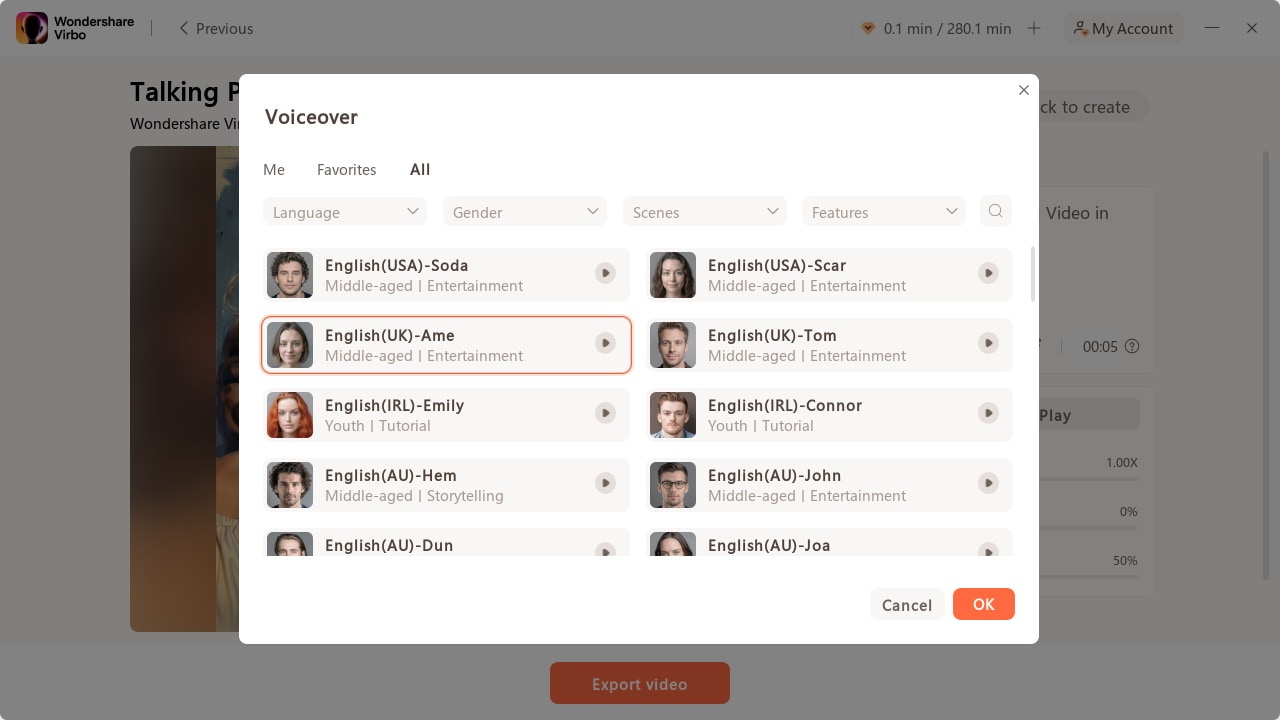
Choose Voiceover
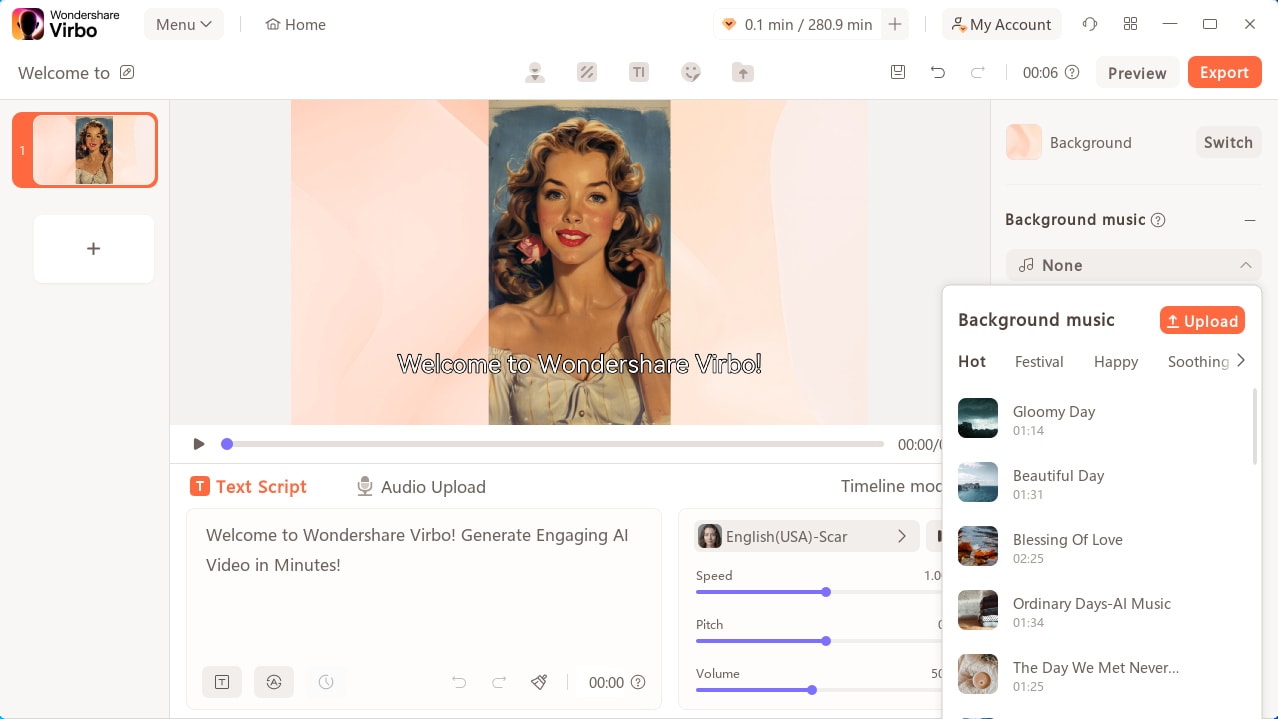
Check “Background Music” to add or upload background music, or add subtitles by checking “Apply Subtitles”.
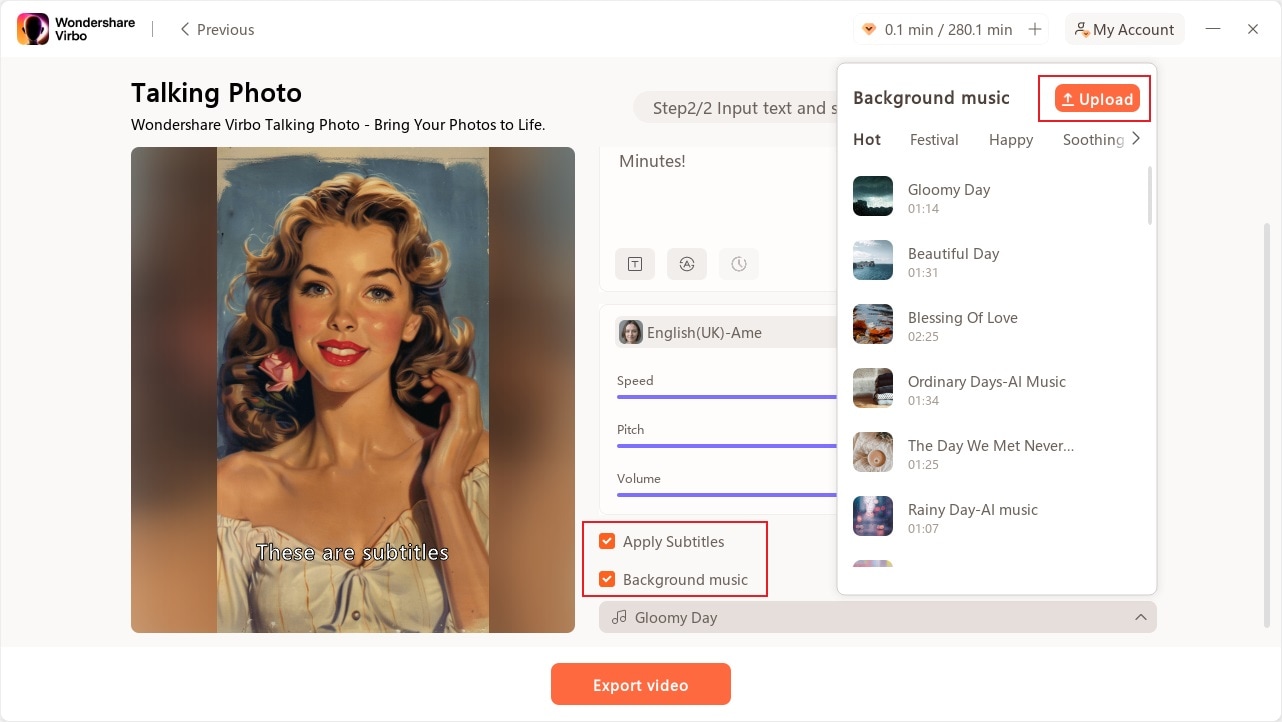
Apply Subtitles And Add Background Music
Step 3. Export Talking Photo
Now, you can click “Export Video” to export the talking photo. Wait for export successfully and then you will see it under “My Creations”.
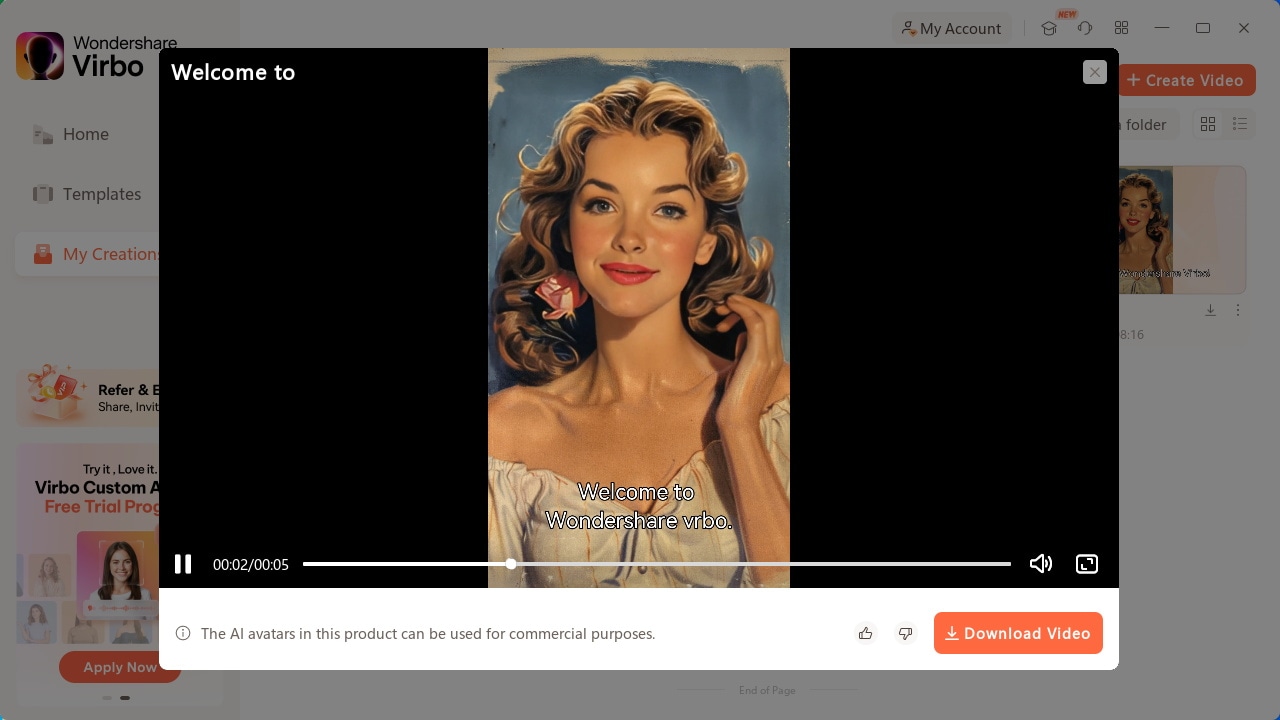
Download Talking Photo
Make Photos Speak Make Photos Speak
Way 2: Use Your Still Photos to Create Videos
Want to create videos with your photo? You can view the following steps:
Step 1. Create a project
After clicking “Talking Photo” on the homepage, pick an image you desire or click “+” to upload an image and tap “Create Video” to start creating a new video.
Generate AI Video Free Generate AI Video Free
Create Video
Step 2. Edit video
Type/paste your voiceover script or click “Audio Upload” to upload/extract/record the audio as video script. You can choose different languages and adjust speed, pitch, and volume at the operation bar. You can also switch the background, add background music, or add subtitles.
Edit Video
Step 3. Export video
Click preview to check the effect of your video. Once you are satisfied with the whole video, click “Export” to generate the video.
Export Video
The generated video will be shown on “My Creations”. You can view it and click “Download Video” to save it to your computer.
Download Video
Generate AI Video Free Generate AI Video Free
02Use Your Still Photos to Create Videos
Way 1: Simply Bring Your Photos to Life with 2 Steps
Simply input your script (or use Virbo’s AI feature to generate one), choose the voice-over, and export the video to achieve the desired effect! You can also record audio online or upload your own recordings to make your photos speak.
Step 1. Choose Talking Photo
Download and install Wondershare Virbo on your computer and click “Talking Photo” to bring photos to life.
Make Photos Speak Make Photos Speak
Click Talking Photo
Pick a template or click “Upload Picture” to upload your own picture and tap “Next”.
Create Next Button
Step 2. Input Text and Set A Voiceover
Enter your voiceover script or click the ‘Audio Upload’ to import an audio file as the voiceover.
Input Script
After entering your voiceover script, you can customize the language, and adjust playback speed, pitch, and volume.
Edit Voiceover
Choose Voiceover
Check “Background Music” to add or upload background music, or add subtitles by checking “Apply Subtitles”.
Apply Subtitles And Add Background Music
Step 3. Export Talking Photo
Now, you can click “Export Video” to export the talking photo. Wait for export successfully and then you will see it under “My Creations”.
Download Talking Photo
Make Photos Speak Make Photos Speak
Way 2: Use Your Still Photos to Create Videos
Want to create videos with your photo? You can view the following steps:
Step 1. Create a project
After clicking “Talking Photo” on the homepage, pick an image you desire or click “+” to upload an image and tap “Create Video” to start creating a new video.
Generate AI Video Free Generate AI Video Free
Create Video
Step 2. Edit video
Type/paste your voiceover script or click “Audio Upload” to upload/extract/record the audio as video script. You can choose different languages and adjust speed, pitch, and volume at the operation bar. You can also switch the background, add background music, or add subtitles.
Edit Video
Step 3. Export video
Click preview to check the effect of your video. Once you are satisfied with the whole video, click “Export” to generate the video.
Export Video
The generated video will be shown on “My Creations”. You can view it and click “Download Video” to save it to your computer.
Download Video
Generate AI Video Free Generate AI Video Free
Live Chat With WooCommerce: Leading Into the Live Selling World
E-commerce has reached an unprecedented level of fame all around the world. It provides convenience for buying and selling goods through accessible platforms.WooCommerce is one of those leading platforms that offer a satisfying e-commerce experience. Also, this platform is well-known for its exceptional functionality and infrastructure, which makes online selling easy.
What if you want aWooCommerce live chat feature to interact with your customers? This article presents benefits and ways to integrate live chat with WooCommerce to interact with customers. You can also learn about an innovative live-streaming platform that boosts your live sales.

Part 1. Overviewing WooCommerce E-Commerce and Its Utility in the Market
WooCommerce is a powerful e-commerce platform renowned for its adaptability. Its scalable nature allows you to start businesses of all sizes. The advanced customization options of WooCommerce make things effortless for users. Moreover, it provides a flexible selling experience, whether you’re selling products or services. Irrespective of its functionality, thelive chat WooCommerce feature is absent from the platform.
People can use WooCommerce as a plugin for WordPress, the leading content management system. This open-source plugin helps users customize their online stores. By doing so, it allows sellers to meet their branding requirements. Also, you can manage inventory, order processing, payment gateways, and shipping details. Moreover, it provides a built-in geo-location support to detect customer’s address.

Features of WooCommerce
Many businesses are using WooCommerce for online stores throughout the world. Its impressive usability and accessibility help users in different e-commerce aspects. Provided are some features of WooCommerce that make it special for brand owners:
1. Inventory Management
It provides multiple inventory management options to track stock levels. You can receive notifications for short or out-of-stock products. Moreover, you can sort or filter products by price, popularity, ratings, latest, and more.
2. Pre-installed Payment Methods
To simplify payment processes, WooCommerce provides pre-installed payment gateways. You can choose any payment method, including Cash on Delivery, PayPal, and Credit Card payments.
3. Sell Anything
With WooCommerce, you can sell anything from real products to digital downloads. Moreover, this 100% open-source plugin allows you to sell anywhere with its global support.
4. Mobile Friendliness
WooCommerce ensures that your store looks equally beautiful on desktop and smartphone. Store owners can even turn their existing stores into mobile apps without custom coding.
Part 2. How To Add Live Chat Feature in WooCommerce?
Live chatting is an essential function for interacting with the audience for trustworthiness. Unfortunately, WooCommerce doesn’t provide a dedicated live chat feature. If you want to use this service, integrate it separately with a third-party source. For this purpose, you can use a reliable plugin that enables WooCommerce online chat.
LiveChat is a renowned customer service platform that provides a superb live experience. It helps to chat with customers and share their data with CRM. Moreover, the AI chatbots help to greet your store visitors with automated responses. They allow you to capture more leads and increase sales. Ultimately, LiveChat helps boost your store’s overall revenue.
Comprehensive Guide to Setting Up the LiveChat Plugin on WooCommerce
Using the LiveChat plugin is a good option to get alive chat for WooCommerce . The query is how to set up the plugin across your WooCommerce store. For this, the provided step-by-step resolves all queries involving setting up the LiveChat plugin:
- Step 1. First, you have to access the WordPress dashboard to enter the “Plugins” section. Then, hit the “Add New” button and write “LiveChat WooCommerce” to search for this plugin. Look for the “WordPress Live Chat Plugin for WooCommerce – LiveChat” in the results that appear. Once identified, click the “Install Now” button to proceed.

- Step 2. Upon installation, you need to hit the “Activate” widget. After that, sign up with your account on the “Integrate with LiveChat” screen.

- Step 3. When the log-in and installation process is complete, a chat widget appears on the website. Then, click on “Go to LiveChat” to start live chatting.

- Step 4. If you want to change the settings, select the “LiveChat” option in the WordPress dashboard. Next, hit “Settings” and turn on or turn off the desired options.

Part 3. Wondershare Virbo Live: Assisting Quality Livestream Selling
Live selling has set marketing expectations high for the sellers. Therefore, you should use an efficient live selling tool to stay competitive. To meet the standards,Wondershare Virbo Live is an intuitive and interactive live streaming tool to enhance your streaming quality. Most sellers don’t have the knowledge to market their items on WooCommerce. For this purpose, this simple and easy-to-use medium will help sellers grow revenue.
Moreover, this tool is compatible with all major social media platforms. This allows you to integrate live streams with YouTube, Facebook, Instagram, and more. You don’t need to download the platform as it supports cloud-based service. Another exciting feature is that you can introduce AI avatars or VTubers to your live sessions. Overall, this is the best live-streaming platform with AI-powered features.
Key Highlights of Wondershare Virbo Live
- The smart AI streamer allows you to translate text for dubbing into different languages. It helps accommodate a wider audience of different regions, ethnicities, and cultures.
- Wondershare Virbo Live helps create scripts for live selling. Its built-in AI Smart Script feature allows you to type or generate a script with instant prompts.
- Users can also change live stream templates and backgrounds. Moreover, it allows the addition of creative stickers for better customer engagement.
Get Started Online Free Download
Step-by-Step Guide to Creating a Streaming Room in Virbo Live
Many live-streaming tools exist, but Wondershare Virbo Live is the most recommended. It provides innovative AI-powered functions to facilitate users in a single platform. Here’s how you can create your streaming room using this tool:
- Step 1. Generate a Blank Live Streaming Room
Access the Virbo Live tool from its official website. You must select the “Create Stream Room Now” button from the display. On the new screen, navigate and select the “Create a Black Livestream Room” option. Upon doing so, you will get access to several live-streaming settings.

Get Started Online Free Download
- Step 2. Integrate Microphone for Human-Like Interaction
Now, press the “Human interaction” tab on the left of your screen to integrate the mic with this tool. You have to hit the “Turn Microphone on to Take Over” button under the “Microphone” sub-section. Also, you can move to the “AI Interaction” tab to create an automated Q&A session.

- Step 3. Customize Live Stream Template and Background
Wondershare Virbo Live presents different templates and backgrounds for users. Click on the “Background” tab from the top navigation bar to try stunning backgrounds. You can also select the “Template” tab to explore various templates for quick live streaming setup.

- Step 5. Pick Suitable AI Avatars for Your Live Event
To add more fun, hit the “AI Avatars” tab from the top navigation bar. This section shows creative avatars with different outfits and poses. You can choose the suitable one that demonstrates your personality. After selecting the avatar, you can preview it on the right side of the screen.

- Step 6. Start Your Livestream After All Settings
After customizing all the features according to your desire, click on the “Start livestream” button at the top right of the screen. The results will be displayed across the respective selection as you decide which platform you’ll be using for the livestream.

Part 4. Discussion: Why Should We Shift To Live Selling?
Live chatting services add more energy to your live events. As discussed, theWooCommerce online chat feature is essential to engage with potential customers. Some people still feel doubtful about whether they will get benefits or not. This section clarifies some potential benefits of shifting to live selling that users can get in the overall market:
- Build Connections: Live streams add a human touch in the live selling that connects viewers emotionally. So you can easily build relationships to increase your brand awareness.
- Successful Selling: People can understand what to expect from a product during the live stream. So, it results in successful live selling and reduced delivery returns.
- Global Audience: Unlike traditional selling strategies, live selling helps reach international audiences. You can showcase products or services from anywhere to gain worldwide customers.
- Digital Experience: Live selling is far ahead of the offline world. For this digital experience, shoppers don’t need to find reliable physical stores. Also, the digitalized live shopping experience is more entertaining and profitable.
Conclusion
This ultimate guide provides an overview of WooCommerce and its features. We have also explained a way to enableWooCommerce live chat . Moreover, we have introduced a live-streaming tool that can integrate with other social platforms. With Virbo Live, users can optimize their streams with features like AI avatars, script generation, and much more.
A Guide on Starting Private Live Streams on YouTube
In today’s digital age, live streaming has become a powerful tool for connecting with audiences in real-time. This method has especially been crucial for businesses looking to get into live selling or gamers wanting to stream their games. But say, for example, that you want to keep your stream private, accessible only to select viewers; how do you do that?
Here’s where private live streaming comes in. This option allows you to share your content with specific individuals, ensuring a more intimate and controlled environment. This guide will teach you how to set upprivate YouTube streams and give you special tips to let AI help you with your streams with Wondershare Virbo.

Part 1: What Do You Need To Get Started With YouTube Private Live Streaming?
Before diving into the exciting world of private live streaming, here is the equipment to ensure a smooth and seamless experience.
- YouTube account. First things first, you’ll need a YouTube account. This is your gateway to the platform and your key to unlock the world of live streaming.
- A capable PC. Next, prepare your PC and the command center for your private stream. While specific requirements vary depending on the complexity of your stream, here are some general recommendations:
- Processor: Intel Core i5 or equivalent (or newer)
- RAM: 8GB or more
- Graphics Card: Dedicated GPU recommended for enhanced performance
- Internet Connection: A stable and fast internet connection with sufficient upload bandwidth (consider at least 3 Mbps for standard definition)
- A streaming tool. Now, you’ll need a streaming tool to capture your video and audio and send it live to YouTube.Wondershare Virbo is recommended, especially for live-selling purposes. Other options include OBS and similar stream apps for other purposes.
With these essential elements in place, you’re on your way to launching your private YouTube adventure.
Part 2: How To Start a Private YouTube Live Stream?
Ready to share your talents or ideas with a select audience? Dive into the steps to create aprivate live stream on YouTube by following the guide below. It’s pretty straightforward.
- Step 1: Access YouTube Studio.Head to your YouTube Studio page (studio.youtube.com) and log in using your Google account linked to your YouTube channel.
- Step 2: Prepare for live streaming**.** ClickCreate in the top left corner of the Studio dashboard, and selectGo Live from the dropdown menu. Alternatively, click the camera icon next to your profile picture and chooseGo Live.

- Step 3: Now, set your visibility. Before starting your broadcast, ensure your stream is private. Under theVisibility setting, click the dropdown menu and choosePrivate . This option restricts viewership to individuals you specifically invite.

- Step 4: There are two methods existing for inviting viewers:
- Email Invitations: Click onShare Privately and enter the email addresses of individuals you wish to grant access. You can also choose to notify them via email.
- Link sharing: Although not recommended for complete privacy, you can copy the stream link and share it directly with trusted individuals. Remember, anyone with the link can access the stream, even uninvited guests.

- Step 5: Once everything is set and your viewers are invited, clickGo Live to launch your private YouTube stream. Remember, only invited individuals using their YouTube accounts can view your content.
Additional Tips for Private YouTube Live Streams
Here are some additional tips that you can follow before starting aprivate YouTube stream :
- Test streaming. Consider using a test stream before inviting viewers to ensure everything runs smoothly.
- Giving guidelines to your viewers. Encourage guests to use their YouTube accounts for optimal viewing experience and security. Further, you can add house rules, especially for more intimate streams or live selling/auctions.
- Exploring advanced privacy settings. Explore advanced privacy settings within YouTube Studio for further control over viewer permissions.
- Using AI . Tools like Wondershare Virbo can help integrate AI into your private YouTube streams. This way, you won’t always have to glue your eyes on your stream. Discover more about this feature in the following section.
By following these steps and keeping privacy in mind, you can effectively host engaging live streams on YouTube, connecting with your chosen audience in a controlled and intimate setting. Remember to personalize your content, interact with your viewers, and enjoy the unique experience of private live streaming.
Part 3: Breaking the Limitations of Live Streams With Wondershare Virbo
Live streaming constantly evolves, offering creators new ways to connect with audiences. While traditional live streams require your physical presence, imagine having an engaging and interactive stream running 24/7, even when you’re not there. This is great, especially forprivate YouTube streams , where the need to engage the select viewers becomes more apparent.
EnterWondershare Virbo , a revolutionary tool that leverages AI to create realistic and captivating live streams around the clock.
Introducing Wondershare Virbo
Gone are the days of relying solely on manual effort to keep your audience engaged. Virbo Live transcends these limitations, offering:
Get Started Online Free Download
- 24/7 content delivery. Whether taking a break or focusing on other tasks, Virbo Live ensures your stream continues with AI-powered content, keeping viewers entertained and informed.
- Virtual host template library. No more scrambling for guest hosts or struggling with solo presentations. Virbo Live’s diverse library of 150+ customizable AI avatars can be your virtual co-host, presenter, or even a captivating character, interacting with viewers, answering questions, and conducting interviews.
- Content creation is made easy with templates. Forget starting from scratch. Virbo Live provides 180+ professionally designed video templates across various themes and styles, saving you time and effort. Plus, enjoy a library of royalty-free music to add the perfect soundtrack.
- Engaging AI voices. Bring your content to life with 120 AI voices, offering a variety of tones and accents, ensuring your message resonates with a global audience.
Integrating AI into Your Live Stream
Adding Virbo Live to your existing setup is simple and intuitive. Add Virbo as a live OBS window and use the YouTube stream key. Here’s a step-by-step guide:
- Step 1: InstallWondershare Virbo or access the web app.
Get Started Online Free Download
- Step 2: ClickCreate a Blank Livestream Room to customize your stream’s interface.

- Step 3: Choose from templates, backgrounds, AI avatars, and stickers to create a visually engaging environment.

- Step 4: UnderScript Lines , write the script your AI host will deliver throughout the stream. UseAI Interaction to set responses for specific questions andHuman interaction for actual responses from your end.

- Step 5: Once everything is set, clickStart Livestream and connect it to your preferred platform through OBS. Paste your streaming key for seamless integration.
Use-Cases for Wondershare Virbo and Private YouTube Live Streaming
Virbo Live empowers you to explore new avenues in content creation. Imagine using it for:
- E-commerce shopping. Showcase products with AI hosts demonstrating their features and answering customer questions in real-time, even outside business hours.
- Educational live tutorials. Host interactive learning experiences with AI tutors delivering engaging lectures and responding to student inquiries.
- Live Q&A sessions. Let your AI host manage large-scale Q&A sessions and field questions and keep the conversation flowing smoothly.
With Wondershare Virbo Live, the possibilities are endless. Unleash your creativity, explore new ways to connect with your audience, and experience the power of 24/7private YouTube streams . Remember, this is just a starting point – personalize your content, experiment with different features, and discover the unique potential Virbo Live brings to your streaming journey.
Conclusion
In today’s digital age, live streaming has become a powerful tool for connecting with audiences in real-time. YouTube live streaming offers a versatile platform to share your passions and connect with a select group of viewers. This article has guided you through setting up aprivate live stream on YouTube , ensuring your content reaches only your guests.
Remember, key considerations include enabling private streaming within YouTube Studio, inviting viewers via email or link sharing, and personalizing your content to create an engaging experience. If you want to take your live streams to the next level, consider Wondershare Virbo, a user-friendly tool designed to simplify private live streaming on YouTube with the help of AI.
Best 10 Hindi Video Translators with Step-by-Step Guidance
Whether you’re a YouTube content creator or a Bollywood movie fan, it is entirely possible to translate Hindi videos to English. We live in an era with advanced AI and features that would entirely blow your mind.
So, in this blog, we’re covering the best 10 Hindi video translators with step-by-step guidance on how you can do it. But first, we will recommend a solution that would make Hindi translation for all devices easier.
Part 1. Most Recommended Hindi Video Translator for all Devices - Virbo
Wondershare Virbo is an AI video generator that covers multinational AI avatars, a plethora of natural voices, royalty-free assets, templates, and cross-platform support. So, whether you want a Hindi national spokesperson for your YouTube channel for media use, or you would like a Chinese national, there’s a choice for everyone.
All you need to have is text that you would like to be converted, and Virbo, with its extreme AI knowledge, would easily get the job done for you. So, let’s talk about some of the features that Virbo offers.
Steps to Translate Video English to Hindi
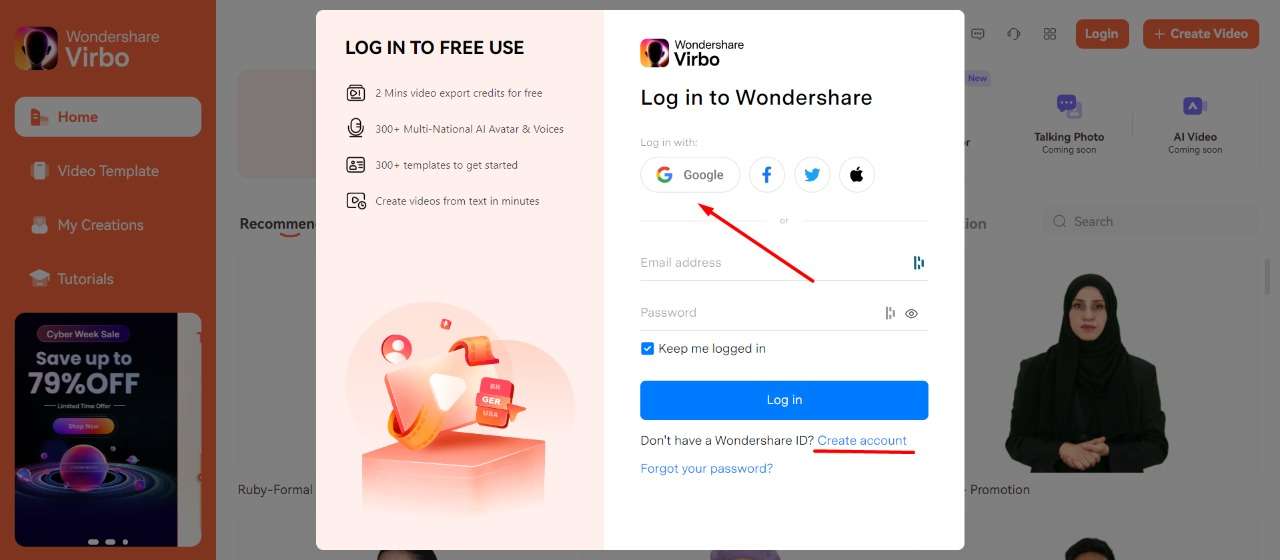
Vibro allows you to generate and translate videos for free, as long as you don’t reach your free quote. So, the first step is to sign up on Virbo for free. Go to the Official App Website and then select “Login”
- You can simply Login with Google or Create an account, based on your preference. And if you already have an account, then you can just login regularly.
- Now you will reach the application page, and in the top right corner you will see the “Video Translator” tool. Click on that.
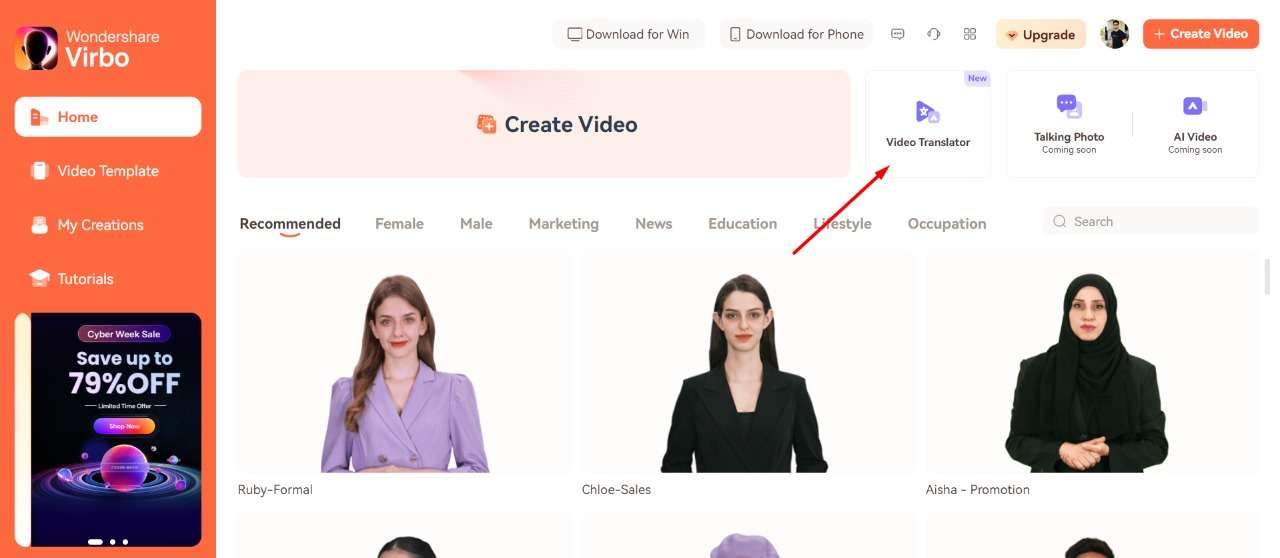
- The app will take you to the next tab. You can also download Virbo on your PC or mobile. Once you are on the Virbo app page, you can upload a video. The free version allows you to translate a video that is up to 2 minutes and 200MB.
Click to upload a video, select the original video language, which is English in our case, and select the target language to “Hindi.” Once you upload the file, select “Translate this video.”
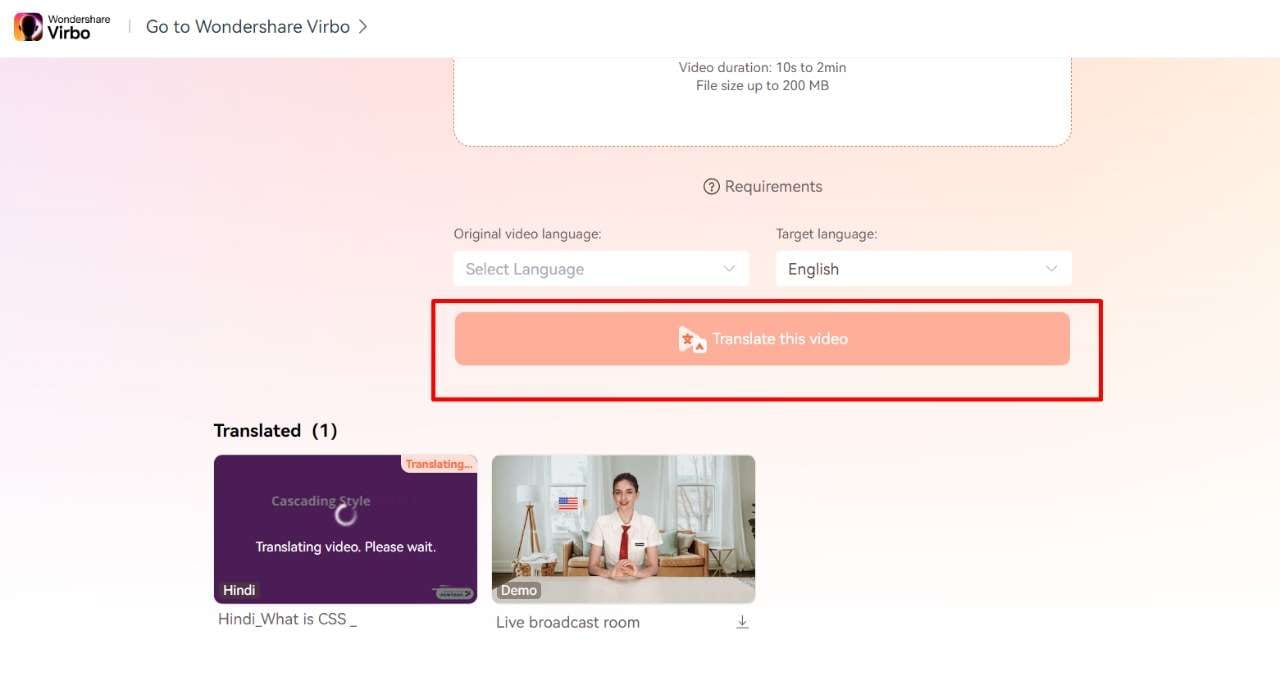
- Wait for the file to be translated, and you will have your own translated video. Now, you can enjoy translating as many videos as you like.
Key Features of Virbo Video Translator
1. AI Avatar
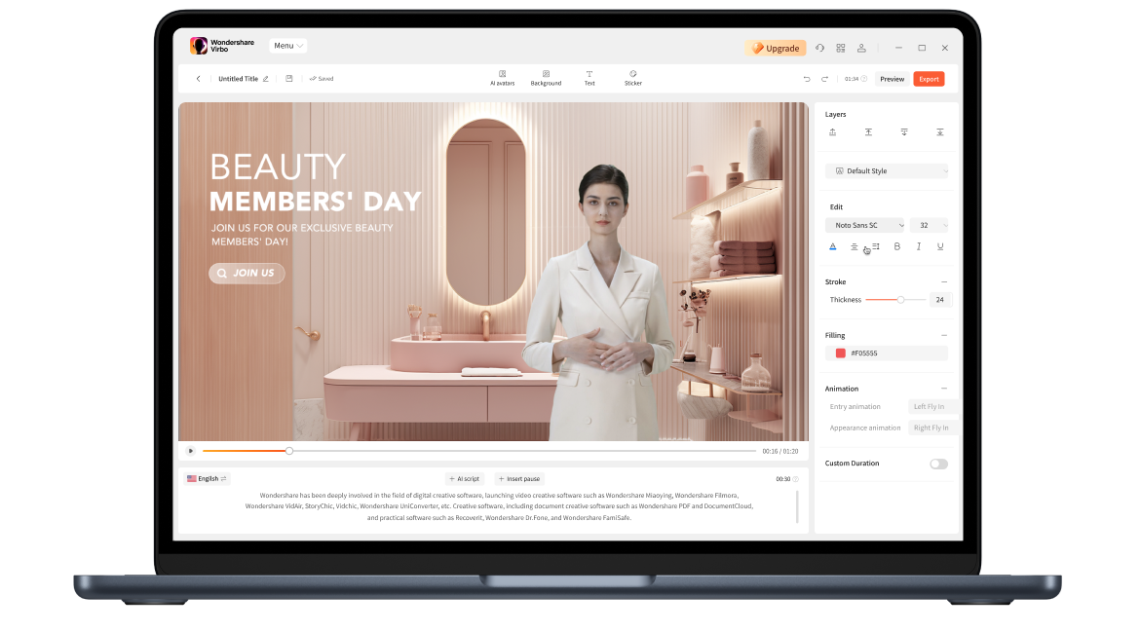
It is the era of the virtual avatars and Virbo absolutely delivers. It generates a virtual avatar for you that you can use to translate Hindi scripts to English with ease. Whether you are a news channel, a YouTuber, or just want to present something from Hindi to English, then using Virbo will be your best bet.
There are more than 300+ real human voices that are natural, you can engage with a broader audience, and the ethnicity choices are more, so no one is left out. All in all, the AI avatar feature of Virbo is revolutionary, making it one of the best Hindi video translators right now.
2. AI Voice
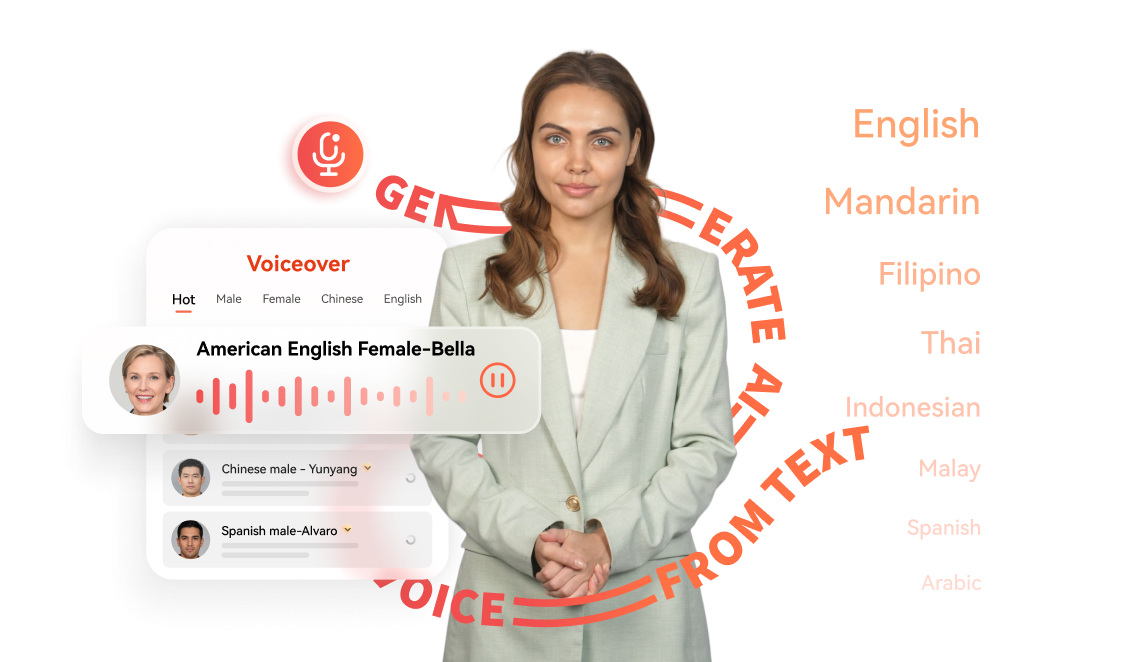
AI Voice is another strong point that goes hand in hand with AI Avatars. If you want to translate videos from Hindi to English and vice versa, you can use AI Voice from Virbo to create educational videos, marketing campaigns, customer interactions, and a lot more. The voice is human-like and uses the latest and greatest AI language models to do so.
3. AI Script Generator
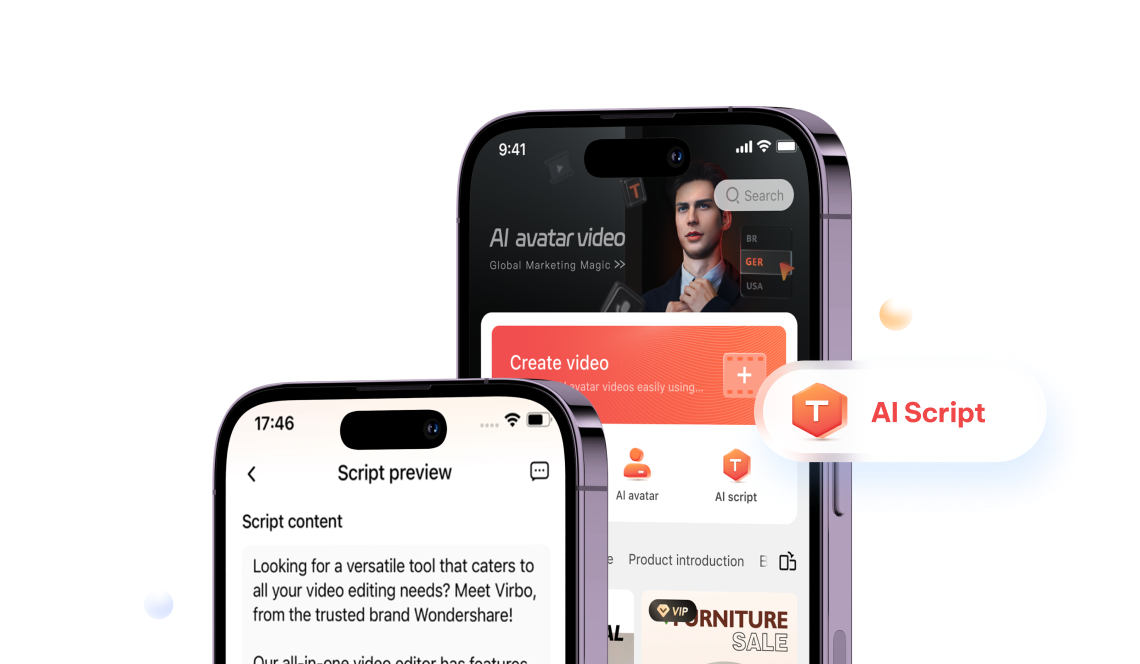
But what if you want to automate the whole process? Well, Vibro also has an AI script generator tool that enables you to use ChatGPT to get AI written scripts. But how will this help? Let’s say you are an educational institution who wants to teach your students some subject in Hindi. With Virbo, you can generate a script and then translate that script into Hindi, making education great again!
Pros of Virbo
- Amazing end results with AI voice and avatar generation tool.
- Video editing features are also included.
- Realistic and natural characters.
- All AI features make the video creation process simpler and effective.
- Powerful translation tool to make realistic videos in various languages.
- Comes with a video translator too that is simple to use.
Cons of Virbo
- Sometimes, there’s a slight lag.
Get Started Online Free Download
Part 2. Alternative 5 tools to translate Hindi video to English [Online]
1. Veed.io
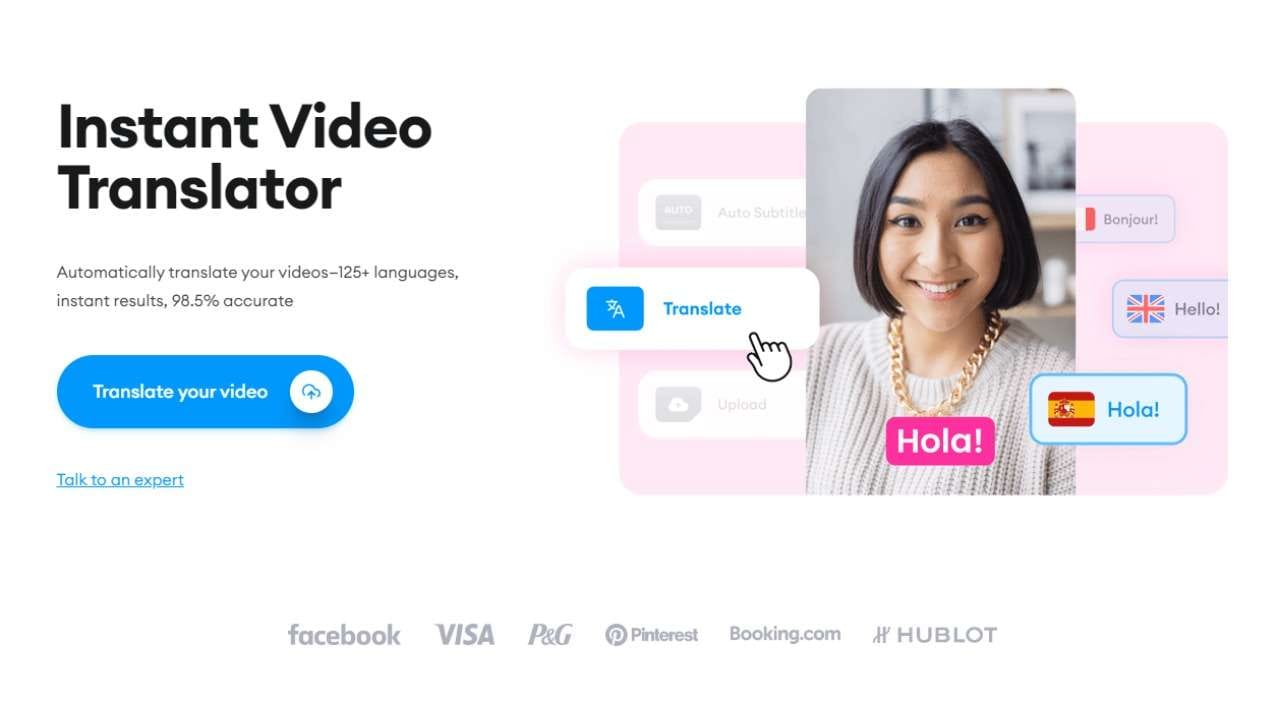
While there are a lot of Hindi-to-English translation tools on the market, you won’t find something like Veed . The reason is simple: it translates videos in 125+ languages with over 98.5% accuracy. Some of the biggest brands like Facebook, VISA, P&G, and Pinterest have also used Veed for their brand, which means Veed has an extremely good qualification for video translation.
Now, let’s talk about its features:
1. Download subtitles for efficient content repurposing:
While many video translation tools offer good features, Veed takes it to the next level by allowing you to download and edit subtitles according to your needs. You can also hard code or burn your subtitles to your videos permanently.
2. Accurate translations:
With over 98% accuracy in subtitles and translation, Veed can also be considered a great substitute for Google Translate and other tools. It is a great tool that also acts as a movie translator in Hindi apps, making it the best online app for translating movies.
Generate Engaging
AI Video in Minutes!
Easily convert text into professional spokesperson videos in over 120+ voices & languages in minutes.
Generate AI Video Free Generate AI Video Now


2. Kapwing
In the world of instant video translation tools, Kapwing takes the cake for being one of the most versatile tools out there. You can use the AI-powered tool in just a couple of minutes with a few clicks, and your work will be done easily.
You can instantly translate videos to and from 70+ languages, which saves hours of manually translating videos to reach a global audience. Here are some of the key features of Kapwing:
1. Automatic translations for videos, audio, and text:
Being an all-in-one translation tool, Kapwing can translate any audio file and even convert videos to text. It uses powerful AI subtitles, transcripts, and text-to-speech generation, so all aspects of content can be translated easily.
2. 70+ languages support:
With Kapwing, you can not only do Hindi video translation but it goes beyond that. With over 70+ languages, there’s a lot of flexibility in terms of which languages you can edit.
3. Flixier
Flixier is one of the easiest software to use if you want a fast video language translator. While it doesn’t have a lot of language options, with 30 well-built languages, you can still get your content transformed into another language.
Flixier is also one of the few translators that allows subtitles translation in Hindi. However, there’s even more. The software is easy to use and doesn’t even require you to have an account unless you decide to go premium. Here are some of the features that it offers:
1. Video translation in browser:
With Flixier, you can easily translate your videos right within your browser. All you need is a good internet connection and a computer that would work well. The translation process is made even simpler because you don’t even have to make an account to use the software.
2. Free to use:
One of the biggest benefits of using Flixier is that it is a free video translator. Of course, as you use it more, you are going to have to buy the premium version, but if you want to try the software or get some simple projects done, then the free version will cater to your needs.
4. Rask AI

Rask AI is the future of video translations. It features over 130 languages, allowing the videos to resonate with viewers all around the globe. Moreover, it uses the latest AI tech to make sure that you get the best possible results every time you use its service.
But the user experience is where Rask AI takes the place of being one of the best Hindi-to-English video translators. All you need is to first upload your video or movie, select a language, and then translate according to your language choice. You will get the best possible result in this case.
Here are some of Rask AI’s features that make it so popular:
1. Automation made easier:
With Rask AI, automation is made easier as you don’t have to worry about taking out all that time to hire a translator, and even then, there’s a good chance of error. The AI-powered technology makes sure that the translation is done efficiently and effectively.
2. Language translation:
Rask AI is specifically made to translate language in video content. This way, no matter what business you have, you can reach a broader audience. The platform is easy to use, and anyone can learn it within a matter of minutes.
5. Typito
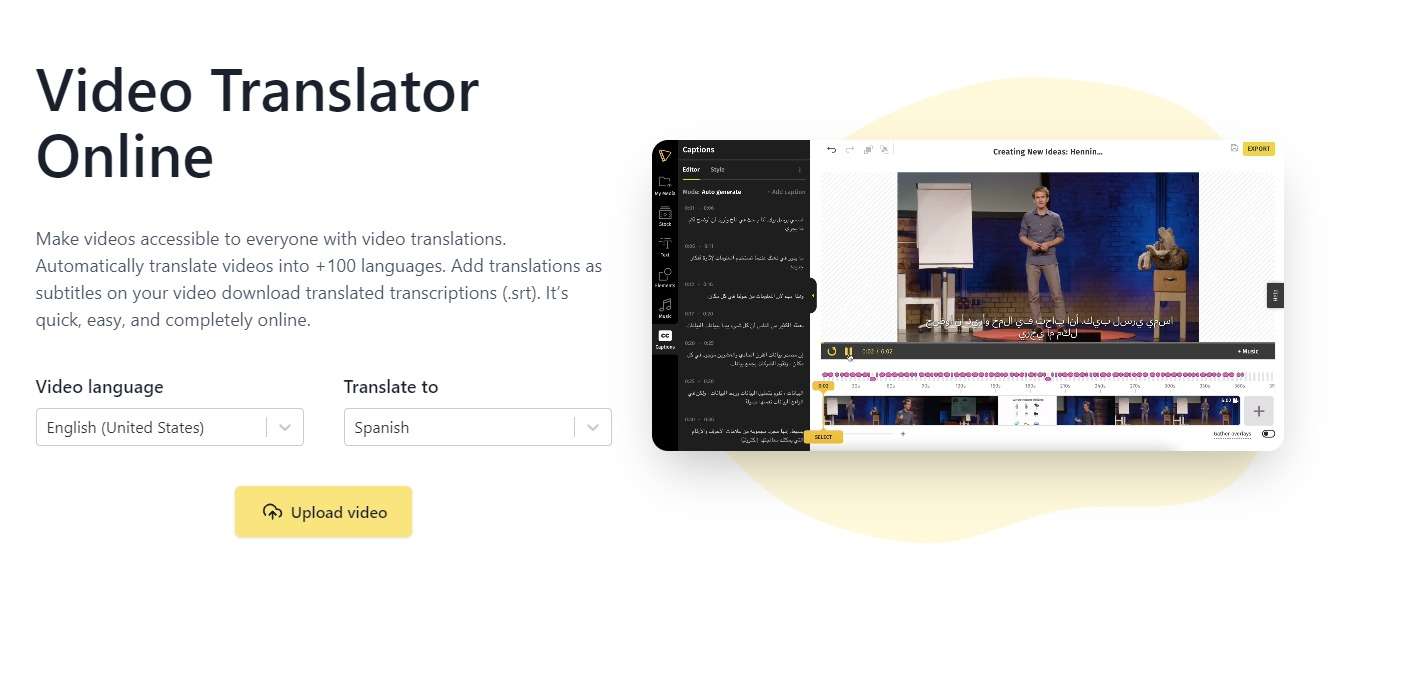
Typito offers one of the best Hindi video-to-English translations, but that’s not all. More than 500,000+ marketers, news agencies, business owners, and influencers are already using Typito to grow their audience to the next level.
Using this software is pretty simple. All you need to do is select the video language of your choice and select the desired translation language. As you upload the video, you need to wait for a few minutes for the online software to process. After some time, you are going to get your newly translated video right on your computer.
Here are some of the key features offered by Typito:
1. Translate into multiple languages:
Typito makes it easier for you to translate videos into multiple languages. The tool is designed to save you hours of your time while you simply get the most professionally translated video in a plethora of languages.
2. Translate YouTube videos:
One of the most popular features of Typito is that it allows you to translate your content far beyond what YouTube has to offer. It can burn your translated subtitles to appear the way you want. Moreover, you can also plate the subtitles on the top or bottom of your video.
3. Translate video to text:
While there are a lot of text-to-video translators, Typito goes beyond the regular stereotypes and also provides video-to-text translation with 95% accuracy. You can also click on the generated transcription to edit any words or phrases to your liking.
Part 3. Alternative 5 tools for Hindi video to English translation [Download]
1. Filmora
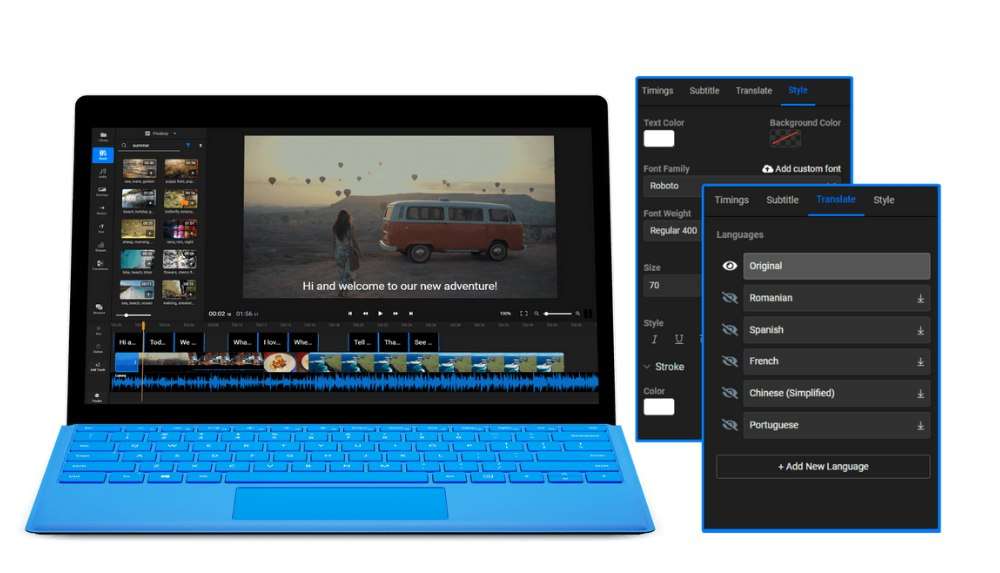
While Filmora has a broader focus, it can do free translations for your videos. You can use the video speech-to-text tool to make your videos more readable. The 1-click translator can translate your video into English, Chinese, Hindi, Spanish, French, Korean, Arabic, Russian, and over 26 languages.
If you want to emphasize or edit the subtitles, you can also use the built-in text editor to change the font, style, color, and everything.
1. Strong speech-to-text feature:
Fillmore has one of the strongest text-to-speech features that it uses to translate videos. Imagine having a video editor that does everything else for you. Filmora aims to be exactly that tool.
2. All-in-one editing tool:
The biggest benefit of using Filmora by far is the fact that it is more than just video translation software. It is mainly a video editing software with a plethora of AI tools that help in various parts of video production.
2. Streamr by VidToon
Streamr is a great tool to automatically convert your audio or video to text and beyond. However, it is a tool that is more focused on subtitles and gives you control over the text side of things.
So, if you ever want a video or audio to be converted into Hindi or English, then Streamr might be the best tool for you. It gives you so much control over the subtitle side of things that you would be amazed.
So, let’s discover some of these features:
1. Surge your conversions:
One of the best ways to tap the untapped markets is by using a tool like Streamr. It allows you to tap into the foreign market and multiply your video exposure by 75% all over the world.
2. Fully automated video:
With Streamr, you can make a fully automated video translation, Video Transcription, Audio Translation, Audio Transcription Software.
3. Vidscribe
Vidscribe is an all-in-one tool with a plethora of features. However, one of its main features is to translate videos from 100s of languages, which is one of the best ways to reach a global audience.
Vidscribe can be downloaded to your PC, but it is a paid tool with features that make translation easier and more effective. Here are some of the features it offers:
1. Global reach:
Vidscribe is ideal for YouTube channels, blogs, and other media companies that want to take over the digital world. It has some of the most advanced tools to translate and then track those metrics. If you want a Hindi-to-English or English-to-Hindi translator, then Vidscribe would be ideal.
2. Money back guarantee:
With VidScribe, you also get a 30-day money-back guarantee. You should know that most online tools don’t work on this model. Since VidScribe is more of a translation and SEO tool, it provides you with a lot of flexibility and options.
4. VSCAT
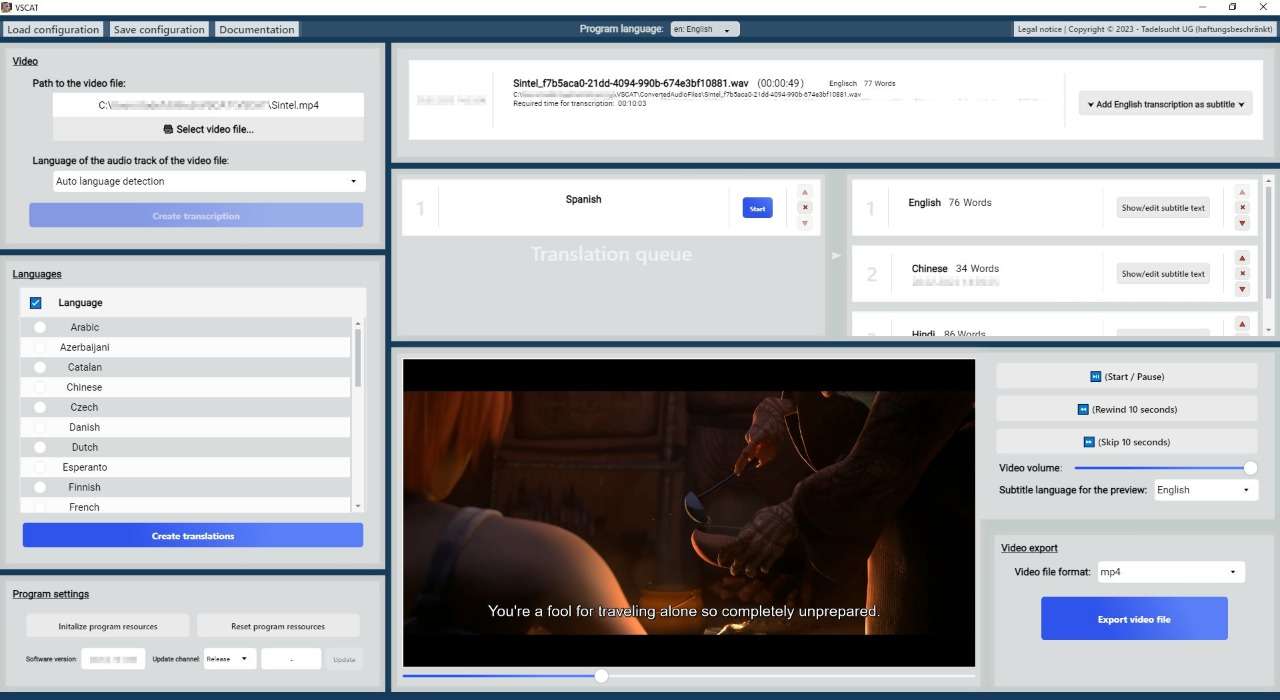
But if you’re looking to translate Hindi to English and vice versa, then a classic tool like VSCAT would be your friend. It is a powerful tool that lets you translate and automatically create video subtitles in multiple languages.
Yes, it does support Hindi, and it does its job perfectly. Here are some of the key features of VSCAT:
1. Advance technology:
VSCAT uses advanced technology like OpenAI’s whisper to help you in the translation of these videos. It is a tool that has proven to be a popular translator time and again. Moreover, with VSCAT, you can enable yourself to provide content that would convert.
2. Easy-to-use:
While VSCAT looks like it’s complex, it’s fairly simple to use. All the features are well-laid out, and you can make any settings you want according to your liking. This means that aside from doing the translation, you can also customize the software according to your liking.
5. Speechify
One of the best translation tools for Hindi to English is Speechify . While the software doesn’t have an app on Windows, you can use it on both Android and iOS. For Windows users, they can easily leverage the Chrome extension or the online tool to translate videos.
Here are a few features that it provides:
1. 80+ language support:
Speechify works like magic. It supports 80+ languages that you can use to automatically translate video or audio. There’s no need for expensive processes or employees, and you can instantly get the desired results according to your liking.
2. Realistic AI voices:
The software does give you extremely good AI voices. They not only sound like humans but everything from the accent and the dialect to everything; you can rely on Speechify to deliver a pristine quality of voiceovers.
Part 4. F.A.Q about Hindi Video Translator
01 How can I translate a Hindi video to English?
To translate a Hindi video into English, you need AI-centric video translation software. We have mentioned a lot of tools above. If you are looking for the perfect tool to translate Hindi to English or English to Hindi, then you should use a tool like Veed.io or Virbo for easy and efficient translation.
02 How to convert Hindi text to English
One of the best ways to convert Hindi text to English is by using a tool like Streamr or Kapwing. Both have great built-in features that allow for easy Hindi text-to-English conversion. Whether you are looking for a Hindi video to English translation tool or something that would translate text, you can find a variety of tools that would help you in achieving this. We have also mentioned them based on the features and expertise of each tool and how they work.
03 How can I translate video words?
To translate video words, you need to use a video-to-text translation tool. In the description above, we have mentioned many tools that can help you achieve the same. If you want to translate Hindi video to English or simply the words, you should aim for a tool that is specifically going to specialize in translating words.
Also read:
- New In 2024, Best Toolbox to Translate YouTube Videos to English Subtitles
- In 2024, A Basic Guidebook To Live Selling in Todays Digital World
- Updated In 2024, 10 Best Free AI Video Generators with Innovative and Advanced Algorithms
- 2024 Approved Guide on How to Enable the Text to Speech Function on iPhone
- Updated Create AI Avatar Videos | Wondershare Virbo Online
- Clone Your Voice Harness the Potential of AI for 2024
- New Auto Translate YouTube Videos Into Different Languages
- 2024 Approved AI Video Translation
- New The Guide to Learning All the Details About Voice Cloning for 2024
- New 2024 Approved The Best English Voice Generator To Convert Text Into Desired Accent
- New In 2024, Best 6 Celebrity Text to Speech AI Voice Generators You May Like
- 2024 Approved Top 10 AI Subtitle Translators for Content Creators
- 2024 Approved The Top 10 AI Avatar Generators
- New In 2024, 7 Best Explainer Video Makers You May Like
- How To Generate Speech From Text | The Top Text-to-Speech Converters
- New 10 Best Text-to-Video AI Generators to Create Engaging Videos for 2024
- In 2024, 5 Smart Tips About YouTube Shorts to Grow Your Business
- Updated Real-Time AI Voice Changer Revolutionizing Communication for 2024
- In 2024, Best 4 Morgan Freeman Voice Generator Tools for Voice Cloning
- 5 Must-Know Hacks to Beat Deepfake Attacks Streamer Survival Guide
- 8 Best Multi-Subtitles Translators You Shouldnt Miss
- In 2024, Narakeet Review Convenient Text to Speech Voice Maker
- New Authors Recommended The Best Text Voice Generators for All Platforms
- Updated How to Translate TikTok Videos Top 5 Auto Translate Tools for 2024
- Updated In 2024, The Most Direct Guide to Learning How to Clone Your Voice
- New 2024 Approved What Is an AI Video Maker? | Wondershare Virbo Glossary
- Updated Talking Photo
- New Top 10 Free AI Voice Generators to Use in Daily Life for 2024
- Updated In 2024, Top 6 Darth Vader AI Generators for All Platforms
- Updated Create AI Avatar Video
- Updated Best Video Translator App for PC Cannot Miss for 2024
- Updated In 2024, Guide to Generating Speech in Different Languages With the Best Tools
- 2024 Approved Translate Videos and Subtitles with Veed.io
- In 2024, Generate Video with Talking Photo Feature
- Updated What Is AI Voice Text to Speech for 2024
- Updated 2024 Approved Easy Steps to Create AI Twitch Streamer with Animated Avatars
- How to Translate TikTok Videos Top 5 Auto Translate Tools
- In 2024, How To Remove Flashlight From iPhone 11 Pro Lock Screen | Dr.fone
- How to Rescue Lost Pictures from Realme GT 5 Pro?
- How Vivo V27e Mirror Screen to PC? | Dr.fone
- How to Recover deleted pictures on iPhone 6s Plus? 5 Best Solutions | Stellar
- Best 10 Mock Location Apps Worth Trying On Xiaomi Redmi Note 12 5G | Dr.fone
- How to Remove and Reset Face ID on Apple iPhone 14 Plus
- In 2024, Dose Life360 Notify Me When Someone Checks My Location On Itel A60s? | Dr.fone
- 10 Free Location Spoofers to Fake GPS Location on your Realme Narzo 60 5G | Dr.fone
- How to Use Phone Clone to Migrate Your Oppo Find N3 Flip Data? | Dr.fone
- In 2024, Apple iPhone 12 Pro Mirror to PC? Top Apps You Must Know | Dr.fone
- Device unlock 14 Pro
- What Legendaries Are In Pokemon Platinum On Motorola Moto G23? | Dr.fone
- In 2024, A Guide Huawei Nova Y91 Wireless and Wired Screen Mirroring | Dr.fone
- In 2024, Here are Some of the Best Pokemon Discord Servers to Join On Oppo Find X6 | Dr.fone
- How Can Infinix Smart 7Mirror Share to PC? | Dr.fone
- How To Recover Apple iPhone XS Max Data From iTunes? | Dr.fone
- Different Methods To Unlock Your Apple iPhone 13 | Dr.fone
- iSpoofer is not working On Oppo A78? Fixed | Dr.fone
- Title: Updated 2024 Approved Ready To Dive Into Photo Talking Videos? Heres What You Need To Know
- Author: Sam
- Created at : 2024-05-19 03:35:07
- Updated at : 2024-05-20 03:35:07
- Link: https://ai-voice-clone.techidaily.com/updated-2024-approved-ready-to-dive-into-photo-talking-videos-heres-what-you-need-to-know/
- License: This work is licensed under CC BY-NC-SA 4.0.
