
:max_bytes(150000):strip_icc():format(webp)/the-10-best-password-managers-of-2022-6543213-7650bf3ab2eb41a08dbee8713ce811e3.jpg)
What Is an AI Voice Generator? | Wondershare Virbo Glossary
What Is an AI Voice Generator? | Wondershare Virbo Glossary
Part 1: What is an AI voice generator?
AI voice generators are advanced technologies that utilize artificial intelligence algorithms to generate lifelike and natural-sounding voices. These innovative tools analyze speech patterns, intonations, and other linguistic elements from extensive datasets, enabling them to generate voices that closely resemble human speech. By inputting text or speech, AI voice generators can generate high-quality voice output that ranges from conversational to professional-grade voices.
Part 2: What are AI voice generators used for?
AI voice generators have numerous applications across various fields:
1. Content Creation
AI voice generators revolutionize content creation by automating the process of generating voiceovers for videos, podcasts, audiobooks, and other multimedia content. They provide an efficient and cost-effective solution, saving time and resources compared to traditional voice recording methods.
2. Accessibility
AI speech generator s improve accessibility for individuals with speech impairments or disabilities. These tools enable them to generate clear, natural-sounding voices, enhancing their communication ability.
3. Virtual Assistants
AI voice generators power virtual assistants like Siri and Google AI, enabling them to respond with human-like voices. These AI-powered virtual assistants provide personalized and interactive experiences for users.
4. Language Learning and Pronunciation
AI audio generator s aid language learners in practicing pronunciation and improving their speaking skills. These tools offer accurate and consistent pronunciation models, helping learners develop fluency and confidence.
Part 3: What are examples of AI voice generators?
Popular examples of AI voice generators include:
1. Wondershare Virbo
By inputting key information, Wondershare Virbo automatically generates scripts and provides AI voiceovers for the generated text. Users can choose from a wide selection of voices and languages, with over 120 options available.
Get Started Online Free Download
2. Siri
Apple’s virtual assistant, Siri, utilizes AI voice generation technology to respond with natural and conversational voices, enhancing the user experience.
3. Google AI
Google AI voice generator is another well-known example that powers Google Assistant, delivering realistic and human-like responses to user queries.
4. Microsoft Azure Text to Speech
Microsoft Azure Text to Speech service provides a powerful AI voice generator that converts text into lifelike speech, offering customizable voices and various language options.
5. Amazon Polly
Amazon Polly is an AI-driven service that converts text into lifelike speech, offering multiple language options and customizable voices.
Part 4: Can I create my own AI voice?
Creating your own AI voice requires advanced technical expertise and extensive resources. While there are research projects and initiatives in voice cloning and personalized AI voices, creating a truly personalized AI voice is a complex and ongoing development area.
In conclusion, AI voice generators have transformed the landscape of voice generation. From content creation to accessibility and virtual assistants, these tools offer wide-ranging applications. Explore popular examples like Siri and Google AI, and take advantage of the best AI voice generators available to create lifelike voices effortlessly. While creating your own AI voice is still a developing field, the possibilities for generating realistic and personalized voices continuously evolve.
Launching Your Live Room | Virbo AI Live Stream
Launching Your Live Room
Explore step-by-step instructions on decorating your space, uploading local images and videos, adding engaging AI interactions, etc. Elevate your streaming experience and captivate your audience with a seamlessly executed live room. Dive into our comprehensive guide now!
02Uploading Local Images and Videos
07AI Intelligent Script Generation
11Starting/Ending the Live Broadcast
Decorating Your Live Room
Decoration Guidance
- Click on the product homepage and create a blank live room to initiate a new live session.

Create a blank live room
- Upon creating a blank live room, the live room editing page will open. The left side serves as the operation area, the right side as the canvas area, and the materials area is located above.

Livestream room navigation
- Click on the templates to use pre-designed combinations of background, virtual hosts, and stickers.

Select a template
- Customize the background from the background library. During the live broadcast, only one background can be used.

Livestream room customization
- Choose a virtual host from the virtual host library. Only one virtual host can be used during the live session.
![]()
Choose a virtual host
- Add stickers from the sticker library. Multiple stickers can be used during the live broadcast.
- After selecting materials, adjust their position and size in the canvas area. Right-click to modify layers, copy, or delete materials.
Uploading Local Images and Videos
Upload background images or videos
- Upload: Click Background -> Upload Background -> Select file to upload. Materials will be displayed in “My Background” after uploading.

Upload Background
- Apply: Click Background -> My Background, then click on the material to use it on the canvas.
- Delete: Hover over the material and click the delete icon to remove it.

Delete Background
Note
Background upload requirements:
- Image and video dimensions should be 9:16
- Image formats: JPG/JPEG/PNG
- Video formats: MP4/MOV
- Resolution should not exceed 1080P
- Video duration should not exceed 30 minutes
- File size should not exceed 1GB
Upload sticker images or videos
- Upload: Click Sticker -> Upload Sticker -> Select file to upload. Materials will be displayed in “My Sticker” after uploading.

Upload Sticker
- Apply: Click Sticker -> My Sticker, then click on the material to use it on the canvas.
- Delete: Click Sticker -> My Sticker, hover over the material, click the delete icon to remove it.

Delete Sticker
Note
Sticker upload requirements:
- Image and video dimensions are flexible.
- Image formats: JPG/JPEG/PNG
- Video formats: MP4/MOV
- Resolution should not exceed 1080P
- Video duration should not exceed 30 minutes
- File size should not exceed 1GB
Text-Driven Live Room
Script Guidance
- Input script text: Copy and paste your script into the script dialogue box.

Text Scripts Inset
- Choose a matching tone: Click the voice-over entrance above, select a suitable tone, and preview it.
- Preview: Click the “Preview” button below the text to listen.
Audio-Driven Live Room
Audio Guidance
- Upload audio: Click Script -> Audio -> Upload local voice and upload the local file.

Upload Audio
- Preview audio: After uploading, click to preview the audio.

Preview Audio
- Audio sorting: Hold and drag to sort the audio files.

Audio sorting
- Audio sorting: Hold and drag to sort the audio files.

Modifying Live Room Name
Method Guidance
- Method 1: Click the edit button in the upper-left corner of the edit page to rename the live room.

Rename Livestream Room
- Method 2: Product homepage -> My Live Rooms -> Click on the more options for an individual live room -> Choose Rename.
Adding AI Identification
Step Guidance
- On the live room editing page, click on the checkbox before the AI identification to enable or disable it.
AI Intelligent Script Generation
Generation Guidance
- Click the “AI Intelligent Script” button below the script, a popup will appear.
- Enter your product name (mandatory), selling points (optional), promotional information (optional), select language and style, then click generate.

AI Script
- The generated result can be further modified, click “Use” to add it to the script dialogue box.
AI Translation
Translation Guidance
- Click the “AI Translation” button below the script, a popup will appear.
- Place the text to be translated on the left, click the middle arrow to select the language for translation (e.g., English), and click translate.

AI Translation
- The generated result can be further modified, click “Use” to add it to the script dialogue box.

AI Translation Result
Manual Interaction
Microphone Interaction
- Operational Flow:
- Click Manual Interaction -> Microphone, and select the microphone device.
- Speak into the microphone and observe the sound wave status.
- Open “Start Live,” wait for the appearance of the virtual host image, and click “Open Mic Takeover.” The virtual host’s mouth will be closed, and your voice will drive the virtual host to speak.
- After speaking, click “End Takeover,” and the virtual host will resume reading the scripted dialogue.
- Click Manual Interaction -> Microphone, and select the microphone device.
- Grant Browser Microphone Access:
- Google Chrome:
*Open Chrome, click the settings icon in the top right.
* Click “Settings,” open the settings page. Select “Privacy and Security” and then click “Site Settings.”
*Enter the site settings page, click “Microphone.”
* On the microphone authorization page, select that the site can request the use of your microphone.
* After these settings, when the browser needs to use the camera or microphone, a device request box will pop up on the page. Select “Allow.” - Mozilla Firefox:
*Open Firefox, click the settings icon in the top right, and click “Settings.”
* Open the settings page, click “Privacy & Security,” and find “Microphone Permissions.” Click “Settings” next to “Microphone.”
*Enter the settings page, add the site that requests the use of your microphone to the list, and click “Save Changes.”
* After these settings, when the browser needs to use the camera or microphone, a device request box will pop up on the page. Select “Allow.” - Sogou Browser:
*Open Sogou Browser, click the settings icon in the top right, and click “Options.”
* Open the options page, click “Advanced,” find “Privacy - Browsers on the Mac System:
*Locate “System Preferences” on your Mac dock and click the icon. Once opened, find “Security & Privacy” and click to open.
* On the “Security & Privacy” page, select “Privacy,” then click on “Microphone” and set the applications that need to use the microphone to “Allow.”
- Google Chrome:
Text Interaction
- Click on “Artificial Interaction” and enter interaction scripts in the input box below.
- Click “Add Text” to add it to the interaction list. After starting the live broadcast, each interaction script will have a send button.

Text Interactionn
- Click “Send” to trigger the AI to speak according to the interaction script.
Intelligent Interaction
Note
The current intelligent interaction feature only supports Alibaba International. If you are streaming on other platforms, you can skip this step.
Setting Entrance
- On the live broadcast page, click on “Intelligent Interaction,” select the live platform, and the supported intelligent interaction features will be randomly displayed.
Q&A Library Settings
- Creating a New Q&A:
- On the product homepage, click on Q&A Library - Add Q&A, and a popup window will appear.
- Fill in the rule name, keywords, reply text, and upload a reply video. Click Save.
Note
Rule Name: Name the rule for easy identification.
Keywords: If a viewer’s question in the live room contains any of these keywords, it will trigger the AI to answer.
Reply Content: You can add up to 5 replies. Include variables like [Viewer’s Nickname] and [Viewer’s Country] for personalized responses.
Sequential Reply: Replies in sequence when triggered.
Random Reply: Randomly selects a reply when triggered.
Reply Video: If configured, the video will be displayed at the specified position until the AI’s reply ends.
- Adjusting Q&A Activation Status:
- Click Q&A Library - Switch to close or open the Q&A rule. When closed, the Q&A rule will not take effect after the live broadcast starts.
- Turning on Q&A Library Switch in the Live Room:
- On the live broadcast editing page, click Intelligent Interaction - Platform, select “Alibaba International,” and turn on the Q&A Library switch. This must be done after starting the live broadcast and capturing the barrage for the function to work.
Greeting Rules Settings
- Greeting Content: You can add up to 5 replies, including variables like [Viewer’s Nickname] and [Viewer’s Country].
- Sequential Reply: Replies in sequence when triggered.
- Random Reply: Randomly selects a reply when triggered.
- On the live broadcast editing page, click Intelligent Interaction - Platform, select “Alibaba International,” turn on the Greeting switch, and click the edit icon to open the editing window. Fill in the reply text and click Save.
Sending Business Cards and Product Catalogs
- On the live broadcast editing page, click Intelligent Interaction - Platform, select “Alibaba International,” turn on the “Send Business Cards” switch, and turn on the “Send Product Catalogs” switch.
Note
These functions will only take effect after starting the live broadcast and capturing the barrage.
How to Start Live Barrage Capture
- Start Broadcasting in Virbo Live
- Follow the steps for “Start/End Broadcast” on the live broadcast editing page.
- Install the Plugin in Chrome
- Ensure Chrome is up to date, then download the plugin from the provided link . After downloading, unzip locally.
- Configure the Plugin in Chrome
- Open Chrome, go to Settings - Extensions - Manage Extensions, enable Developer mode, click “Load Unpacked,” and select the unzipped folder. Enable “Allow in incognito mode” in the plugin details.
- Copy the Live Control Page Link
- Copy the link of your live control page (web version) from the live platform. Paste the link into the live broadcast editing page under Intelligent Interaction - Live Room Link Input, then click “Start Capturing.”
Note
Alibaba International currently supports automatic Q&A, automatic greetings, automatic business card sending, and automatic product catalog sending. You can turn on the corresponding switches and then configure the detailed settings for each item.
Starting/Ending the Live Broadcast
Starting the Live Broadcast
- On the live broadcast editing page, click “Start Broadcasting.”
- The AI live broadcast window will appear shortly after, displaying the AI live broadcast.
Using Your Broadcasting Partner or OBS
Note
Keep the AI live broadcast window open on the desktop during the broadcast, or it will not broadcast properly.
- Open your broadcasting partner or OBS, add a window, select the Wondershare VVB (Live Version) live window.
- Click “Start Broadcasting.” Use Alt + mouse to crop out the web bar or use the zoom function to remove it.
- During the live broadcast, you can only modify the “Artificial Interaction” function; other broadcast settings cannot be changed.
Ending the Broadcast
- When concluding the live broadcast, initiate the termination of the live stream on the platform’s broadcasting partner first, followed by clicking the “End Live” button on Virbo Live to finalize the shutdown process.
02Uploading Local Images and Videos
07AI Intelligent Script Generation
11Starting/Ending the Live Broadcast
Decorating Your Live Room
Decoration Guidance
- Click on the product homepage and create a blank live room to initiate a new live session.
Create a blank live room
- Upon creating a blank live room, the live room editing page will open. The left side serves as the operation area, the right side as the canvas area, and the materials area is located above.
Livestream room navigation
- Click on the templates to use pre-designed combinations of background, virtual hosts, and stickers.
Select a template
- Customize the background from the background library. During the live broadcast, only one background can be used.
Livestream room customization
- Choose a virtual host from the virtual host library. Only one virtual host can be used during the live session.
![]()
Choose a virtual host
- Add stickers from the sticker library. Multiple stickers can be used during the live broadcast.
- After selecting materials, adjust their position and size in the canvas area. Right-click to modify layers, copy, or delete materials.
Uploading Local Images and Videos
Upload background images or videos
- Upload: Click Background -> Upload Background -> Select file to upload. Materials will be displayed in “My Background” after uploading.
Upload Background
- Apply: Click Background -> My Background, then click on the material to use it on the canvas.
- Delete: Hover over the material and click the delete icon to remove it.
Delete Background
Note
Background upload requirements:
- Image and video dimensions should be 9:16
- Image formats: JPG/JPEG/PNG
- Video formats: MP4/MOV
- Resolution should not exceed 1080P
- Video duration should not exceed 30 minutes
- File size should not exceed 1GB
Upload sticker images or videos
- Upload: Click Sticker -> Upload Sticker -> Select file to upload. Materials will be displayed in “My Sticker” after uploading.
Upload Sticker
- Apply: Click Sticker -> My Sticker, then click on the material to use it on the canvas.
- Delete: Click Sticker -> My Sticker, hover over the material, click the delete icon to remove it.
Delete Sticker
Note
Sticker upload requirements:
- Image and video dimensions are flexible.
- Image formats: JPG/JPEG/PNG
- Video formats: MP4/MOV
- Resolution should not exceed 1080P
- Video duration should not exceed 30 minutes
- File size should not exceed 1GB
Text-Driven Live Room
Script Guidance
- Input script text: Copy and paste your script into the script dialogue box.
Text Scripts Inset
- Choose a matching tone: Click the voice-over entrance above, select a suitable tone, and preview it.
- Preview: Click the “Preview” button below the text to listen.
Audio-Driven Live Room
Audio Guidance
- Upload audio: Click Script -> Audio -> Upload local voice and upload the local file.
Upload Audio
- Preview audio: After uploading, click to preview the audio.
Preview Audio
- Audio sorting: Hold and drag to sort the audio files.
Audio sorting
- Audio sorting: Hold and drag to sort the audio files.
Modifying Live Room Name
Method Guidance
- Method 1: Click the edit button in the upper-left corner of the edit page to rename the live room.
Rename Livestream Room
- Method 2: Product homepage -> My Live Rooms -> Click on the more options for an individual live room -> Choose Rename.
Adding AI Identification
Step Guidance
- On the live room editing page, click on the checkbox before the AI identification to enable or disable it.
AI Intelligent Script Generation
Generation Guidance
- Click the “AI Intelligent Script” button below the script, a popup will appear.
- Enter your product name (mandatory), selling points (optional), promotional information (optional), select language and style, then click generate.
AI Script
- The generated result can be further modified, click “Use” to add it to the script dialogue box.
AI Translation
Translation Guidance
- Click the “AI Translation” button below the script, a popup will appear.
- Place the text to be translated on the left, click the middle arrow to select the language for translation (e.g., English), and click translate.
AI Translation
- The generated result can be further modified, click “Use” to add it to the script dialogue box.
AI Translation Result
Manual Interaction
Microphone Interaction
- Operational Flow:
- Click Manual Interaction -> Microphone, and select the microphone device.
- Speak into the microphone and observe the sound wave status.
- Open “Start Live,” wait for the appearance of the virtual host image, and click “Open Mic Takeover.” The virtual host’s mouth will be closed, and your voice will drive the virtual host to speak.
- After speaking, click “End Takeover,” and the virtual host will resume reading the scripted dialogue.
- Click Manual Interaction -> Microphone, and select the microphone device.
- Grant Browser Microphone Access:
- Google Chrome:
*Open Chrome, click the settings icon in the top right.
* Click “Settings,” open the settings page. Select “Privacy and Security” and then click “Site Settings.”
*Enter the site settings page, click “Microphone.”
* On the microphone authorization page, select that the site can request the use of your microphone.
* After these settings, when the browser needs to use the camera or microphone, a device request box will pop up on the page. Select “Allow.” - Mozilla Firefox:
*Open Firefox, click the settings icon in the top right, and click “Settings.”
* Open the settings page, click “Privacy & Security,” and find “Microphone Permissions.” Click “Settings” next to “Microphone.”
*Enter the settings page, add the site that requests the use of your microphone to the list, and click “Save Changes.”
* After these settings, when the browser needs to use the camera or microphone, a device request box will pop up on the page. Select “Allow.” - Sogou Browser:
*Open Sogou Browser, click the settings icon in the top right, and click “Options.”
* Open the options page, click “Advanced,” find “Privacy - Browsers on the Mac System:
*Locate “System Preferences” on your Mac dock and click the icon. Once opened, find “Security & Privacy” and click to open.
* On the “Security & Privacy” page, select “Privacy,” then click on “Microphone” and set the applications that need to use the microphone to “Allow.”
- Google Chrome:
Text Interaction
- Click on “Artificial Interaction” and enter interaction scripts in the input box below.
- Click “Add Text” to add it to the interaction list. After starting the live broadcast, each interaction script will have a send button.
Text Interactionn
- Click “Send” to trigger the AI to speak according to the interaction script.
Intelligent Interaction
Note
The current intelligent interaction feature only supports Alibaba International. If you are streaming on other platforms, you can skip this step.
Setting Entrance
- On the live broadcast page, click on “Intelligent Interaction,” select the live platform, and the supported intelligent interaction features will be randomly displayed.
Q&A Library Settings
- Creating a New Q&A:
- On the product homepage, click on Q&A Library - Add Q&A, and a popup window will appear.
- Fill in the rule name, keywords, reply text, and upload a reply video. Click Save.
Note
Rule Name: Name the rule for easy identification.
Keywords: If a viewer’s question in the live room contains any of these keywords, it will trigger the AI to answer.
Reply Content: You can add up to 5 replies. Include variables like [Viewer’s Nickname] and [Viewer’s Country] for personalized responses.
Sequential Reply: Replies in sequence when triggered.
Random Reply: Randomly selects a reply when triggered.
Reply Video: If configured, the video will be displayed at the specified position until the AI’s reply ends.
- Adjusting Q&A Activation Status:
- Click Q&A Library - Switch to close or open the Q&A rule. When closed, the Q&A rule will not take effect after the live broadcast starts.
- Turning on Q&A Library Switch in the Live Room:
- On the live broadcast editing page, click Intelligent Interaction - Platform, select “Alibaba International,” and turn on the Q&A Library switch. This must be done after starting the live broadcast and capturing the barrage for the function to work.
Greeting Rules Settings
- Greeting Content: You can add up to 5 replies, including variables like [Viewer’s Nickname] and [Viewer’s Country].
- Sequential Reply: Replies in sequence when triggered.
- Random Reply: Randomly selects a reply when triggered.
- On the live broadcast editing page, click Intelligent Interaction - Platform, select “Alibaba International,” turn on the Greeting switch, and click the edit icon to open the editing window. Fill in the reply text and click Save.
Sending Business Cards and Product Catalogs
- On the live broadcast editing page, click Intelligent Interaction - Platform, select “Alibaba International,” turn on the “Send Business Cards” switch, and turn on the “Send Product Catalogs” switch.
Note
These functions will only take effect after starting the live broadcast and capturing the barrage.
How to Start Live Barrage Capture
- Start Broadcasting in Virbo Live
- Follow the steps for “Start/End Broadcast” on the live broadcast editing page.
- Install the Plugin in Chrome
- Ensure Chrome is up to date, then download the plugin from the provided link . After downloading, unzip locally.
- Configure the Plugin in Chrome
- Open Chrome, go to Settings - Extensions - Manage Extensions, enable Developer mode, click “Load Unpacked,” and select the unzipped folder. Enable “Allow in incognito mode” in the plugin details.
- Copy the Live Control Page Link
- Copy the link of your live control page (web version) from the live platform. Paste the link into the live broadcast editing page under Intelligent Interaction - Live Room Link Input, then click “Start Capturing.”
Note
Alibaba International currently supports automatic Q&A, automatic greetings, automatic business card sending, and automatic product catalog sending. You can turn on the corresponding switches and then configure the detailed settings for each item.
Starting/Ending the Live Broadcast
Starting the Live Broadcast
- On the live broadcast editing page, click “Start Broadcasting.”
- The AI live broadcast window will appear shortly after, displaying the AI live broadcast.
Using Your Broadcasting Partner or OBS
Note
Keep the AI live broadcast window open on the desktop during the broadcast, or it will not broadcast properly.
- Open your broadcasting partner or OBS, add a window, select the Wondershare VVB (Live Version) live window.
- Click “Start Broadcasting.” Use Alt + mouse to crop out the web bar or use the zoom function to remove it.
- During the live broadcast, you can only modify the “Artificial Interaction” function; other broadcast settings cannot be changed.
Ending the Broadcast
- When concluding the live broadcast, initiate the termination of the live stream on the platform’s broadcasting partner first, followed by clicking the “End Live” button on Virbo Live to finalize the shutdown process.
Creating AI Videos With AI Avatars
Creating AI Videos With AI Avatars
With the help of the right avatars, you can easily define the perfect gender, race, features, and appearance of the AI video according to your desired results. All you have to do is select the AI avatar and continue the process.
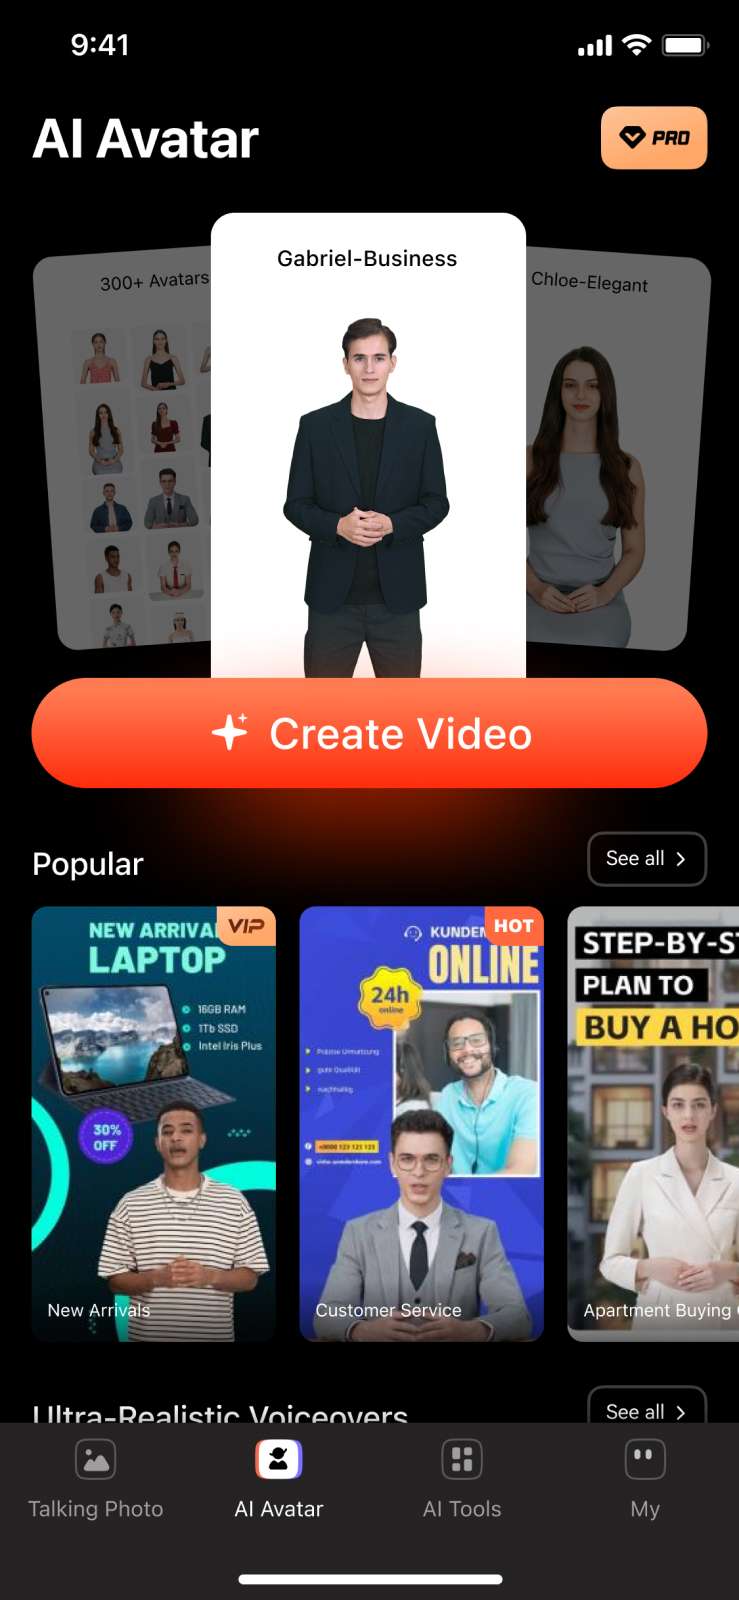
Step 1: Select the option of “AI Avatars” from the homepage of Wondershare Virbo.
Step 2: You will be directed to a window where you can select any appropriate avatar from your required category.
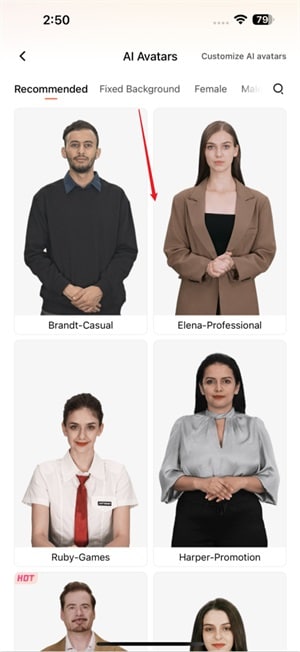
Step 3: On selecting a particular avatar, you will be guided into the preview interface, where you can observe the characteristics of the selected option.
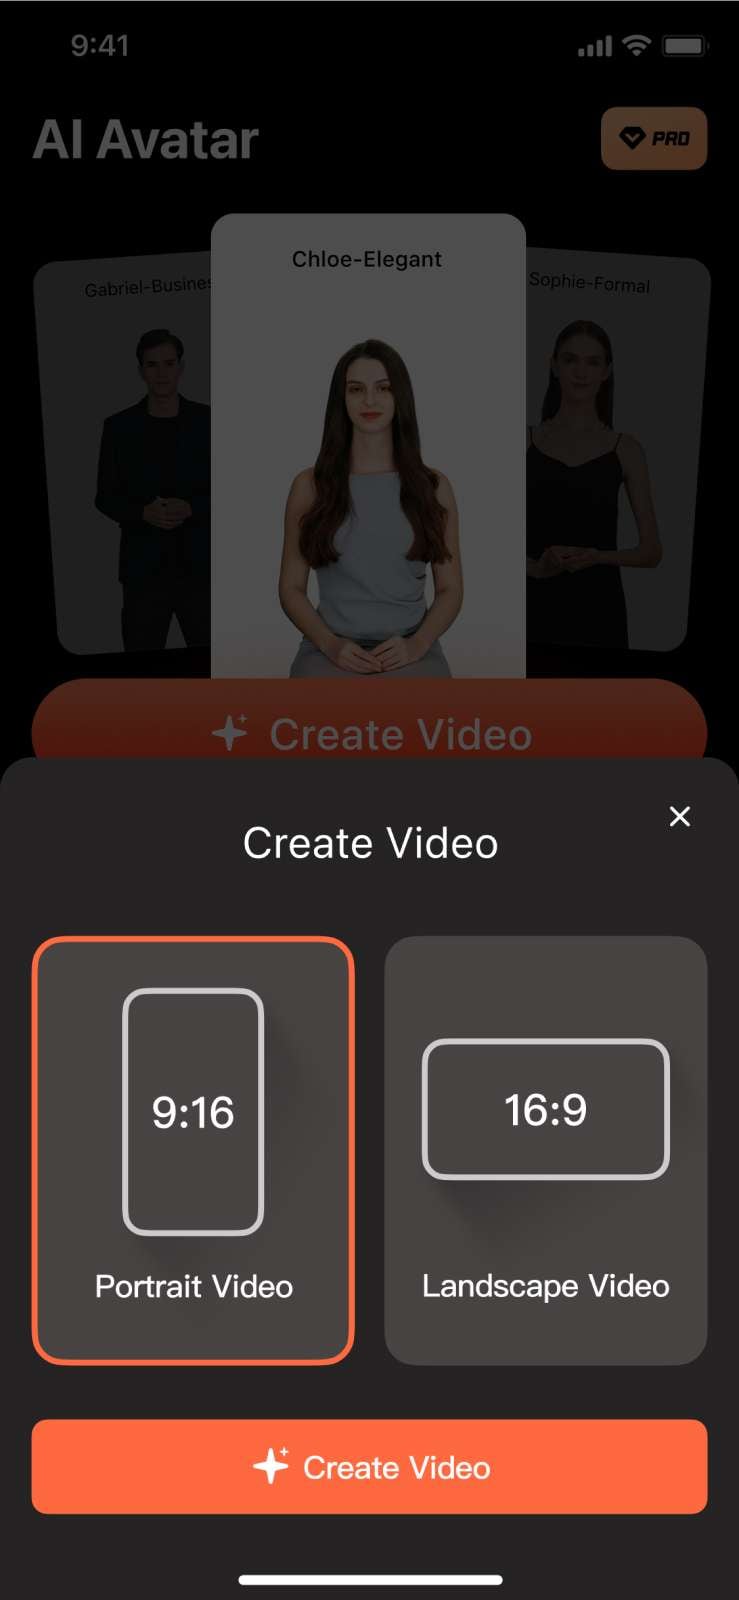
Step 4: As you choose the option of “Create Video” from the bottom, you will be guided to select the orientation of your AI video. Select any and continue by tapping the “Create now” button.
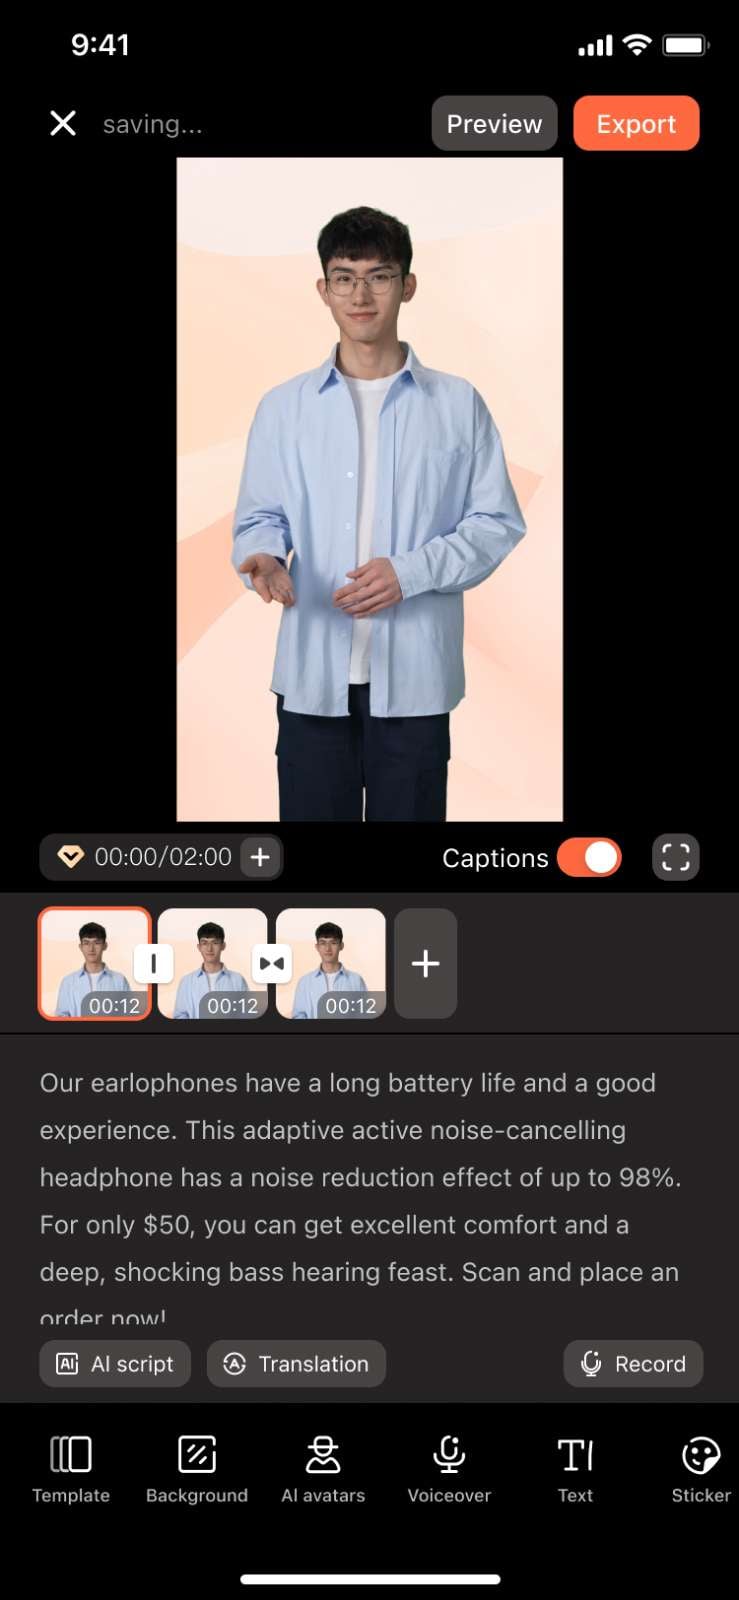
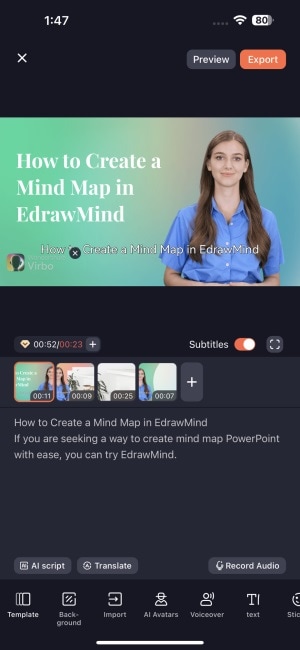
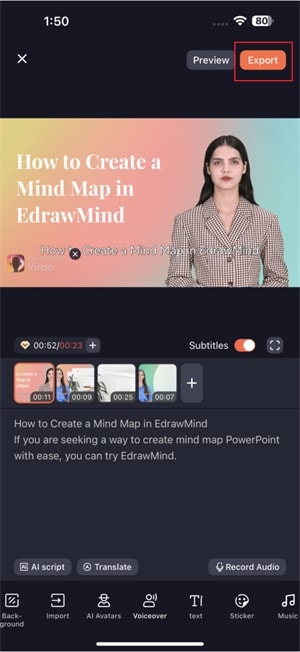
Step 5: You will be redirected to the video creation and editing section. Here you can make all kinds of changes to your video, including adding text, changing background, and much more. Proceed to the “Preview” or “Export” button according to your requirements. If you select the “X” button, this will prompt you to save the created video in the “Drafts”.
Step 2: You will be directed to a window where you can select any appropriate avatar from your required category.
Step 3: On selecting a particular avatar, you will be guided into the preview interface, where you can observe the characteristics of the selected option.
Step 4: As you choose the option of “Create Video” from the bottom, you will be guided to select the orientation of your AI video. Select any and continue by tapping the “Create now” button.
Step 5: You will be redirected to the video creation and editing section. Here you can make all kinds of changes to your video, including adding text, changing background, and much more. Proceed to the “Preview” or “Export” button according to your requirements. If you select the “X” button, this will prompt you to save the created video in the “Drafts”.
Creating AI Videos With Templates
Creating AI Videos With Templates
Using the templates available on the platform, you can make quick decisions in selecting the perfect human scenes and characters for the respective industry or business you are representing. Once selected, you can have it replaced with your text, images, and videos. Having the templates makes your operations quick and enhances your productivity tenfold.
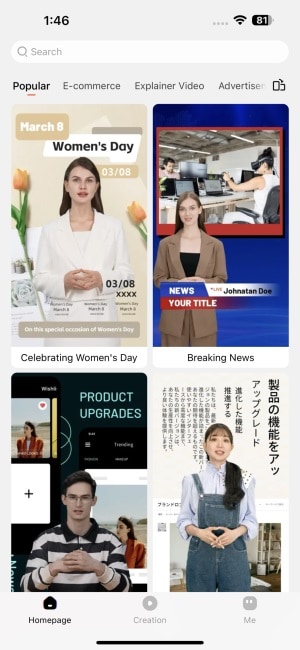
Step 1: Look for the templates on the home screen of Wondershare Virbo. As you scroll down, you can observe the different categories of templates according to the scenes. The platform also displays small previews of every template.
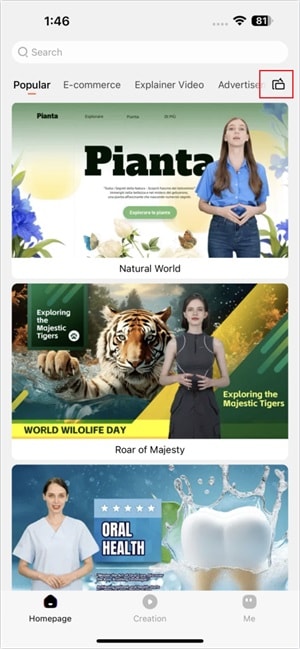
Step 2: Select any specific category you wish to select according to your requirements. Change the orientation of the videos from Vertical (9:16) to Horizontal (16:9) using the button on the top-right.
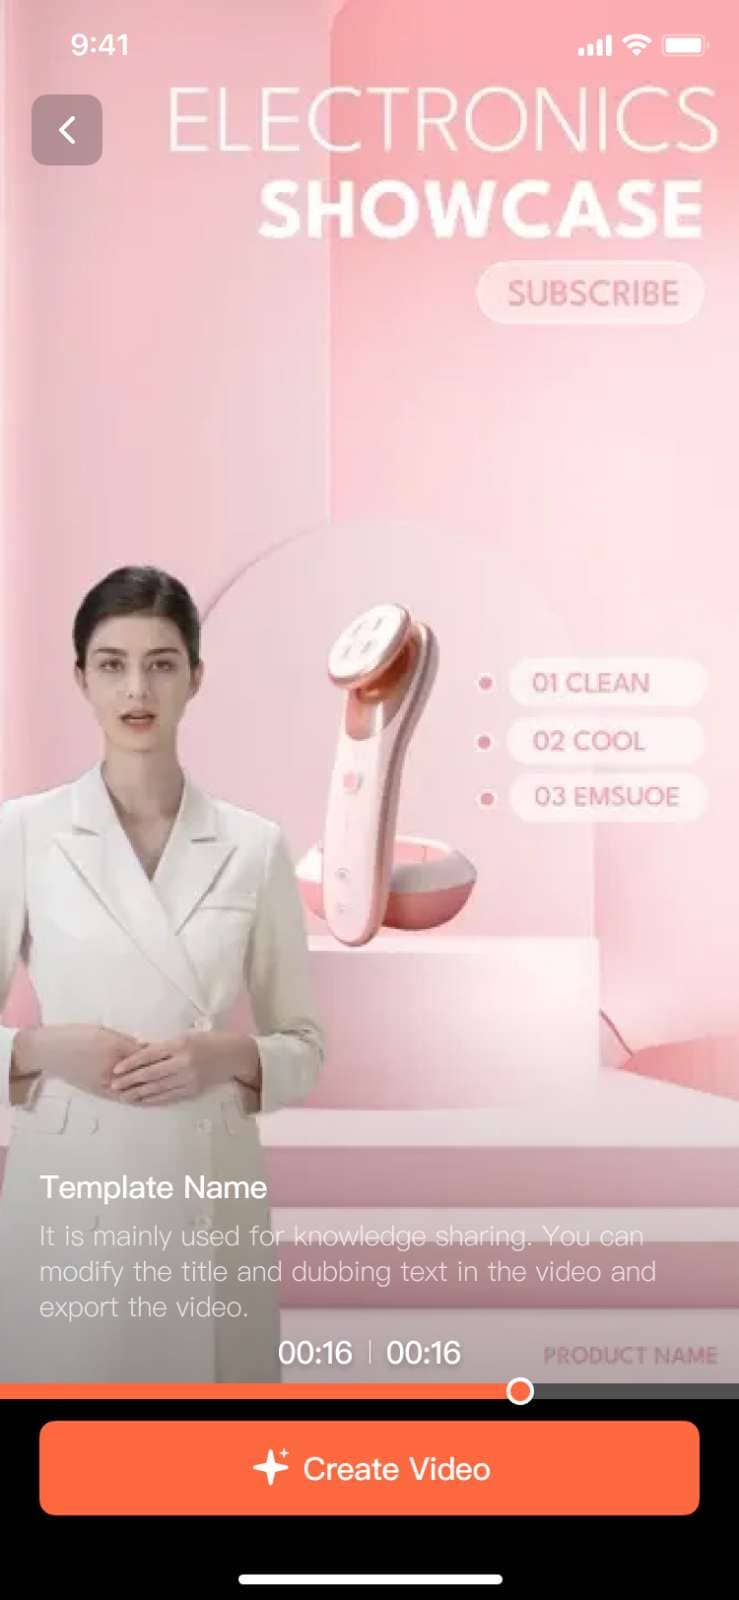
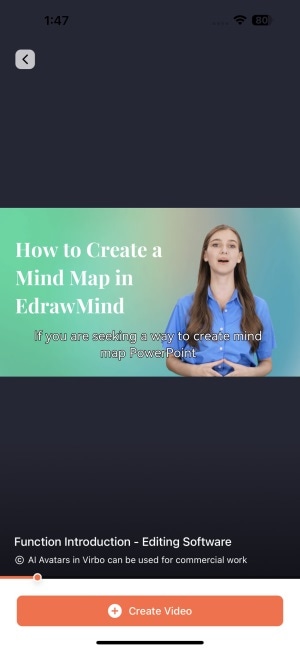
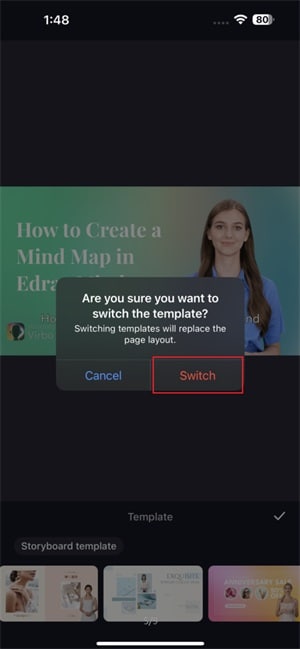
Step 3: As you select a template, you will be led to the preview window of the digital template. Look through all the effects and choose the “Create video” option to proceed.
Step 4: You will be navigated to the respective video creation page, where you can make edits to the template.
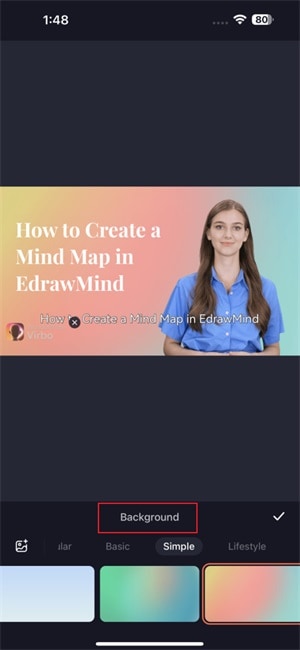
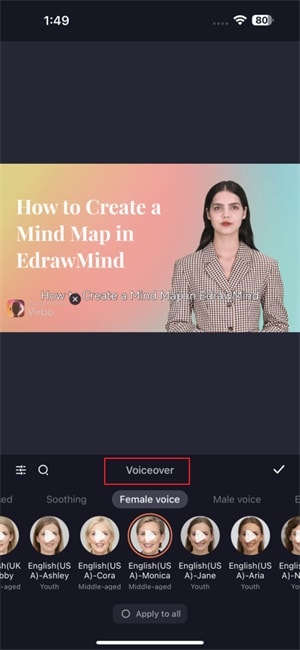
Step 5: As you continue editing the video template, you can make all kinds of changes. This involves changing the background, replacing templates, changing the avatars, or selecting a new dubbing from the options.

Step 6: Once you are satisfied with the video template, continue to select the “Preview” button to view the final results. On confirmation, select the “Export” button adjacent to it to save your video template.
Step 2: Select any specific category you wish to select according to your requirements. Change the orientation of the videos from Vertical (9:16) to Horizontal (16:9) using the button on the top-right.
Step 3: As you select a template, you will be led to the preview window of the digital template. Look through all the effects and choose the “Create video” option to proceed.
Step 4: You will be navigated to the respective video creation page, where you can make edits to the template.
Step 5: As you continue editing the video template, you can make all kinds of changes. This involves changing the background, replacing templates, changing the avatars, or selecting a new dubbing from the options.
Step 6: Once you are satisfied with the video template, continue to select the “Preview” button to view the final results. On confirmation, select the “Export” button adjacent to it to save your video template.
Netflix Subtitle Translation Methods: Comprehensive Guide
Subtitle translation on Netflix plays a pivotal role in enhancing the global viewership experience. With Netflix’s expansive reach across diverse linguistic demographics, accurateNetflix translation ensures accessibility and inclusivity for audiences worldwide. Subtitles not only cater to non-native speakers but also serve the needs of the deaf and hard-of-hearing community fostering a more comprehensive viewing environment.
The importance of precise translation lies in preserving the nuances of dialogue, cultural references, and context, thus maintaining the authenticity of the content. To address this, various software tools and methods, includingNetflix subtitles translator , are employed, leveraging technology and human expertise to ensure high-quality translations. In this article, we will explore various software and methods for translating subtitles on Netflix effectively.
Part 1: Difficulties Lies in Netflix Subtitle Translation

Translating subtitles for Netflix is a multifaceted endeavor that extends beyond linguistic conversion. It entails delicately navigating cultural nuances, balancing precision with sensitivity, and encapsulating dialogue essence within tight constraints.
As Netflix expands globally, high-qualitytranslation Netflix becomes crucial for a seamless viewing experience. To deepen comprehension, here are the complexities inherent inNetflix subtitle translation :
●Preserving Cultural Nuances
This involves accurately conveying cultural references, humor, and idiomatic expressions while ensuring they resonate with the target audience. It requires translators to understand the cultural context deeply to maintain the authenticity of the content.
●Balancing Linguistic Accuracy and Cultural Sensitivity
Achieving a balance between linguistic precision and cultural relevance is crucial to avoid misinterpretations or causing offense. Translators must ensure that their translations accurately reflect the original meaning while remaining sensitive to cultural differences.
●Interpreting Context
Understanding the context of dialogues and scenes is essential for translation accurately. This is particularly challenging when cultural context significantly influences meaning which requires translators to grasp subtle nuances and implications.
●Time Constraints and Character Limits
Subtitles must be concise and displayed within limited screen space. Translators face the challenge of conveying meaning efficiently without sacrificing accuracy under strict time and space constraints.
●Technical Challenges
Translators often work with specific software and must adhere to technical guidelines provided by Netflix. This includes subtitles formatting and timing, which requires proficiency in technical aspects alongside linguistic skills.
●Maintaining Consistency
Consistency in terminology, style, and tone across episodes or seasons is essential for a seamless viewing experience. Translators need to ensure that their translations remain coherent and consistent throughout the content.
●Adapting to Language Evolution
Languages evolve over time, and translators need to stay updated with contemporary usage and emerging expressions. This requires ongoing education awareness of linguistic trends to ensure translations remain relevant and accurate.
Part 2: How to Translate Netflix Subtitle Using a Dedicated Tool - Wondershare Virbo
Netflix subtitle translation can indeed feel daunting at first, with its complexities and nuances. However, fear not, for withWondershare Virbo as your trusted companion, what may initially seem like a daunting task quickly transforms into a smooth and ultimately rewarding experience.

Get Started Online Free Download
In this guide, we will demonstrate how Virbo’s user-friendly interface and advanced features make translating Netflix subtitles a breeze. Follow the instructions outlined below:
- Step 1: Simply open your browser and enterWondershare Virbo into the search bar. If you don’t have an account yet, you can create one by following the registration process. If you already have an existing account, log in using your credentials.

Get Started Online Free Download
- Step 2: After logging in to your account, navigate to the top of the page and click on theFeature option. From there, selectAI Video Translate.

- Step 3: You’ll find instructions on how to use the Video Translate feature of Wondershare Virbo. Scroll down and locate two buttons: Free Download and Translate Video Online. Click on theTranslate Video Online button.

- Step 4: Select theUpload Video icon and choose the video from your local files by clickingOpen . Allow some time for the video to upload.

- Step 5: Once the video has been uploaded successfully, choose the original video language from the dropdown menu on the left.

- Step 6: Following that, proceed to select the target language from the dropdown menu on the right.

- Step 7: Click on the dropdown menu for Advanced settings, then toggle on both Subtitle and Proofread video script options. Below, click theTranslate the video button.
_Note: If the video primarily showcases one individual’s frontal face, you can also enable Lip-sync by toggling it on.

- Step 8: Wait until the loading process is complete. Once done, review the subtitles to ensure they meet the standards. If necessary, you can edit them before clicking theSave button.

- Step 9: Once you’ve finished reviewing or editing, click on theTranslate video button and wait until the video has been successfully translated.

- Step 10: To access the translated video for download, simply click on theDownload video button below.

Part 3: What Are The Methods and Tips for Effective Netflix Subtitle Translation?

Netflix, a renowned entertainment platform, offers a wide range of shows and movies to audiences worldwide. Subtitles play a crucial role in ensuring that viewers from different language backgrounds can enjoy the content. In this section, we will discuss various methods and techniques aimed at enhancing the quality of subtitle translation on Netflix.
●Maintaining Context, Tone, and Style
Translating subtitles requires more than just converting words. Translators must grasp the content of each dialogue and scene to accurately convey the intended meaning. They consider factors like character emotions, background information, and narrative flow to ensure the translated subtitles resonate with viewers. Consistency in tone and style across subtitles maintains the immersive experience for the audience to ensure they remain engaged with the content.
●Handling Cultural References and Idiomatic Expressions
Cultural references and idiomatic expressions are integral parts of language and storytelling. However, they can be challenging to translate accurately, especially when the cultural context differs between languages. Translators need to carefully adapt these elements to ensure they make sense to the target audience while staying true to the original intent of the content.
●Adapting Linguistic Nuances
Languages have their own unique nuances and subtleness that may not have direct equivalents in other languages. Translators must navigate these differences skillfully to preserve the richness and depth of the original dialogue. This involves understanding linguistic nuances such as wordplay, sarcasm, metaphor, and finding appropriate equivalents in the target language.
●Utilizing Translation Tools and Technology
Translation software and tools can significantly streamline the subtitle translation process, improving efficiency and consistency. However, these tools are not reliable and require human oversight. Translators leverage technology to enhance their workflow while also relying on their linguistic expertise and cultural awareness to produce high-quality translations.
●Collaboration and Peer Review
Collaboration with fellow translators and subject matter experts is invaluable in ensuring the quality of consistency of subtitle translations. Peer review allows translators to receive constructive feedback, identify potential errors or inconsistencies, and refine their translations accordingly. This collaborative approach helps maintain the overall quality of subtitle translations and ensures that the final product meets the highest standards.
●Cultural Sensitivity and Awareness
Cultural sensitivity is paramount in subtitle translation, as translations that disregard cultural norms or sensitivities can lead to misunderstandings or offense. Translators must conduct thorough research into the cultural context of the source material and seek feedback from native speakers to ensure that their translations are respectful, accurate, and culturally appropriate.
By embracing these best practices, translators can effectively bridge linguistic and cultural barriers that will ensure Netflix subtitles resonate with diverse audiences worldwide.
Conclusion
In this comprehensive guide toNetflix subtitle translation , we’ve explored the intricate process of making content accessible across languages. We’ve discussed the hurdles faced by translators, from preserving cultural nuances to maintaining linguistic precision. Subtitle translation transcends mere word conversion; it is about facilitating seamless viewer immersion across diverse linguistic backgrounds. The significance of Netflix subtitle translation cannot be understated—it promotes inclusivity and cultural exchange, enriching the global viewing experience.
ThroughWondershare Virbo’s Video Translate feature , the translation process is simplified. By embracing translation initiatives, individuals can bridge linguistic barriers and foster a more connected world.
5 Top Realistic Text to Speech AI Voice Generators You May Like
The development of realistic text to speech technology has been one of the most revolutionary and fascinating technological advances to date. Gone are the days when this field was dominated by robotic, repetitive voices. We now live in a time where text-to-speech AI voice generators have attained astounding levels of realism, successfully replicating human-like tones, accents, and emotions. This is possible as a result of the incredible advancements in artificial intelligence.
Realistic text to speech voices offer a level of immersion that was previously unattainable. By incorporating natural pauses, inflections, and stress patterns, these voices enhance the listening experience, making interactions more meaningful.
If you are looking to give your digital content a creative edge and more human-like interaction, then look no further. In this article, we’ll introduce you to the 5 best realistic Text to Speech (TTS) AI voice generators that are sure to captivate your audience and improve your content strategy.
Part 1. Why do People Need Realistic Text to Speech Voices?
Realistic AI voice generators have captured the interest of people from various walks of life, revolutionizing the way we consume and interact with content. These voices are making digital experiences more inclusive, immersive, and enjoyable. From accessibility to entertainment, education to innovation, the need for realistic text-to-speech voices is becoming increasingly evident.
1. Improving Communication for People with Virtual Impairment
Realistic TTS voices have opened up a new realm of possibilities for individuals with disabilities. Those who are visually impaired or have reading difficulties can now access written content effortlessly. These advanced voices convert written text into spoken words, enabling visually impaired individuals to “read” books, articles, and documents, and stay updated with current affairs and information.
2. Incorporating Personalization and Emotion
The ability to infuse technology with human-like emotion and personalization is also one of the most compelling reasons people lean towards realistic TTS voices. These voices have gone beyond the monotone robotic sounds of the past, allowing technology to speak with warmth, empathy, and even humor. Imagine a GPS that doesn’t just provide directions, but also offers reassuring words during stressful moments, creating a more human connection between man and machine.
3. Breaking Language Barriers
The world is a melting pot of languages and cultures, and realistic TTS voices are playing a crucial role in breaking down language barriers. Language learning becomes more immersive as learners can listen to accurate pronunciations and intonations, helping them grasp the nuances of a new language. Additionally, communication between individuals who speak different languages becomes smoother and more effective, fostering international connections.
4. Revolutionizing Education and Learning Processes
Realistic TTS voices have triggered a revolution in the field of education. These voices bring textbooks to life, narrating lessons in a way that engages students and enhances their understanding. Complex topics become more accessible, and the learning experience becomes dynamic and interactive. Moreover, for auditory learners,text to speech realistic voice free or paid tools offer an alternative avenue for absorbing information, catering to diverse learning styles.
5. Elevating Entertainment and Storytelling Experiences
From audiobooks to video games, entertainment industries are harnessing the power of realistic TTS voices to create immersive experiences. Characters come to life with distinct voices, enhancing the narrative and making stories more captivating. In the gaming world, players interact with NPCs (non-playable characters) that respond with human-like speech, adding layers of realism and engagement to virtual realms.
Part 2. Top 5 Realistic Text to Speech AI Voice Generators
Whether you’re a content creator, educator, or just looking to explore new tools, the following 5 AI voice generators are worth your attention. These tools are not only highly advanced but also capable of producing remarkably realistic and human-like voices.
1.Virbo
Virbo is a cutting-edge, one of themost realistic AI voice generators that utilizes state-of-the-art neural networks to produce speech that closely resembles natural human speech patterns. Virbo is not just another text-to-speech generator; it’s an exceptional tool that bridges the gap between text and lifelike speech. Virbo’s speech output is characterized by its fluidity, intonation, and emotion, making it a powerful tool for a wide range of applications.
Get Started Online Free Download
Compatibility of virbo
- Windows, iOS, Androids, Online
Key Features of Virbo
- Realism: Virbo’s speech synthesis is characterized by its natural flow and authentic expression.
- Not only does this innovative AI script feature enable you to create expressive content, but it also offers seamless optimization, all from the comfort of your Windows computer.
- Virbo is a cost-effective tool that also comes with platform support. Its single premium account can even be used easily across multiple platforms.
- Customization: Users can adjust parameters such as pitch, speed, and accent to align with their preferences.
- Multilingual Support: Virbo supports a wide array of languages, broadening its global appeal.
- Realistic voice generator with emotion infusion: The tool can infuse emotions into the generated speech, enhancing its engagement factor.
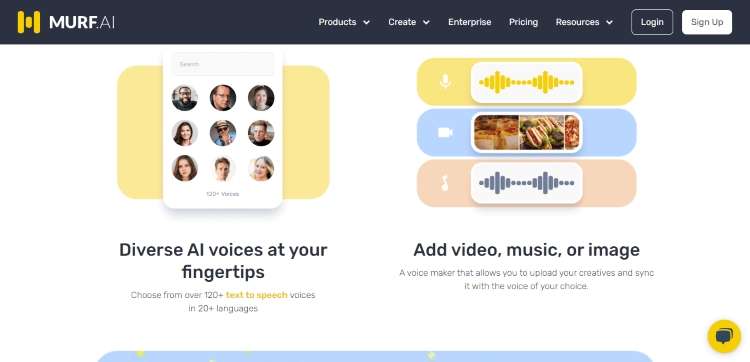
2. Murf
When it comes totext to speech realistic voice generation, Murf isn’t playing around. This sophisticated voice generator takes things beyond the ordinary by letting you fine-tune every aspect of the generated voice. We’re talking about more than just adjusting the pitch, punctuation, emphasis, and other elements to make the AI generated voice sound as compelling as possible; Murf allows you to seamlessly integrate your multimedia elements.
From videos that command attention, audio that resonates, to images that paint a thousand words—Murf pairs your generated voice with these media, creating an immersive experience that’s nothing short of extraordinary.
Compatibility of Murf
- Windows, Mac, iOS, Androids.
Key Features of Murf
- Murf seamlessly integrates into various platforms and applications, like Google Slides, etc.
- Tone, accents, and other elements can all be customized
- It support multitude of languages, ensuring that users worldwide can access content in their preferred language.
- Natural Sounding Speech
- It can infuse speech with appropriate emotions, conveying feelings that resonate with the content’s intent.
- Clean and minimalist interface
3. Listnr
Listnr offer one of themost realistic text to speech generation system that employs cutting-edge machine learning techniques to produce speech that is virtually indistinguishable from human voices. Thisrealistic text to speech free and paid tool harnesses the power of deep neural networks to understand and replicate the nuances of pronunciation, intonation, and even the subtle pauses that make human speech so authentic.

Compatibility of Listnr
- Windows, Mac, iOS, Androids.
Key Features of Listnr
- Listnr supports over 142 languages, including English, German Spanish, French, and more.
- It offers you the option of choosing one of three voices: Male, Female, or Child (for children in particular).
- Utilizing Listnr’s Audio Player embed widgets, users can integrate audio into their websites.
- It allows Podcast hosting, recording, and editing
- The user interface of thisrealistic text to speech software is intuitive and user-friendly
- Natural and Expressive Voice Generation
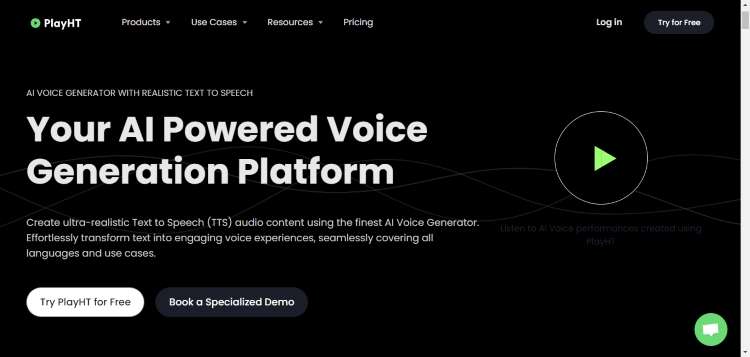
4.Playht
PlayHT is a sophisticated paid andfree realistic text to speech generator that employs cutting-edge technology to convert written content into lifelike speech. This technology utilizes deep learning and neural networks to create a seamless and authentic auditory experience, making it sound as if a human is delivering the content.
Built using next generation AI speech technology, PlayHT’s voices accurately mimic human speech by extracting emotion from text.
Compatibility of Play.ht
- Online
Key Features of PlayHT
- It features an expansive library of over 800 natural-sounding AI Voices, including human-like intonation
- PlayHT supports more than 142 languages and accents
- Offers Voice-overs for videos, podcasting, e-learning, and more.
- Play.HT greets users with an intuitive and visually appealing interface.
- It has an extensive range of supported formats.
- With Play.ht, you can listen and preview text before converting it to speech
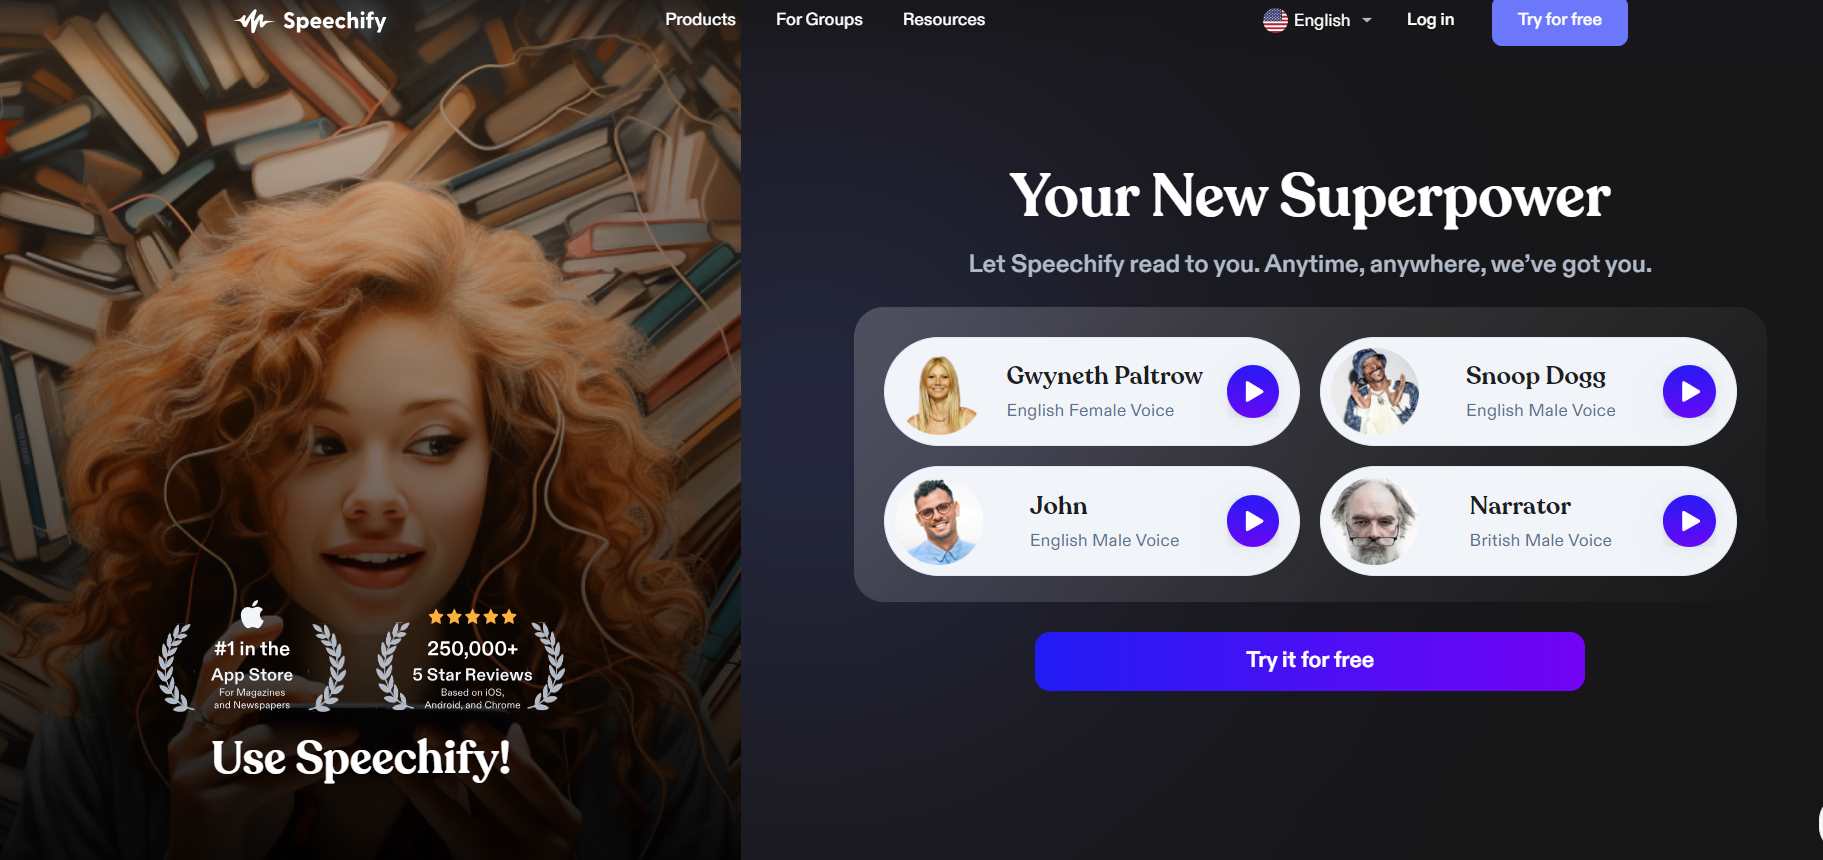
5.Speechify
Speechify takes text-to-speech technology to a whole new level. Its advanced technology utilizes powerful algorithms to convert written content, such as articles, books, or documents, into clear and natural-sounding audio. This process involves analyzing the text, interpreting its context, and then rendering it into speech with remarkable accuracy. Users can simply input the text, select preferences, and let Speechify take care of the rest.
Compatibility of Speechify
- Online, Windows, iOS, Android
Key Features of Speechify
- It comes with Sophisticated user interface
- Speechify supports over
- Speechify employs advanced AI algorithms to generate speech that closely resembles human speech patterns.
- Speechify text to speech software can read aloud up to nine times faster than the normal reading speed
- With Speechify, you can change voices and accents across multiple languages.
- It has the ability to read content in multiple languages, up to 30+, including Englis, French, German, etc.
Part 3. Hot FAQs about the Realistic Text to Speech AI voice generators
Q1: Are these AI voice generators suitable for commercial use?
A: Yes, each realistic AI voice generator mentioned offer options for both personal and commercial use, with varying pricing plans.
Q2: Can I customize the pitch and tone of the generated voices?
A: Absolutely! Most of these tools provide customization options to tailor the voice output according to your preferences.
Q3: Do these TTS AI generators support multiple languages?
A: Yes, each of these generators supports a diverse range of languages to cater to a global audience.
Q4: How easy is it to integrate these AI voice generators into my applications?
A: Integration is relatively straightforward, with comprehensive documentation and resources provided by the respective companies.
Q5: Are there any privacy concerns related to using these AI voice generators?
A: Data privacy is a priority for these companies. However, it’s recommended to review their privacy policies to understand how your data is used and stored.
Conclusion
In a world where technology is constantly pushing boundaries, realistic TTS AI voice generators stand as a testament to the remarkable progress we’ve made. Whether it’s about making interactions more natural or catering to accessibility needs, these tools have something to offer for everyone.
Handling Exceptions
Handling Exceptions
Effectively managing unforeseen scenarios or exceptions, ensuring a smooth and uninterrupted live streaming experience!
02Insufficient Cloud Storage Space
03No Sound in the Live Mini-Window
04Video Lag or Audio-Video Desynchronization
08Unusual Duration of Live Streaming
No Live Streaming Permissions
1For our free users, kindly note that streaming privileges are not available. Upgrade to a VIP membership by visiting our purchase page.
2If you are already a VIP user, please ensure your authorization is current. You can refresh it by navigating to the product homepage and clicking on your personal profile.
Insufficient Cloud Storage Space
1Check your cloud storage status by clicking on your personal avatar on the product homepage.
2If your cloud storage is running low, head to the purchase page to acquire additional space.
No Sound in the Live Mini-Window
1We highly recommend using the Chrome browser and updating it to the latest version for optimal and stable performance.
Video Lag or Audio-Video Desynchronization
1We highly recommend using the Chrome browser and updating it to the latest version for optimal and stable performance.
Text Cannot Be Previewed
1We highly recommend using the Chrome browser and updating it to the latest version for optimal and stable performance.
Streaming Failed
1We highly recommend using the Chrome browser and updating it to the latest version for optimal and stable performance.
Live Streaming in Progress
1We highly recommend using the Chrome browser and updating it to the latest version for optimal and stable performance.
Unusual Duration of Live Streaming
1We highly recommend using the Chrome browser and updating it to the latest version for optimal and stable performance.
Order Inquiries
1We highly recommend using the Chrome browser and updating it to the latest version for optimal and stable performance.
Also read:
- 2024 Approved What Is AI Background Generator? | Wondershare Virbo Glossary
- Top 10 AI Script Generators
- Updated Top 5 AI Movie Script Generators
- Updated Create AI Video with AI Avatar | Wondershare Virbo for 2024
- New In 2024, Best Narrator Voice Generators
- Updated The Best Voice Changers to Sound Like a Stormtrooper
- New Complete Guide of Top Video Language Translators
- Updated In 2024, Top 10 Robotic Voice Generators
- 2024 Approved Must-Read Top 10 AI Realistic Avatar Generators
- Easy Ways to Translate TikTok Videos for 2024
- In 2024, Create An AI Avatar Video
- Updated In 2024, Top 4 Eminem Voice Generator Apps for PC, Mac, Mobile, and Online
- A Brief Review of CapCut Translate With Alternative for 2024
- New What Is an AI Artist for 2024
- New In 2024, Unlocking TalkShopLive Pros and Tips for Live Shopping Success
- New The Ultimate Guide to Generating Speech in Different Languages With the Best Tools for 2024
- How to Change Apple iPhone SE (2022) Location on Skout | Dr.fone
- How to Transfer Photos from Nokia G42 5G to New Android? | Dr.fone
- All About Factory Reset, What Is It and What It Does to Your Samsung Galaxy S21 FE 5G (2023)? | Dr.fone
- Cellular Network Not Available for Voice Calls On Samsung Galaxy XCover 7 | Dr.fone
- How Can I Catch the Regional Pokémon without Traveling On Honor Play 8T | Dr.fone
- In 2024, How To Unlock Any Vivo V30 Pro Phone Password Using Emergency Call
- 9 Best Free Android Monitoring Apps to Monitor Phone Remotely For your Samsung Galaxy M34 5G | Dr.fone
- In 2024, How To Pause Life360 Location Sharing For Nokia C12 Plus | Dr.fone
- In 2024, What to do if your Apple iPhone 13 Pro has bad ESN or blacklisted IMEI?
- How to Change Your OnePlus Nord N30 5G Location on life360 Without Anyone Knowing? | Dr.fone
- How Do I Stop Someone From Tracking My Apple iPhone 14? | Dr.fone
- Title: What Is an AI Voice Generator? | Wondershare Virbo Glossary
- Author: Sam
- Created at : 2024-04-17 22:00:49
- Updated at : 2024-04-18 22:00:49
- Link: https://ai-voice-clone.techidaily.com/what-is-an-ai-voice-generator-wondershare-virbo-glossary/
- License: This work is licensed under CC BY-NC-SA 4.0.
