
:max_bytes(150000):strip_icc():format(webp)/how-to-turn-on-microphone-on-an-android-phone-5184530-372d01459baa44978ef72242d007992a.jpg)
Updated 2024 Approved What Is AI Background Generator?
What Is AI Background Generator?
Introduction:
In the dynamic realm of digital design, the convergence of human ingenuity and artificial intelligence has ushered in a remarkable era of creative innovation. One such transformative marvel is the AI background generator. By seamlessly integrating the prowess of AI algorithms with the realm of visual aesthetics, this technology is redefining the way we conceptualize and design digital environments.
What Is AI Background Generator?
An AI background generator is an advanced tool that leverages artificial intelligence to autonomously create captivating digital backgrounds. By analyzing patterns, color schemes, and design principles, these generators generate intricate and mesmerizing backgrounds that can set the stage for various digital endeavors.
The Main Purpose of AI Background Generator:
At its core, the AI background generator is designed to simplify and enhance the process of crafting visually appealing backgrounds. Traditionally, the creation of intricate backgrounds demanded significant time and effort. AI background generators mitigate this challenge by instantly producing intricate designs, ensuring a harmonious blend of aesthetics and efficiency.
What Is AI Background Generator Used For?
- Digital Art: Digital artists utilize AI background generators to create immersive landscapes for their artistic creations. This tool complements their imagination by providing a rich tapestry upon which their artworks can unfold.
- Web Design: Web designers employ AI background generators to craft visually engaging backdrops for websites and applications. These backgrounds can enhance user experience and set the tone for the content being presented.
- Graphic Design: Graphic designers harness AI background generators to quickly generate backgrounds for various design projects, including posters, flyers, and advertisements.
Background Types Generated:
- Abstract Patterns: AI background generators excel at producing intricate and abstract patterns that can add depth and complexity to digital projects.
- Nature Scenes: These generators can replicate natural environments, including landscapes, forests, oceans, and celestial vistas, imbuing digital content with a touch of the natural world.
- Urban Landscapes: AI background generators can craft urban landscapes with cityscapes, skylines, and architectural elements, perfect for applications in urban-themed designs.
- Sci-Fi and Fantasy: These generators can create imaginative and otherworldly backgrounds, suitable for sci-fi and fantasy-themed projects.
List of Best AI Background Generators:
- Deep Dream Generator: Utilizing deep neural networks, this generator crafts abstract and surreal backgrounds, often resembling a dreamlike state.
- Artbreeder: This platform allows users to blend and evolve images, offering a diverse array of artistic backgrounds.
- Designify: Designify offers a range of AI-generated backgrounds, from abstract patterns to nature scenes, catering to various design needs.
- Remove.bg: While primarily focused on removing backgrounds, this tool can also create simple background replacements, making it handy for quick design edits.
- Pixeltrue BG Generator: Specializing in web design backgrounds, Pixeltrue offers a collection of AI-generated backgrounds suitable for various digital projects.
Conclusion:
The emergence of AI background generators underscores the harmonious marriage of human creativity and technological innovation. These tools empower creators, designers, and artists to swiftly access a wealth of captivating backgrounds, fostering imaginative digital landscapes that captivate audiences and enhance visual narratives. As AI continues to evolve, the realm of digital design stands on the brink of even more awe-inspiring creative possibilities.
[Top List] Best 5 Tools for Creating Talking Avatars
Avatars have become crucial in many different industries in the last few years. Whether it is customer support or entertaining people, avatars connect businesses with their audience in a better way. As technology gets better, we’re witnessing a remarkable evolution in avatars.
Read this article to learn some freetalking avatar makers you can use. Also, we’ll explore the finest tool to use this innovative technology while joining in the fun for diverse purposes.
![]()
Part 1. Recommended: Finest Talking Avatar Creation With Wondershare Virbo
Wondershare Virbo stands out as an exceptional tool for creating talking avatars. It offers a comprehensive solution for crafting high-quality avatars on a single platform. The tool is versatile, showing compatibility with various devices and operating systems. This groundbreaking tool lets you bring your static photo into a dynamic storyteller.
Plus, it lets you add voice clips to your photos to make them interactive. Its talking feature adds emotion, explanation, or personalized messages to your visual content. Users can transform old pictures into captivating stories with personalized voice clips. With the support of a wide range of accents, you can create talking avatars that resonate with the global audience.
Highlighted Features of Wondershare Virbo
- The text-to-speech feature converts text into spoken language for smooth
- Users can elevate the mood and atmosphere with personalized background music within the Talking Photo feature.
- Its versatile AI avatars and clear audio quality ensure that your voiceovers are crisp and clear.
Pricing Plans
- Monthly Plan: $9.9
- Essential Yearly Plan: $19.9
- Pro Yearly Plan: $199
Step-by-Step Guide to Using the Talking Photo Feature in Wondershare Virbo
Wondershare Virbo ensures a seamless experience for its users in talking avatar creation. The process is as simple as it can customize your talking photos. Follow the below-mentioned detailed steps to use thisAI-speaking avatar creator :
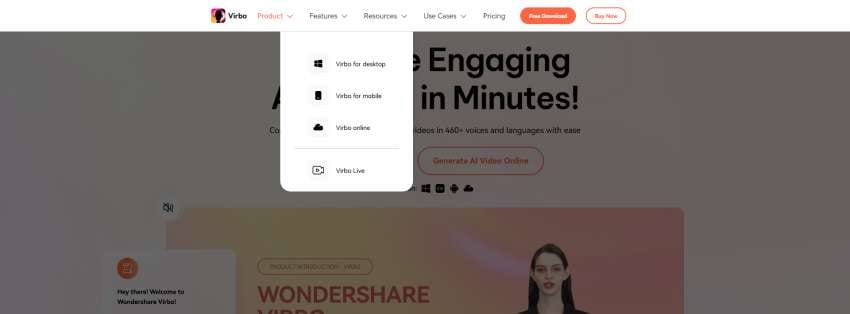
Step 1. Download Virbo and Access Its Talking Photo Feature
Begin by downloading and installing this AItalking avatar maker on your devices. Afterward, launch the tool on your system and access its dashboard. Click the “Talking Photo” button among the available options here.
![]()
Get Started Online Free Download
Step 2. Select AI Avatar or Import Your Photo
A mini window will pop up on the screen, allowing you to select from preset images. You can also import the picture by browsing your system. Once you’ve selected, you’ll be directed toward a new window.
![]()
Step 3. Generate Script Using AI
Head to the bottom left in the upcoming window and hit the “AI Script” icon. Type the script in the text box and optimize it with AI features. Afterward, press the “Apply” button from the right bottom to use it for talking avatar.
![]()
Step 4. Make Adjustments in Language and Gender
After creating a script, it is time to customize its language. Tap on the “Language” button, which opens a pop-up window. Clicking on the “Language” dropdown menu allows you to choose your preferred language. You can opt for either male or female by choosing the “Gender” dropdown menu. Later, click on the “OK” button to proceed with the process.
![]()
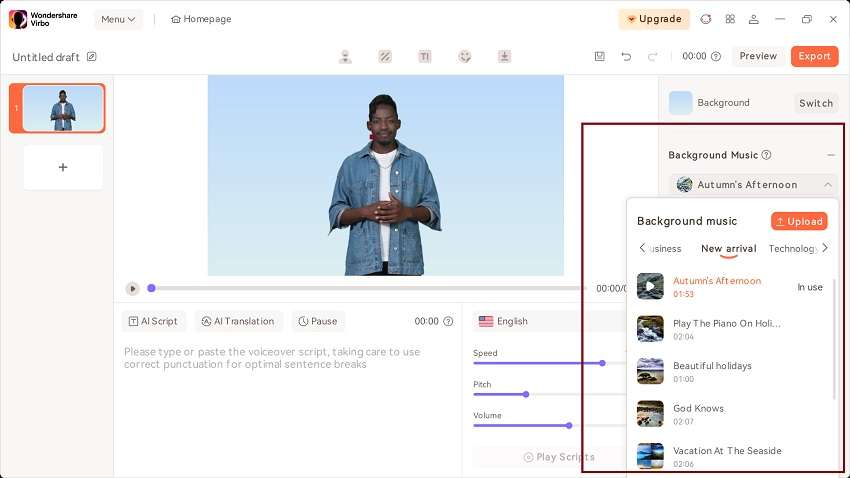
Step 5. Modify the Voiceover Characteristics and Export the Video
Next, personalize the qualities of voiceover under the language section. Here, you can modify the “Speed,” “Pitch,” and “Volume” as needed. You can preview the video you’ve customized by tapping on the “Play” icon. Finally, navigate toward the top left corner of the window and press the “Export” button to save it.
![]()
Pricing Plans
- Monthly Plan: $9.9
- Essential Yearly Plan: $19.9
- Pro Yearly Plan: $199
Part 2. Alternatives: Other Talking Avatar Creator Tools for Enhanced Content
Previously, we have discussed the best tool to generate talking AI avatars. However, if you want to try out some alternatives to Wondershare Virbo, we have a solution. For this purpose, we’ve enlisted some othertalking avatar creators to help you in getting results to your satisfaction:
1.Akool
Akool is a comprehensive generative AI platform available for creators and innovators. Its intuitive features allow users to materialize ideas quickly for diverse marketing and advertising needs. You can upload JPEG and PNG images of less than 30MB for each picture on the tool. Plus, the picture should be clear as it does not detect blurry, overexposure, and side faces.
![]()
Pros
- With film-level quality outputs, it ensures high-quality visuals and videos.
- Thetalking avatar creator achieves up to 8k resolution for pictures and 4k.
Cons
- One problem is that talking avatars can’t sound entirely natural yet.
Pricing Plans
- Professional Plan: $30 per month (600 credits)
- Studio Plan: $500 per month (12000 credits)
Steps To Create Talking Avatars With Akool
As discussed before, Akool lets its users customize their talking avatars. Let’s discuss the steps tocreate a talking avatar online for free using this tool:
Step 1. Get the online tool through your preferred web browser and open its homepage. Now, hover over the “Platform” dropdown menu and select the “Talking Photo” feature.
![]()
Step 2. Within the upcoming window, click the “Choose File” button from the center to upload the image. Also, you can choose an example offered by the tool. After making a selection, you can also revert changes.
![]()
Step 3. After uploading the picture, head to the “Text” section on the right side and type in the script. Then, under the “Voice” section, make adjustments in gender, language, and speed. Later, preview your generated talking avatar and tap the “Results” at the top right. Finally, the tool will process it and provide you with the final results.
![]()
2.Yepic AI
If you also want to createan AI talking avatar , Yepic AI is your go-to preference. You can create a lifelike digital version of yourself with just a headshot. Users can uniquely present their videos by choosing from over 40 preset avatars. It boasts many actors, languages, and voices, with over 450 options available to personalize your avatar.
![]()
Pros
- The tool personalizes every aspect of your videos, from backgrounds and transitions to actors and voices.
- You can scale and localize your content across different countries, languages, and accents.
Cons
- It offers only 20 video credits per month, and one credit equals a 60s video, limiting extensive use.
Pricing Plans
- Consumer Plan: £5.75 /month
- Standard Plan: £24.16/month
- Plus Plan: £65.83/month
- Premium Plan: £415.83/month
- Infinite Plan: £665.83/month
Steps To Create Talking Avatars with Yepic AI
Users can utilize the capabilities of this tool to create talking avatars seamlessly. Here are the steps to carry out the process of makingAI-speaking avatars to engage viewers.
Step 1. To start the process, tap the “Get Started” button on the main website page and access the editing window. The tool lets you choose avatars or talking photos within this editing interface.
Step 2. Afterward, in the text box, type your script and hit the “Listen” button. Alternatively, you can upload your voiceover to the tool to make it personalized.
Step 3. Upon uploading the voiceover, select the voice and the desired language for your written words. Then, select the desired background and add shapes to modify the outlook of your talking avatar. Finally, preview the video and download it to share with others.
3.Speechify
Speechify Studio serves as the premier AI Video and AI Voice Platform. This site empowers anyone to create professional videos in just one minute, with no skills required. You can quickly produce captivating content using AI-generated talking faces. It lets youcreate a talking avatar online for free to save your valuable resources and time.
![]()
Pros
- Speechify Studio offers a user-friendly interface that makes video production quick and effortless.
- Users can combine high-quality text-to-speech synthesis with lifelike avatars for an interactive audiovisual experience.
Cons
- The narration of this tool lacks human-like empathy and emotions.
Pricing Plans
Talk to the sales team.
Steps To Create Talking Avatars with Speechify
With Speechify’s intuitive interface, you can easily perform various tasks. In the following section, you’re given the simple steps to create anAI talking avatar using this online tool.
Step 1. First, access the “AI-Generated Talking Face” page from the main interface of Speechify. Proceed by hitting the “Try for Free” button and log in using a Google account. After entering the editing interface, press “Create AI Avatar,” which leads you to a new window.
![]()
Step 2. Now, opt for the desired avatar from a vast library. Upon selecting this avatar, it will appear on the right side of the editing window. Afterward, you can adjust “Avatar Style” and the “Layout” settings.
![]()
Import your script from a media file or paste a URL from YouTube. Afterward, choose the voiceover among the available options and preview the video. Once satisfied, tap the “Export” button at the top right to download this from this tool.
![]()
4.HitPaw Online AI Face Animator
This online AI face animator is an easy-to-use AI-based tool that brings your still images to life with animated faces. You can choose from various funny templates to animate your photos with a simple upload and a click. It allows you to add humor and personality to your images. The tool supports JPG, PNG, JPEG, and WEBP formats for pictures and animates them with customization.
![]()
Pros
- Users can animate various photos, from individual portraits to group shots, with many templates available.
- It emphasizes safety and security and ensures your photos are protected.
Cons
- Weekly Plan: $0.57/Day
- Monthly Plan: $0.27/Day
- Yearly Plan: $0.13/Day
Steps To Create Talking Avatars With HitPaw Online AI Face Animator
HitPaw Online is another onlinetalking avatar maker with a straightforward approach. The following are the steps to animate a photo using this online tool:
Step 1. Visit the tool’s official website and access the main user interface. You can place your cursor over the “Photo AI” dropdown menu and click “AI Face Animator.”
![]()
Step 2. Next, hit the “Upload Image” button from the left side. This action will move you to the main editing window to create talking avatars.
![]()
Step 3. Select the “Drag and drop or click to upload image” option from the left panel in the new window. Under the “Choose a Template” section, select the category of style and expression for your uploaded photo. Then, press the “Animate” button at the bottom. Now, you can see your animated image in the middle of the screen after processing.
![]()
Step 4. Once satisfied with the results, download it on your system. You can save it with the HitPaw logo or as a GIF for fun.
Image name: best-tools-for-creating-talking-avatars-20.jpg
Image alt: download final product from hitpaw
![]()
Conclusion
We conclude that there are variousspeaking avatar creator platforms with different features. These tools make it easy to create avatars that talk to use for different functions. However, the one that stands out among these options is Wondershare Virbo. You can customize your avatars in just a few clicks on different devices.
Get Started Online Free Download
Master Amazon Live: Features, Pro Tips and Future Trends
Going live on Amazon is a great way to drive sales and traffic to your product. The platforms work in a similar way to other livestreaming services including Facebook and Taobao. Sellers can useAmazon Live streaming to drive trading and brand awareness of their products. In this article, we explore theAmazon Live streaming shopping experience including the key features and pro tips.
Part 1: Live on Amazon: A Game-Changer for Sellers
Amazon has been hosting many live streams where sellers promote a wide range of products. With Amazon Live Events, thousands of creators and influencers sell products and demonstrate how they work. This type of livestream shopping is an effective marketing strategy. It allows a personable host to demonstrate products while shoppers talk about their experience and ask any burning questions.
01 What isAmazon Live Streaming?
Amazon Live Streaming is an interactive fee that allows brands to show live videos for their products. You can introduce your brands to the audience and demonstrate how products work. With Amazon Live, sellers highlight their product listings and create banners for customers using product promotions on a carousel below each live video. On the other hand, customers interact with the live video by asking questions in the comment sections or chatting with hosts.

02 Who Can Benefit from Amazon Live?
Amazon Live streaming sales focus on the desires of the shoppers to know more about a product. It is also based on the tendency of online shoppers to impulse buy. By providing instant answers to shoppers, sellers can minimize the guesswork and boost sales.
- Shoppers: Discover new products and see them in demonstrated action before making a purchase. They can also ask questions in real time and get additional information.
- Seller and Brands: Increased product awareness and sales with the potential for building brand image.
- Influencers: A new income stream and access to a wider audience while building relationships with brands.
- Fans of Influencers : Get to know their favorite personalities better and get exclusive deals or discounts from their recommendations.
- Anyone Seeking Entertainment : Amazon Livestream can be a source of entertainment with DIY projects and demonstrations.
03 Is Amazon Live Streaming Right for You?
Amazon Live is an effective tool for starting a major sale or increasing the overall awareness of your product. The program streams live videos on the Amazon Live homepage to your brand’s product details pages giving you more exposure. You can speak about your products or simply demonstrate how they work. This makes Amazon Live a highly engaging promotional tool that sellers and influencers can use to drive more informed shoppers to buy their products, Here are some pros and cons of using Amazon Sale live streaming:
Pros
- A free live-streaming platform for sellers
- Offers creative tools and resources to effectively promote your products
- Amazon Live selling is a small part of the growing market and offers the opportunity for brands to scale
Cons
- Low consumer engagement rates with low-quality videos
- You will still need a creative team with resources to represent your brand well
- Amazon Live is still a fledging service and does not offer influencer marketing nor have its own place on Amazon’s website navigation yet
Part 2: Step Guidance: Getting Started with Amazon Live
To create a livestream on Amazon, you need to be a U.S. Professional Seller either registered as a U.S. Vendor or in the Amazon Brand Registry. Sellers who meet the requirements can create their livestreams through theAmazon Live Creator mobile app.

With Amazon streaming live service, you can record Livestream in advance and schedule them to go up at a later date or go Live in real-time. This will usually depend on your goals and the kind of interaction you want with your audience. In any case, Amazon recommends the use of an external camera and a video encounter instead of your mobile phone to ensure quality video. Although you can use either, an external camera gives you an edge in terms of quality. Let’s have a look at a detailed step-by-step guide to getting started with Amazon Live:
Step 1 Create an Amazon Live Account
Download theAmazon Live Creator app from the Apps Store. The app is currently only available for iOS and will work on iPhone or iPad. Sign into your Seller, Influencer, or Vendor account and create a Live Account.

Step 2 Enter Details of your Product or Brand
Choose your brand and enter the desired profile name. Edit your profile the way you like to be a true representation of your brand.

Step 3 Add Products to Your Livestream
Choose the products you want to add to your livestream. These are the products that you want to promote and use to engage with your viewers.

Step 4 Set Up Your Amazon Livestream
With the product added, you are ready to set up your live stream. Take some time in the practice mode to familiarize yourself with the platform, and prepare your talking points. Also, come up with responses to possible customer questions and any other important information. Although Amazon Live is free, you can also consider using Amazon advertising to reach a wider audience.

Step 5 Go Live
Once everything is ready, enter your stream time and start time. You can view your analytics from the homepage and see how well the live stream is performing.

Once published, Amazon Live events can be found on theAmazon.com/Live page . They are also discoverable in Amazon stores, product detail pages, and the Amazon mobile app under “Amazon Live.” A well-presented Amazon Live stream will:
- Build a community by communicating and engaging with consumers
- Entice viewers to take action
- Reduce pre-purchase support requests, such as live chat
- Generate sales
- Lower returns by providing essential details and answers
Bonus Tip: Enhanced Live Streaming with AI (Future Trends)
As artificial intelligence continues to touch every aspect of life, brands can leverage this technology to offer more personalized content to their audience.Virbo Live offers you an ultimate AI streamer experience where you can host live shopping with an AI streamer. Instead of creating content from scratch, choose an AI streamer to interact with your audience, saving the time and cost of hiring a human streamer. Embark on this transformative streaming journey, and keep your audience engaged even without your direct involvement.

01 Leveraging Virbo AI streaming for sales and shopping
Virbo Live offers you access to multi-lingual AI-driven avatars or Vtubers that will sell your products and interact with your viewers in real time. The AI-powered avatars can provide more information about your products and answer questions from your viewers. By automating the streaming process, you can transform your viewers’ experience while boosting your revenue.
As Amazon Live becomes more popular among sellers and buyers, any solution that would make the work of sellers easier is worth exploring. Virbo Live offers you an excellent solution to live stream your products without the heavy budget of hiring a creative team. You only need to select an Avatar of your choice, generate a script, and allow the avatar to do the rest.
02 Simplified workflow and better viewer experience with Virbo Live
Virbo Live offers you a simplified workflow for a better viewer experience by creating a realistic and seamless interaction with the audience. Although the avatars are AI-powered, they can interact freely with the audience, ensuring they have perfect information before making a purchase. Some of the features that make Virbo Live such a powerful tool include:
- Realistic AI-driven Avatars : Interact with and keep your viewers engaged by mimicking natural movements perfectly.
- AI Live Shopping Script Generation : Automatically generate a script for your AI streamer by adding details about your product
- Multiple Languages and Accents : Automatically translate your script to desired a language and integrate the right accent for your viewers
- Customizable Q&A Repository : Create a personalized Q&A database so that your AI streamer can connect with your viewers better and offer realistic solutions
- Interaction Through Text : Trigger your AI streamer to automatically speak your text and engage with the viewers
Conclusion
Amazon Live lets sellers and influencers promote products through live streaming. Get started easily, interact with your audience, and showcase your products. TryVirbo Live ‘s AI streamers for a cost-effective and efficient alternative.
What Is AI Voice Text to Speech? | Wondershare Virbo Glossary
Part 1: What is AI Text to Speech?
AI text to speech (TTS) is the cutting-edge technology that utilizes artificial intelligence algorithms to convert written text into natural-sounding spoken language. By analyzing the textual input, AI TTS systems generate audio output that simulates human speech, incorporating elements such as intonation, rhythm, and emphasis. This advanced technology enables computers and devices to communicate with users using lifelike and expressive voices.
Part 2: What Can AI Voice Text to Speech Be Used For?
AI voice text to speech has numerous applications across various domains:
Accessibility: AI text to voice technology empowers individuals with visual impairments or reading difficulties to access written content by converting it into spoken language. It enhances accessibility by enabling users to listen to digital books, articles, and other textual materials.
Language Learning: AI TTS tools aid language learners in improving pronunciation and comprehension. Learners can listen to correct pronunciation models and practice speaking skills by converting written text into spoken language.
Assistive Technologies: Text to voice finds applications in assistive technologies such as screen readers, voice assistants, and navigation systems. These technologies assist users in interacting with devices, accessing information, and navigating digital interfaces using spoken language.
Content Creation: AI TTS is employed in content creation for generating voiceovers in videos, podcasts, audiobooks, and other multimedia content. It enables the automation of voice narration, saving time and resources compared to traditional voice recording methods.
Part 3: What Are Some Examples of AI TTS?
1. Wondershare Vibro
Harnessing the power of AI text to speech and digital avatar technology, Vibro offers 120+ AI voices. Experience the incredible realism as your digital avatars speak in lifelike voices with just a few simple steps.
Get Started Online Free Download
2. Murf
Murf is an AI-powered text to speech solution known for its natural and expressive voices. It offers a wide range of customizable voice options suitable for various applications.
3. Uberduck
Uberduck is another notable AI TTS tool providing high-quality, lifelike voice synthesis. It offers versatile voice customization options and supports multiple languages.
4. Google Cloud Text-to-Speech
Google Cloud Text-to-Speech is a powerful AI-based service that converts text into natural-sounding speech. It offers a broad selection of voices in multiple languages.
5. Amazon Polly
Amazon Polly is an AI-driven text-to-speech service that converts written text into lifelike speech. It provides realistic voices and supports various languages and accents.
In conclusion, AI text to speech technology transforms how we interact with written content by converting it into spoken language. From accessibility to language learning and content creation, AI TTS offers diverse applications. Explore famous examples like Murf and Uberduck, and leverage the power of AI text to speech for enhanced communication and content accessibility.
Launching Your Live Room | Virbo AI Live Stream
Launching Your Live Room
Explore step-by-step instructions on decorating your space, uploading local images and videos, adding engaging AI interactions, etc. Elevate your streaming experience and captivate your audience with a seamlessly executed live room. Dive into our comprehensive guide now!
02Uploading Local Images and Videos
07AI Intelligent Script Generation
11Starting/Ending the Live Broadcast
Decorating Your Live Room
Decoration Guidance
- Click on the product homepage and create a blank live room to initiate a new live session.

Create a blank live room
- Upon creating a blank live room, the live room editing page will open. The left side serves as the operation area, the right side as the canvas area, and the materials area is located above.

Livestream room navigation
- Click on the templates to use pre-designed combinations of background, virtual hosts, and stickers.

Select a template
- Customize the background from the background library. During the live broadcast, only one background can be used.

Livestream room customization
- Choose a virtual host from the virtual host library. Only one virtual host can be used during the live session.
![]()
Choose a virtual host
- Add stickers from the sticker library. Multiple stickers can be used during the live broadcast.
- After selecting materials, adjust their position and size in the canvas area. Right-click to modify layers, copy, or delete materials.
Uploading Local Images and Videos
Upload background images or videos
- Upload: Click Background -> Upload Background -> Select file to upload. Materials will be displayed in “My Background” after uploading.

Upload Background
- Apply: Click Background -> My Background, then click on the material to use it on the canvas.
- Delete: Hover over the material and click the delete icon to remove it.

Delete Background
Note
Background upload requirements:
- Image and video dimensions should be 9:16
- Image formats: JPG/JPEG/PNG
- Video formats: MP4/MOV
- Resolution should not exceed 1080P
- Video duration should not exceed 30 minutes
- File size should not exceed 1GB
Upload sticker images or videos
- Upload: Click Sticker -> Upload Sticker -> Select file to upload. Materials will be displayed in “My Sticker” after uploading.

Upload Sticker
- Apply: Click Sticker -> My Sticker, then click on the material to use it on the canvas.
- Delete: Click Sticker -> My Sticker, hover over the material, click the delete icon to remove it.

Delete Sticker
Note
Sticker upload requirements:
- Image and video dimensions are flexible.
- Image formats: JPG/JPEG/PNG
- Video formats: MP4/MOV
- Resolution should not exceed 1080P
- Video duration should not exceed 30 minutes
- File size should not exceed 1GB
Text-Driven Live Room
Script Guidance
- Input script text: Copy and paste your script into the script dialogue box.

Text Scripts Inset
- Choose a matching tone: Click the voice-over entrance above, select a suitable tone, and preview it.
- Preview: Click the “Preview” button below the text to listen.
Audio-Driven Live Room
Audio Guidance
- Upload audio: Click Script -> Audio -> Upload local voice and upload the local file.

Upload Audio
- Preview audio: After uploading, click to preview the audio.

Preview Audio
- Audio sorting: Hold and drag to sort the audio files.

Audio sorting
- Audio sorting: Hold and drag to sort the audio files.

Modifying Live Room Name
Method Guidance
- Method 1: Click the edit button in the upper-left corner of the edit page to rename the live room.

Rename Livestream Room
- Method 2: Product homepage -> My Live Rooms -> Click on the more options for an individual live room -> Choose Rename.
Adding AI Identification
Step Guidance
- On the live room editing page, click on the checkbox before the AI identification to enable or disable it.
AI Intelligent Script Generation
Generation Guidance
- Click the “AI Intelligent Script” button below the script, a popup will appear.
- Enter your product name (mandatory), selling points (optional), promotional information (optional), select language and style, then click generate.

AI Script
- The generated result can be further modified, click “Use” to add it to the script dialogue box.
AI Translation
Translation Guidance
- Click the “AI Translation” button below the script, a popup will appear.
- Place the text to be translated on the left, click the middle arrow to select the language for translation (e.g., English), and click translate.

AI Translation
- The generated result can be further modified, click “Use” to add it to the script dialogue box.

AI Translation Result
Manual Interaction
Microphone Interaction
- Operational Flow:
- Click Manual Interaction -> Microphone, and select the microphone device.
- Speak into the microphone and observe the sound wave status.
- Open “Start Live,” wait for the appearance of the virtual host image, and click “Open Mic Takeover.” The virtual host’s mouth will be closed, and your voice will drive the virtual host to speak.
- After speaking, click “End Takeover,” and the virtual host will resume reading the scripted dialogue.
- Click Manual Interaction -> Microphone, and select the microphone device.
- Grant Browser Microphone Access:
- Google Chrome:
*Open Chrome, click the settings icon in the top right.
* Click “Settings,” open the settings page. Select “Privacy and Security” and then click “Site Settings.”
*Enter the site settings page, click “Microphone.”
* On the microphone authorization page, select that the site can request the use of your microphone.
* After these settings, when the browser needs to use the camera or microphone, a device request box will pop up on the page. Select “Allow.” - Mozilla Firefox:
*Open Firefox, click the settings icon in the top right, and click “Settings.”
* Open the settings page, click “Privacy & Security,” and find “Microphone Permissions.” Click “Settings” next to “Microphone.”
*Enter the settings page, add the site that requests the use of your microphone to the list, and click “Save Changes.”
* After these settings, when the browser needs to use the camera or microphone, a device request box will pop up on the page. Select “Allow.” - Sogou Browser:
*Open Sogou Browser, click the settings icon in the top right, and click “Options.”
* Open the options page, click “Advanced,” find “Privacy - Browsers on the Mac System:
*Locate “System Preferences” on your Mac dock and click the icon. Once opened, find “Security & Privacy” and click to open.
* On the “Security & Privacy” page, select “Privacy,” then click on “Microphone” and set the applications that need to use the microphone to “Allow.”
- Google Chrome:
Text Interaction
- Click on “Artificial Interaction” and enter interaction scripts in the input box below.
- Click “Add Text” to add it to the interaction list. After starting the live broadcast, each interaction script will have a send button.

Text Interactionn
- Click “Send” to trigger the AI to speak according to the interaction script.
Intelligent Interaction
Note
The current intelligent interaction feature only supports Alibaba International. If you are streaming on other platforms, you can skip this step.
Setting Entrance
- On the live broadcast page, click on “Intelligent Interaction,” select the live platform, and the supported intelligent interaction features will be randomly displayed.
Q&A Library Settings
- Creating a New Q&A:
- On the product homepage, click on Q&A Library - Add Q&A, and a popup window will appear.
- Fill in the rule name, keywords, reply text, and upload a reply video. Click Save.
Note
Rule Name: Name the rule for easy identification.
Keywords: If a viewer’s question in the live room contains any of these keywords, it will trigger the AI to answer.
Reply Content: You can add up to 5 replies. Include variables like [Viewer’s Nickname] and [Viewer’s Country] for personalized responses.
Sequential Reply: Replies in sequence when triggered.
Random Reply: Randomly selects a reply when triggered.
Reply Video: If configured, the video will be displayed at the specified position until the AI’s reply ends.
- Adjusting Q&A Activation Status:
- Click Q&A Library - Switch to close or open the Q&A rule. When closed, the Q&A rule will not take effect after the live broadcast starts.
- Turning on Q&A Library Switch in the Live Room:
- On the live broadcast editing page, click Intelligent Interaction - Platform, select “Alibaba International,” and turn on the Q&A Library switch. This must be done after starting the live broadcast and capturing the barrage for the function to work.
Greeting Rules Settings
- Greeting Content: You can add up to 5 replies, including variables like [Viewer’s Nickname] and [Viewer’s Country].
- Sequential Reply: Replies in sequence when triggered.
- Random Reply: Randomly selects a reply when triggered.
- On the live broadcast editing page, click Intelligent Interaction - Platform, select “Alibaba International,” turn on the Greeting switch, and click the edit icon to open the editing window. Fill in the reply text and click Save.
Sending Business Cards and Product Catalogs
- On the live broadcast editing page, click Intelligent Interaction - Platform, select “Alibaba International,” turn on the “Send Business Cards” switch, and turn on the “Send Product Catalogs” switch.
Note
These functions will only take effect after starting the live broadcast and capturing the barrage.
How to Start Live Barrage Capture
- Start Broadcasting in Virbo Live
- Follow the steps for “Start/End Broadcast” on the live broadcast editing page.
- Install the Plugin in Chrome
- Ensure Chrome is up to date, then download the plugin from the provided link . After downloading, unzip locally.
- Configure the Plugin in Chrome
- Open Chrome, go to Settings - Extensions - Manage Extensions, enable Developer mode, click “Load Unpacked,” and select the unzipped folder. Enable “Allow in incognito mode” in the plugin details.
- Copy the Live Control Page Link
- Copy the link of your live control page (web version) from the live platform. Paste the link into the live broadcast editing page under Intelligent Interaction - Live Room Link Input, then click “Start Capturing.”
Note
Alibaba International currently supports automatic Q&A, automatic greetings, automatic business card sending, and automatic product catalog sending. You can turn on the corresponding switches and then configure the detailed settings for each item.
Starting/Ending the Live Broadcast
Starting the Live Broadcast
- On the live broadcast editing page, click “Start Broadcasting.”
- The AI live broadcast window will appear shortly after, displaying the AI live broadcast.
Using Your Broadcasting Partner or OBS
Note
Keep the AI live broadcast window open on the desktop during the broadcast, or it will not broadcast properly.
- Open your broadcasting partner or OBS, add a window, select the Wondershare VVB (Live Version) live window.
- Click “Start Broadcasting.” Use Alt + mouse to crop out the web bar or use the zoom function to remove it.
- During the live broadcast, you can only modify the “Artificial Interaction” function; other broadcast settings cannot be changed.
Ending the Broadcast
- When concluding the live broadcast, initiate the termination of the live stream on the platform’s broadcasting partner first, followed by clicking the “End Live” button on Virbo Live to finalize the shutdown process.
02Uploading Local Images and Videos
07AI Intelligent Script Generation
11Starting/Ending the Live Broadcast
Decorating Your Live Room
Decoration Guidance
- Click on the product homepage and create a blank live room to initiate a new live session.
Create a blank live room
- Upon creating a blank live room, the live room editing page will open. The left side serves as the operation area, the right side as the canvas area, and the materials area is located above.
Livestream room navigation
- Click on the templates to use pre-designed combinations of background, virtual hosts, and stickers.
Select a template
- Customize the background from the background library. During the live broadcast, only one background can be used.
Livestream room customization
- Choose a virtual host from the virtual host library. Only one virtual host can be used during the live session.
![]()
Choose a virtual host
- Add stickers from the sticker library. Multiple stickers can be used during the live broadcast.
- After selecting materials, adjust their position and size in the canvas area. Right-click to modify layers, copy, or delete materials.
Uploading Local Images and Videos
Upload background images or videos
- Upload: Click Background -> Upload Background -> Select file to upload. Materials will be displayed in “My Background” after uploading.
Upload Background
- Apply: Click Background -> My Background, then click on the material to use it on the canvas.
- Delete: Hover over the material and click the delete icon to remove it.
Delete Background
Note
Background upload requirements:
- Image and video dimensions should be 9:16
- Image formats: JPG/JPEG/PNG
- Video formats: MP4/MOV
- Resolution should not exceed 1080P
- Video duration should not exceed 30 minutes
- File size should not exceed 1GB
Upload sticker images or videos
- Upload: Click Sticker -> Upload Sticker -> Select file to upload. Materials will be displayed in “My Sticker” after uploading.
Upload Sticker
- Apply: Click Sticker -> My Sticker, then click on the material to use it on the canvas.
- Delete: Click Sticker -> My Sticker, hover over the material, click the delete icon to remove it.
Delete Sticker
Note
Sticker upload requirements:
- Image and video dimensions are flexible.
- Image formats: JPG/JPEG/PNG
- Video formats: MP4/MOV
- Resolution should not exceed 1080P
- Video duration should not exceed 30 minutes
- File size should not exceed 1GB
Text-Driven Live Room
Script Guidance
- Input script text: Copy and paste your script into the script dialogue box.
Text Scripts Inset
- Choose a matching tone: Click the voice-over entrance above, select a suitable tone, and preview it.
- Preview: Click the “Preview” button below the text to listen.
Audio-Driven Live Room
Audio Guidance
- Upload audio: Click Script -> Audio -> Upload local voice and upload the local file.
Upload Audio
- Preview audio: After uploading, click to preview the audio.
Preview Audio
- Audio sorting: Hold and drag to sort the audio files.
Audio sorting
- Audio sorting: Hold and drag to sort the audio files.
Modifying Live Room Name
Method Guidance
- Method 1: Click the edit button in the upper-left corner of the edit page to rename the live room.
Rename Livestream Room
- Method 2: Product homepage -> My Live Rooms -> Click on the more options for an individual live room -> Choose Rename.
Adding AI Identification
Step Guidance
- On the live room editing page, click on the checkbox before the AI identification to enable or disable it.
AI Intelligent Script Generation
Generation Guidance
- Click the “AI Intelligent Script” button below the script, a popup will appear.
- Enter your product name (mandatory), selling points (optional), promotional information (optional), select language and style, then click generate.
AI Script
- The generated result can be further modified, click “Use” to add it to the script dialogue box.
AI Translation
Translation Guidance
- Click the “AI Translation” button below the script, a popup will appear.
- Place the text to be translated on the left, click the middle arrow to select the language for translation (e.g., English), and click translate.
AI Translation
- The generated result can be further modified, click “Use” to add it to the script dialogue box.
AI Translation Result
Manual Interaction
Microphone Interaction
- Operational Flow:
- Click Manual Interaction -> Microphone, and select the microphone device.
- Speak into the microphone and observe the sound wave status.
- Open “Start Live,” wait for the appearance of the virtual host image, and click “Open Mic Takeover.” The virtual host’s mouth will be closed, and your voice will drive the virtual host to speak.
- After speaking, click “End Takeover,” and the virtual host will resume reading the scripted dialogue.
- Click Manual Interaction -> Microphone, and select the microphone device.
- Grant Browser Microphone Access:
- Google Chrome:
*Open Chrome, click the settings icon in the top right.
* Click “Settings,” open the settings page. Select “Privacy and Security” and then click “Site Settings.”
*Enter the site settings page, click “Microphone.”
* On the microphone authorization page, select that the site can request the use of your microphone.
* After these settings, when the browser needs to use the camera or microphone, a device request box will pop up on the page. Select “Allow.” - Mozilla Firefox:
*Open Firefox, click the settings icon in the top right, and click “Settings.”
* Open the settings page, click “Privacy & Security,” and find “Microphone Permissions.” Click “Settings” next to “Microphone.”
*Enter the settings page, add the site that requests the use of your microphone to the list, and click “Save Changes.”
* After these settings, when the browser needs to use the camera or microphone, a device request box will pop up on the page. Select “Allow.” - Sogou Browser:
*Open Sogou Browser, click the settings icon in the top right, and click “Options.”
* Open the options page, click “Advanced,” find “Privacy - Browsers on the Mac System:
*Locate “System Preferences” on your Mac dock and click the icon. Once opened, find “Security & Privacy” and click to open.
* On the “Security & Privacy” page, select “Privacy,” then click on “Microphone” and set the applications that need to use the microphone to “Allow.”
- Google Chrome:
Text Interaction
- Click on “Artificial Interaction” and enter interaction scripts in the input box below.
- Click “Add Text” to add it to the interaction list. After starting the live broadcast, each interaction script will have a send button.
Text Interactionn
- Click “Send” to trigger the AI to speak according to the interaction script.
Intelligent Interaction
Note
The current intelligent interaction feature only supports Alibaba International. If you are streaming on other platforms, you can skip this step.
Setting Entrance
- On the live broadcast page, click on “Intelligent Interaction,” select the live platform, and the supported intelligent interaction features will be randomly displayed.
Q&A Library Settings
- Creating a New Q&A:
- On the product homepage, click on Q&A Library - Add Q&A, and a popup window will appear.
- Fill in the rule name, keywords, reply text, and upload a reply video. Click Save.
Note
Rule Name: Name the rule for easy identification.
Keywords: If a viewer’s question in the live room contains any of these keywords, it will trigger the AI to answer.
Reply Content: You can add up to 5 replies. Include variables like [Viewer’s Nickname] and [Viewer’s Country] for personalized responses.
Sequential Reply: Replies in sequence when triggered.
Random Reply: Randomly selects a reply when triggered.
Reply Video: If configured, the video will be displayed at the specified position until the AI’s reply ends.
- Adjusting Q&A Activation Status:
- Click Q&A Library - Switch to close or open the Q&A rule. When closed, the Q&A rule will not take effect after the live broadcast starts.
- Turning on Q&A Library Switch in the Live Room:
- On the live broadcast editing page, click Intelligent Interaction - Platform, select “Alibaba International,” and turn on the Q&A Library switch. This must be done after starting the live broadcast and capturing the barrage for the function to work.
Greeting Rules Settings
- Greeting Content: You can add up to 5 replies, including variables like [Viewer’s Nickname] and [Viewer’s Country].
- Sequential Reply: Replies in sequence when triggered.
- Random Reply: Randomly selects a reply when triggered.
- On the live broadcast editing page, click Intelligent Interaction - Platform, select “Alibaba International,” turn on the Greeting switch, and click the edit icon to open the editing window. Fill in the reply text and click Save.
Sending Business Cards and Product Catalogs
- On the live broadcast editing page, click Intelligent Interaction - Platform, select “Alibaba International,” turn on the “Send Business Cards” switch, and turn on the “Send Product Catalogs” switch.
Note
These functions will only take effect after starting the live broadcast and capturing the barrage.
How to Start Live Barrage Capture
- Start Broadcasting in Virbo Live
- Follow the steps for “Start/End Broadcast” on the live broadcast editing page.
- Install the Plugin in Chrome
- Ensure Chrome is up to date, then download the plugin from the provided link . After downloading, unzip locally.
- Configure the Plugin in Chrome
- Open Chrome, go to Settings - Extensions - Manage Extensions, enable Developer mode, click “Load Unpacked,” and select the unzipped folder. Enable “Allow in incognito mode” in the plugin details.
- Copy the Live Control Page Link
- Copy the link of your live control page (web version) from the live platform. Paste the link into the live broadcast editing page under Intelligent Interaction - Live Room Link Input, then click “Start Capturing.”
Note
Alibaba International currently supports automatic Q&A, automatic greetings, automatic business card sending, and automatic product catalog sending. You can turn on the corresponding switches and then configure the detailed settings for each item.
Starting/Ending the Live Broadcast
Starting the Live Broadcast
- On the live broadcast editing page, click “Start Broadcasting.”
- The AI live broadcast window will appear shortly after, displaying the AI live broadcast.
Using Your Broadcasting Partner or OBS
Note
Keep the AI live broadcast window open on the desktop during the broadcast, or it will not broadcast properly.
- Open your broadcasting partner or OBS, add a window, select the Wondershare VVB (Live Version) live window.
- Click “Start Broadcasting.” Use Alt + mouse to crop out the web bar or use the zoom function to remove it.
- During the live broadcast, you can only modify the “Artificial Interaction” function; other broadcast settings cannot be changed.
Ending the Broadcast
- When concluding the live broadcast, initiate the termination of the live stream on the platform’s broadcasting partner first, followed by clicking the “End Live” button on Virbo Live to finalize the shutdown process.
How to Make an Explainer Video [Step by Step Guide]
Explainer Videos are a key tool that companies are using to spread brand awareness and get prospective consumers closer to making a purchase. Social media explainer videos may be among the most effective of the many kinds of marketing videos. This kind of instructional video production might seem like a difficult endeavor.

Many people believe that in order to complete it, they must engage a explainer video services. Although it is always a possibility, it is not necessary. Most of the time, anybody can make a fantastic animated explainer video with a little bit of know-how, perseverance, and, of course, a video editor.
Part 1: Purpose of Making Explainer Videos
A short-form video that presents a company’s product, service, or business concept in an effective and appealing manner is known as an explainer video. These videos are often used for marketing or sales objectives. Explainer videos are often hosted by companies on their landing pages or shown on the front page of their websites.
Simplify Complex Concepts
Explainer videos are a terrific method to briefly present a topic or idea. This might be a brief description of your firm, product, or service. In any case, it provides a simple point of entry for those who are unfamiliar with your brand. The greatest explainer videos are often shorter, lasting between one and two minutes, but they are generally under three minutes long. Explainer videos need to make it clear what they want the viewers to do after seeing.
Increase Brand Awareness and Reach
Explainer videos are designed to solve a particular issue, describe a product or service, and explain why they are the best option. They’re an essential component of content marketing since they let you to convey key information quickly and leave an impression that sticks.
Enhance Audience Engagement and Retention
Nobody likes to search for information or read a handbook. Explainer videos might provide simple explanations, detailed instructions, or other courses. The best explainer videos are those whose tone and style reflect both the brand and the target audience.
Drive Conversions and Sales
Explainer video is a triumph grounded on actual achievements. For explainer videos to successfully convey a brand’s value proposition, they must be of high quality in both production and content. That’s why explainer video creators are in demand for contemporary business marketing.
Part 2: How to Make Explainer Videos
In a presentation, there is a time constraint. An explainer video might assist provide background knowledge or convey key points up front so you can quickly access additional pertinent information. You’ve come to the perfect spot whether you’re just beginning to research explainer videos for your company or considering updating your current ones. We’ll go over all you need to know about them in this article, as well as how you can use them to build your brand.
1. Define Your Target Audience and Goal
Understand why you are doing the video. Make sure you are offering your consumers genuine value. Give them excellent stuff that they won’t be able to resist. It takes careful planning and thinking to create great video content. It involves being aware of your objectives and what you want to accomplish with your explainer video. A quality video production firm will make sure that the strategy they use for an explainer video is consistent with the business’s brand and culture.
You should be aware of your audience and make sure your TA finds your message engaging and clear. Find out what essential knowledge they need, then include it within the video. Anywhere it is accessible, the material is successful due to its clarity and simplicity. It has the same effect whether it is seen on a firm website’s home page, shared on a smartphone, or even broadcast on a huge digital billboard.
2. Draft a Compelling Script
Just as vital as the video’s graphics is an interesting screenplay. Your viewers won’t respond as you need them to if your video doesn’t present a captivating tale. It may be used into a presentation or the onboarding process for new employees. It could be used as a component of a crowdsourcing initiative or as material for client and contract bids.
You must carefully consider your options since you will inevitably fail without a solid script. Include all pertinent information: a description of the product, its advantages, lead magnets (features that will draw prospective consumers), a target audience message, and a call to action. Your strategy should be in line with how you want your clients and consumers to see you. This might be done in a manner that exudes inventiveness and humor or in a reassuringly professional manner.
3. Design Visually Appealing Illustrations or Animations
Since the majority of people believe that a website ought to be enormous when it is designed. Include all of the elements and features in it. It must have a lot of content, a lot of pictures, and a lot of eye-catching graphics. However, nowadays, a lot of companies and brands use “minimalist” or straightforward online content. Make sure, nevertheless, that the viewers of the video are not diverted.
For this reason, animated explanation videos are a wonderful complement to websites. They are concise and simple to distribute. Not to mention that they are a great technique to increase the number of visitors to your website or page. Keep the animation basic and focus on the overall message of the video rather than the animation. Additionally, the audience should understand the message. Its objective is to clearly and concisely communicate your product or concept.
4. Choose Suitable Voiceover or Soundtrack
An explainer video’s purpose is to describe a certain product or service. Because of this, using the proper voice is essential. The narrator’s voice should be audible and understandable. But to swiftly capture your audience’s interest, address their problems right away in your video.
Make sure the narrators speak plainly and without using any fancy language. They must to be able to talk easily and spontaneously about your product. To ensure all of these voice instructions implemented carefully, you need an all-in-one AI explainer video maker andVirbo provides you a way to do that effortlessly.
Get Started Online Free Download
Use Virbo to narrate a captivating tale while adding sound effects, comedy, and accent variations. Of course, a lot relies on the storyteller. Avoid monotony at all costs to avoid the video being disliked. Virbo gives you the customization ability so the narrator must be able to modulate their speech’s intonation, tone, and speed in addition to having a pleasing and lively voice. Here’s why you should consider having this explainer video maker:
AI-Powered Explainer:

Creating explainer films does not have to be expensive or time-consuming, and Virbo ensures that it is not. Virbo can let you produce live action videos with only a script.
Easy Compatibility:
Whether you’re using PC or Mobile, Virbo is a good option for creating explanatory videos as it works seamlessly on both the devices. The good part is, Virbo is also available online so you can access it on your browser with a single account.
Automated Voiceovers:
Choose from a broad range of AI-generated voiceovers to pick the ideal one for your business explainer films.
AI-Generated Avatars:
![]()
Virbo has 150 or more AI avatars and attributes from many locations and ethnicities throughout the world.
Customizable Template Collection:
With this professional explainer video creator, all you have to do is use the 180+ Virbo themes and royalty-free music to add originality to your explainer films.
4. Use Appropriate Timing and Pacing
The viewers will be able to decide within the first eight seconds of the video whether they want to keep viewing the full thing or not. Most likely, it will be sufficient to persuade them to buy the product or service.
By relating to the viewers and grabbing their attention right away, a superb explainer video makes the most of the available time. Naturally, your video has to be focused and brief. The buyer will grasp your product after viewing even just the first 10 or 15 seconds, even if they are unaware of what it does now.
5. Add Captions or Subtitles for Accessibility
A tangible product is necessary for live action, and for the majority of kinds, a screen recording and product presentation are also necessary. The explainer video creation phase will be much simplified if all assets are organized and in one location. At this point, it’s important to gather additional components like photos, company logos, and music.
6. Optimize for Various Platforms and Devices
You must optimize your video before posting it to guarantee that the intended audience will watch it through. The best place to accomplish this is on YouTube, but if you work in a certain industry, you may also try Virbo.
Don’t forget to optimize your site for mobile devices as well. Verify that the video player works on various devices, such as smartphones and tablets.
7. Test and Gather Feedback
Innovation is encouraged by a digital process’s ability to be cost-effective. It enables you to test things out with the ability to quickly make adjustments or revisions if something doesn’t work correctly. And if it succeeds, it may elevate a decent explanation video to outstanding status. This increases consumer confidence in your brand or goods. And if you want to connect with your audience, it is crucial.
An effective explainer video may serve as a contemporary business card. It’s a fast and simple approach to engage with people, to communicate your values and your ability to assist them. At the start and conclusion of the video, make sure to clearly explain what your product is about and how it functions. Your objective is to get people to break down or explain your merchandise in order to ensure that they comprehended your explainer video.
8. Iterate and Refine Your Video
Explainer videos must to be simple to comprehend and explain. Making sure it makes sense is the greatest approach to do this. Returning to your message and the purpose of your explainer video, let’s discuss. Make sure to explain every aspect of your product and how it functions to them, regardless of how pricey or well-known the product is to them. They will then be able to tell others about your product and how well it functions.
This phase is included into the production process if you’re using a video creator like Virbo. If you’re recording, on the other hand, now is the moment to export your material to an editing program and assemble the video. Use Virbo to remove any poor takes, extraneous information, create transitions, and add any additional elements like music.
Conclusion:
We really hope that this tutorial has aided in your comprehension of the explainer video production process and inspired you to give it a go. You’re in luck if you find yourself looking up a new product you just learned about and want to see a video about it.
Therefore, a good explainer video is essential to grab the attention of the target audience. Because of this, the most effective ones are created with an AI based tool and that’s where you need Virbo to make it happen. Create your video using Virbo to put your planning into action. You may either use a video-making tool or it’s built-in editing features to enhance your explainer videos productivity.
Easy Ways to Translate TikTok Videos
TikTok has become a global sensation in today’s digital age. Their short-form video content has transformed the social media landscape. It has become one of the most popular social media platforms, with millions of users worldwide.
To maximize engagement reach, creators can nowtranslate TikTok videos into different languages and expand their audience. If you are curious, we’ll delve into how to translate TikTok videos in this article.

Part 1. Why Do Creators and Brands Need to Translate TikTok Videos
TikTok’s translation feature helps users understand content in different languages. It translates captions and text from one language to another. Hence, everyone can enjoy the videos. To use the translation feature, tap “See translation” at the bottom of the screen. The app will translate the captions into your device’s language.
Here are more reasons why it’s important:
Reaching New Markets
TikTok translate breaks language barriers. Helping you reach new audiences who may not understand your content otherwise. This feature makes it easier to connect with them. And leading to more engagement and potential leads.
Enhancing Rankings
Translating content broadens its reach, leading to increased engagement and popularity. This feature, in turn, can improve its ranking on search engines. Higher rankings mean more visibility and traffic. This means more conversions, especially if the video is embedded on your website.
Improving TikTok Advertising
When running ads, the translation tool allows targeting audiences in other languages. This feature eliminates language barriers and expands your ad reach. Potential increasing ad effectiveness and reaching a wider audience.
Boosting Sales Conversions
Adding captions to videos increases impressions by over 55%. As a business owner, captions help. With the translation tool, more people from different backgrounds can understand your content. This feature will enhance the viewing experience. Potential in boosting their chances of buying your product.
Part 2. How to Translate TikTok Videos to English with Auto-Translate Feature
In 2022, TikTok introduced translation tools to break down language barriers. Making content more accessible to all users. The main components of TikTok’s translation tool include captions and description translation, auto-generated video captions, and sticker translation.
1. Captions and description translation
This feature allows users to auto-translate captions and descriptions. Therefore, users can enjoy TikTok videos in languages other than their own. For instance, if you want totranslate a TikTok video to English from Japanese captions. You can follow these steps:
- Step 1. Go to your profile, then click the three strips at the top of the screen.

- Step 2. Open Settings and Privacy

- Step 3. Go to Language under the Content & Activity section

- Step 4. Toggle on Always Show Translations

Once selected, you can translate captions and descriptions of videos in different languages. You can click “See Translation” when watching TikTok’s videos.
2. Auto-generated video captions
This feature allows viewers to enable closed captions for videos they’re watching. And eliminate the need for creators to add captions manually. The auto-generated captions appear above the video creator’s name on the For You Page. Captions will appear once you tap them.

3. Sticker Translation
This feature enables the translation of text stickers. Stickers are the text overlays you see while watching a video. With this feature, you can understand the text stickers that are using other languages.
These translation features facilitate communication across language barriers. Accessing content from around the world becomes easier. Regardless of one’s language or geographical location. You can go tothis link for more detailed information about auto-translate tools.
Part 3. How to Translate TikTok Videos into Any Language with AI Video Translator
TikTok’s auto-translation feature has a limited range of languages. They only allow auto-translation within captions. Wondershare Virbo offers a solution to enhance your experience beyond the platform’s features.TikTok video translator byW onder share Virbo is a tool that enables users to make their TikTok videos speak in different languages. By using this tool, you can also add subtitles to the videos.
Here is the step-by-step guide how to translate TikTok video using Virbo’s AI Video Translator tool:
- Step 1. Go to Wondershare Virbo official website and select Generate AI Video Online.

Get Started Online Free Download
- Step 2. Create an account or log-in

- Step 3. Once you land on the Virbo homepage, go to Video Translate

- Step 4. Upload the video you want to translate
In the Video Translator interface, upload the video file you want to translate. Then, select the original video language and the preferred target language. You can also activate the Lip Sync feature to ensure the accuracy of audio translation with the video’s lip movements.

- Step 5. Click “Translate this video” to start the translation process. Virbo AI will seamlessly translate the audio and synchronize it with the video. Depending on the video’s length and complexity, the process may take some time to complete.
Conclusion
In conclusion, using Virbo’s Translator tool totranslate TikTok videos has many benefits. It helps creators reach more people and engage with diverse audiences worldwide. As we look to the future of making content on TikTok, tools like Virbo’s Translator tool will be super necessary. They’ll help break down language barriers and make content accessible to everyone.
Also read:
- Updated 2024 Approved Demystifying AI Game Generators | Wondershare Virbo Glossary
- In 2024, How To Access and Watch Nonstop NBA Live Stream Free Online
- Top 7 Online Auto Subtitle Translators for Content Creators for 2024
- New Best 10 Free AI Video Generators with Innovative/Advanced Algorithms
- Updated In 2024, Top 10 Free AI Voice Generators to Use in Daily Life
- Updated In 2024, AI Video Translation
- 2024 Approved Create AI Avatar Videos | Wondershare Virbo Online
- Updated Best 5 Udemy Subtitle Translator (Auto Translation)
- 2024 Approved What Are AI Tools? | Wondershare Virbo Glossary
- New Top 8 Multi-Subtitles Translators You Can Use for 2024
- Updated In 2024, A Step-by-Step Guide on How to Promote YouTube Channel
- New In 2024, Top 10 AI Subtitle Translators for Content Creators That Anyone Can Use
- New In 2024, How To Generate Speech From Text | The Top Text-to-Speech Converters
- New 2024 Approved Level Up Your AI Streaming Game A Quick Guide and Tool Recommendation
- Facebook Live Shopping A Comprehensive Guide for 2024
- 2024 Approved What Is an AI Presentation Maker? | Wondershare Virbo Glossary
- Updated 2024 Approved Top 5 AI YouTube Shorts Generators to Create Diverse and Engaging Videos
- New In 2024, Translate Video From Japanese to English Online for Free
- New What Is an AI Editor for 2024
- Updated Easy Steps To Create Talking Memoji on iPhone Free for 2024
- Updated What Is AI Marketing? | Wondershare Virbo Glossary for 2024
- Updated In 2024, Generate Video with Talking Photo Feature
- 2024 Approved Exploring Key Components and Creation Process of AI Face Generators
- Updated What Is an AI Tool?
- New In 2024, Template | Wondershare Virbo
- New In 2024, What Is AI Voice Text to Speech? | Wondershare Virbo Glossary
- New 2024 Approved What Is an AI Video Maker? | Wondershare Virbo Glossary
- In 2024, Easily Unlock Your Oppo A78 5G Device SIM
- In 2024, How to Screen Mirroring Tecno Camon 20 to PC? | Dr.fone
- In 2024, How Do You Unlock your iPhone 14 Pro Max? Learn All 4 Methods
- In 2024, 3 Methods to Mirror Oppo K11 5G to Roku | Dr.fone
- In 2024, How to Bypass Google FRP Lock from OnePlus Open Devices
- How To Restore Missing Photos Files from Honor Magic V2.
- In 2024, How To Open Your Apple iPhone X Without a Home Button
- New Guide How To Check iCloud Activation Lock Status On Your Apple iPhone 11 Pro
- In 2024, How to Fake Snapchat Location without Jailbreak On Samsung Galaxy A15 4G | Dr.fone
- Easy steps to recover deleted call history from Galaxy S24 Ultra
- The Ultimate Guide to Unlocking Your iPhone 14 Plus on MetroPCS
- Where Is the Best Place to Catch Dratini On Gionee F3 Pro | Dr.fone
- In 2024, iPhone Is Disabled? Here Is The Way To Unlock Disabled iPhone 6 | Dr.fone
- How to Share Location in Messenger On Xiaomi 13T Pro? | Dr.fone
- How to Find iSpoofer Pro Activation Key On OnePlus 12? | Dr.fone
- In 2024, Does Life360 Notify When You Log Out On Apple iPhone 14 Pro? | Dr.fone
- 8 Workable Fixes to the SIM not provisioned MM#2 Error on Infinix GT 10 Pro | Dr.fone
- In 2024, How to use Snapchat Location Spoofer to Protect Your Privacy On Motorola Edge+ (2023)? | Dr.fone
- In 2024, How to Unlock iPhone 14 Pro, Apples New iPhone | Dr.fone
- How To Fake GPS On Honor V Purse For Mobile Legends? | Dr.fone
- Why Your Samsung Galaxy A05s Screen Might be Unresponsive and How to Fix It | Dr.fone
- Top 5 Ways to Fix Excel 2021 File Not Opening Error | Stellar
- Pokemon Go No GPS Signal? Heres Every Possible Solution On Poco M6 Pro 4G | Dr.fone
- How to recover deleted photos on Realme 11 Pro
- How to Track Realme V30 Location by Number | Dr.fone
- 3 Ways to Track Poco C65 without Them Knowing | Dr.fone
- In 2024, 9 Mind-Blowing Tricks to Hatch Eggs in Pokemon Go Without Walking On Samsung Galaxy A14 5G | Dr.fone
- Title: Updated 2024 Approved What Is AI Background Generator?
- Author: Sam
- Created at : 2024-05-19 03:35:15
- Updated at : 2024-05-20 03:35:15
- Link: https://ai-voice-clone.techidaily.com/updated-2024-approved-what-is-ai-background-generator/
- License: This work is licensed under CC BY-NC-SA 4.0.
