
:max_bytes(150000):strip_icc():format(webp)/GettyImages-971165690-1e0af1d9299f4fdba1225c2d20c739f2.jpg)
Updated 2024 Approved Diverse Template
Diverse Template
Template
Virbo’s template feature collects a wide range of ready-made and exquisite video templates for users to choose from, eliminating the hassle of creating videos from scratch. With just a few simple clicks, you can easily create a sophisticated video that guarantees your satisfaction.
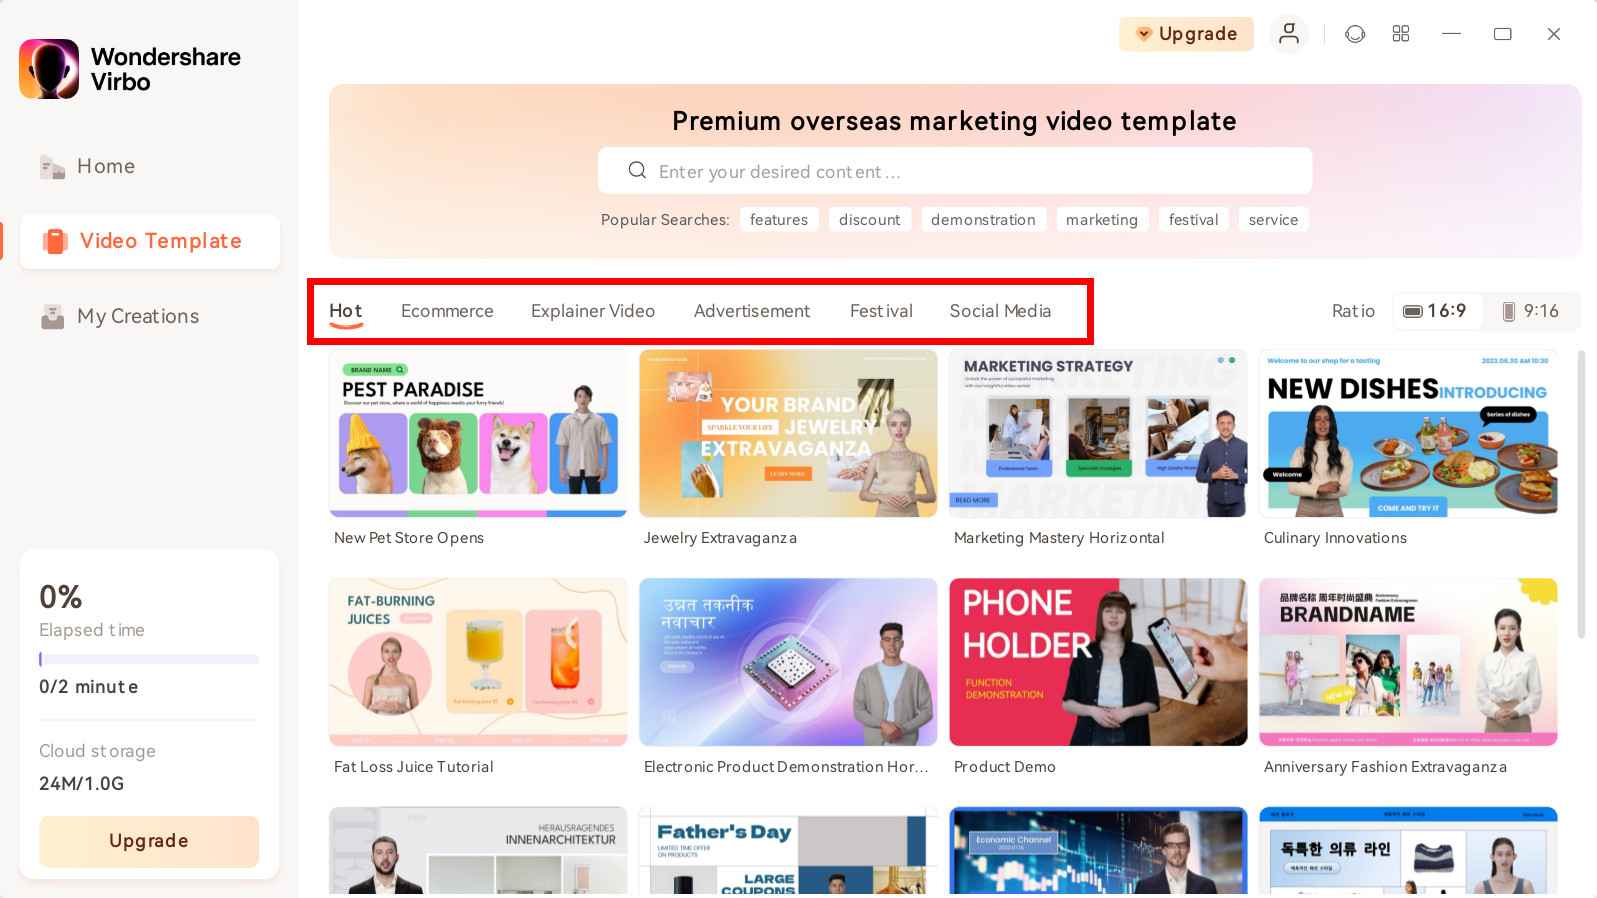
Step 1. Choose Template
On the main interface of Virbo, you can click on the “Video Template” tab to switch to the template display area. Above the templates, there are six categorized sections: Hot, Ecommerce, Explainer Video, Advertisement, Festival, and Social Media.
Choose Template
There is also a ratio selection switch beside it, where you can choose your preferred video aspect ratio.

Choose Aspect Ratio
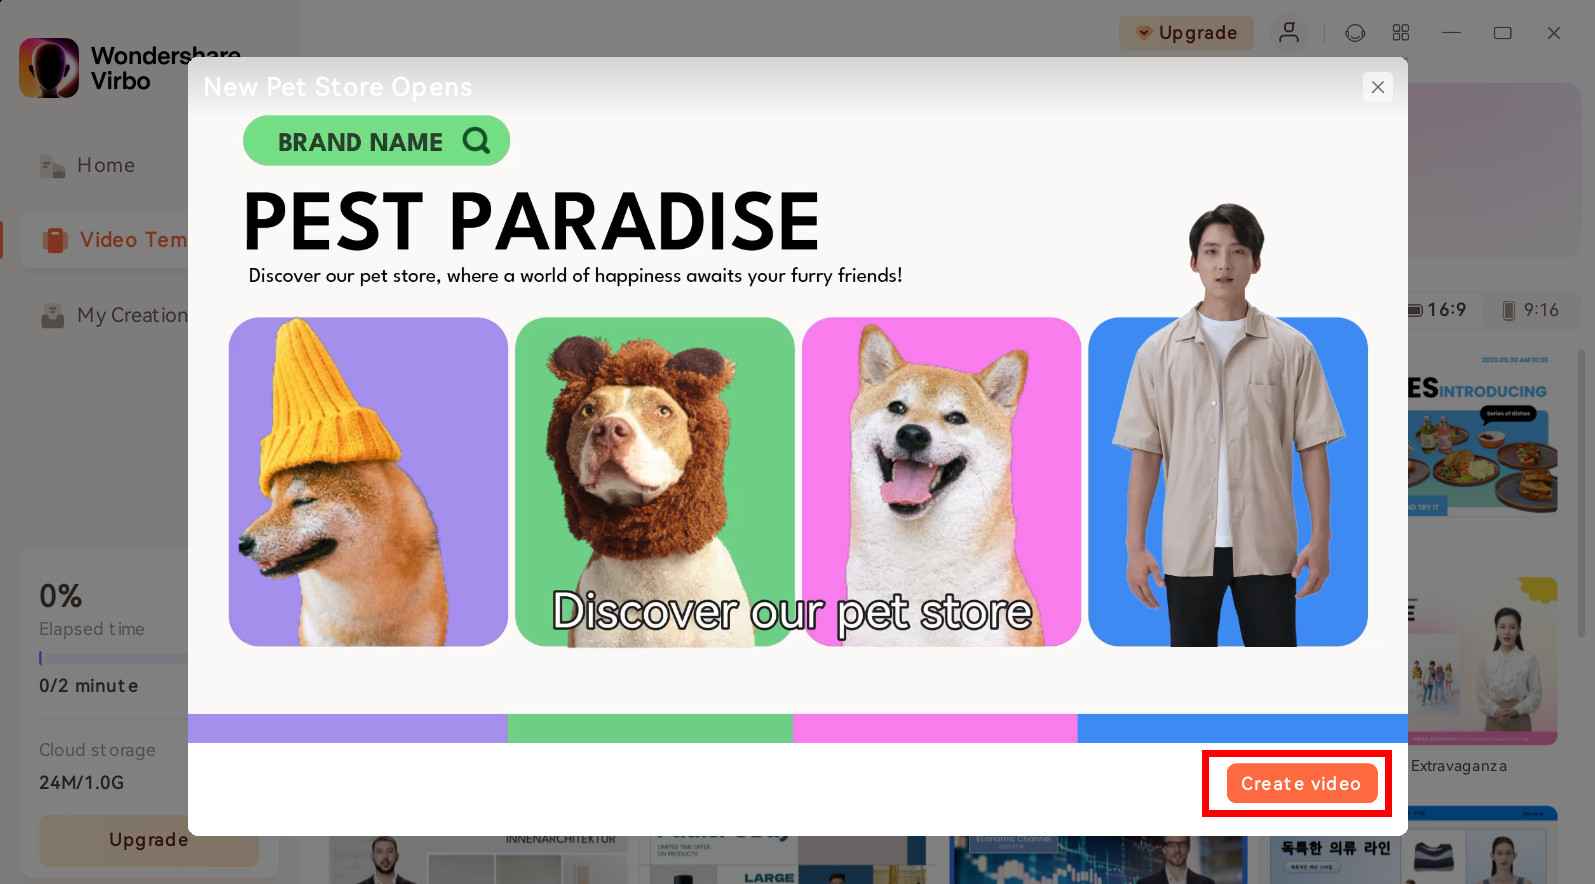
Step 2. Create Video
After selecting your preferred template, click and preview it. Then, in the bottom right corner, click the “Create Video” button to proceed to the editing interface.
Create Video
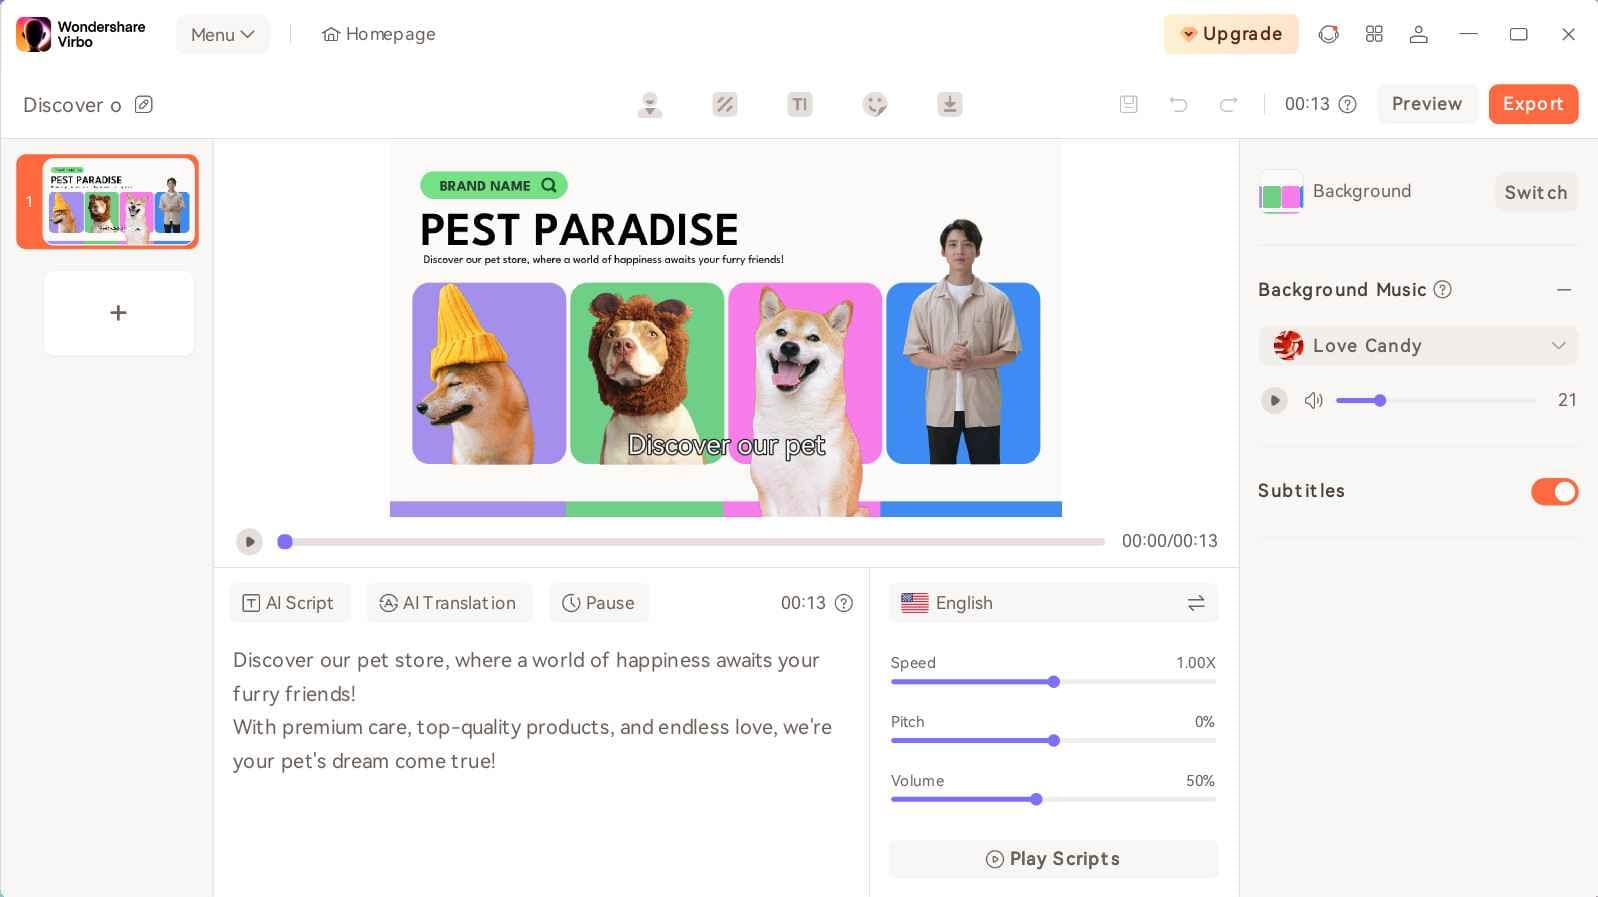
Step 3. Edit Video
In the editing interface, you can enter the script text and adjust elements like voiceover and avatar. You can also change the background and add stickers, among other options.
Edit Video
FAQs about Diverse Templates
1Are These Avatars Based On Real Humans?
Yes, these avatars are all based on video footage using real actors.
2Can the Generated Videos with Digital Presenter Be Used for Commercial Purposes?
For free users, videos are not allowed to be used for commercial purpose. For subscribed users, all materials provided in the software are commercially available, and the produced videos containing digital humans are also available for commercial use. Subscribe now>
3Can I Control Avatars’ Gestures or Expressions?
For personalized avatars on Virbo, you can enjoy the liberty to craft gestures and expressions to your liking. Click now to explore Virbo’s Customization Service!
Step 1. Choose Template
On the main interface of Virbo, you can click on the “Video Template” tab to switch to the template display area. Above the templates, there are six categorized sections: Hot, Ecommerce, Explainer Video, Advertisement, Festival, and Social Media.
Choose Template
There is also a ratio selection switch beside it, where you can choose your preferred video aspect ratio.
Choose Aspect Ratio
Step 2. Create Video
After selecting your preferred template, click and preview it. Then, in the bottom right corner, click the “Create Video” button to proceed to the editing interface.
Create Video
Step 3. Edit Video
In the editing interface, you can enter the script text and adjust elements like voiceover and avatar. You can also change the background and add stickers, among other options.
Edit Video
FAQs about Diverse Templates
1Are These Avatars Based On Real Humans?
Yes, these avatars are all based on video footage using real actors.
2Can the Generated Videos with Digital Presenter Be Used for Commercial Purposes?
For free users, videos are not allowed to be used for commercial purpose. For subscribed users, all materials provided in the software are commercially available, and the produced videos containing digital humans are also available for commercial use. Subscribe now>
3Can I Control Avatars’ Gestures or Expressions?
For personalized avatars on Virbo, you can enjoy the liberty to craft gestures and expressions to your liking. Click now to explore Virbo’s Customization Service!
The Best Tools to Convert Text to MP3 With the Best Natural Voices
Text to MP3 voice makers can convert your text into speech in an MP3 format. The benefits of such tools can enhance your productivity and work efficiency. As a language enthusiast, you can listen to the generated speech in MP3 format. Moreover, MP3 file formats are compatible with all media players and codecs.
Thus, you can listen to the generated MP3 voice on any device comfortably. In this article, we will guide you on how toconvert text into MP3 through professional TTS converters. Therefore, continue reading this article to learn about the best MP3 voice makers and their key features.
Part 1: How a Text to MP3 Voice Maker Can Help You in Your Daily Routine Tasks
Text to MP3 voice makers can make your daily tasks quicker and more efficient. This section will highlight some of the major advantages of usinga text-to-speech generator MP3 .
1. Entertainment and Gaming Industries
In the entertainment industry, creators may need to add voiceovers to their movies. This can help them reach an international audience easily. Moreover, game lovers also love to add their commentary in the form of narration. Such tasks can only be done through reliable MP3 voice makers supporting different languages and voices.
2. Enhances Productivity
Do you want to read your audiobooks or e-magazines while doing house chores? Well, you can use MP3 TTS converters to read the textual content from your e-newspapers and audiobooks in the perfect voice. Thus, it can improve your work productivity and efficiency to a greater extent.
3. Acts as an Assistant
Text-to-speech generator MP3 can also be integrated with assistive technology to help you in various cases. For example, MP3 TTS converters can help in the form of screen readers and voice assistants to execute tasks. They can also be embedded with communication devices to help tourists navigate and travel.
4. Language Training
Are you a language enthusiast? Language learning can be crucial if you want to excel in the correct pronunciation of words in many languages. Using an MP3 TTS converter, you can listen to the native pronunciation of difficult words in a compatible MP3 file format. By repeatedly listening to the generated MP3 file, you can practice the desired language easily.
5. Helps Visually Disabled
There are some unfortunate groups of people who cannot access textual information due to their disabilities. However, with MP3 TTS converters, they can convert text into speech to absorb the information easily. In this way, they can access digital content in the form of a natural human voice without challenges.
Part 2: The Best 5 Tools to Convert Text to MP3 With the Highest Accuracy
Have you ever tried MP3 TTS converters? This section will discuss the top 5 tools that can convert text to MP3 with accuracy and reliability.
1. Virbo
Virbo is a unique TTS converter offering more than 120 languages and AI voices. You can easily launch this tool on the Web, Windows, iOS, and Android devices. To convert text into MP3, Virbo offers many options for customization. You can select the gender and an AI voice of your desired attire. There are many accents of different languages which you can choose preferably.
Moreover, you would find multiple speaking tones like commercial, lively, natural, and many more on Virbo. The quality of the generated AI voices is professional and clear. It has a friendly interface that can help convert text to speech quickly. Thus, Virbo is an all-in-one tool that can meet all your needs to convert text into high-quality voices in MP3 format.

Get Started Online Free Download
Key Features
- To give your AI voice a virtual presenter, Virbo offers over 150 AI Avatars. The AI Avatars are present in appealing attires with perfect voices.
- The AI script generator of Virbo is integrated with ChatGPT to write your script easily. Through this feature, you can create flawless titles for your videos.
- Virbo can create videos in both portrait and landscape modes. Moreover, it can export video in up to 1080p quality.
Rating
- 85/5
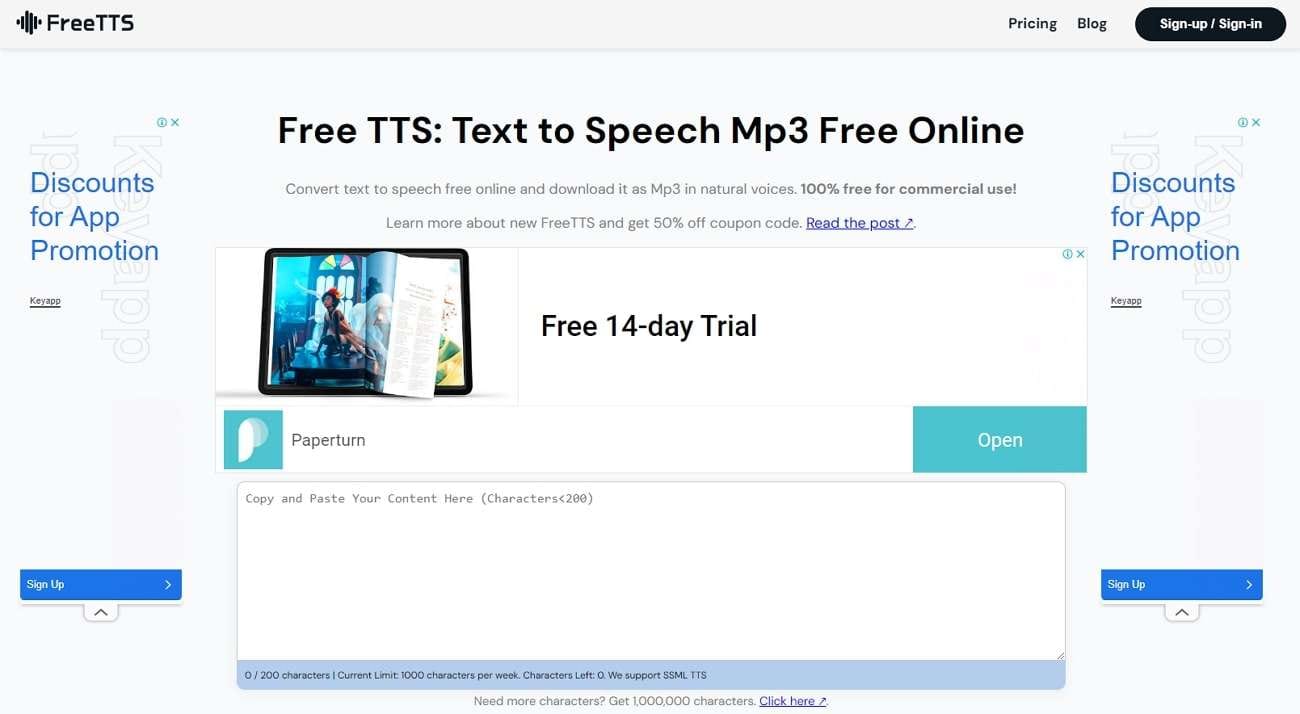
2. FreeTTS
FreeTTS is a basic tool that canconvert text to MP3 efficiently. You can use this tool for commercial purposes with high security. It supports over 50 languages to facilitate a global audience. It is a free-to-use text-to-MP3 converter and does not require registration. By buying its premium plans, you can get 5000 characters for each conversion.
Furthermore, it uses Google machine learning technology to generate speech from text accurately. On this tool, you can also get 24/7 customer support to consult about queries. Moreover, the premium plans support WaveNet, Neural2, and standard Google voices. Thus, you must explore FreeTTS to make MP3 voices for commercial purposes.
Key Features
- This tool has SSML support that can create customized voices. With this support, you can add pauses and emphasis to the generated voice.
- FreeTTS uses high security to protect your data. The servers of this tool automatically delete data after 24 hours.
- With SSML support, you can say the date, characters, time, and unit in a correct manner.
Rating
- 1/5
3. PlayHT
PlayHT is an advanced tool supporting more than 800 AI voices. This tool lets you get explainer, conversational, children, and narrative voices. You can also explore character voices that you can add in voiceovers and narrations of the movies. In its extensive library, you can discover more than 100 diverse languages. There are also multiple accents of some common languages according to the nationalities.
Furthermore, you can easily import your script into its text editor. By doing so, you can convert text into speech within a few clicks. Therefore, PlayHT is a renowned tool that can offer excellent results in creating AI voices in MP3.
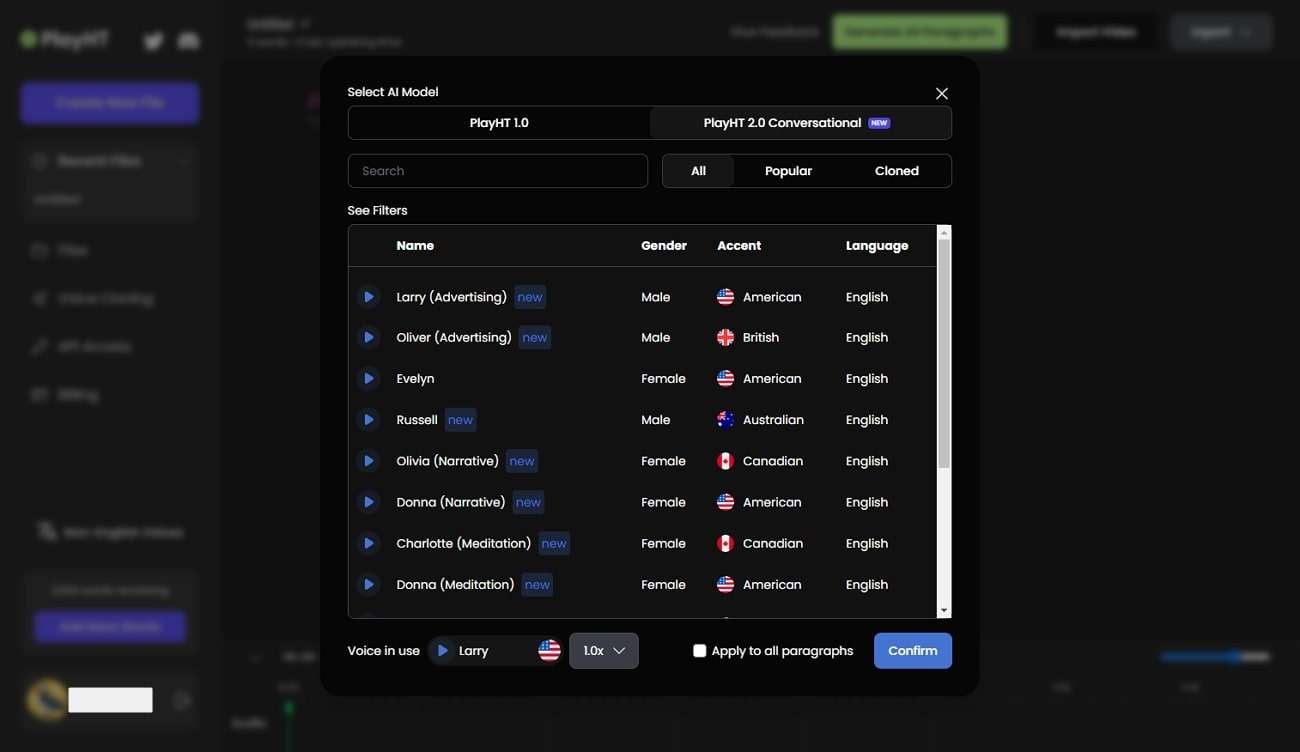
Key Features
- This tool supports multiple voices in the same MP3 file. Using this feature, you can create conversations between the characters easily.
- It offers custom pronunciations to help you in adding modifications. You can redefine the pronunciations of certain words through this feature.
- You can also alter voice inflections by changing the pitch, rate, and volume of the AI voices.
Rating
- 3/5
4. SpeechGen.io
SpeechGen.io is a powerful tool that can generate realistic voices from your textual script. You can find over 270 natural AI voices on this tool with accurate accents. The interface of this tool lets you test the AI voices for free. After listening to the voices, you can select your favorite AI voice from the provided options.
Furthermore, you can set the output settings of the AI voice according to your desire. You can modify speed, pitch, volume, stress, and intonation on this tool. Thus, it gives you complete freedom to create a customized voice in MP3 file format. Along with supporting MP3 file format, it also shows compatibility with WAV and OGG.
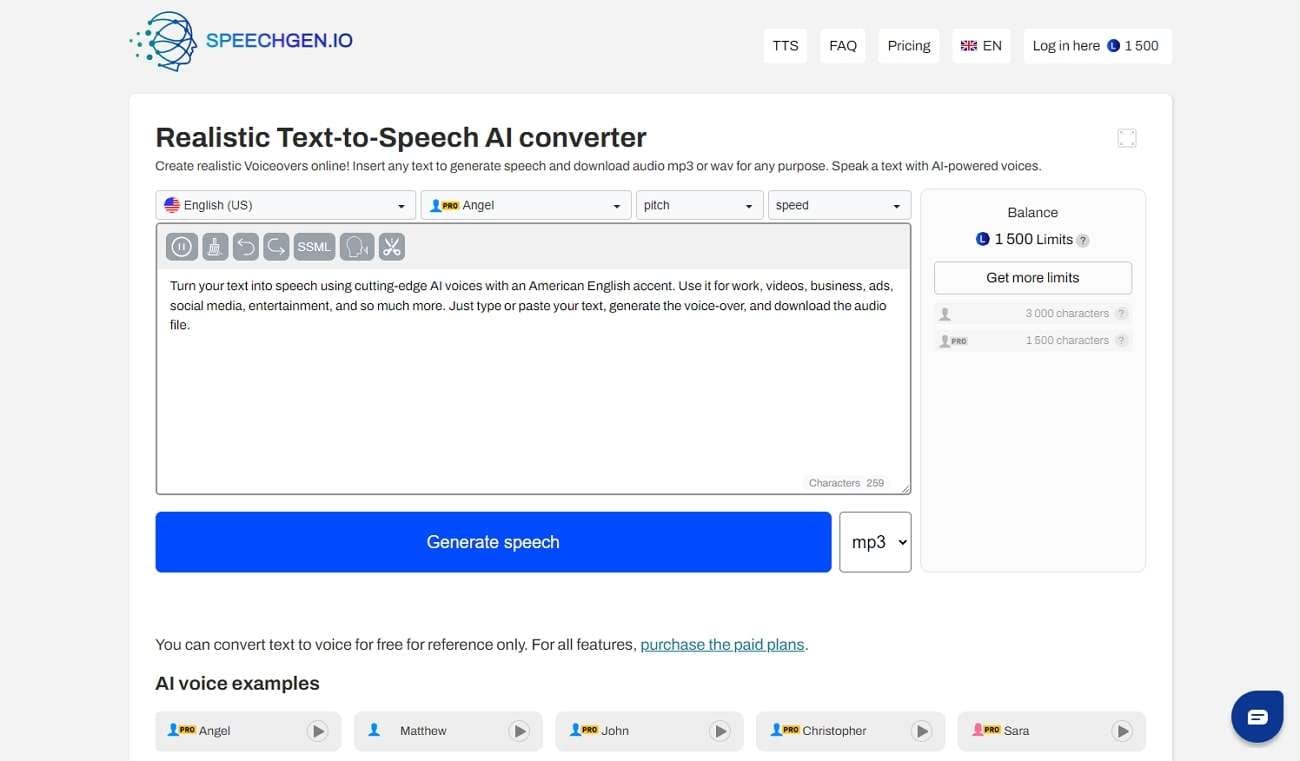
Key Features
- Thistext-to-speech generator MP3 shows support for all the famous editing software. The supported editing programs are Audacity, Adobe, DaVinci Resolve, Apple Motion, iMovie, etc.
- You can share your MP3 audio file with your colleagues with a link. By tapping on the link, your friends can listen to the AI voice easily.
- The cloud server of this tool saves the history of your AI voices and scripts in a secure manner. You can also create a “Favorite” folder to keep all your AI voices intact.
Rating
- 5/5
5. Voicemaker
Voicemaker is a famous online platform that canconvert text into MP3 with high audio quality. It contains various effects that let you add human emotions to your AI voice. From the audio settings, you can also determine the volume, pitch, and sample rate of your AI. Furthermore, it supports more than 1000 AI voices that you can explore in its library.
The supported languages are more than 130 to offer you diversity. To find your desired AI voice, you can conduct a search through country, language, and gender. Therefore, Voicemaker is a popular TTS converter as it can produce accurate AI voices from the given text.
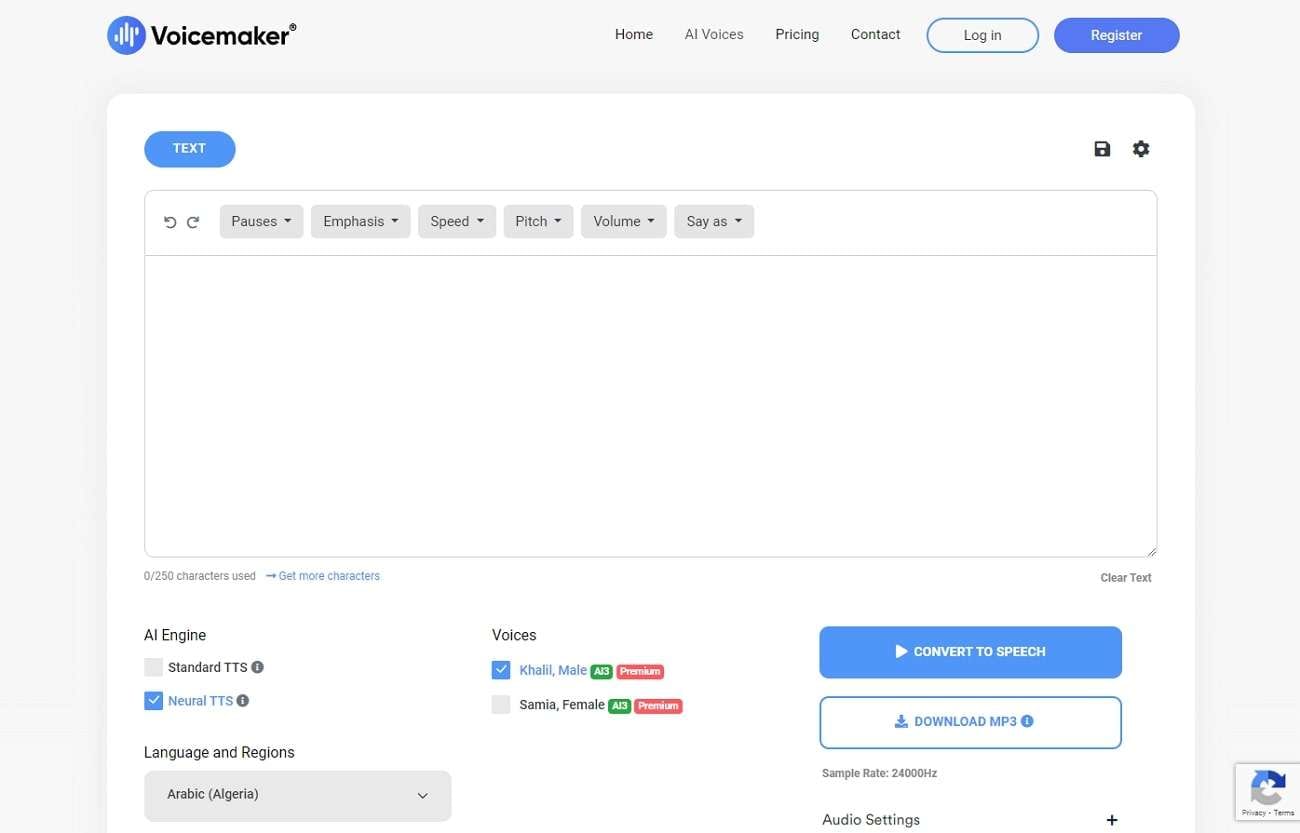
Key Features
- This tool has two AI engines: Standard and Neural. Both engines have different AI voices in various accents.
- The voice settings let you adjust the sliders of voice speed and volume accordingly. You can also reset the basic settings quickly.
- You can create voice profiles by buying premium subscriptions. Moreover, it offers cloud storage of up to 10GB in paid plans.
Rating
- 25/5
Conclusion
MP3 voice makers convert the textual content into an audible MP3 file format. These MP3 TTS converters can significantly benefit you in improving productivity, language learning, and making information accessible. Through this article, you came across the famous text-to-speech MP3 tools that can produce excellent results. Thus, you can read this guide to find the besttext-to-speech generator MP3 .
Launching Your Live Room
Launching Your Live Room
Explore step-by-step instructions on decorating your space, uploading local images and videos, adding engaging AI interactions, etc. Elevate your streaming experience and captivate your audience with a seamlessly executed live room. Dive into our comprehensive guide now!
02Uploading Local Images and Videos
07AI Intelligent Script Generation
11Starting/Ending the Live Broadcast
Decorating Your Live Room
Decoration Guidance
- Click on the product homepage and create a blank live room to initiate a new live session.

Create a blank live room
- Upon creating a blank live room, the live room editing page will open. The left side serves as the operation area, the right side as the canvas area, and the materials area is located above.

Livestream room navigation
- Click on the templates to use pre-designed combinations of background, virtual hosts, and stickers.

Select a template
- Customize the background from the background library. During the live broadcast, only one background can be used.

Livestream room customization
- Choose a virtual host from the virtual host library. Only one virtual host can be used during the live session.
![]()
Choose a virtual host
- Add stickers from the sticker library. Multiple stickers can be used during the live broadcast.
- After selecting materials, adjust their position and size in the canvas area. Right-click to modify layers, copy, or delete materials.
Uploading Local Images and Videos
Upload background images or videos
- Upload: Click Background -> Upload Background -> Select file to upload. Materials will be displayed in “My Background” after uploading.

Upload Background
- Apply: Click Background -> My Background, then click on the material to use it on the canvas.
- Delete: Hover over the material and click the delete icon to remove it.

Delete Background
Note
Background upload requirements:
- Image and video dimensions should be 9:16
- Image formats: JPG/JPEG/PNG
- Video formats: MP4/MOV
- Resolution should not exceed 1080P
- Video duration should not exceed 30 minutes
- File size should not exceed 1GB
Upload sticker images or videos
- Upload: Click Sticker -> Upload Sticker -> Select file to upload. Materials will be displayed in “My Sticker” after uploading.

Upload Sticker
- Apply: Click Sticker -> My Sticker, then click on the material to use it on the canvas.
- Delete: Click Sticker -> My Sticker, hover over the material, click the delete icon to remove it.

Delete Sticker
Note
Sticker upload requirements:
- Image and video dimensions are flexible.
- Image formats: JPG/JPEG/PNG
- Video formats: MP4/MOV
- Resolution should not exceed 1080P
- Video duration should not exceed 30 minutes
- File size should not exceed 1GB
Text-Driven Live Room
Script Guidance
- Input script text: Copy and paste your script into the script dialogue box.

Text Scripts Inset
- Choose a matching tone: Click the voice-over entrance above, select a suitable tone, and preview it.
- Preview: Click the “Preview” button below the text to listen.
Audio-Driven Live Room
Audio Guidance
- Upload audio: Click Script -> Audio -> Upload local voice and upload the local file.

Upload Audio
- Preview audio: After uploading, click to preview the audio.

Preview Audio
- Audio sorting: Hold and drag to sort the audio files.

Audio sorting
- Audio sorting: Hold and drag to sort the audio files.

Modifying Live Room Name
Method Guidance
- Method 1: Click the edit button in the upper-left corner of the edit page to rename the live room.

Rename Livestream Room
- Method 2: Product homepage -> My Live Rooms -> Click on the more options for an individual live room -> Choose Rename.
Adding AI Identification
Step Guidance
- On the live room editing page, click on the checkbox before the AI identification to enable or disable it.
AI Intelligent Script Generation
Generation Guidance
- Click the “AI Intelligent Script” button below the script, a popup will appear.
- Enter your product name (mandatory), selling points (optional), promotional information (optional), select language and style, then click generate.

AI Script
- The generated result can be further modified, click “Use” to add it to the script dialogue box.
AI Translation
Translation Guidance
- Click the “AI Translation” button below the script, a popup will appear.
- Place the text to be translated on the left, click the middle arrow to select the language for translation (e.g., English), and click translate.

AI Translation
- The generated result can be further modified, click “Use” to add it to the script dialogue box.

AI Translation Result
Manual Interaction
Microphone Interaction
- Operational Flow:
- Click Manual Interaction -> Microphone, and select the microphone device.
- Speak into the microphone and observe the sound wave status.
- Open “Start Live,” wait for the appearance of the virtual host image, and click “Open Mic Takeover.” The virtual host’s mouth will be closed, and your voice will drive the virtual host to speak.
- After speaking, click “End Takeover,” and the virtual host will resume reading the scripted dialogue.
- Click Manual Interaction -> Microphone, and select the microphone device.
- Grant Browser Microphone Access:
- Google Chrome:
*Open Chrome, click the settings icon in the top right.
* Click “Settings,” open the settings page. Select “Privacy and Security” and then click “Site Settings.”
*Enter the site settings page, click “Microphone.”
* On the microphone authorization page, select that the site can request the use of your microphone.
* After these settings, when the browser needs to use the camera or microphone, a device request box will pop up on the page. Select “Allow.” - Mozilla Firefox:
*Open Firefox, click the settings icon in the top right, and click “Settings.”
* Open the settings page, click “Privacy & Security,” and find “Microphone Permissions.” Click “Settings” next to “Microphone.”
*Enter the settings page, add the site that requests the use of your microphone to the list, and click “Save Changes.”
* After these settings, when the browser needs to use the camera or microphone, a device request box will pop up on the page. Select “Allow.” - Sogou Browser:
*Open Sogou Browser, click the settings icon in the top right, and click “Options.”
* Open the options page, click “Advanced,” find “Privacy - Browsers on the Mac System:
*Locate “System Preferences” on your Mac dock and click the icon. Once opened, find “Security & Privacy” and click to open.
* On the “Security & Privacy” page, select “Privacy,” then click on “Microphone” and set the applications that need to use the microphone to “Allow.”
- Google Chrome:
Text Interaction
- Click on “Artificial Interaction” and enter interaction scripts in the input box below.
- Click “Add Text” to add it to the interaction list. After starting the live broadcast, each interaction script will have a send button.

Text Interactionn
- Click “Send” to trigger the AI to speak according to the interaction script.
Intelligent Interaction
Note
The current intelligent interaction feature only supports Alibaba International. If you are streaming on other platforms, you can skip this step.
Setting Entrance
- On the live broadcast page, click on “Intelligent Interaction,” select the live platform, and the supported intelligent interaction features will be randomly displayed.
Q&A Library Settings
- Creating a New Q&A:
- On the product homepage, click on Q&A Library - Add Q&A, and a popup window will appear.
- Fill in the rule name, keywords, reply text, and upload a reply video. Click Save.
Note
Rule Name: Name the rule for easy identification.
Keywords: If a viewer’s question in the live room contains any of these keywords, it will trigger the AI to answer.
Reply Content: You can add up to 5 replies. Include variables like [Viewer’s Nickname] and [Viewer’s Country] for personalized responses.
Sequential Reply: Replies in sequence when triggered.
Random Reply: Randomly selects a reply when triggered.
Reply Video: If configured, the video will be displayed at the specified position until the AI’s reply ends.
- Adjusting Q&A Activation Status:
- Click Q&A Library - Switch to close or open the Q&A rule. When closed, the Q&A rule will not take effect after the live broadcast starts.
- Turning on Q&A Library Switch in the Live Room:
- On the live broadcast editing page, click Intelligent Interaction - Platform, select “Alibaba International,” and turn on the Q&A Library switch. This must be done after starting the live broadcast and capturing the barrage for the function to work.
Greeting Rules Settings
- Greeting Content: You can add up to 5 replies, including variables like [Viewer’s Nickname] and [Viewer’s Country].
- Sequential Reply: Replies in sequence when triggered.
- Random Reply: Randomly selects a reply when triggered.
- On the live broadcast editing page, click Intelligent Interaction - Platform, select “Alibaba International,” turn on the Greeting switch, and click the edit icon to open the editing window. Fill in the reply text and click Save.
Sending Business Cards and Product Catalogs
- On the live broadcast editing page, click Intelligent Interaction - Platform, select “Alibaba International,” turn on the “Send Business Cards” switch, and turn on the “Send Product Catalogs” switch.
Note
These functions will only take effect after starting the live broadcast and capturing the barrage.
How to Start Live Barrage Capture
- Start Broadcasting in Virbo Live
- Follow the steps for “Start/End Broadcast” on the live broadcast editing page.
- Install the Plugin in Chrome
- Ensure Chrome is up to date, then download the plugin from the provided link . After downloading, unzip locally.
- Configure the Plugin in Chrome
- Open Chrome, go to Settings - Extensions - Manage Extensions, enable Developer mode, click “Load Unpacked,” and select the unzipped folder. Enable “Allow in incognito mode” in the plugin details.
- Copy the Live Control Page Link
- Copy the link of your live control page (web version) from the live platform. Paste the link into the live broadcast editing page under Intelligent Interaction - Live Room Link Input, then click “Start Capturing.”
Note
Alibaba International currently supports automatic Q&A, automatic greetings, automatic business card sending, and automatic product catalog sending. You can turn on the corresponding switches and then configure the detailed settings for each item.
Starting/Ending the Live Broadcast
Starting the Live Broadcast
- On the live broadcast editing page, click “Start Broadcasting.”
- The AI live broadcast window will appear shortly after, displaying the AI live broadcast.
Using Your Broadcasting Partner or OBS
Note
Keep the AI live broadcast window open on the desktop during the broadcast, or it will not broadcast properly.
- Open your broadcasting partner or OBS, add a window, select the Wondershare VVB (Live Version) live window.
- Click “Start Broadcasting.” Use Alt + mouse to crop out the web bar or use the zoom function to remove it.
- During the live broadcast, you can only modify the “Artificial Interaction” function; other broadcast settings cannot be changed.
Ending the Broadcast
- When concluding the live broadcast, initiate the termination of the live stream on the platform’s broadcasting partner first, followed by clicking the “End Live” button on Virbo Live to finalize the shutdown process.
02Uploading Local Images and Videos
07AI Intelligent Script Generation
11Starting/Ending the Live Broadcast
Decorating Your Live Room
Decoration Guidance
- Click on the product homepage and create a blank live room to initiate a new live session.
Create a blank live room
- Upon creating a blank live room, the live room editing page will open. The left side serves as the operation area, the right side as the canvas area, and the materials area is located above.
Livestream room navigation
- Click on the templates to use pre-designed combinations of background, virtual hosts, and stickers.
Select a template
- Customize the background from the background library. During the live broadcast, only one background can be used.
Livestream room customization
- Choose a virtual host from the virtual host library. Only one virtual host can be used during the live session.
![]()
Choose a virtual host
- Add stickers from the sticker library. Multiple stickers can be used during the live broadcast.
- After selecting materials, adjust their position and size in the canvas area. Right-click to modify layers, copy, or delete materials.
Uploading Local Images and Videos
Upload background images or videos
- Upload: Click Background -> Upload Background -> Select file to upload. Materials will be displayed in “My Background” after uploading.
Upload Background
- Apply: Click Background -> My Background, then click on the material to use it on the canvas.
- Delete: Hover over the material and click the delete icon to remove it.
Delete Background
Note
Background upload requirements:
- Image and video dimensions should be 9:16
- Image formats: JPG/JPEG/PNG
- Video formats: MP4/MOV
- Resolution should not exceed 1080P
- Video duration should not exceed 30 minutes
- File size should not exceed 1GB
Upload sticker images or videos
- Upload: Click Sticker -> Upload Sticker -> Select file to upload. Materials will be displayed in “My Sticker” after uploading.
Upload Sticker
- Apply: Click Sticker -> My Sticker, then click on the material to use it on the canvas.
- Delete: Click Sticker -> My Sticker, hover over the material, click the delete icon to remove it.
Delete Sticker
Note
Sticker upload requirements:
- Image and video dimensions are flexible.
- Image formats: JPG/JPEG/PNG
- Video formats: MP4/MOV
- Resolution should not exceed 1080P
- Video duration should not exceed 30 minutes
- File size should not exceed 1GB
Text-Driven Live Room
Script Guidance
- Input script text: Copy and paste your script into the script dialogue box.
Text Scripts Inset
- Choose a matching tone: Click the voice-over entrance above, select a suitable tone, and preview it.
- Preview: Click the “Preview” button below the text to listen.
Audio-Driven Live Room
Audio Guidance
- Upload audio: Click Script -> Audio -> Upload local voice and upload the local file.
Upload Audio
- Preview audio: After uploading, click to preview the audio.
Preview Audio
- Audio sorting: Hold and drag to sort the audio files.
Audio sorting
- Audio sorting: Hold and drag to sort the audio files.
Modifying Live Room Name
Method Guidance
- Method 1: Click the edit button in the upper-left corner of the edit page to rename the live room.
Rename Livestream Room
- Method 2: Product homepage -> My Live Rooms -> Click on the more options for an individual live room -> Choose Rename.
Adding AI Identification
Step Guidance
- On the live room editing page, click on the checkbox before the AI identification to enable or disable it.
AI Intelligent Script Generation
Generation Guidance
- Click the “AI Intelligent Script” button below the script, a popup will appear.
- Enter your product name (mandatory), selling points (optional), promotional information (optional), select language and style, then click generate.
AI Script
- The generated result can be further modified, click “Use” to add it to the script dialogue box.
AI Translation
Translation Guidance
- Click the “AI Translation” button below the script, a popup will appear.
- Place the text to be translated on the left, click the middle arrow to select the language for translation (e.g., English), and click translate.
AI Translation
- The generated result can be further modified, click “Use” to add it to the script dialogue box.
AI Translation Result
Manual Interaction
Microphone Interaction
- Operational Flow:
- Click Manual Interaction -> Microphone, and select the microphone device.
- Speak into the microphone and observe the sound wave status.
- Open “Start Live,” wait for the appearance of the virtual host image, and click “Open Mic Takeover.” The virtual host’s mouth will be closed, and your voice will drive the virtual host to speak.
- After speaking, click “End Takeover,” and the virtual host will resume reading the scripted dialogue.
- Click Manual Interaction -> Microphone, and select the microphone device.
- Grant Browser Microphone Access:
- Google Chrome:
*Open Chrome, click the settings icon in the top right.
* Click “Settings,” open the settings page. Select “Privacy and Security” and then click “Site Settings.”
*Enter the site settings page, click “Microphone.”
* On the microphone authorization page, select that the site can request the use of your microphone.
* After these settings, when the browser needs to use the camera or microphone, a device request box will pop up on the page. Select “Allow.” - Mozilla Firefox:
*Open Firefox, click the settings icon in the top right, and click “Settings.”
* Open the settings page, click “Privacy & Security,” and find “Microphone Permissions.” Click “Settings” next to “Microphone.”
*Enter the settings page, add the site that requests the use of your microphone to the list, and click “Save Changes.”
* After these settings, when the browser needs to use the camera or microphone, a device request box will pop up on the page. Select “Allow.” - Sogou Browser:
*Open Sogou Browser, click the settings icon in the top right, and click “Options.”
* Open the options page, click “Advanced,” find “Privacy - Browsers on the Mac System:
*Locate “System Preferences” on your Mac dock and click the icon. Once opened, find “Security & Privacy” and click to open.
* On the “Security & Privacy” page, select “Privacy,” then click on “Microphone” and set the applications that need to use the microphone to “Allow.”
- Google Chrome:
Text Interaction
- Click on “Artificial Interaction” and enter interaction scripts in the input box below.
- Click “Add Text” to add it to the interaction list. After starting the live broadcast, each interaction script will have a send button.
Text Interactionn
- Click “Send” to trigger the AI to speak according to the interaction script.
Intelligent Interaction
Note
The current intelligent interaction feature only supports Alibaba International. If you are streaming on other platforms, you can skip this step.
Setting Entrance
- On the live broadcast page, click on “Intelligent Interaction,” select the live platform, and the supported intelligent interaction features will be randomly displayed.
Q&A Library Settings
- Creating a New Q&A:
- On the product homepage, click on Q&A Library - Add Q&A, and a popup window will appear.
- Fill in the rule name, keywords, reply text, and upload a reply video. Click Save.
Note
Rule Name: Name the rule for easy identification.
Keywords: If a viewer’s question in the live room contains any of these keywords, it will trigger the AI to answer.
Reply Content: You can add up to 5 replies. Include variables like [Viewer’s Nickname] and [Viewer’s Country] for personalized responses.
Sequential Reply: Replies in sequence when triggered.
Random Reply: Randomly selects a reply when triggered.
Reply Video: If configured, the video will be displayed at the specified position until the AI’s reply ends.
- Adjusting Q&A Activation Status:
- Click Q&A Library - Switch to close or open the Q&A rule. When closed, the Q&A rule will not take effect after the live broadcast starts.
- Turning on Q&A Library Switch in the Live Room:
- On the live broadcast editing page, click Intelligent Interaction - Platform, select “Alibaba International,” and turn on the Q&A Library switch. This must be done after starting the live broadcast and capturing the barrage for the function to work.
Greeting Rules Settings
- Greeting Content: You can add up to 5 replies, including variables like [Viewer’s Nickname] and [Viewer’s Country].
- Sequential Reply: Replies in sequence when triggered.
- Random Reply: Randomly selects a reply when triggered.
- On the live broadcast editing page, click Intelligent Interaction - Platform, select “Alibaba International,” turn on the Greeting switch, and click the edit icon to open the editing window. Fill in the reply text and click Save.
Sending Business Cards and Product Catalogs
- On the live broadcast editing page, click Intelligent Interaction - Platform, select “Alibaba International,” turn on the “Send Business Cards” switch, and turn on the “Send Product Catalogs” switch.
Note
These functions will only take effect after starting the live broadcast and capturing the barrage.
How to Start Live Barrage Capture
- Start Broadcasting in Virbo Live
- Follow the steps for “Start/End Broadcast” on the live broadcast editing page.
- Install the Plugin in Chrome
- Ensure Chrome is up to date, then download the plugin from the provided link . After downloading, unzip locally.
- Configure the Plugin in Chrome
- Open Chrome, go to Settings - Extensions - Manage Extensions, enable Developer mode, click “Load Unpacked,” and select the unzipped folder. Enable “Allow in incognito mode” in the plugin details.
- Copy the Live Control Page Link
- Copy the link of your live control page (web version) from the live platform. Paste the link into the live broadcast editing page under Intelligent Interaction - Live Room Link Input, then click “Start Capturing.”
Note
Alibaba International currently supports automatic Q&A, automatic greetings, automatic business card sending, and automatic product catalog sending. You can turn on the corresponding switches and then configure the detailed settings for each item.
Starting/Ending the Live Broadcast
Starting the Live Broadcast
- On the live broadcast editing page, click “Start Broadcasting.”
- The AI live broadcast window will appear shortly after, displaying the AI live broadcast.
Using Your Broadcasting Partner or OBS
Note
Keep the AI live broadcast window open on the desktop during the broadcast, or it will not broadcast properly.
- Open your broadcasting partner or OBS, add a window, select the Wondershare VVB (Live Version) live window.
- Click “Start Broadcasting.” Use Alt + mouse to crop out the web bar or use the zoom function to remove it.
- During the live broadcast, you can only modify the “Artificial Interaction” function; other broadcast settings cannot be changed.
Ending the Broadcast
- When concluding the live broadcast, initiate the termination of the live stream on the platform’s broadcasting partner first, followed by clicking the “End Live” button on Virbo Live to finalize the shutdown process.
How To Perform a Successful Streaming on Twitch
Live streaming has become a regular source of enjoyment for many people in recent years, especially on a platform like Twitch. In the first quarter of 2023 alone, Twitch users watchedover 5.3 billion hours of video.
If you’re a content creator, you should definitely consider leveraging this power of Twitch video streaming, as it tends to have higher levels of engagement compared to pre-recorded content. But with so many Twitch streamers out there, standing out from the crowd can be challenging.
If you’re new to the scene, we can help you start your Twitch streaming journey off right with the right gear and some useful tips.

Part 1: Essential Preparations Before Beginning Your Twitch Streaming Journey
Whether you’re playing games, hosting events, or just chatting, streaming on Twitch is an exciting and rewarding way to engage with your audience in real-time. But to do well on Twitch, you need to prepare properly so your viewers can enjoy watching your content.
To start streaming on Twitch, here’s what you’ll need:
Twitch Streaming Software
First, you need to download streaming software for your Twitch video streaming. OBS Studio is the popular one, but Twitch has released its Twitch Studio, which is more beginner-friendly.
- OBS Studio
OBS Studio is a free streaming software that works on any device. You can use it to make your Twitch streams live more attractive by adding alerts, creating starting screens, and using different audio and video sources.
- Twitch Studio
Twitch Studio is the official free streaming application developed to simplify the streaming process for new streamers on Twitch. It offers an intuitive interface and pre-made scenes designed to streamline the user experience.
Streaming equipment
- A device to stream from
To kickstart your Twitch streaming journey, the first step you need to take is selecting the device from which you’ll broadcast. You can use your desktop, mobile phone, or gaming console. Your choice will depend on your existing equipment and the nature of your intended content.
If you plan to make gaming content for your Twitch Live, we recommend using a PC with these specifications:
- CPU
When streaming and gaming, it’s crucial to have a powerful CPU to minimize lagging. The number of cores in a CPU determines its processing power, ranging from dual to eight cores. Some good options to consider are the AMD Ryzen 9 5900X, Intel i9 – 12900K, or the more budget-friendly Intel Core i5-12400.
- GPU or graphic cards
Nvidia RTX graphics cards come equipped with built-in hardware encoders, which can lighten the CPU’s workload when used with OBS Studio. Alternatively, you can consider the Radeon RX 570 and the GeForce GTX 1660 Ti for quality GPU options.
- Microphone
Although you might get by using a gaming headset’s built-in microphone for a bit, it’s better to invest in a standalone mic from the start. Some top microphone options for Twitch streaming include the Elgato Wave:3, HyperX QuadCast S, Audio-Technica AT2020, Razer Seiren Mini, and Blue Yeti X.
- Webcam
If your Twitch stream content involves showcasing your reactions or facial expressions, investing in a camera is a wise choice. Webcams are convenient as they can easily connect to your computer or laptop.
You can consider some popular webcam choices like the Logitech HD Pro C920, Logitech StreamCam, Logitech BRIO, Microsoft LifeCam HD-3000, and Razer Kiyo.

Understanding Twitch Streaming Rules
Aside from preparing your streaming gear, you must also understand Twitch streaming rules to avoid any potential violations that could result in penalties or even suspension of your account. Twitch’s community guidelines cover a wide range of topics, including harassment, hate speech, copyright infringement, and mature content. You can read the full Twitch streaming ruleshere .
Part 2: Comprehensive Guide To Stream Live on PC, Mac, or Smartphone on Twitch
Once you’ve gathered all the necessary equipment, you can proceed with the following steps to start your Twitch stream.
How to stream Twitch live on PC or Mac
Step 1: Download and installTwitch Studio on your PC or Mac. Then, launch Twitch Studio and log in to your Twitch account. You’ll receive a prompt to connect your microphone and webcam.
Step 2: Use Twitch Studio to customize your Twitch stream with different scenes and settings. Experiment with these features to find what works best for your livestream.

Step 3: When you’re ready to start broadcasting, click “Start Stream” at the bottom of the Twitch Studio. Then, select your stream category and enter your live stream title. Hit “Go Live” to begin streaming.

How to stream Twitch live on a smartphone
Starting Twitch streaming from your smartphone is a bit different, as the app primarily allows broadcasting from your device’s camera. Here’s how to live stream on Twitch from your smartphone:
Step 1: Download and install theTwitch App .
Step 2: Log in to the Twitch app. Then, go to your profile and tap “Go Live.” If you are using newer version of the Twitch app, you can tap “Create.”

You’ll then have two options: “Stream Games” or “Stream IRL.” The “Stream IRL” will allow you to live stream on Twitch using your phone’s camera, while the first option lets you stream mobile games.

Step 3: Grant access to your camera and/or microphone before starting your stream.
Step 4: Set up the stream and Go Live. Give your stream a name, choose a content category, and select the camera you want to use.
Once you’ve completed these steps, press the “Start Stream” button, and you’ll be live on Twitch.
Key elements of success for streaming on Twitch
While the process for starting Twitch streaming may be similar for all streamers, what makes a streamer successful? Based on reports, there are a few key elements of success for streaming on Twitch.
- Engaging content
Successful Twitch streamers captivate their audience with compelling content that resonates with viewers. This could include entertaining gameplay, informative discussions, or engaging activities. If people like your stream, they might subscribe or donate their money.
- Make use of the interactive features
Twitch stream labs offer unique features like chat rooms and special emojis, fostering interaction between streamers and viewers. Streamers actively engaging with their audience tend to cultivate a loyal and enthusiastic community.
- Consistency and persistence
This is often the toughest part. On Twitch, consistency is crucial. Successful streamers usually maintain regular schedules to make sure their audience knows when to expect new content. If you are new, continuous live streaming can be an effective strategy to engage with your audience consistently and increase your channel’s visibility.
Part 3: Best AI-Powered Tool for You To Set Up a 24/7 Live Stream on Twitch
If you want to make your Twitch channel stand out and automate the live streaming process, you can use Wondershare Virbo Live. With this tool, you can set up a 24/7 live stream on Twitch without needing to be present all the time.
Additionally, the Virbo live stream feature seamlessly integrates with major live-streaming platforms supported by OBS. You can also use it on numerous other platforms, such as TikTok Live, 1688 Live Platform, Alibaba International, Kwai, and more.
How to live stream 24/7 on Twitch with Wondershare Virbo Live
To live stream 24/7 on Twitch with Virbo, you will first need to prepare your AI avatar on Virbo Live to broadcast continuously on Twitch. Once you have customized your avatar, you can obtain the streaming key from Twitch. This key will enable OBS to connect with Twitch’s streaming platform.
Follow the detailed steps on how to live stream 24/7 on Twitch:
Step 1: Access Wondershare Virbo Live and create a live streaming room.
Go toWondershare Virbo Live and select “Create Stream Room Now” > “Create a Blank Live Stream Room” to initiate the setup process.

Step 2: Write your content script or upload audio recordings.
Within the Virbo Live interface, you can either compose the script for your live stream or upload pre-recorded audio content by selecting “Upload local file.”

Pro Tip: You can use Virbo’s AI Script Writer for inspiration. Click on “AI Smart Script” and provide topic details, language preferences, and stylistic choices. Click “Generate” to create a script. Then, you can refine it as needed.
Step 3: Customize your AI avatar and background.
Navigate to “AI Avatars” to select an avatar for your live stream. Additionally, you can customize the background, incorporate stickers, or use available templates.

Step 4: Start the live stream.
Once your AI avatar and background are set, click “Start Livestream” to commence broadcasting. The next step should be acquiring the Twitch streaming key to put into the OBS.

Once everything is ready, click “Start Streaming” in OBS Studio, and your stream will broadcast on Twitch.
Conclusion
With billions of hours of video watched and many content creators vying for attention, streaming on Twitch can be exciting and challenging. However, by following the essential preparations outlined in this guide, you’ll be able to kickstart your Twitch live stream ahead of others.
You can use Wondershare Virbo Live to make an automated streaming experience 24/7. This helps you maintain a consistent presence on the platform even when you’re not around.
A Basic Guidebook To Live Selling in Today’s Digital World
The spread of the internet has changed consumer purchasing habits in recent years. Now, social media platforms are the growing digital marketplaces for products. The COVID-19 pandemic accelerated the trend of online shopping, and people now prefer buying online. This digital shopping mode eliminates the struggle to leave physical spaces in their busy routines.
The same goes for the marketing field, which has revolutionized with live sales. Venders prefer to sell items online to generate the greatest sales without physical systems. If that interests you, get more insights onlivestream selling through this article.

Part 1. A Basic Preview To “Live Shopping”
Livestream selling or live shopping refers to live product demonstrations on digital platforms. The retailer or host has to introduce themselves, their store, and sale before describing products. They explain each detail of the products and their prices while holding them in a direct video call. During that, ensure that followers can see the product and interact through comments.
Customers perceive it as a lively shopping experience instead of websites loading products. It creates a sense of connection as people feel like shopping in physical stores. Aslive selling has a core element of being in real time, people can question and know about the product. Compared with traditional shopping, one can place an order through links mentioned in the livestream.

Is It Beneficial To Sell Live in This Digital Industry?
Live selling is an emerging way to attract customers to shop on online marketplaces. According toresearch , 76% of US adults prefer shopping online for clothes and groceries. It focuses on customers’ desire to know about products that generate sales. Thus, it proves beneficial in many terms, among which a few are elaborated below:
1. Engaging and Updating Communication
Businesses can directly engage with a broader audience by entering the live selling industry. They get knowledge about current product trends to introduce similar things. Besides, this method eliminates the need to target customers in-store or via e-mails. Now, businesses can market their product and live sales simultaneously.
2. Reduced Return Rates and Customer Satisfaction
Before live selling, people need to search for what they want by visiting the official sites of brands. Also, they scroll to read honest product reviews for the validity of products. With live selling, customers can view the products and ask questions during the live sessions. Therefore, it lowers the return rates to 40% while increasing customer satisfaction and trust.
3. Potential Growth and Virtual Demonstrations
This online shopping mode has the potential to upscale your business. According to a survey, companies can see top-line growth upward of 25% through live selling. Apart from upscaling, they can see their digital competitors and define new ways to stand out. Sellers can compete by providing discount coupons and virtual demonstrations of products.
Part 2. What’s the Core Elements of a Live Video
Selling products via online videos is a marketing technique that is rapidly growing. Already, 80% of marketers confess that livestream shopping is integral to boosting sales online. If you are going tosell live as a seller, you should read this part for some insights. Here, you will learn the core elements of a live video to make your sale successful:
1. Livestream Selling Platform
To expand the product’s reach, it is essential to carefully select anonline live selling platform. It could be a native live shopping platform, social media, or merchant website. As Gen Z and millennials are more attracted to live streaming, social media platforms would be ideal hosts. Many brands are integrating social media with e-commerce to cut the need for two separate apps.
2. Real-Time Session With Host
Upon choosing a suitable platform, a live video session is arranged. For that purpose, you need a host who should seem trustworthy and relatable to the product. There could be more than one person in the live sale to demonstrate products and share tips and benefits. Besides, the host needs to interact with the customers and share thoughts about the product.
3. Points of Product or Video Content
The main object of live selling is to sell products, but the best way is to create hype. In this regard, brands offer special discounts and giveaways valid only during live streams. It increases the tendency of customers to make purchases during the live sessions. The live session must be 20-30 minutes and include click-on links for easy buying.
Significant Statistics To Support Increasing Influence of Live Selling
The concept of livestream sales emerged decades ago but gained aspotlight in 2016 in China. Afterward, it flourished worldwide and grew to 171 billion USD in 2020. An estimation of the US livestream shopping market reveals worth $35 billion by 2024.Live selling is evolving not only in the US but also in other regions of the globe.
| Live Streaming Sales in Regions | |
|---|---|
| China | 4.9 trillion yuan in 2023 |
| The United States | $17 billion in 2023 |
| Europe | Influenced 50% more than physical or online Purchasing |
| Livestream shopping Platforms (US 2022) | |
| Facebook Live | 55% |
| YouTube Live | 52% |
| 46% | |
| Amazon Live | 30% |
Part 3. Live Selling Strategies To Boost Revenue
Anyone canlive sale online because you have to explain products and respond to queries. Yet not everyone generates the same revenue and gets immense popularity. The reason is operative strategies and tips, which you can use in the below discussion to gear up your shopping stream.
1. Use 24/7 Hours Seamless AI Live Streaming Software
Most sellers are unaware of current digital trends and the right actions for live selling. In that context, you need a platform to provide everything from script to selling videos. However, usingWondershare Virbo Live and staying in a single place is suggested to plan and execute the live shopping. Virbo Live is an AI tool that connects sellers with customers through streaming videos.
- AI Avatar: Wondershare Virbo Live offers an AI avatar feature for start-ups and small business owners. It eliminates the need for a well-groomed host or managing crew. AI avatars can perfectly mimic your actions with natural movements to engage the audience.
- Q&A Library: The platform allows the creation of automatic responses with a personalized library of questions. The major advantage of having such an option is that it helps users connect better with the audience.
- Text Interaction: The quality of content can be easily manipulated and managed across Wondershare Virbo Live. You can provide text to trigger your AI streamer to speak within the live stream.
Compatibility with Platforms: YouTube, LinkedIn, Facebook, Instagram, TikTok, Twitch, Alibaba, and X(Twitter).
Get Started Online Free Download
Steps To Create a Complete Livestream Room With Wondershare Virbo Live
Wondershare Virbo Live is available online and offers a cloud-based service. To fully utilize this live selling strategy, follow these steps and explore this all-in-one tool:
- Step 1. Access the Main Interface of Virbo Live
Start the process on Wondershare Virbo Live by clicking the “Create Stream Room Now” button. You need to select the “Create a Blank Livestream Room” button to initiate the livestream room creation.

Get Started Online Free Download
- Step 2. Customize the Live Stream Video in Virbo Live
Once you find yourselves in the editing section, add a script you want to use in your live-stream video. While staying in the “Script lines” section, you can add a script in the form of text or audio. If you wish to add an audio script, go to the “Audio” tab and select “Upload local voice.” This voice will then be used across the live stream video in Virbo Live.

- Step 3. Set Avatar and Other Elements Before Starting Livestreaming
Following this, you can add your required avatars, background, and stickers to the video with the options at the top of the window. Finally, when you are done exploring, hit the “Start livestream” option and live sell on any of the supported platforms.

2. Pick an Appropriate Date and Time
Another tip to consider is choosing the right time and date for the maximum viewers. In this regard, retailers should avoid a popular shopping period such as Black Friday. In contrast, it is suggested to pick weekends or holidays where customers must be free to join. Also, never choose the working hours of any day and consider the time zones for a global audience.
3. Keep the Conversation Engaging and Funny
Customers can read the product details and see how it looks, so what difference will they get from a live sale? Considering this perspective, sellers should bring something unique to the shopping stream. For this purpose, they can explain the product’s benefits and use cases. Furthermore, they should keep their tone friendly and humorous for the targeted audience.
Conclusion
To summarize,livestream sale s is an emerging concept to boost revenue and sales. As shown in this article, it is fruitful for retailers and significantly contributes to generating sales. Like China’s ever-changing live selling industry, Wondershare Virbo Live is also an emerging tool. It is emerging to change virtual selling dynamics by providing seamless live-stream videos.
Common Platforms for Live Streaming | Virbo AI Live Stream
Common Platforms for Live Streaming
Maximize your reach with Virbo AI Live Stream on popular live streaming platforms. Uncover the common platforms compatible with our technology!
03TikTok
05Kwai
Alibaba International
Operational Steps
- Prepare Equipment, Network, and Browser
- Install Virtual Sound Card
- Due to audio restrictions on Alibaba International, a virtual sound card is required. If your computer’s sound device has a “stereo mix,” it can be used as an alternative. Check the path: My Computer - Properties - Sound - Sound Control Panel - Recording.
- Set Up “Stereo Mix”
- Skip this step if using a virtual sound card.
- Click My Computer - Properties - Sound - Sound Control Panel - Recording, activate stereo sound effects, and set it as default.
- Click Properties - Listen, select your speaker device, and click OK.
- Confirm the settings by playing a video on your computer. If both speakers and the microphone show sound detection, the setup is successful.
- Download and Install OBS
- As Alibaba International has restrictions on webcams, OBS is needed as a virtual camera (future Virbo Live product features will support this).
- After installation, go to Settings - Video and change the resolution to “1080x1920.” Select the “+” sign - Window Capture, and add the window of the Live Explosion (Live Version).
- Crop the URL bar by holding Ctrl + left-click. Click “Start Virtual Camera.”
- Prepare Materials
- Initiate the Live Stream
- Start Live Streaming on Alibaba Seller’s Live Companion
- Log in to Alibaba Seller, open the live stream, and the Alibaba Live Companion window will pop up.
- Choose “Free Mode,” add the camera, select Logitech c930e, and display it to cover the entire screen.
- Set the microphone to stereo mix or virtual sound card, click OK, and confirm the microphone has fluctuations.
- After adding products, click “Start Live” or “Start Reception.”
1688 Live Platform
Operational Steps
- Prepare Equipment, Network, and Browser
- Prepare Materials
- Initiate the Live Stream
- Start Live Streaming on 1688 Live Companion
- Log in to the 1688 Live Companion client, click the material management “+” sign - Window, select the digital person live window, and click OK.
- Zoom in the window to remove the URL bar. Click “Start Streaming,” and the live stream has started.
TikTok
Operational Steps
- Keep your equipment, network, and browser ready
- Please check the Device/Network/Browser Requirements for a detailed guide.
- Initiate the Live Stream
*Download and open the TikTok Live Studio and tap the “add source” icon (+) at the left of the screen.

Login
* Select Virbo LIVE browser (chrome.exe) from the menu. Once you select Virbo LIVE successfully, you’ll be able to see a preview of your video feed.
Adjust source
* In this part, drag and manipulate the controls to adjust the screen, ensuring a perfect showcase.
Adjust screen
- When you’re ready, tap “Go LIVE” to begin streaming.
Note
If your screen shows “ Tiktok Live studio access, it will soon be available.” Stay tuned for updates. This condition means that you still need to meet the requirements for Tiktok Live.
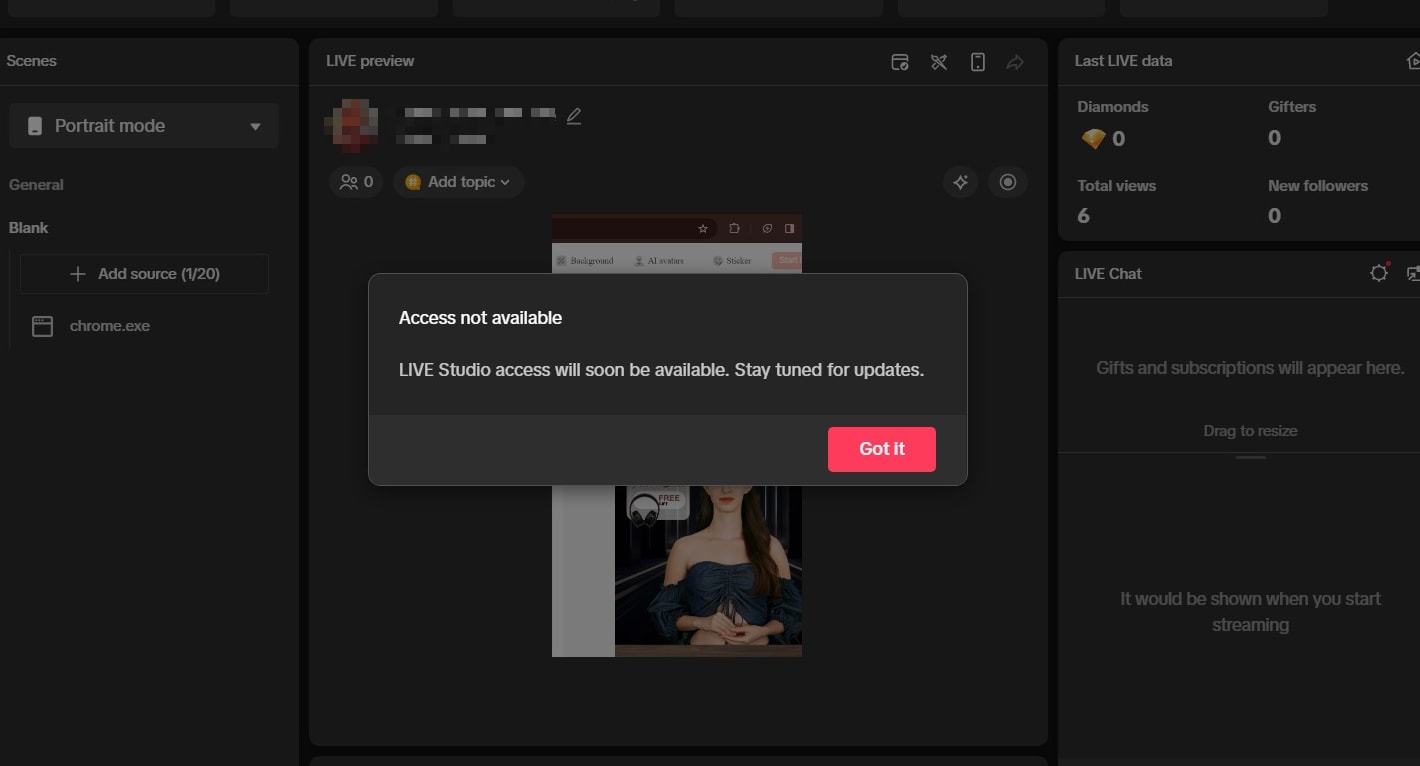
No access
TikTok Live Requirements: 1k followers, 25 min streamed in the last 180 days, and no bans. For details, please click here to get the TikTok Live studio guidelines
WeChat Video
Operational Steps
- Prepare Equipment, Network, and Browser
- Prepare Materials
- Initiate the Live Stream
- Start Live Streaming on WeChat Video Live Companion
- Log in to the WeChat Video Live Companion client, click the material management “+” sign - Window, select the digital person live window, and click OK.
- Alt + mouse or zoom the window to remove the URL bar. Click “Start Live,” and the live stream has started.
Kwai
Operational Steps
- Prepare Equipment, Network, and Browser
- Prepare Materials
- Initiate the Live Stream
- Start Live Streaming on Kuaishou Live Companion
- Log in to the Kuaishou Live Companion client, click the material management “+” sign - Window, select the digital person live window, and click OK.
- Alt + mouse or zoom the window to remove the URL bar. Click “Start Live,” and the live stream has started.
03TikTok
05Kwai
Alibaba International
Operational Steps
- Prepare Equipment, Network, and Browser
- Install Virtual Sound Card
- Due to audio restrictions on Alibaba International, a virtual sound card is required. If your computer’s sound device has a “stereo mix,” it can be used as an alternative. Check the path: My Computer - Properties - Sound - Sound Control Panel - Recording.
- Set Up “Stereo Mix”
- Skip this step if using a virtual sound card.
- Click My Computer - Properties - Sound - Sound Control Panel - Recording, activate stereo sound effects, and set it as default.
- Click Properties - Listen, select your speaker device, and click OK.
- Confirm the settings by playing a video on your computer. If both speakers and the microphone show sound detection, the setup is successful.
- Download and Install OBS
- As Alibaba International has restrictions on webcams, OBS is needed as a virtual camera (future Virbo Live product features will support this).
- After installation, go to Settings - Video and change the resolution to “1080x1920.” Select the “+” sign - Window Capture, and add the window of the Live Explosion (Live Version).
- Crop the URL bar by holding Ctrl + left-click. Click “Start Virtual Camera.”
- Prepare Materials
- Initiate the Live Stream
- Start Live Streaming on Alibaba Seller’s Live Companion
- Log in to Alibaba Seller, open the live stream, and the Alibaba Live Companion window will pop up.
- Choose “Free Mode,” add the camera, select Logitech c930e, and display it to cover the entire screen.
- Set the microphone to stereo mix or virtual sound card, click OK, and confirm the microphone has fluctuations.
- After adding products, click “Start Live” or “Start Reception.”
1688 Live Platform
Operational Steps
- Prepare Equipment, Network, and Browser
- Prepare Materials
- Initiate the Live Stream
- Start Live Streaming on 1688 Live Companion
- Log in to the 1688 Live Companion client, click the material management “+” sign - Window, select the digital person live window, and click OK.
- Zoom in the window to remove the URL bar. Click “Start Streaming,” and the live stream has started.
TikTok
Operational Steps
- Keep your equipment, network, and browser ready
- Please check the Device/Network/Browser Requirements for a detailed guide.
- Initiate the Live Stream
*Download and open the TikTok Live Studio and tap the “add source” icon (+) at the left of the screen.
Login
* Select Virbo LIVE browser (chrome.exe) from the menu. Once you select Virbo LIVE successfully, you’ll be able to see a preview of your video feed.
Adjust source
* In this part, drag and manipulate the controls to adjust the screen, ensuring a perfect showcase.
Adjust screen
- When you’re ready, tap “Go LIVE” to begin streaming.
Note
If your screen shows “ Tiktok Live studio access, it will soon be available.” Stay tuned for updates. This condition means that you still need to meet the requirements for Tiktok Live.
No access
TikTok Live Requirements: 1k followers, 25 min streamed in the last 180 days, and no bans. For details, please click here to get the TikTok Live studio guidelines
WeChat Video
Operational Steps
- Prepare Equipment, Network, and Browser
- Prepare Materials
- Initiate the Live Stream
- Start Live Streaming on WeChat Video Live Companion
- Log in to the WeChat Video Live Companion client, click the material management “+” sign - Window, select the digital person live window, and click OK.
- Alt + mouse or zoom the window to remove the URL bar. Click “Start Live,” and the live stream has started.
Kwai
Operational Steps
- Prepare Equipment, Network, and Browser
- Prepare Materials
- Initiate the Live Stream
- Start Live Streaming on Kuaishou Live Companion
- Log in to the Kuaishou Live Companion client, click the material management “+” sign - Window, select the digital person live window, and click OK.
- Alt + mouse or zoom the window to remove the URL bar. Click “Start Live,” and the live stream has started.
What Is AI Voice? | Wondershare Virbo Glossary
Part 1: What exactly is AI voice?
AI voice is an advanced application of AI language technology that utilizes artificial intelligence algorithms to generate or manipulate human-like voices. Powered by machine learning algorithms and deep neural networks, AI voice systems excel in replicating and modifying agents with remarkable precision and an uncanny sense of naturalness.
The application of AI voice is extensive, and one of the latest applications is providing voiceover for AI-generated videos. Wondershare Virbo is a powerful AI video maker that utilizes advanced AI algorithms to enhance your scripts and allows you to select ideal characters from a pool of 150+ digital personas. Furthermore, it offers a library of 120+ AI voices for voiceover, enabling you to quickly generate various marketing, educational, social media, and news videos.
Part 2: What are the advantages of using AI voices?
Flexibility and Customization
AI voice changing and cloning allows users to modify their voices to suit specific needs, experiment with different accents or styles, and create unique character voices.
Time and Resource Savings
AI voiceover services automate the process of narrating videos and audio content, eliminating the need for hiring voice actors and reducing production time and costs.
Cost-Effectiveness
Free AI voice generators provide a budget-friendly option for individuals and small businesses to access high-quality voice synthesis without investing in expensive recording equipment or professional voice talent.
Get Started Online Free Download
Part 3: What are AI voices used for?
Entertainment Industry
AI voices are extensively used in the entertainment industry for various purposes, such as dubbing, creating character voices in animated films, enhancing gaming experiences, and enabling AI voice changing and voice cloning capabilities.
Advertising and Marketing
AI voices significantly create impactful commercials, radio ads, and promotional videos. With AI voiceover technology, brands can deliver their messages consistently and engagingly, capturing the attention of their target audience.
E-learning and Language Learning
AI voices are highly beneficial in e-learning platforms, offering narration for instructional videos, audiobooks, and language-learning materials. These AI voices provide learners with consistent pronunciation, enabling them to improve their listening skills and grasp foreign languages more effectively.
Virtual Assistants
AI voices power virtual assistants like Siri, Alexa, and Google Assistant, enhancing their capabilities to deliver natural and conversational responses. Integrating AI voice technology makes interactions with virtual assistants more human-like and intuitive, creating a seamless user experience.
Also read:
- Updated In 2024, Best 10 Chinese Video to English Translators
- New Introduction for 2024
- New A Guide on Starting Private Live Streams on YouTube for 2024
- Updated How to Make Explainer Videos—Step by Step Guide
- What Is AI Voice, In 2024
- 2024 Approved Tips for Perfecting Your Talking Face Content A Complete Guide
- Updated 2024 Approved Best Video Translator App for PC Cannot Miss
- New Cloning Voices With Hugging Face An In-Depth Review
- 2024 Approved Maximize Your User Engagement With Instagram Live Shopping Expert Tips
- In 2024, Get To Know OpenAIs Sora and How To Use It
- 2024 Approved What Is AI Text to Video? | Wondershare Virbo Glossary
- 2024 Approved Make Your Pictures Speak Online With the Best Tools Recommended
- New 2024 Approved 5 Smart Tips About YouTube Shorts to Grow Your Business
- Updated 2024 Approved Create AI Avatar Video | Online
- In 2024, What Is AI API?
- Updated What Is an AI Headshot Generator, In 2024
- Updated Create An AI Avatar Video
- In 2024, Boost Sales with Live Shopping Learn Winning Strategies From Top Brands
- Best 5 Viral Video Marketing Techniques For Big Sellers for 2024
- New Everything You Want To Know About Kapwing Video Translation for 2024
- 2024 Approved What Is an AI Editor? | Wondershare Virbo Glossary
- New 2024 Approved Best 7 Photo Talking AI
- Updated In 2024, An Exhaustive List of Lip Sync Apps for Vibrant Video Creation
- How to share/fake gps on Uber for Apple iPhone SE | Dr.fone
- What Is a SIM Network Unlock PIN? Get Your Oppo A1x 5G Phone Network-Ready
- In 2024, Mastering Android Device Manager The Ultimate Guide to Unlocking Your Xiaomi Device
- Why Is My Motorola Moto G14 Offline? Troubleshooting Guide | Dr.fone
- 8 Safe and Effective Methods to Unlock Your Apple iPhone 13 Pro Max Without a Passcode | Dr.fone
- In 2024, How to Transfer Data from Honor 100 to Other Android Devices? | Dr.fone
- In 2024, Three Ways to Sim Unlock Asus ROG Phone 8 Pro
- In 2024, Does find my friends work on Apple iPhone XS | Dr.fone
- Apple iPhone X Backup Password Never Set But Still Asking? Heres the Fix | Dr.fone
- Ultimate guide to get the meltan box pokemon go For Vivo Y78+ (T1) Edition | Dr.fone
- Undelete lost messages from Google Pixel Fold
- 8 Quick Fixes Unfortunately, Snapchat has Stopped on Xiaomi Redmi Note 12 Pro 5G | Dr.fone
- A Quick Guide to Samsung Galaxy M14 4G FRP Bypass Instantly
- Additional Tips About Sinnoh Stone For Lava Yuva 2 | Dr.fone
- Title: Updated 2024 Approved Diverse Template
- Author: Sam
- Created at : 2024-05-19 03:35:07
- Updated at : 2024-05-20 03:35:07
- Link: https://ai-voice-clone.techidaily.com/updated-2024-approved-diverse-template/
- License: This work is licensed under CC BY-NC-SA 4.0.
