Updated 2024 Approved 7 Best Explainer Video Makers You May Like
7 Best Explainer Video Makers You May Like
An explainer video is a short video of a few minutes in which a company can represent its product. The main purpose of making explanatory videos is to boost the company’s sales. Because in explainer video production it must be kept in mind that the company’s product is completely explained and some awareness will also be created among the people about your brand. Other purposes may include providing education, improving SEO, etc. In this article, I am going to tell you the importance of making an explainer video along with the names of some explainer video creators. So, let’s dive into it.
Part 1: The Importance of Making Explainer Videos
The importance of making explainer videos in today’s digital world can be described in the following points:
1. Engage and connect with the audience
Explainer video contains images, animations, and stories which help in grabbing the attention of the users so that one can engagingly convey his information. This can bring a positive impact on your brand. It also helps in the educational process, educator uses explanatory videos to grab the attention of the students so that they can able to understand and learn more and more.
2. Increase brand awareness and reach
With the help of these explanatory videos, one can create awareness about his brand among the public and also increase its reach by sharing these videos on different video-sharing platforms as well as on a website. With multi-platform accessibility and search engine visibility, these videos position your logo as an industry authority, whilst regular branding and compelling calls to motion foster a deeper connection, ultimately changing visitors into unswerving clients and advocates.
3. Boost conversion rates and sales
By showcasing your products through these explanatory videos, one can easily increase conversion rates as well as sales also because these types of videos are usually created in a way that they can answer the particular question which is in the mind of the public and embedded on the landing pages. Explanatory videos increase logo attention and reach by simplifying complex messages, enticing viewers with visuals and emotions, and inspiring social sharing.
4. Enhance website SEO and visibility
An explanatory video is always beneficial for your website because by embedding explainer videos on a website one can enhance his website’s SEO and later bring organic traffic also it can help in reducing bounce rate, making the website look more appealing, enhancing user experience and also grabbing their attention.
5. Stand out in a competitive market
It is very much important to represent your product in a unique attention-grabbing way to generate sales in today’s fast-paced digital world because you have many competitors and you have to win the race. So, after not any compromise on quality and quantity as well you should have to advertise your brand in such a way that it becomes unique in front of everyone.
Part 2: 7 Best Explainer Video Makers
There are many explainer video creators in marketing we are going to discuss 7 best explainer video makers among them.
1. Wideo
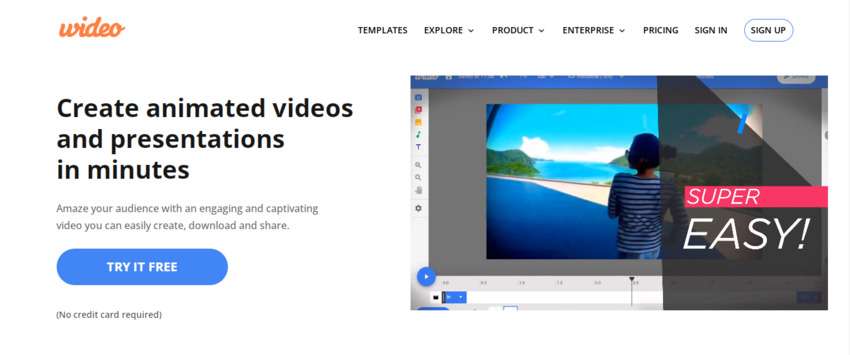
Wideo is an amazing web-based platform for creating animated videos. It helps users in creating 2d or 3d explainer videos without any technical skills or prior experience. Just like other products it also has its good and Cons which are as follows:
Pros
- It is user-friendly. Anyone can use it.
- It offers a wide range of graphics, templates ad animations. By using all these you can grab the attention of the users easily.
- Wideo is cloud-based which allows different users to work on the same project at a time. This is very helpful for team working as well as remote working.
- As it is a web-based platform so you do not have to download any heavy software and apps as well.
Cons
- Wideo is only suitable for basic projects not for complex projects.
- Although Wideo is also available in the free version some of its advanced features have subscription fees.
- As it is a web-based platform that’s why it requires a stable internet connection.
- Wideo allows you to add audio to your content but there are some restrictions like you do not adjust the volume according to your choice etc.
2. Powtoon

Powtoon is also a web-based platform for creating videos. It is too much user friendly so that anybody can use it effectively. It also helps in creating lectures and explainer videos.
Pros
- Powtoon has different pre-designed templates specifically for explainer videos which helps in creating eye-catching videos. You can also customize templates easily.
- You can easily share the designed video to your social media accounts or website etc.
- It allows you to add transition effects your videos.
- Moreover, you can add your voiceovers or other sound effects to your video.
Cons
- As it is also a web-based platform so it is also dependent on the Internet. Failure in internet connection may cause problems for you.
- It also has sharing limitation as per your subscription plans.
- Powtoon is not designed to create professional animations.
3. Moovly
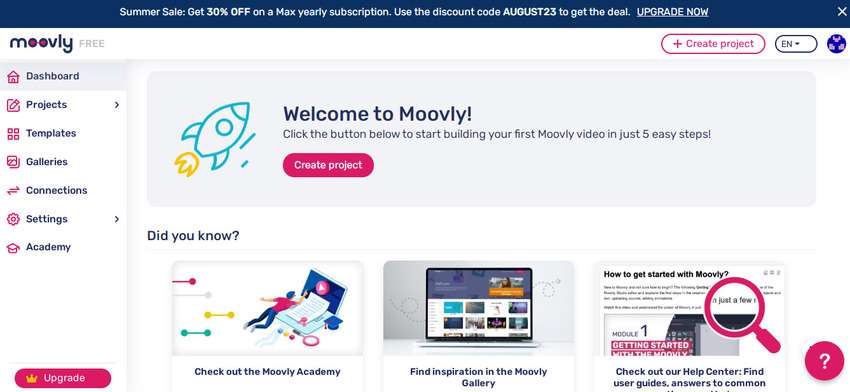
Moovly is an online video creation platform through which one can easily create explainer videos because it provides a variety of templates, images as well as audio clips. It is good to use in small businesses as well as for educational purposes. Some of its pros and cons are as under:
Pros
- Moovly offers an easy-to-use interface for beginners.
- It has over one million libraries of stock images, templates as well as audio files.
- You can also add audio and do voiceovers.
- It also allows users to export videos in HD quality.
- Moreover, it is affordable to begin with creating explainer videos.
Cons
- Advanced features are only available in premium plans.
- You may also experience bad customer response.
- You may find bugs.
- It focuses on 2d animation and has limitations in 3d animation.
4. Vyond
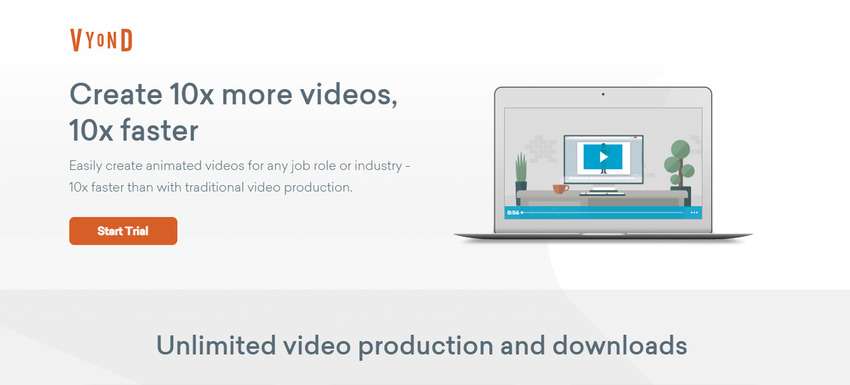
Vyond is another cloud-based software for video creation. It not just only helps in creating 2d and 3d animated videos but also creates whiteboard explainer videos. It is a good choice for freelancers and also for educators because it helps too much in creating engaging content.
Pros
- Vyond has huge assets of templates, images, etc.
- It has integrated with different software like google drive etc.
- The platform has made sharing explainer videos easy.
- It also has good customer support.
Cons
- Vyond is undoubtedly an expensive tool to try.
- It has some restrictions on freemium version for 3D animations.
- It also has some restrictions when we customize templates by our choice.
- You may face some bugs and errors while dealing with longer videos.
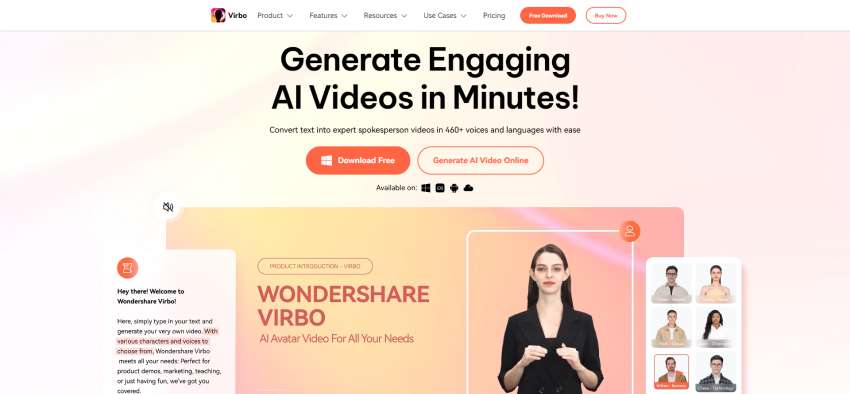
5. Virbo
Virbo is developed by Wondershare. It is an Ai video creation platform where you can easily create high-quality videos with less or sometimes with no editing. So, say goodbye to old editing software that takes lots of time name of editing because it’s time to say hello to Virbo as it creates engaging videos for you with the help of AI. Virbo mainly needs a stable internet connection, a 4 GB RAM, a 20 GB of storage.
Get Started Online Free Download
Compatibility
Virbo is compatible a with wide range of devices which includes:
- Desktop computes
- Web Browsers
Key Features
Here are some key features of Virbo by Wondershare
- Virbo supports diversified operating systems, due to which you can use its single premium account on multiple platforms without issues.
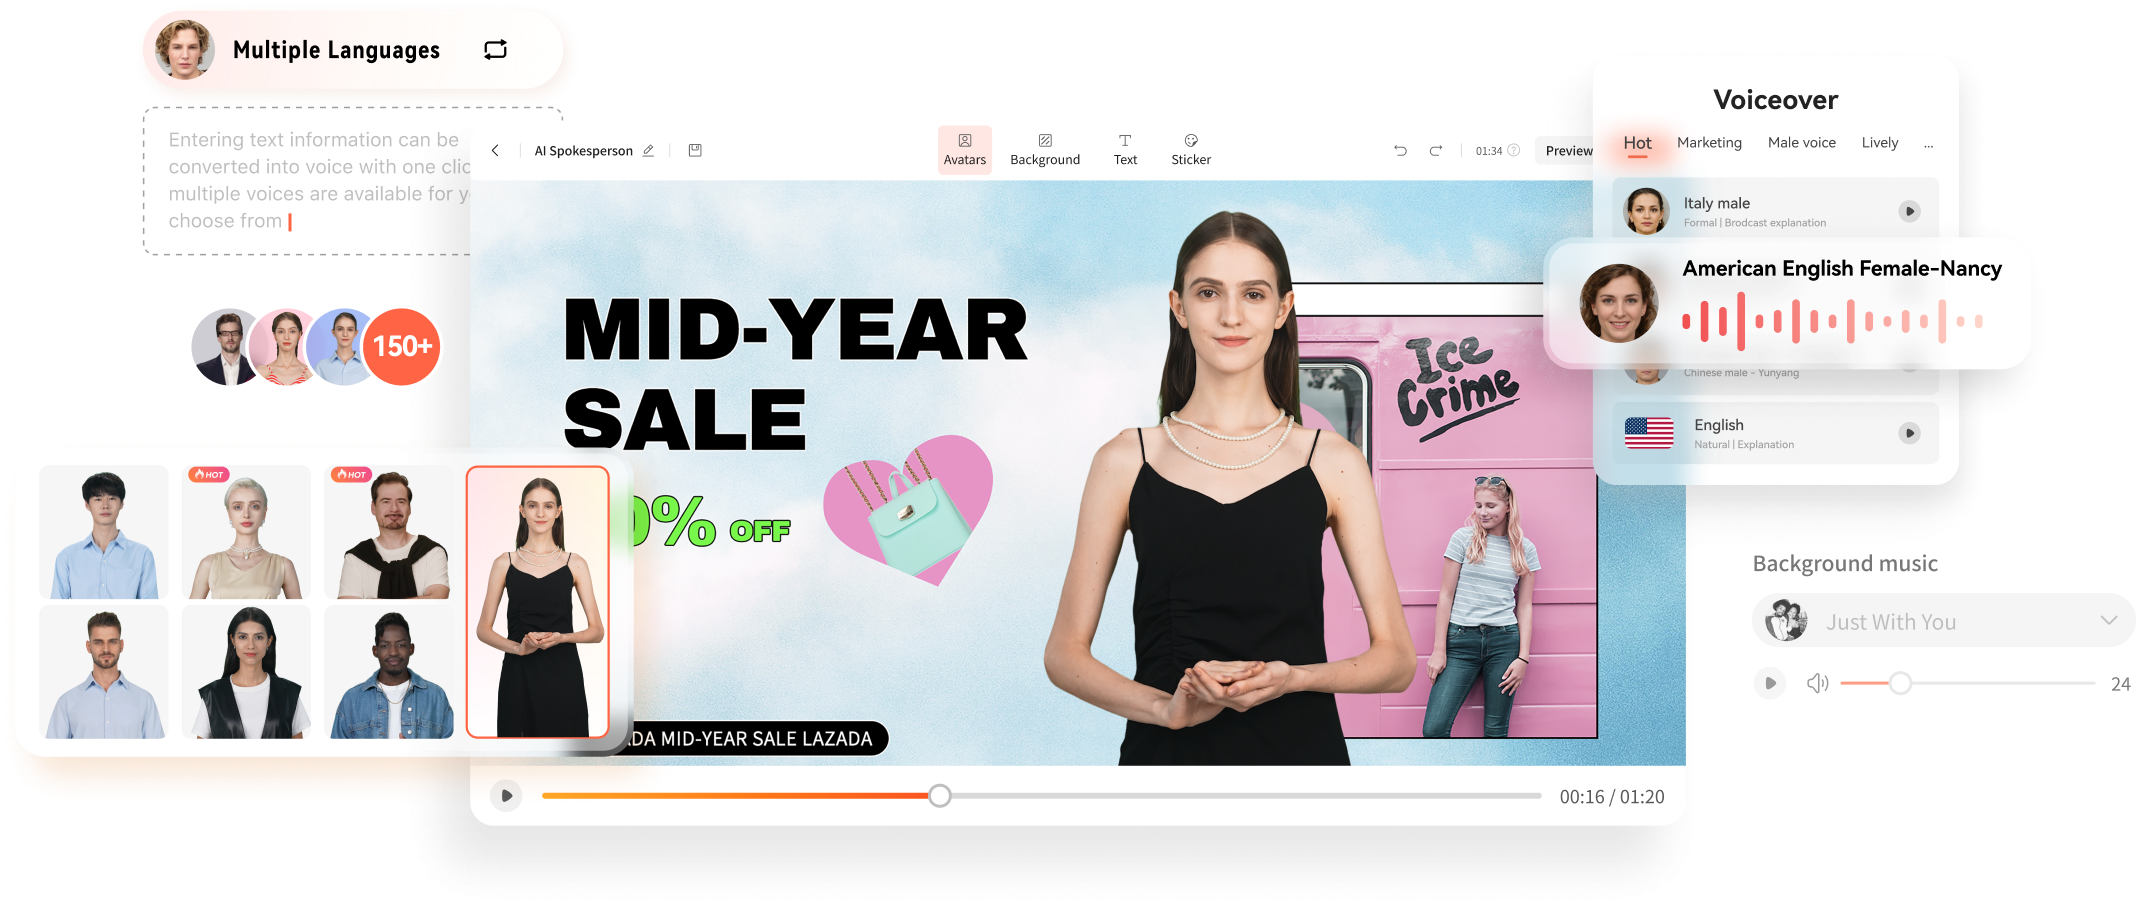
- It integrates 150+ AI Avatars with multinational features. You can also select the AI Avatars as per their styles, ages, or ethnicity.
- There are versatile amounts of commercial stock in Virbo. You can also use the 180+ Virbo templates along with royalty-free music.
- This tool also integrates natural AI Voices. With these AI Voices, you can make top-class text-to-speech videos.
6. Animaker
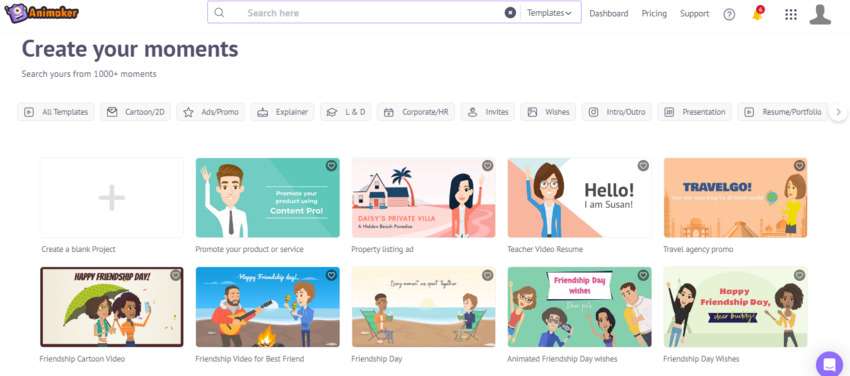
Animaker is yet another online video creation platform for explainer videos. It allows users to create animated videos, presentations as well as other visual content. It is very helpful in explainer video production. Here are some Pros and Cons of the product.
Pros
- Animaker is good to start with due to low-budget and intuitive UI.
- It has large asset of images and templates which you can easily customize according to your choice.
- It also has an ability to do voiceovers as well as add audio effects.
Cons
- Although it has user friendly interface but the beginners may feel difficulties in understanding the effective use of tools and features.
- It primarily focuses on 2d animation.
7. Biteable
Biteable is a web video creation platform that permits users to create animated explainer movies, product demos, and social media videos quickly and effortlessly. It has ability to export videos in HD first-rate with a number of customizable templates to begin with.
Pros
- Biteable has ability to add textual content, voiceovers, and song.
- It has affordable pricing plans.
- Sometimes it has free plan to be had.
Cons
- Biteable can be sluggish to render larger videos.
- It’s some features are available only in top-class plans.
- Its customer guide can be sluggish to respond.
- There are some bugs in this software.
Conclusion
In the dynamic realm of animation and video tools, numerous alternatives, along with Wideo, Powtoon, Moovly, Vyond, Animaker, and Biteable, present themselves as reachable solutions for content material advent, catering to people with restricted layout expertise. Striking a balance between comfort and disadvantages inclusive of getting to know curves and net reliance is pivotal in making a knowledgeable preference. Virbo, an AI-driven platform, distinguishes itself by using hastily generating brilliant videos, though with ability downsides.
Notably, Virbo excels through its consumer-intuitive interface, collaborative talents, and reservoir of inventory sources. While mainly desirable for crafting advertising and marketing and academic movies, customers with aspirations of complicated customization might discover exchange avenues well worth exploring. In evaluating these options, customers have to weigh the advantages of ease-of-use in opposition to concerns like net get admission to and hardware prerequisites to select the device that aligns greatly with their content material advent objectives.
Create AI Avatar Video
Create AI Avatar Videos
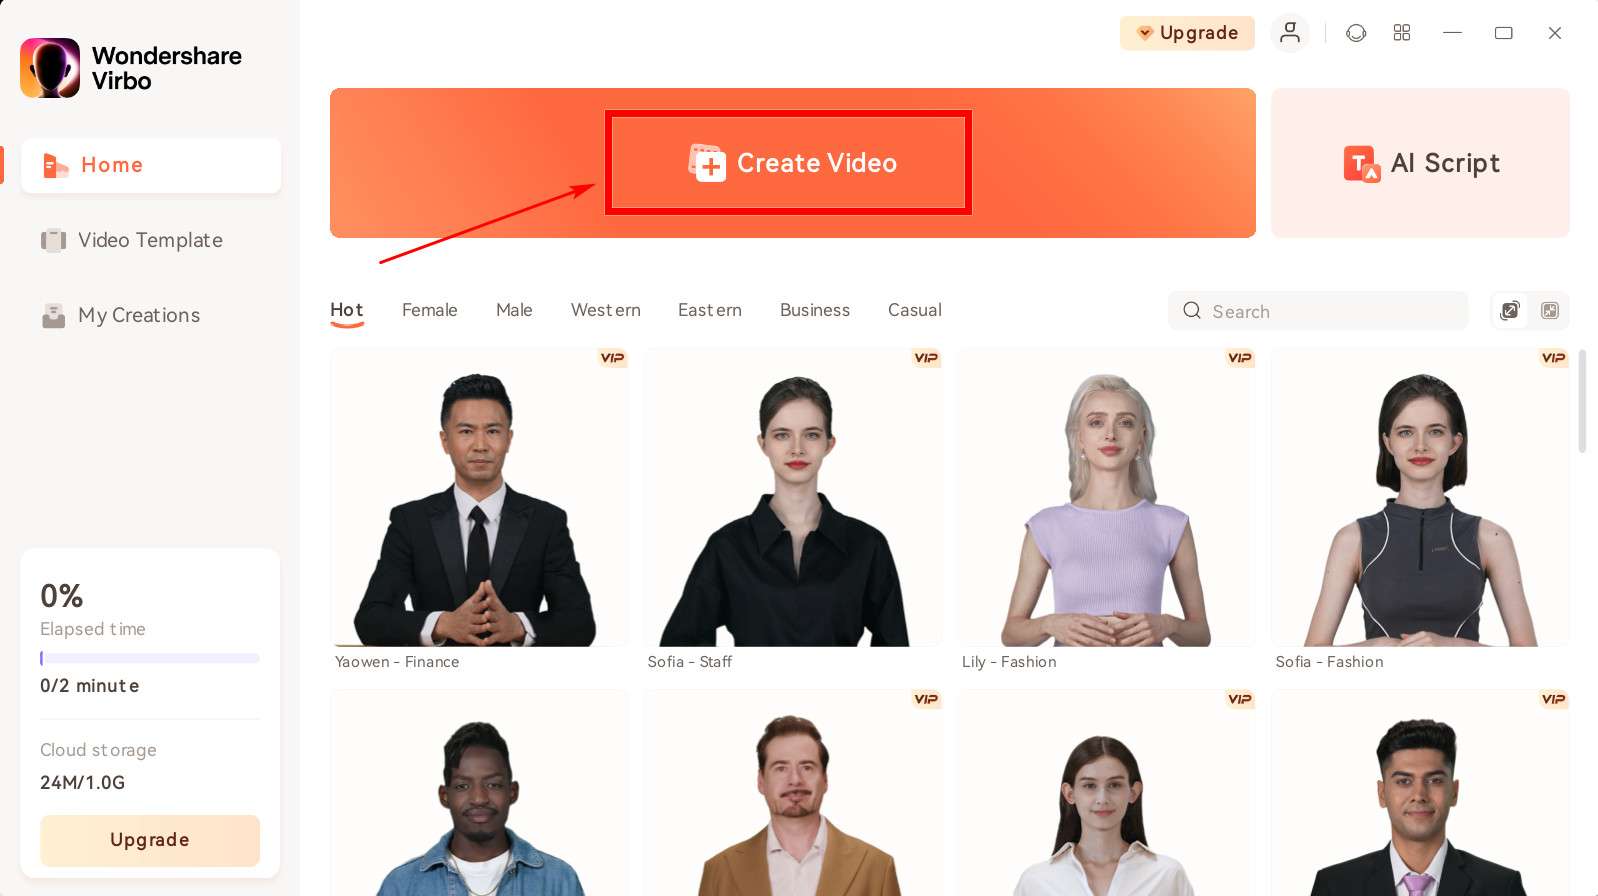
You can start creating your AI avatar video by clicking the “Create Video” button on the homepage.
03 Edit Video
04 Export Video
Step 1. Create a Project
Click “Create Video” to start creating a new video.
Create a Project
Select the video aspect ratio that you desire. You can choose either to make a landscape video or a portrait video based on your needs. Click “Create Video”.
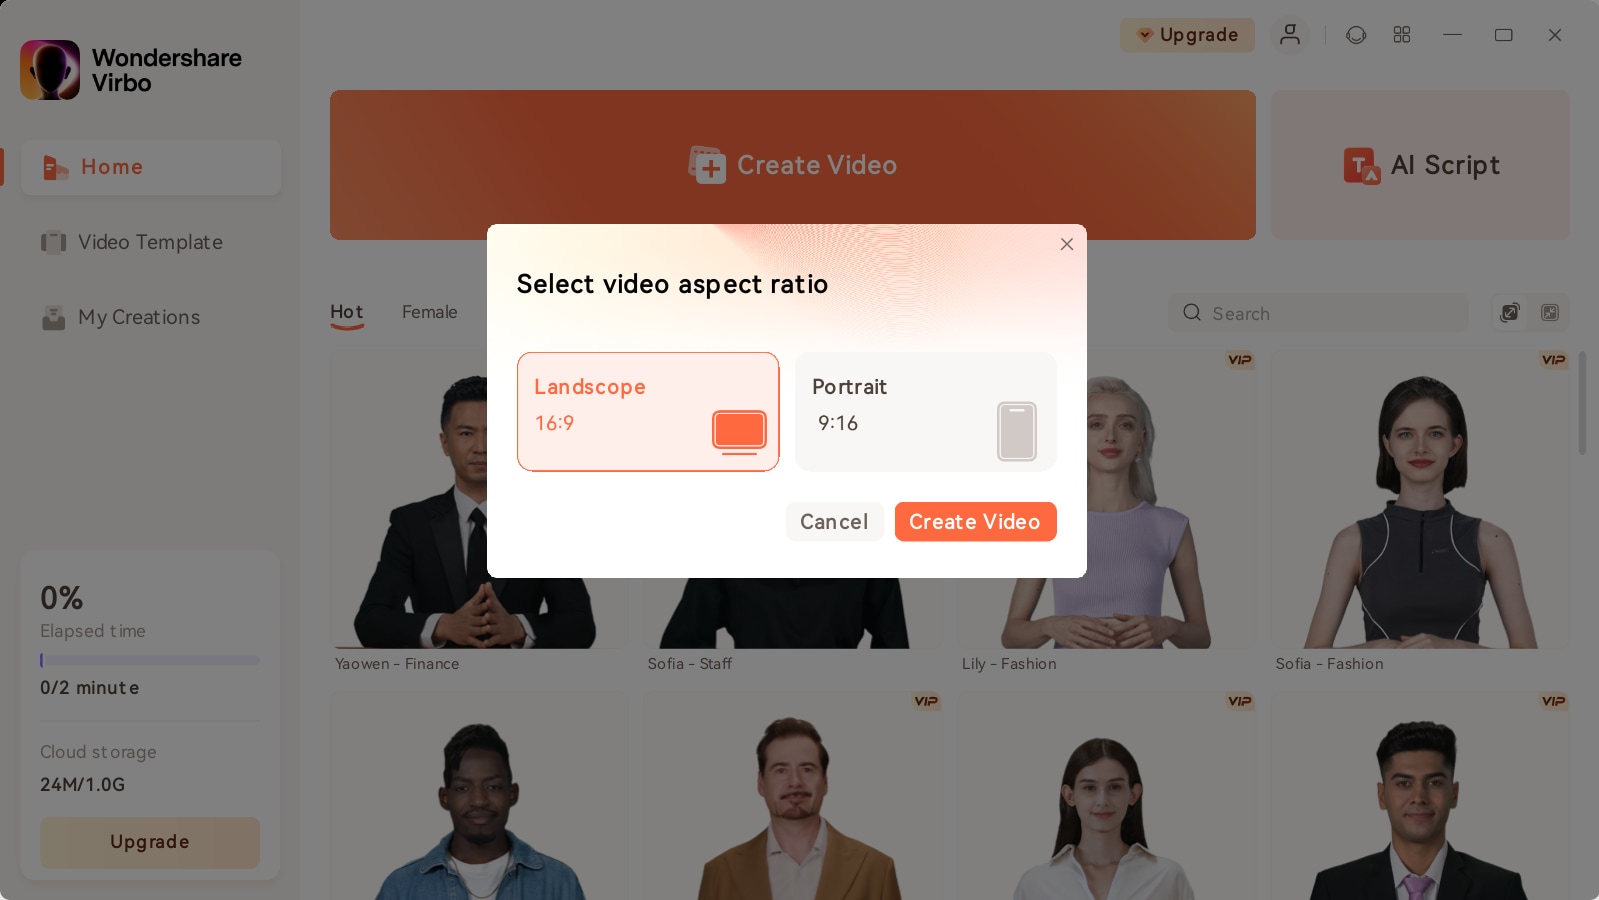
Choose Aspect Ratio
Step 2. Choose Avatar & Voiceover
Once inside the user interface, click “Avatars” to pick an AI avatar for your video. Click the shown avatar in the screen, and an action bar will appear on the right side of the screen, where you can choose to adjust the style and location of the displayed video persona.
![]()
Choose Avatar
Enter the text you intend to put in the video. You can adjust the speed, pitch and volume of your avatar at the bar shown on the right. Click “Play Script” or “Preview” once you finished operation to preview the video.
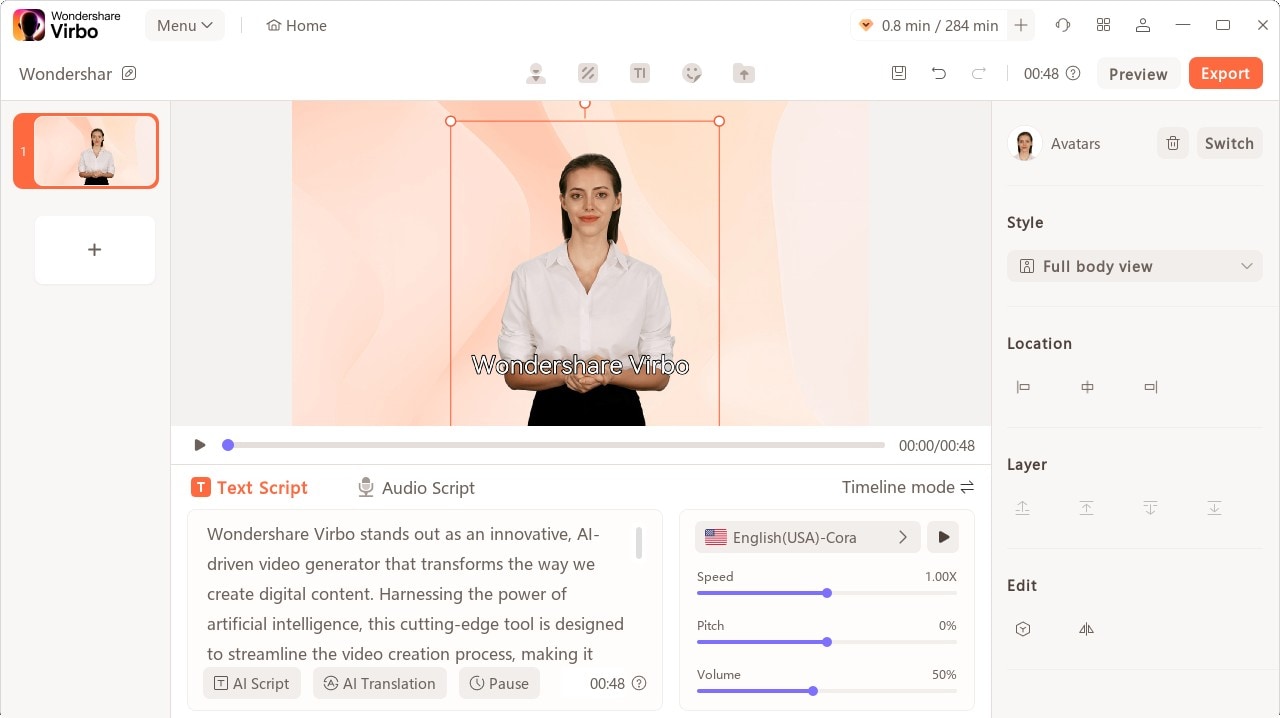
Play Scripts
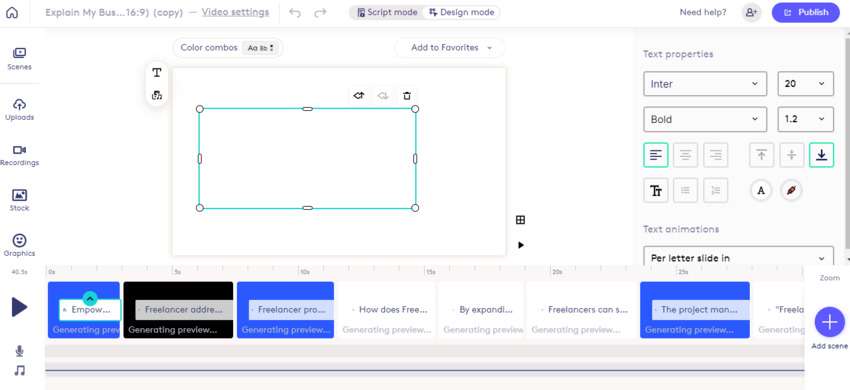
Step 3. Edit Video
You can also adjust the background, choose the text style, or add the sticker to the video.
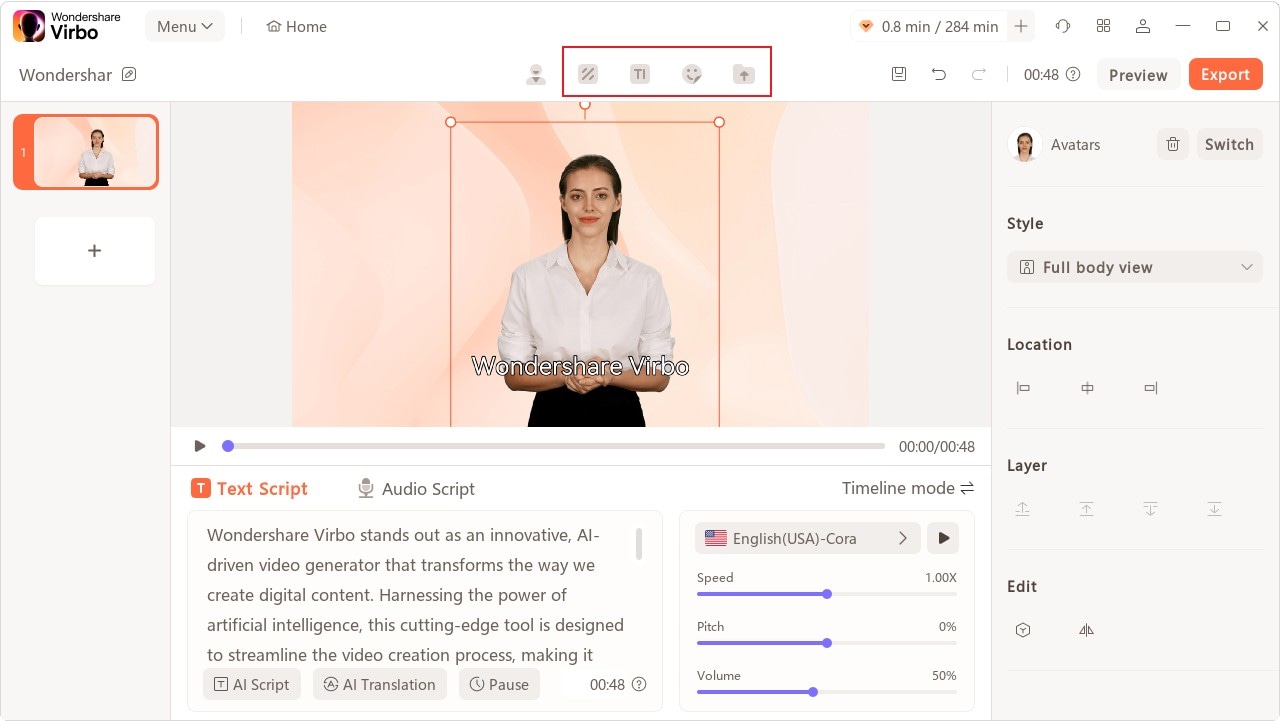
Edit Video
Click Background Music > None to choose the music for the video, or you can upload your own music that you intend to use.
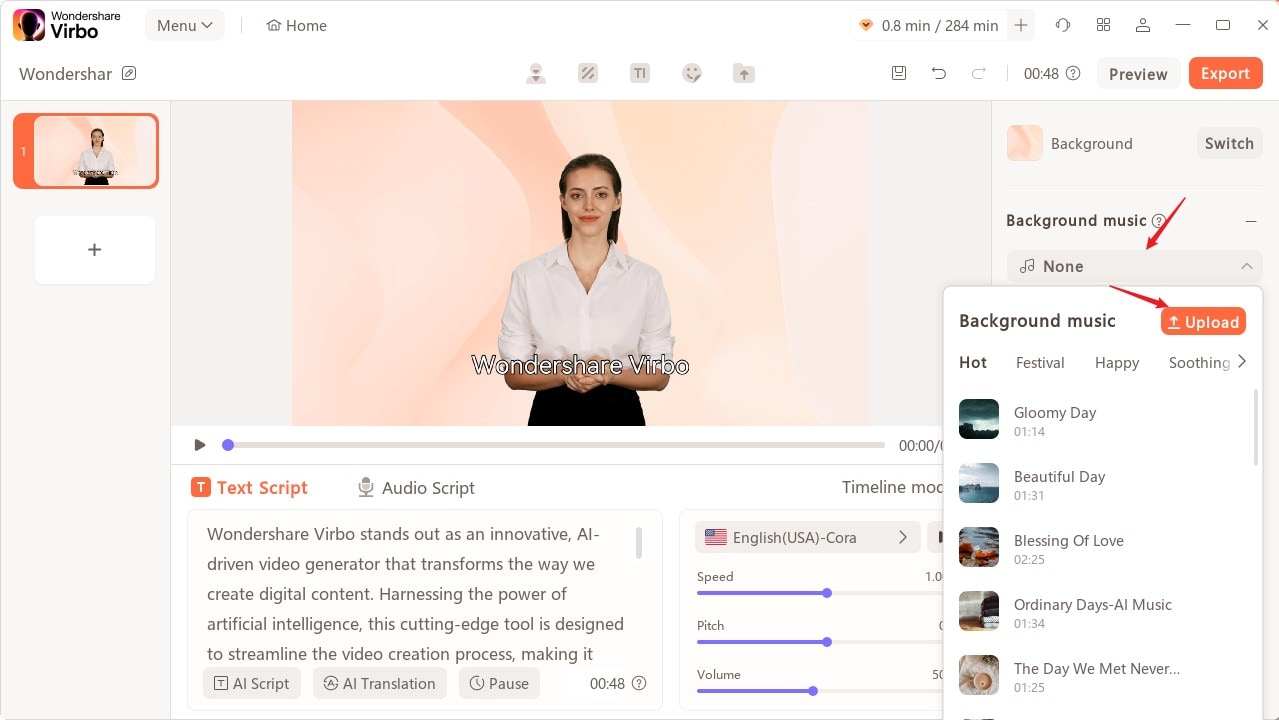
Choose Background Music
Step 4. Export Video
Once you are satisfied with the effect of the whole video, click “Export” to generate the video. In this way, a brand new video using Virbo AI avatar is created.
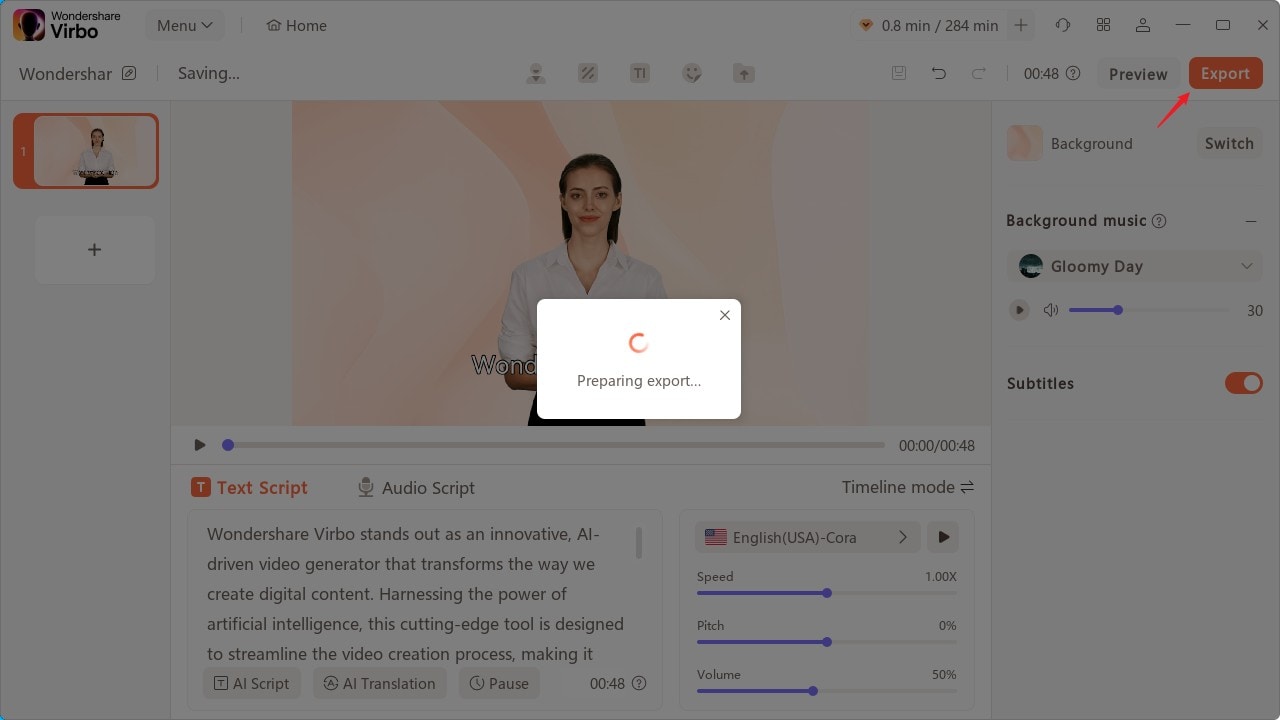
Export Video
03 Edit Video
04 Export Video
Step 1. Create a Project
Click “Create Video” to start creating a new video.
Create a Project
Select the video aspect ratio that you desire. You can choose either to make a landscape video or a portrait video based on your needs. Click “Create Video”.
Choose Aspect Ratio
Step 2. Choose Avatar & Voiceover
Once inside the user interface, click “Avatars” to pick an AI avatar for your video. Click the shown avatar in the screen, and an action bar will appear on the right side of the screen, where you can choose to adjust the style and location of the displayed video persona.
![]()
Choose Avatar
Enter the text you intend to put in the video. You can adjust the speed, pitch and volume of your avatar at the bar shown on the right. Click “Play Script” or “Preview” once you finished operation to preview the video.
Play Scripts
Step 3. Edit Video
You can also adjust the background, choose the text style, or add the sticker to the video.
Edit Video
Click Background Music > None to choose the music for the video, or you can upload your own music that you intend to use.
Choose Background Music
Step 4. Export Video
Once you are satisfied with the effect of the whole video, click “Export” to generate the video. In this way, a brand new video using Virbo AI avatar is created.
Export Video
How To Start a Private Live Stream on YouTube
In today’s digital age, live streaming has become a powerful tool for connecting with audiences in real-time. This method has especially been crucial for businesses looking to get into live selling or gamers wanting to stream their games. But say, for example, that you want to keep your stream private, accessible only to select viewers; how do you do that?
Here’s where private live streaming comes in. This option allows you to share your content with specific individuals, ensuring a more intimate and controlled environment. This guide will teach you how to set upprivate YouTube streams and give you special tips to let AI help you with your streams with Wondershare Virbo.

Part 1: What Do You Need To Get Started With YouTube Private Live Streaming?
Before diving into the exciting world of private live streaming, here is the equipment to ensure a smooth and seamless experience.
- YouTube account. First things first, you’ll need a YouTube account. This is your gateway to the platform and your key to unlock the world of live streaming.
- A capable PC. Next, prepare your PC and the command center for your private stream. While specific requirements vary depending on the complexity of your stream, here are some general recommendations:
- Processor: Intel Core i5 or equivalent (or newer)
- RAM: 8GB or more
- Graphics Card: Dedicated GPU recommended for enhanced performance
- Internet Connection: A stable and fast internet connection with sufficient upload bandwidth (consider at least 3 Mbps for standard definition)
- A streaming tool. Now, you’ll need a streaming tool to capture your video and audio and send it live to YouTube.Wondershare Virbo is recommended, especially for live-selling purposes. Other options include OBS and similar stream apps for other purposes.
With these essential elements in place, you’re on your way to launching your private YouTube adventure.
Part 2: How To Start a Private YouTube Live Stream?
Ready to share your talents or ideas with a select audience? Dive into the steps to create aprivate live stream on YouTube by following the guide below. It’s pretty straightforward.
- Step 1: Access YouTube Studio.Head to your YouTube Studio page (studio.youtube.com) and log in using your Google account linked to your YouTube channel.
- Step 2: Prepare for live streaming**.** ClickCreate in the top left corner of the Studio dashboard, and selectGo Live from the dropdown menu. Alternatively, click the camera icon next to your profile picture and chooseGo Live.

- Step 3: Now, set your visibility. Before starting your broadcast, ensure your stream is private. Under theVisibility setting, click the dropdown menu and choosePrivate . This option restricts viewership to individuals you specifically invite.

- Step 4: There are two methods existing for inviting viewers:
- Email Invitations: Click onShare Privately and enter the email addresses of individuals you wish to grant access. You can also choose to notify them via email.
- Link sharing: Although not recommended for complete privacy, you can copy the stream link and share it directly with trusted individuals. Remember, anyone with the link can access the stream, even uninvited guests.

- Step 5: Once everything is set and your viewers are invited, clickGo Live to launch your private YouTube stream. Remember, only invited individuals using their YouTube accounts can view your content.
Additional Tips for Private YouTube Live Streams
Here are some additional tips that you can follow before starting aprivate YouTube stream :
- Test streaming. Consider using a test stream before inviting viewers to ensure everything runs smoothly.
- Giving guidelines to your viewers. Encourage guests to use their YouTube accounts for optimal viewing experience and security. Further, you can add house rules, especially for more intimate streams or live selling/auctions.
- Exploring advanced privacy settings. Explore advanced privacy settings within YouTube Studio for further control over viewer permissions.
- Using AI . Tools like Wondershare Virbo can help integrate AI into your private YouTube streams. This way, you won’t always have to glue your eyes on your stream. Discover more about this feature in the following section.
By following these steps and keeping privacy in mind, you can effectively host engaging live streams on YouTube, connecting with your chosen audience in a controlled and intimate setting. Remember to personalize your content, interact with your viewers, and enjoy the unique experience of private live streaming.
Part 3: Breaking the Limitations of Live Streams With Wondershare Virbo
Live streaming constantly evolves, offering creators new ways to connect with audiences. While traditional live streams require your physical presence, imagine having an engaging and interactive stream running 24/7, even when you’re not there. This is great, especially forprivate YouTube streams , where the need to engage the select viewers becomes more apparent.
Enter Wondershare Virbo , a revolutionary tool that leverages AI to create realistic and captivating live streams around the clock.
Introducing Wondershare Virbo
Gone are the days of relying solely on manual effort to keep your audience engaged. Virbo Live transcends these limitations, offering:
Get Started Online Free Download
- 24/7 content delivery. Whether taking a break or focusing on other tasks, Virbo Live ensures your stream continues with AI-powered content, keeping viewers entertained and informed.
- Virtual host template library. No more scrambling for guest hosts or struggling with solo presentations. Virbo Live’s diverse library of 150+ customizable AI avatars can be your virtual co-host, presenter, or even a captivating character, interacting with viewers, answering questions, and conducting interviews.
- Content creation is made easy with templates. Forget starting from scratch. Virbo Live provides 180+ professionally designed video templates across various themes and styles, saving you time and effort. Plus, enjoy a library of royalty-free music to add the perfect soundtrack.
- Engaging AI voices. Bring your content to life with 120 AI voices, offering a variety of tones and accents, ensuring your message resonates with a global audience.
Integrating AI into Your Live Stream
Adding Virbo Live to your existing setup is simple and intuitive. Add Virbo as a live OBS window and use the YouTube stream key. Here’s a step-by-step guide:
- Step 1: Install Wondershare Virbo or access the web app.
Get Started Online Free Download
- Step 2: ClickCreate a Blank Livestream Room to customize your stream’s interface.

- Step 3: Choose from templates, backgrounds, AI avatars, and stickers to create a visually engaging environment.

- Step 4: UnderScript Lines , write the script your AI host will deliver throughout the stream. UseAI Interaction to set responses for specific questions andHuman interaction for actual responses from your end.

- Step 5: Once everything is set, clickStart Livestream and connect it to your preferred platform through OBS. Paste your streaming key for seamless integration.
Use-Cases for Wondershare Virbo and Private YouTube Live Streaming
Virbo Live empowers you to explore new avenues in content creation. Imagine using it for:
- E-commerce shopping. Showcase products with AI hosts demonstrating their features and answering customer questions in real-time, even outside business hours.
- Educational live tutorials. Host interactive learning experiences with AI tutors delivering engaging lectures and responding to student inquiries.
- Live Q&A sessions. Let your AI host manage large-scale Q&A sessions and field questions and keep the conversation flowing smoothly.
With Wondershare Virbo Live, the possibilities are endless. Unleash your creativity, explore new ways to connect with your audience, and experience the power of 24/7private YouTube streams . Remember, this is just a starting point – personalize your content, experiment with different features, and discover the unique potential Virbo Live brings to your streaming journey.
Conclusion
In today’s digital age, live streaming has become a powerful tool for connecting with audiences in real-time. YouTube live streaming offers a versatile platform to share your passions and connect with a select group of viewers. This article has guided you through setting up aprivate live stream on YouTube , ensuring your content reaches only your guests.
Remember, key considerations include enabling private streaming within YouTube Studio, inviting viewers via email or link sharing, and personalizing your content to create an engaging experience. If you want to take your live streams to the next level, consider Wondershare Virbo, a user-friendly tool designed to simplify private live streaming on YouTube with the help of AI.
Design Cartoon Images With the Best Tools
Cartoon conversation images are a modern technique to convey messages effectively. People stick around because they learn best by seeing things in books or social media. Also, people like cartoons because they tell stories in pictures that are easy to understand and enjoy.
Cartoons have come a long way, from cave paintings and symbolic drawings to AI-powered conversational videos. This article will teach you the best ways to create chatting cartoon images.
Part 1. Make Realistic Talking Cartoon Conversation Avatars With Wondershare Virbo
Standing out as an influencer today can be difficult since you should always look for new trends to boost engagement. If you’re struggling to stay on top of the rapidly changing trends, Wondershare Virbo is clearly right here for you. It allows you to add audio clips to your photos to engage people emotionally and send personal messages.
You can also add personalized background music to your talking cartoon images and give your viewers a unique experience. Virbo’s talking photo feature has made static images a thing of the past. This new feature gives you high-quality AI audio to send your message as clearly as possible. Thus, you can go viral with this amazing tool in just a few simple steps.
Top Features of Wondershare Virbo
- Virbo Talking Photo offers you a wide range of high-quality avatars to bring to life. If that is not enough, you can upload any image you would like to convert to the avatar.
- The text-to-speech feature of this tool allows you to transform your text into an audio message in several languages and accents.
- You can also upload your voice as an audio clip. Within a few seconds, you can have your own talking images cartoon.
Steps of Using the Talking Photo Feature in Wondershare Virbo
Wondershare Virbo makes your life easier with its various features. You can easily create and edit videos with its Talking Photo feature. If you want to interact with the audience globally, follow the steps to create AI-avatar videos:
Step 1. Open the Platform and Select Talking Photo
First, open Wondershare Virbo to enter its interface. Once you open the platform, hit the “Talking Photo” feature in the “Home” tab.

Get Started Online Free Download
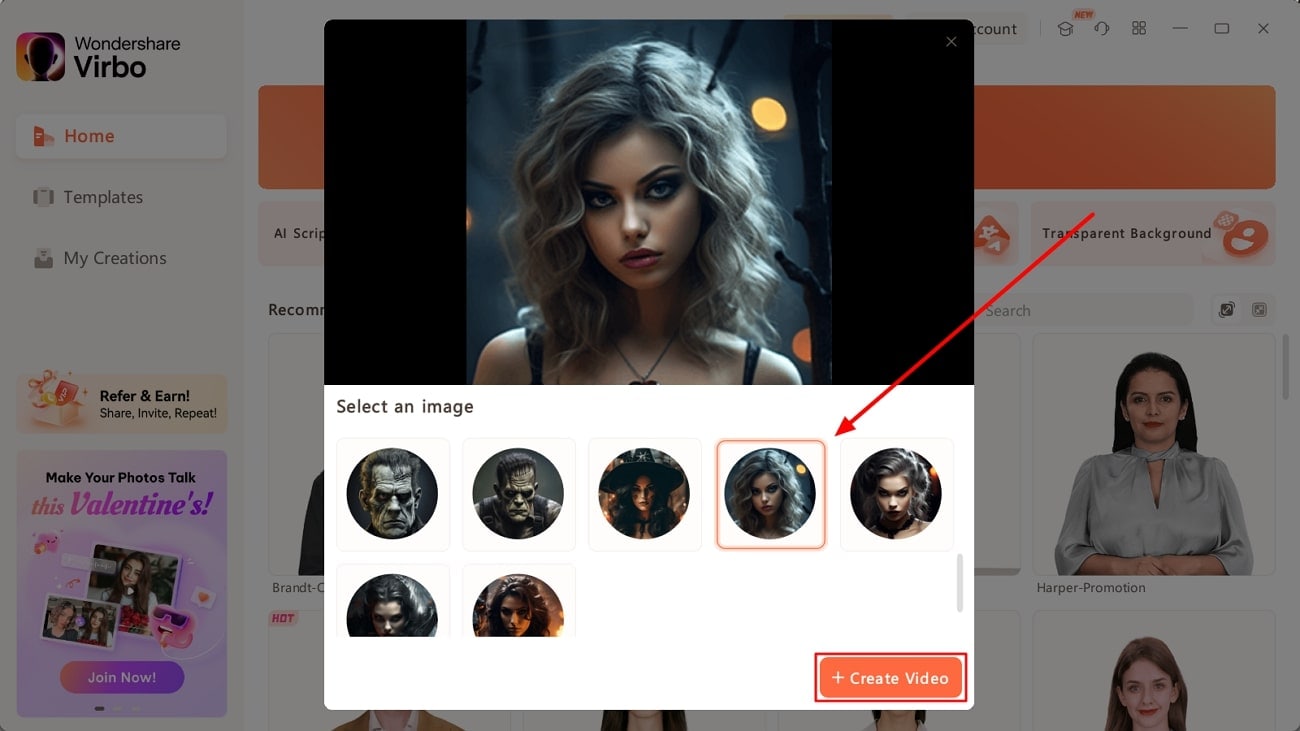
Step 2. Import the Image for Creating Video
After clicking the feature, a window will pop up on your device with the “Select an Image” option. Here, select the image of your choice and click on the “Create Video” option below to generate a video.
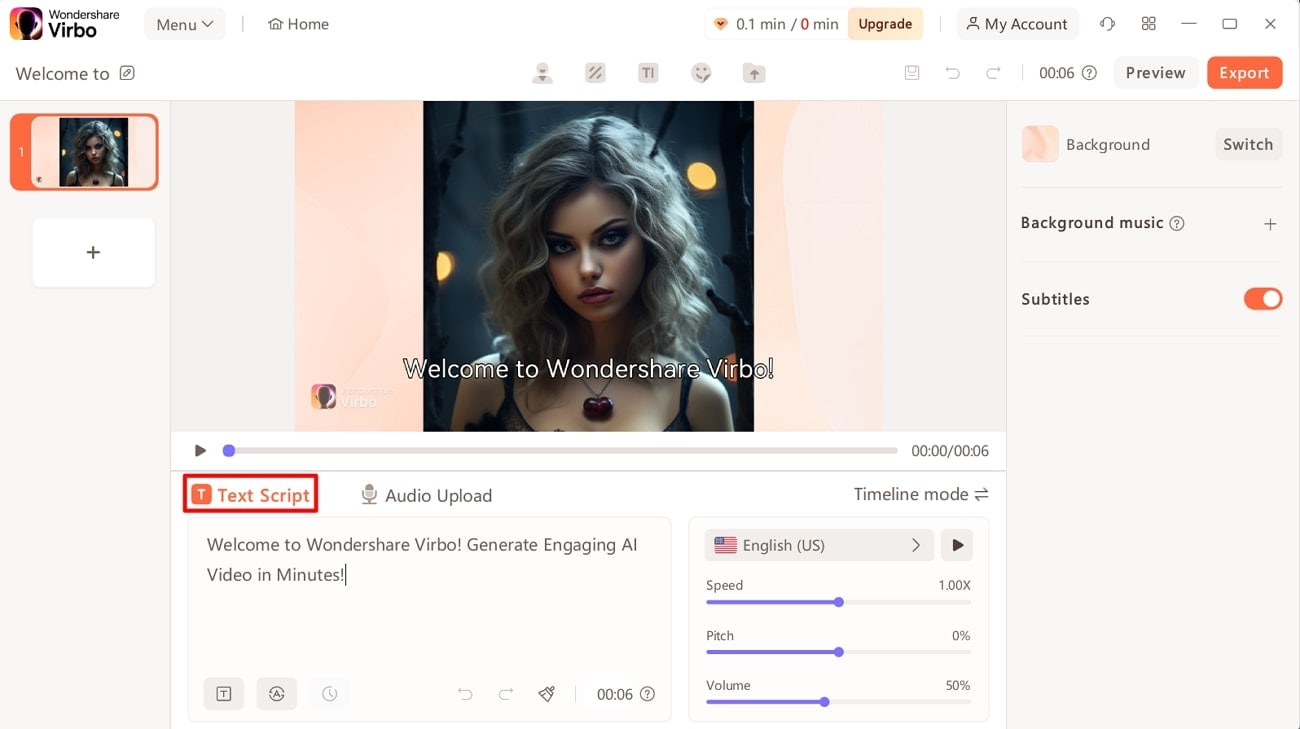
Step 3. Write a Script for Your Video
Once you pick the avatar, locate the text box on the left side of the window. Write an engaging script to convey a message through your realistic, talking animated avatars.
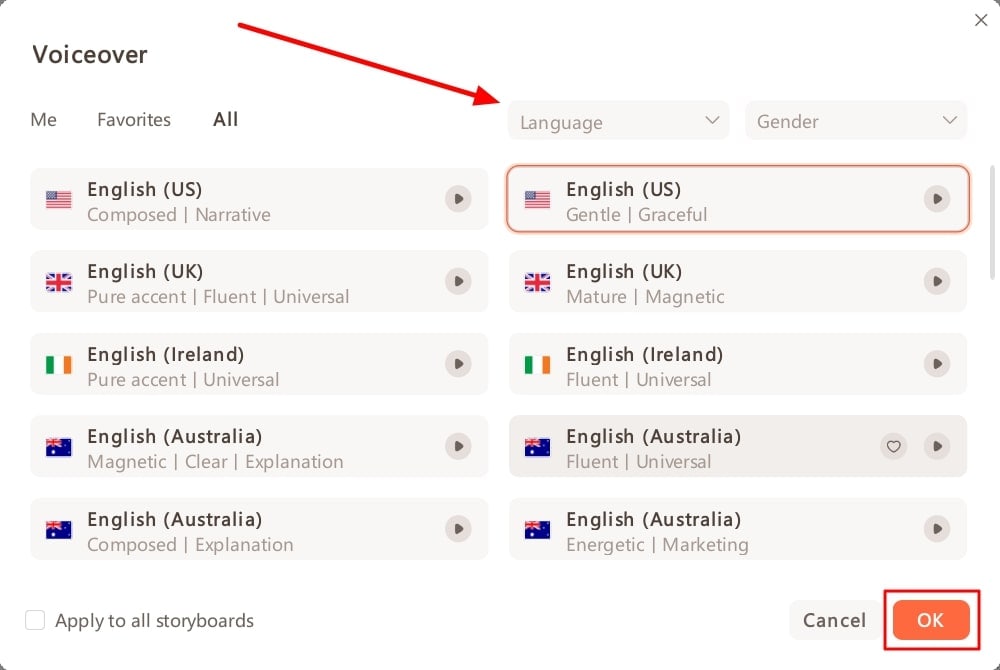
Step 4. Select Your Desired Language and Accent for Creating a Realistic Avatar
Start by clicking on the language menu to access a set of settings. Within this window, select the gender for the voiceover from the dropdown menu. Afterward, you’ll be able to choose your preferred language and accent. Upon making these selections, click the “OK” button to proceed.
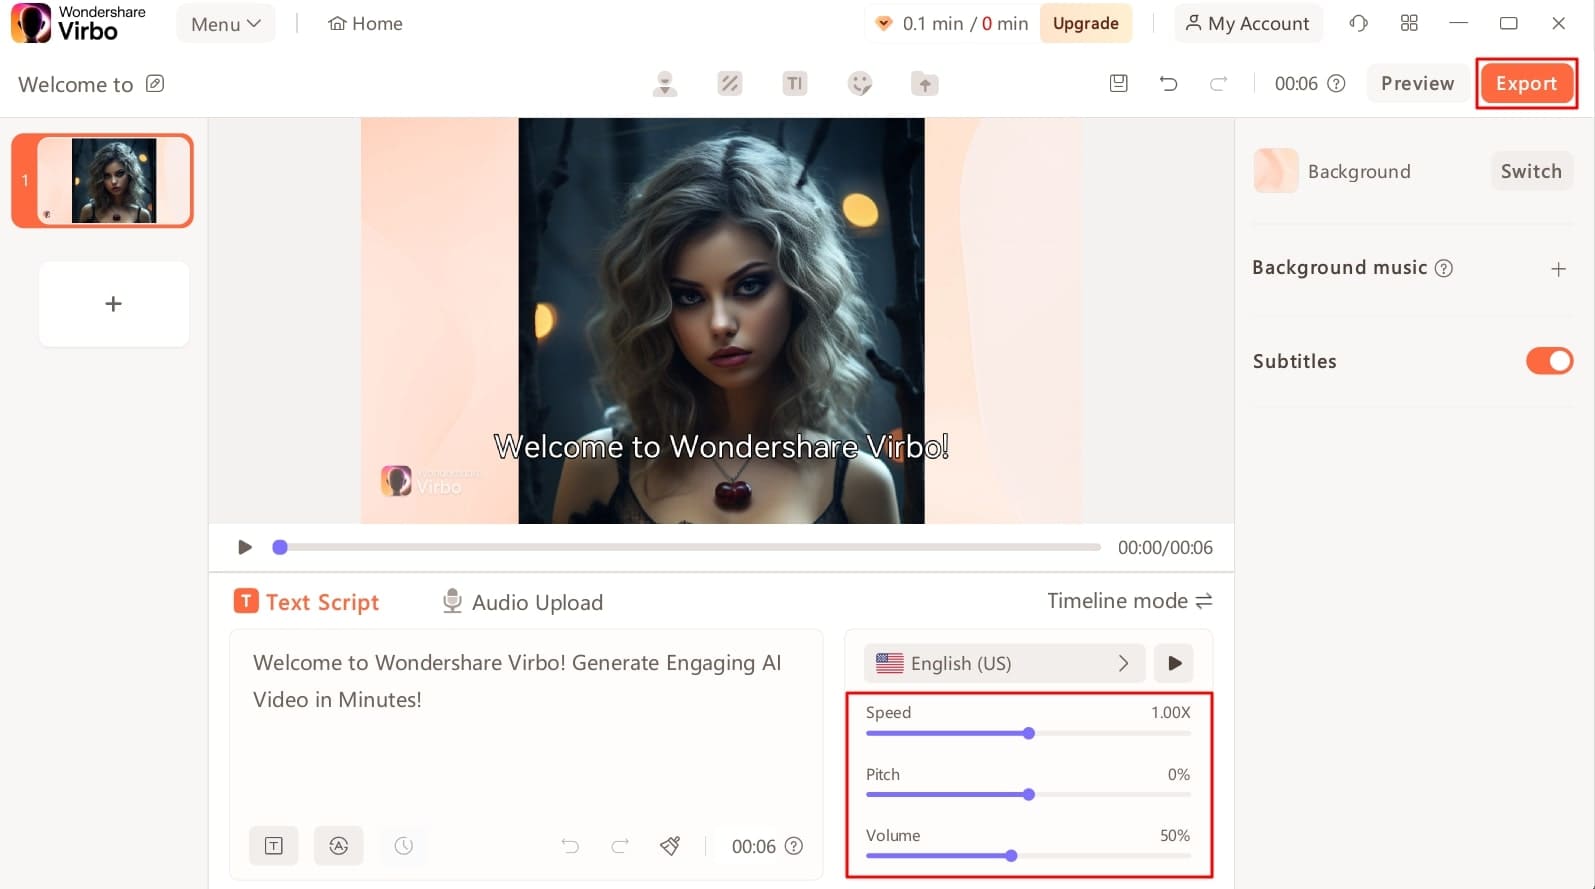
Step 5. Customize the Settings and Export the Talking Animated Video
Now, fine-tune the voiceover’s speed, pitch, and volume using the sliders. Once adjustments are complete, you can save this realistic animated video by clicking the “Export” button.
Part 2. How To Make Chatting Cartoon Images With Side Faces?
As we discussed, chatting cartoon images have emerged as vital for engaging with the audience. However, it is not easy to generate side pose animated images using conventional tools. Users can face difficulty in finding a tool to create such images. Nevertheless, you don’t have to worry about this problem, as we have identified a suitable tool for you.
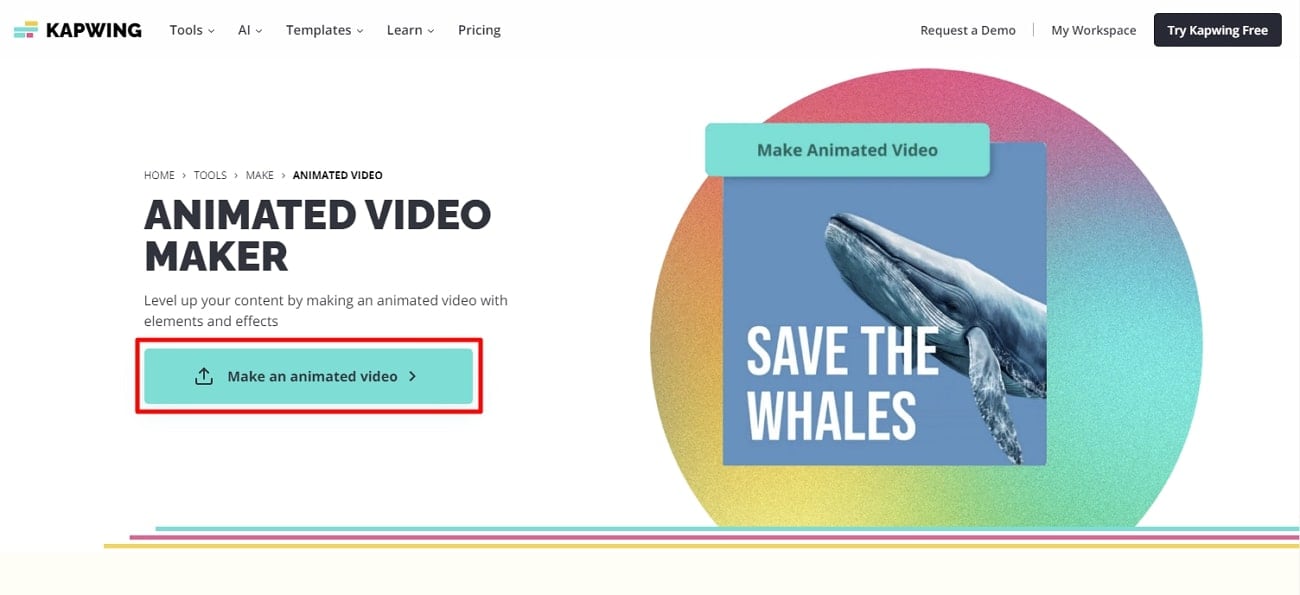
If you are also looking to create speaking cartoon images, Kapwing can prove to be a handy tool in this regard. This tool’s animated video maker feature offers thousands of side-face animations and effects to make content more interesting.
Key Features of Kapwing
- You can simply prompt AI to generate side pose animated videos.
- It allows you to set custom backgrounds for your talking cartoon images.
- Kapwing even allows users to make creative memes with its built-in meme generator.
Guide To Make Side Face Chatting Cartoons via Kapwing
With the simple interface of this tool, you can bring your character to life in no time. Follow the steps below and make a perfect animation of conversation cartoon images.
Step 1. After accessing the Kapwing website, select the “Animated Video Maker” feature from the “Tools” section. Click the “Make an animated video” button to launch the editing interface.
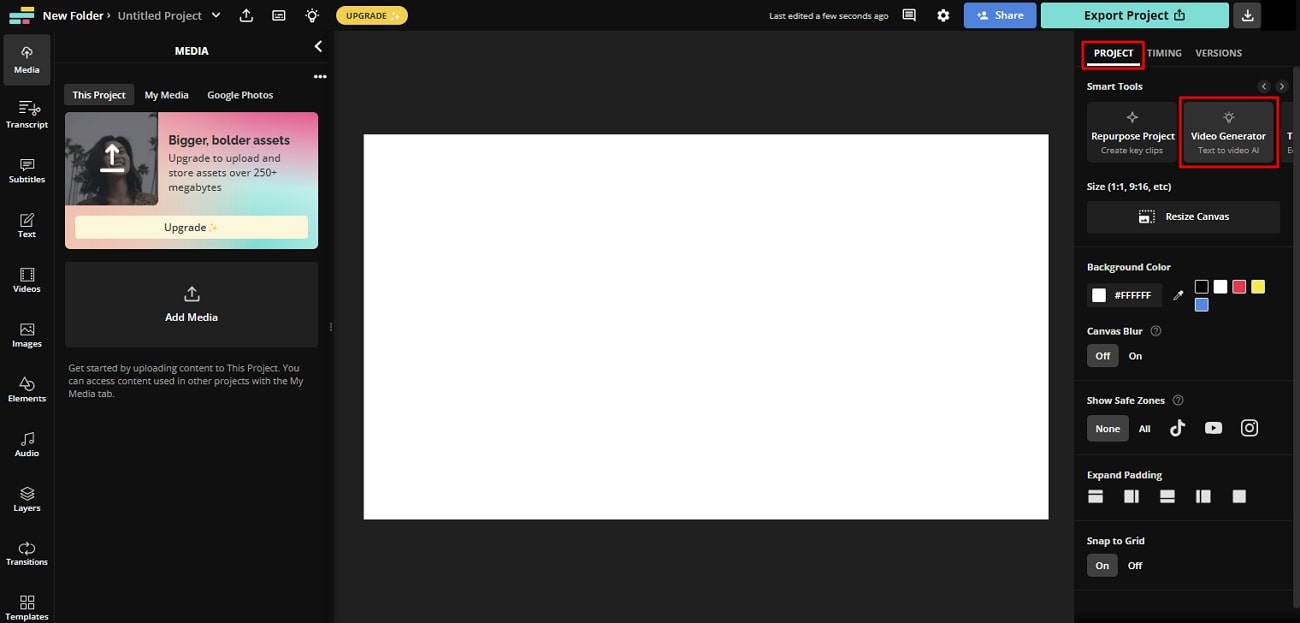
Step 2. Once you get to the editing interface, select the required canvas aspect ratio for your project. Then, head to the “Smart Tools” section from the “Project” tab and choose the “Video Generator” feature.
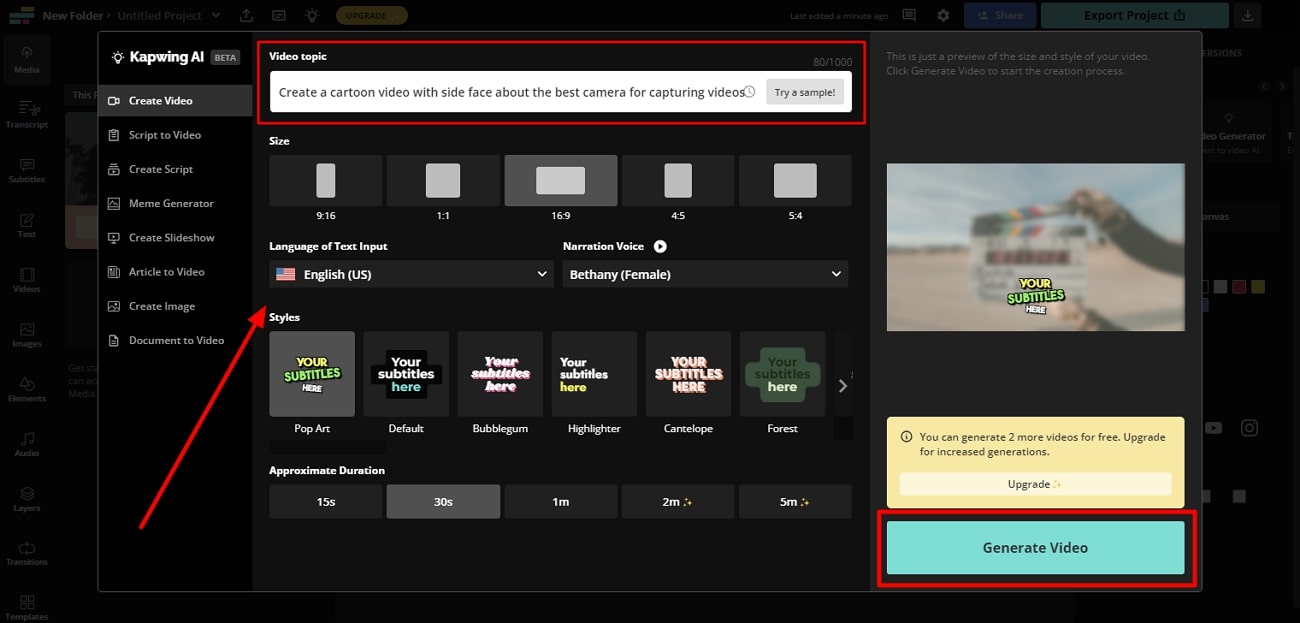
Step 3. Type the relevant command in the prompt box to generate a video for side-face chatting cartoons. You can also set the language, voice, and video duration. Once you’ve set all the respective parameters, click the “Generate Video” button.
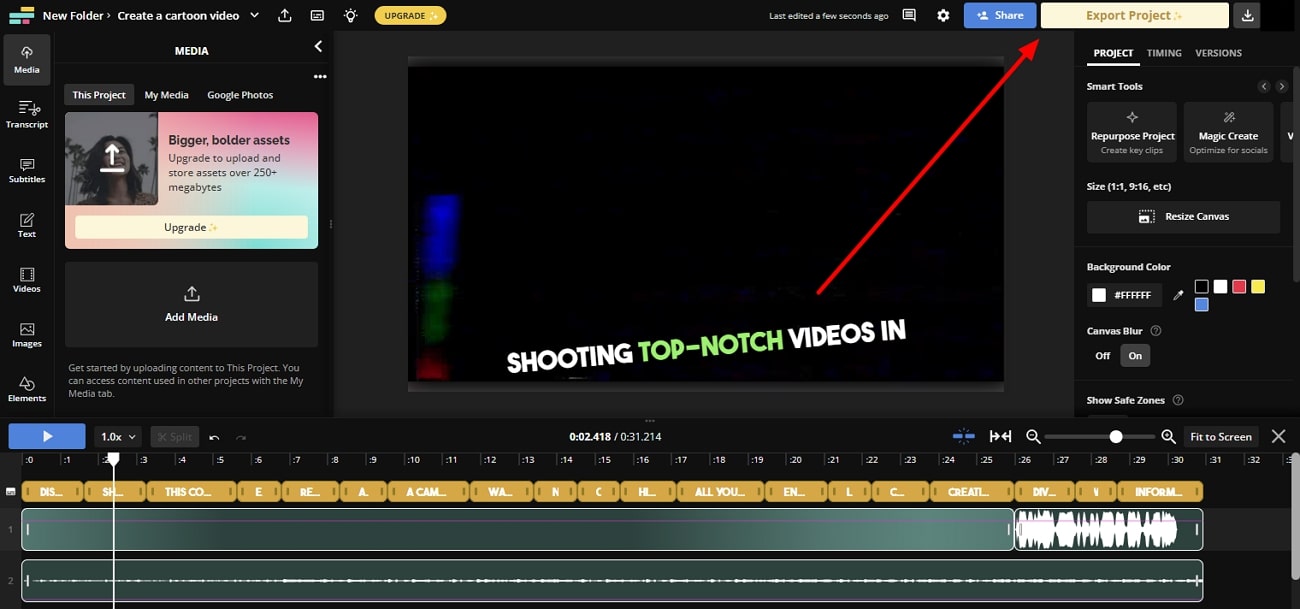
Step 4. After that, a pop-up window will appear to show the generating process. When it ends, click the “Export” button to save your project to your device. You can also share it across social media using the “Share” button.
Part 3. How To Make Chatting Cartoon Images With Simple Lines?
Brush Ninja is an online animation maker that helps to showcase your creativity. It has a pack of innovative features to turn you into an artist. You can make hand-drawn animations with multiple frames. Also, you can create desired GIFs with ease and confidence. It is one of the best open-source libraries for creating vector drawings with digital brushes.
Key Features of Brush Ninja
- With the online editor of Brush Ninja, you can draw and paint freely.
- Users can explore different brushes and colors to make 2D speaking cartoon images.
- This tool allows you to introduce multiple frames and sound effects for appealing animations.
Steps To Create Animations With Brush Ninja
Want to add animations to your casual or working tasks? Follow these steps individually to create impressive animations using the Brush Ninja tool:
Step 1. Initially, visit the official website of the Brush Ninja tool. On the site’s main interface, click on the “Create” dropdown option to see available free art tools. Then, select the “Brush Ninja” tool from the list.
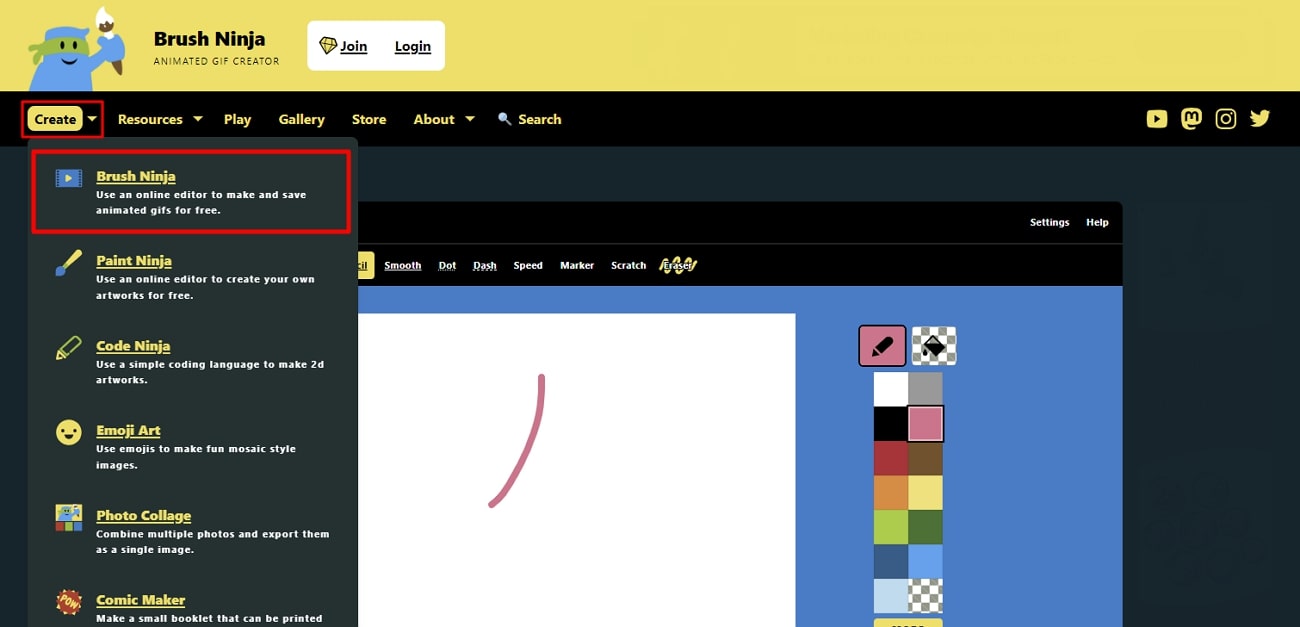
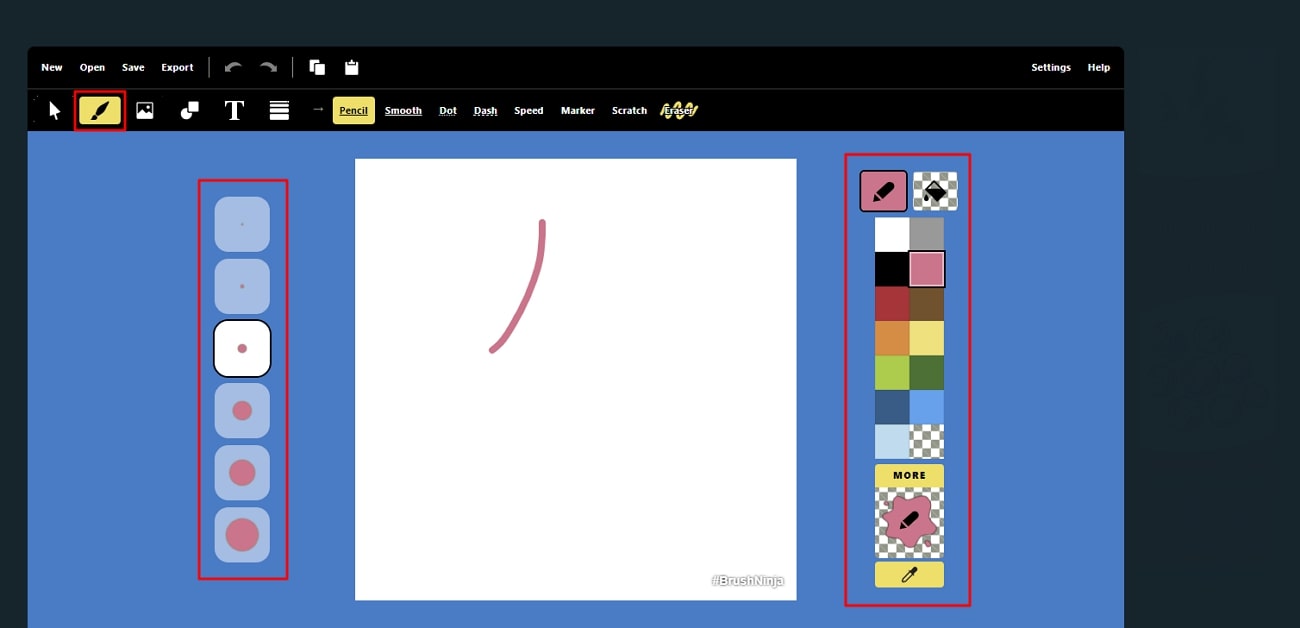
Step 2. After going into the tool, select “Brush Type” from the given options, including pencil, marker, and more. Then, set the “Brush Size” from tiny to huge size options on the left side. After that, choose “Brush Color” from the available colors on the right side.
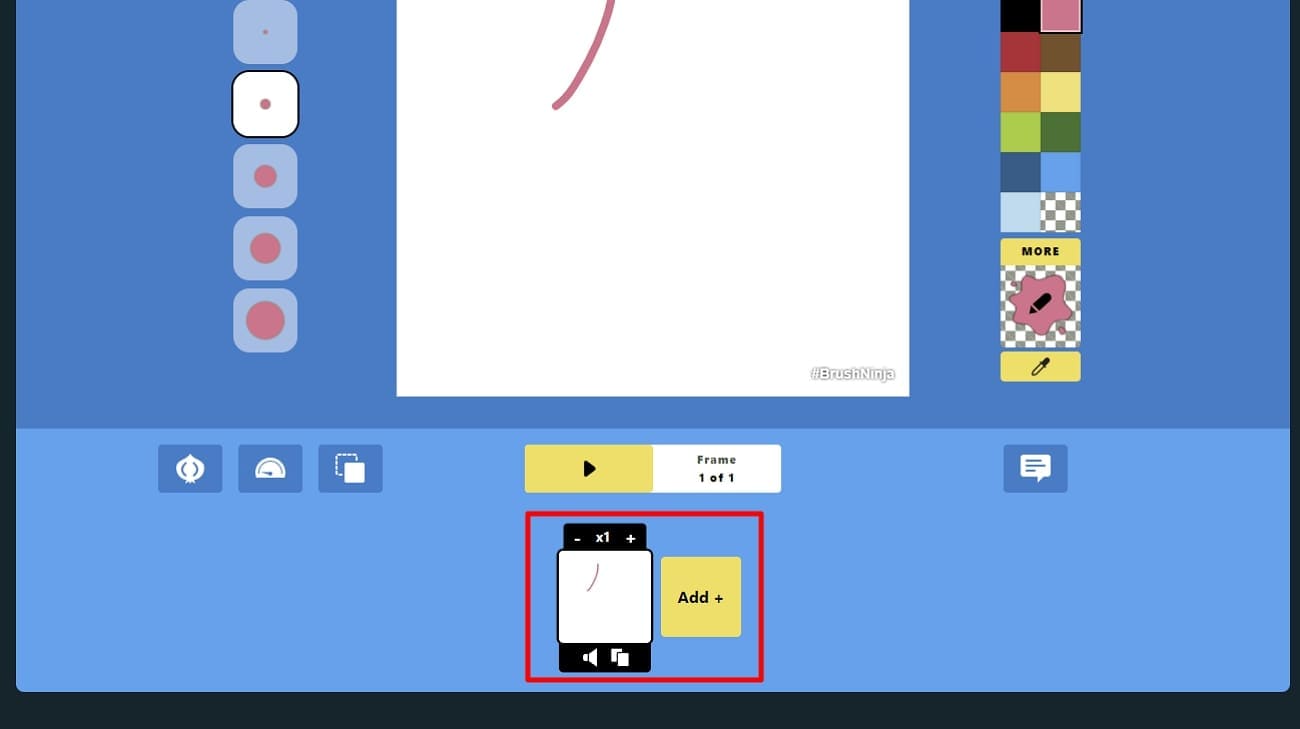
Step 3. With these selections, draw on the white canvas. Scroll slightly and hit the “Add +” button to add more frames. Also, you can check or delete them from the display. Moreover, there is also an option to duplicate frames.
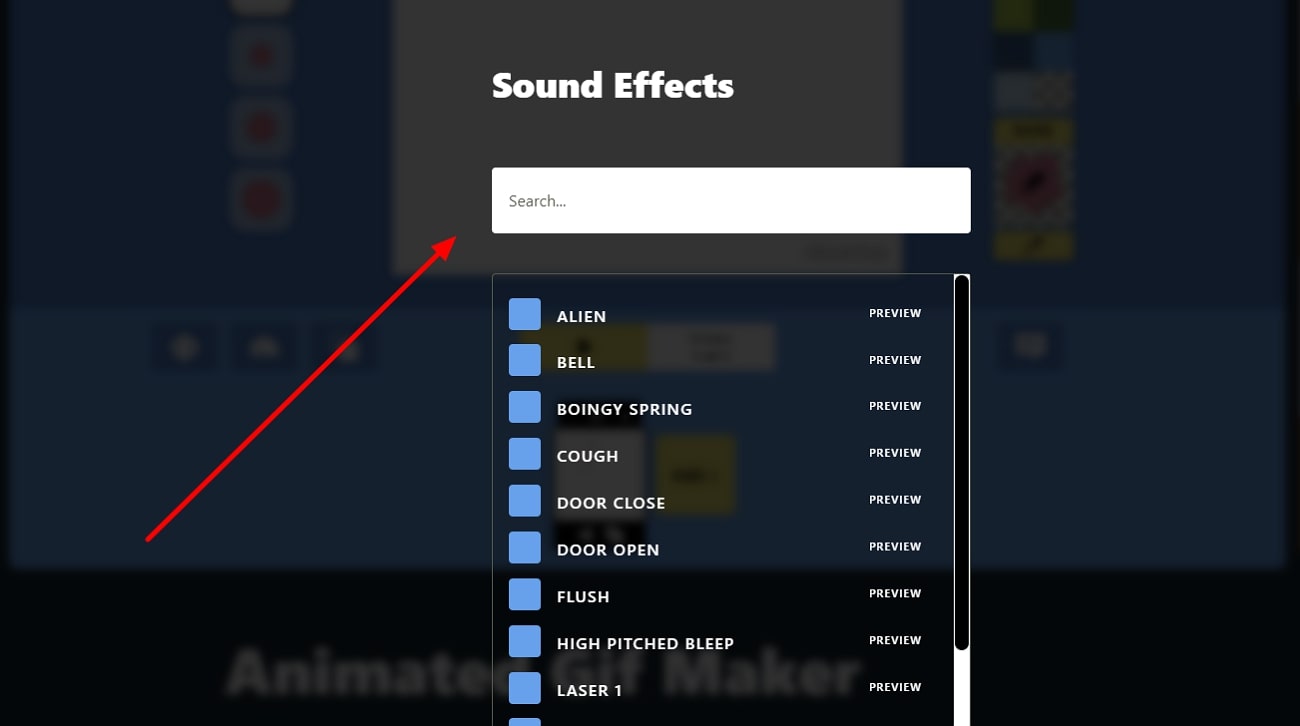
Step 4. Then, it is time to add sound effects. For that, click on each frame’s “Sound” icon. In the “Sound Effects,” you can select the best-suited option for each frame. You can also listen to these sound effects before exporting.
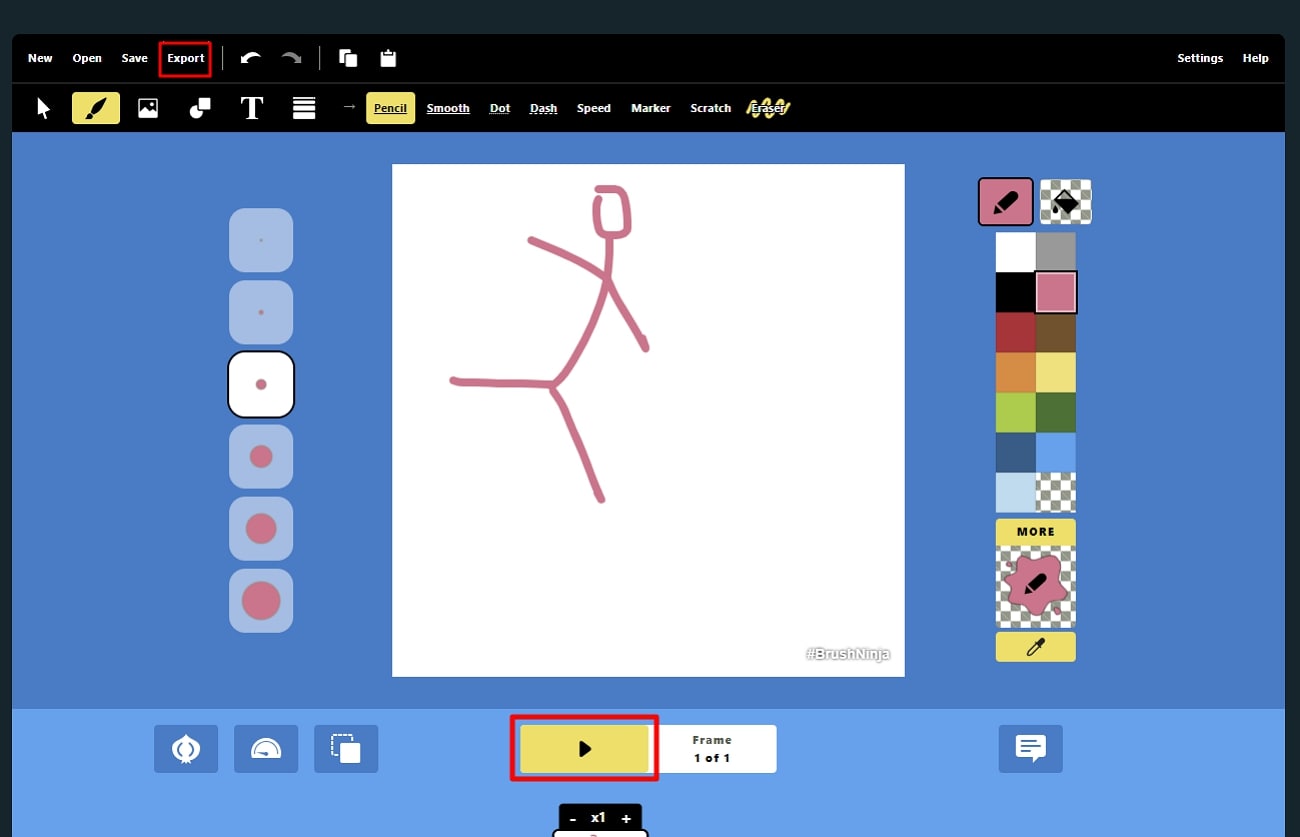
Step 5. Lastly**,** you can preview your creation by clicking the “Play Animation” icon. If everything is fine, hit the “Export” option in the tool’s top bar to save the animation.
Conclusion
All in all, cartoon conversation images are a popular form of visual entertainment everyone enjoys. This guide has discussed some of the effective tools to create talking cartoon images. Moreover, we have introduced you to the creativity of making side-face conversations and hand-drawn animations.
However, if you want to cartoonize your content with a professional touch, Wondershare Virbo is the ultimate choice. This tool provides users with realistic AI avatars to generate cartoon images that satisfy their artistic sense.
Eric Miller Eric Miller Apr 16, 24 Share article: Eric Miller Apr 16, 24 Share article:_ ](https://tools.techidaily.com/wondershare/virbo/download/)[](javascript:;)
You May Also Like
What Is an AI Headshot Generator? | Wondershare Virbo Glossary
Part 1. What is an AI headshot generator?
An AI headshot generator is a software or application that utilizes artificial intelligence (AI) to create realistic and high-quality headshot images of individuals. These generators use deep learning techniques to produce lifelike portraits from scratch, often employing convolutional neural networks (CNNs) and generative adversarial networks (GANs).
Users typically provide input to the AI headshot generator, such as specifying certain attributes or characteristics they want in the generated image, like age, gender, ethnicity, facial expression, and more. The AI then processes this input and generates a corresponding headshot that matches the desired criteria.
These generators can be used for various purposes, including creating profile pictures, avatars, character images for games or storytelling, and even for artistic or creative projects. It’s worth noting that while these generators can produce impressive results, they might sometimes unintentionally perpetuate certain biases present in the training data, which is an important consideration when using such tools.
Part 2. Can AI-created headshots be used in professional occasion?
Certainly! AI-generated headshots have become increasingly sophisticated and can be employed in various professional settings. Here are some points to consider when using AI-created headshots for professional occasions:
1. Quality and Realism
Before utilizing AI-generated headshots in a professional context, ensuring that the images’ quality and realism meet your standards is crucial. The headshots should look natural and professional, without any apparent distortions or artifacts.
2. Consistency
AI-generated headshots can offer a consistent visual aesthetic across your team’s profiles or marketing materials. It can help establish a cohesive brand identity and create a polished impression.
3. Time and Cost Efficiency
Generating headshots with AI can be quicker and more cost-effective than scheduling and conducting photoshoots for every individual. It is particularly useful when working with large teams or for time-sensitive projects
4. Personal Data Privacy
When using AI to generate headshots, you don’t need to collect personal photographs of your team members. It can help address privacy concerns arising from collecting and using private photos.
5. Ethical Considerations
Considering any ethical implications of using AI-generated content is essential. Transparency is critical—let your audience know if the images are AI-generated, not actual photographs.
6. Diversity and Inclusion
AI-generated headshots should reflect diversity and inclusivity. Ensure that your tool has been trained on a diverse dataset to avoid unintentional biases in gender, ethnicity, age, etc.
7. Customization
Some AI headshot generators allow customization, such as adjusting facial expressions, hairstyles, and other features. This can help tailor the generated images to match your brand’s unique style.
8. Legal Considerations
Be aware of copyright or licensing issues related to the AI-generated images. Ensure you have the right to use and distribute the photos for your intended purposes.
Ultimately, the decision to use AI-generated headshots in professional settings depends on your specific needs and the industry in which you operate. As AI technology improves, these generated images will likely become even more convincing and versatile for various applications.
New : Essential Details of Making Perfect Talking Face
Thetalking face mechanism stands as a powerful technique for engagement with people. You can present information, share stories, or convey messages to the audience through this content. This innovative approach trends across various platforms, from social media to market industries. So, we will shed comprehensive light on the essential details required to make a perfectspeaking face.
Moreover, this guide will focus on the diversity in this field using different advanced tools. As a bonus aid, we will also spotlight a particular tool designed for this purpose.
Part 1. List of Impressive Talking Face Tools To Consider in 2024
You can generate atalking face for posting on social media to capture people’s attention. Many tools are available in the market to help you intalking face generation. Below aresome of the best tools to generate such creative content.
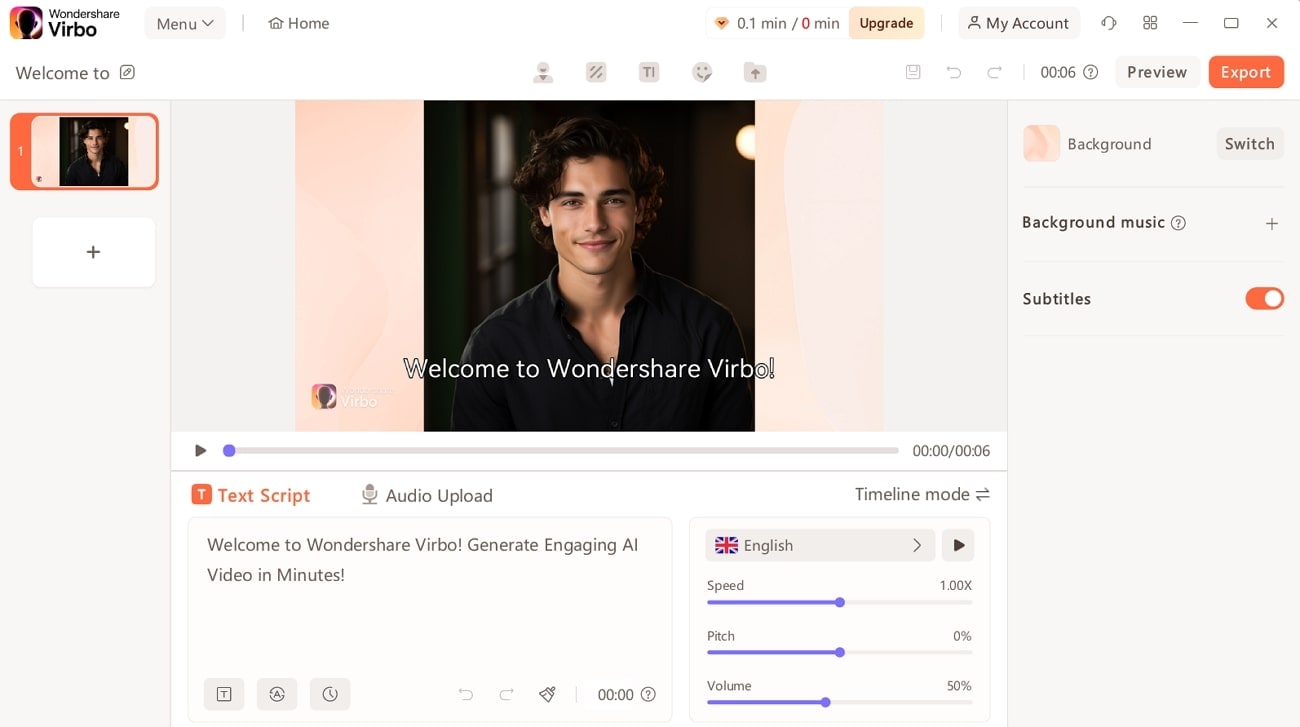
1. Wondershare Virbo
When seeking the most efficient tool for creating talking face content for marketing and other purposes, Wondershare Virbo is your go-to option. You can also amaze your viewers and exceptionally deliver your messages. Besides the online version, this tool also provides an offline video generator. All in all, this AI-powered tool makes your videos unforgettable for the audience.
Get Started Online Free Download
Key Features
- Users can choose various AI avatars to generate talking face content.
- You can reach global audiences with a wide variety of accents and languages.
- Virbo lets you record your audio directly to make your photo say the same words.
1. Vidnoz
Vidnoz can help you to turn still images into lifelike characters. With the help of talking photos, you can deliver information in human voice and animation. It will make your speeches engaging and effective for the audience. You can provide a script to the tool to generate a lip-syncing video.
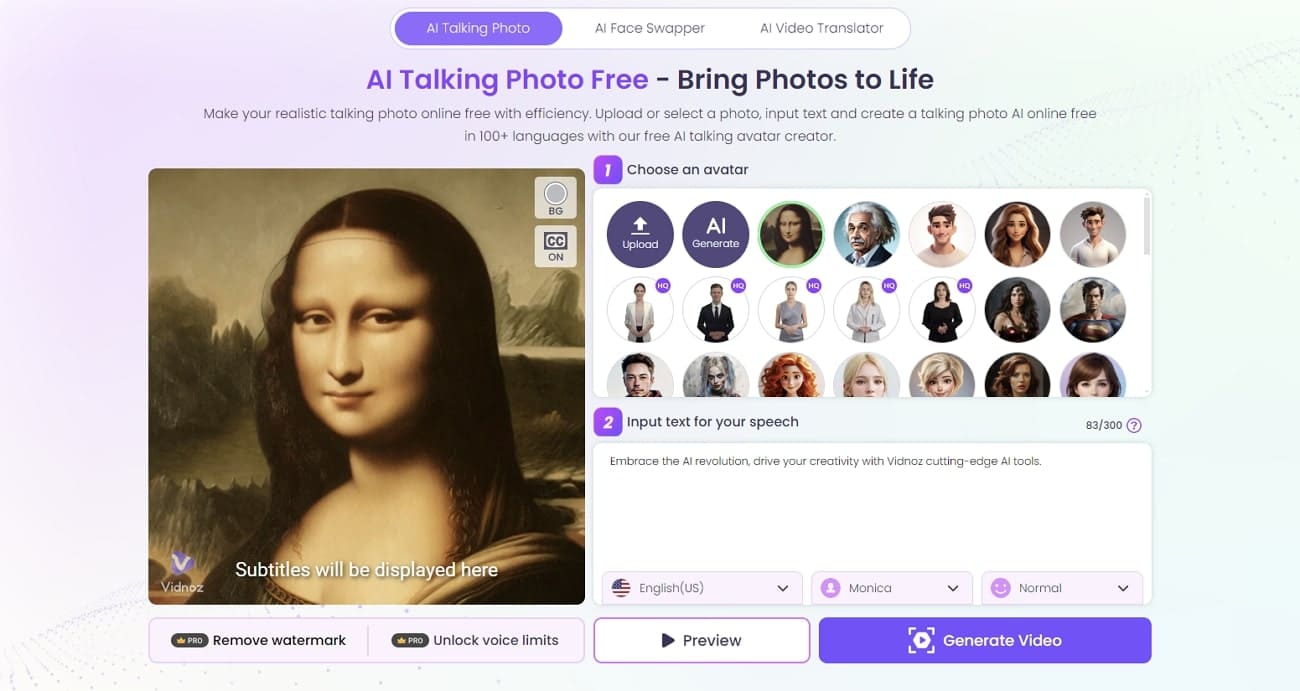
Key Features
- This tool offers 400+ AI avatars to produce videos in different languages and accents.
- It provides a voice library to give voiceover to any uploaded picture.
- You can create a custom AI avatar using the “AI Generate” feature.
2. Dupdub
Dupdub is one of the most comprehensive tools to generate aspeak face . Users can give personal voiceovers to AI avatars with this tool. It allows you to add the script to create personalized videos. In addition, you can also use AI to generate a perfect script for your talking photo.
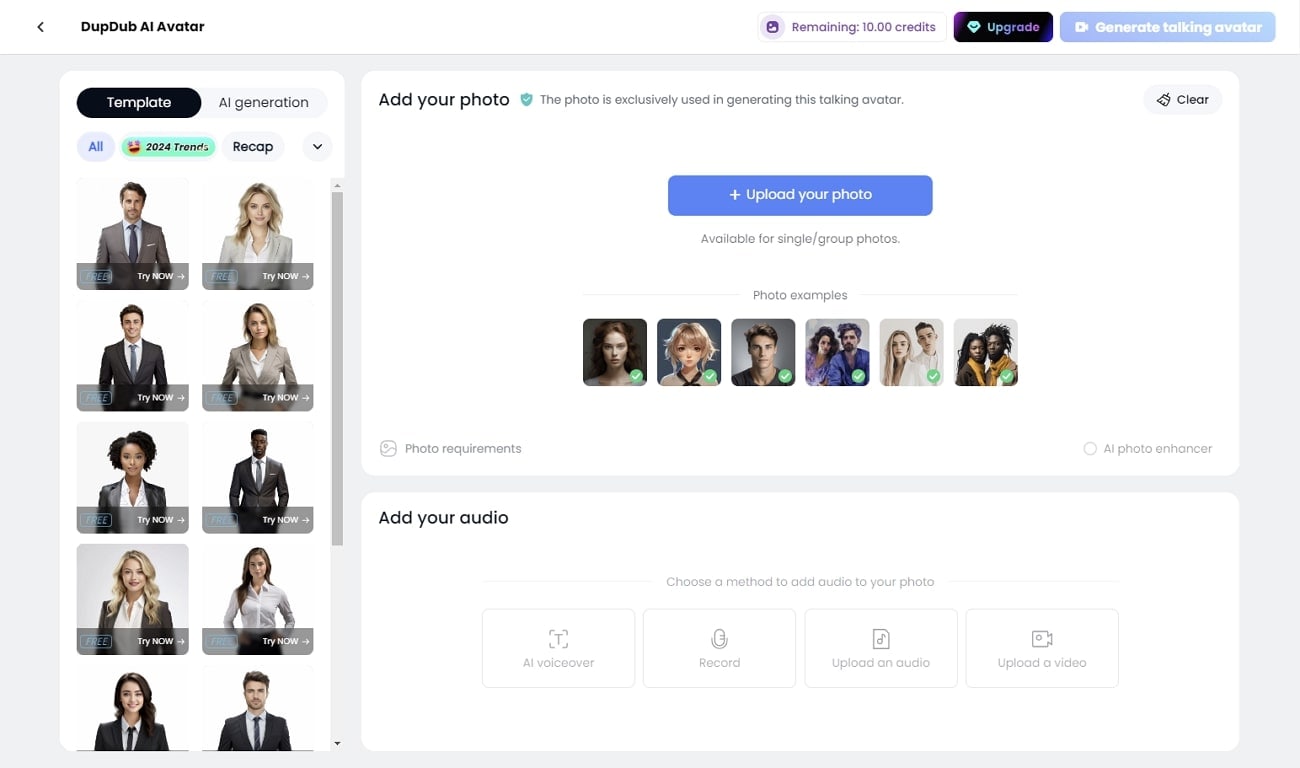
Key Features
- You can apply multiple emotions, including anger or sadness, to your voiceover.
- This tool allows you to adjust the pitch and speed of the voice of yourtalking face.
- Dupdub provides a great lip-sync effect according to your input text.
3. Feedeo
If you want a tool to help you create interactive3D face video s, Feedeo should be your go-to tool. With its component features, you can add buttons and emojis to your talking photos. Plus, you can also utilize the logic feature to determine the direction of your talkative video.

Key Features
- This tool provides a range of AI avatars for creating talking photos.
- You can add personalized scripts to deliver your message through these videos.
- It offers an AI avatar voice for generating the required talking face.
4. DeepBrain
DeepBrain allows you to generatea 3D talking face with personalized pose dynamic s. This tool has 100+ stock of avatars that have human-like expressions and accents. With the help of this tool, you can generate hyper-realistic speech. Moreover, it helps you create lip-syncing videos with this tool for different purposes.
Key Features
- Its text-to-speech feature can generate voiceover for your talking face video.
- This tool has a library of 100+ studio-quality voices.
- You just have to prompt AI to generate a talking head video.
5. Yepic
Yepic is a tool that can let you create talking photos in 65+ languages. It offers AI-powered features to customize your talking photo. It has a lip sync technology that adjusts a person’s speaking manner to match the brand’s tone.
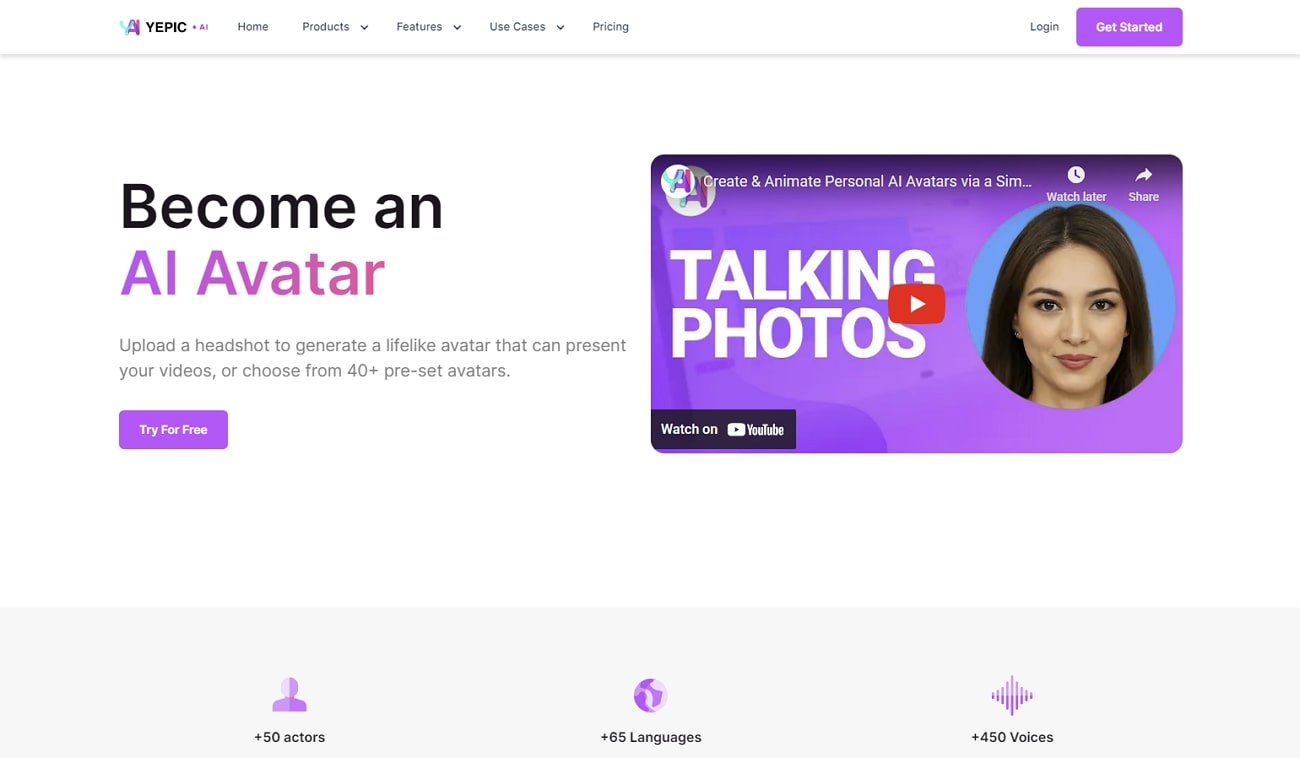
Key Features
- Yepic offers various talking styles and voices for different use cases.
- It allows you to select the age, gender, and ethnicity of an avatar.
- This tool offers 40+ AI actors for your talking photos.
Part 2. How to Make Good Talking Face With Recommend Tool
You become familiar with the online tools that can generate3D talking face videos. Undoubtedly, these tools provide features to customize talking face video. However, when searching them on the browser to create talking photos, there is a hassle with these tools. If you want a desktop solution, we have discussed Wondershare Virbo as a diversified tool that offers this service.
To make your videos catchy, it allows you to create talking head videos with different avatars. This feature helps your videos become more engaging and memorable. Users can easily adjust the audio’s volume, pitch, and speed while creating the talking photo.
Key Features Highlighting Wondershare Virbo
- Text-to-Speech: WondershareVirbo’s text-to-speech feature can help you generate a voice for talking photos.
- Add Background Music: It has a background music feature to personalize your animated images. You can import the music, which will be inserted across the entire video.
- Personalize Your Content: Through this tool, you can add stickers and backgrounds to your videos. It also allows you to upload your personalized backgrounds to create videos according to your taste.
Step-by-Step Guide To Use Talking Photo Feature in Wondershare Virbo
The talking photo feature provides different languages and accents for a voiceover. Follow the step-by-step guide below to use the talking photo feature in Wondershare Virbo:
Step 1. Download Wondershare Virbo and Choose Talking Photo Feature
Firstly, download this tool to your system from its official website. After launching and accessing it, explore the features of the tool. Click the “Talking Photo” option on its main interface to open a new window.

Get Started Online Free Download
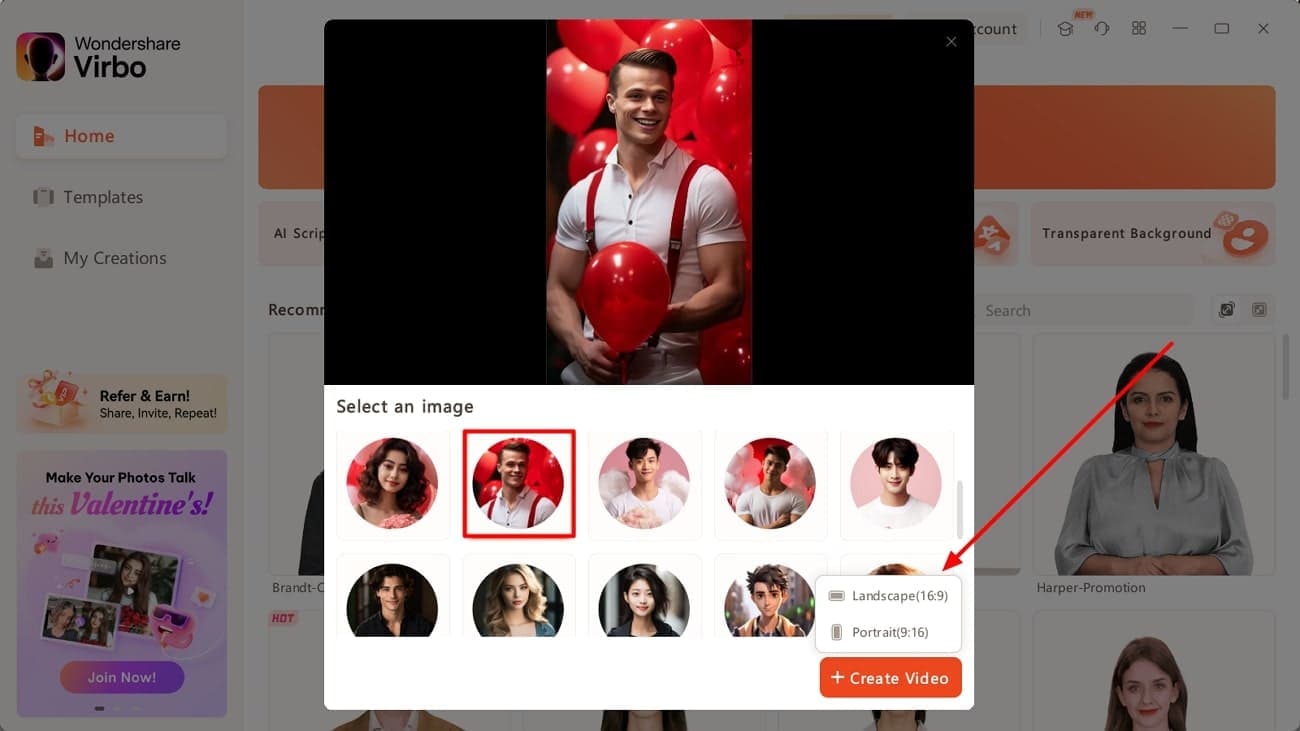
Step 2. Upload a Photo or Choose Avatar
Once the new window is opened, upload the required photo by hitting the “+” icon. You can also choose from one of the available avatar options. Now, click the “Create Video” button at the bottom of the window.\
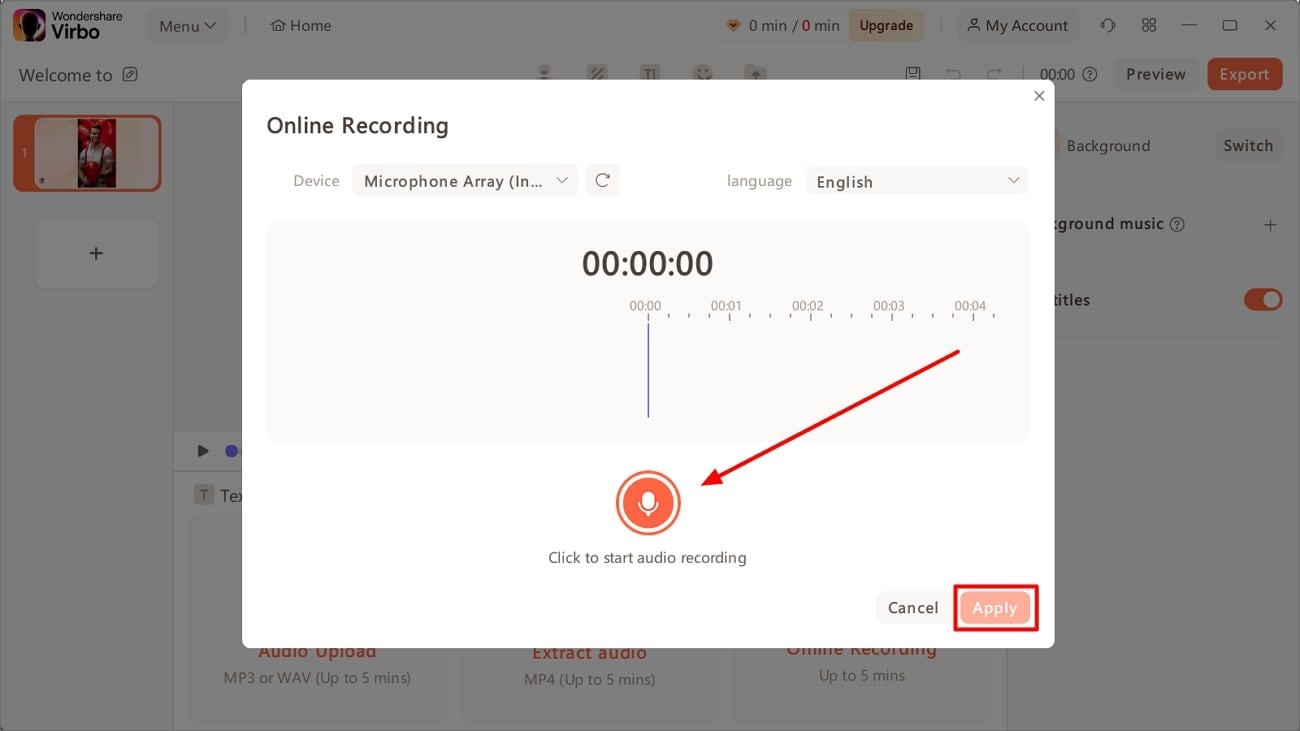
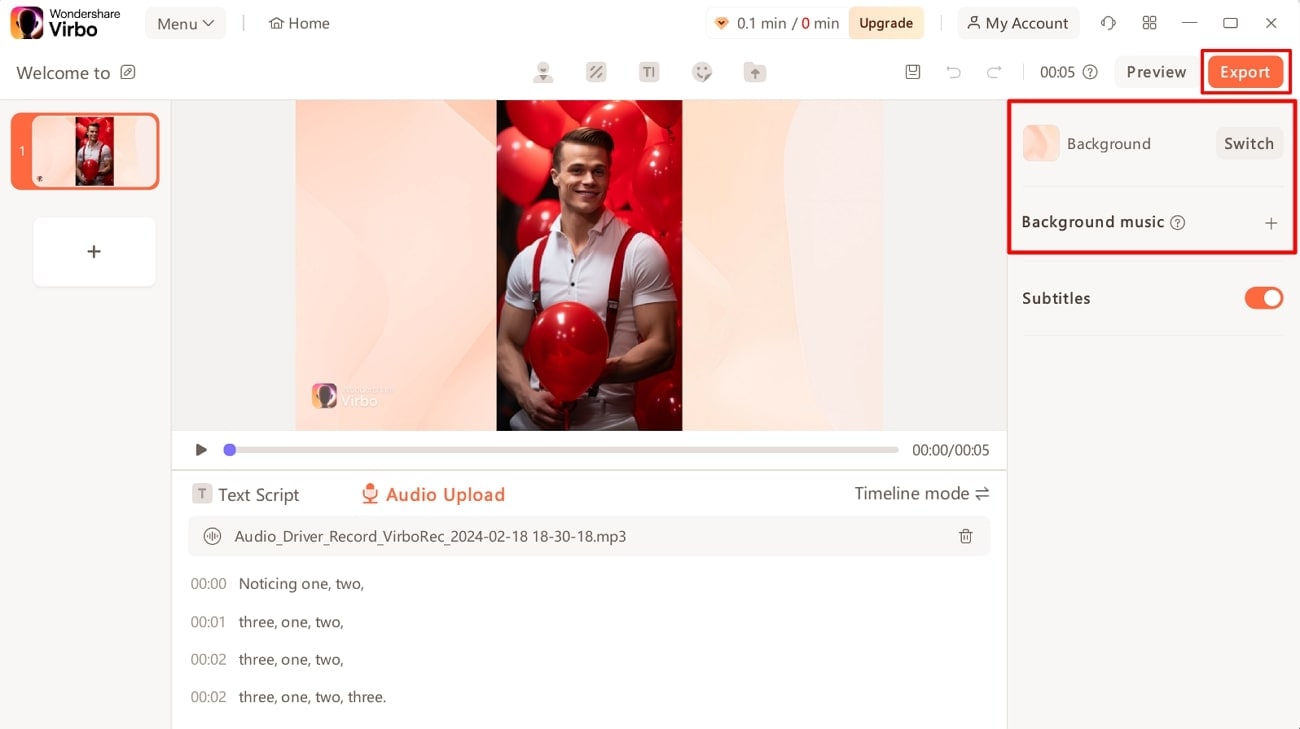
Step 3. Record Audio for Talking Photo Voiceover
On the newly opened screen of the tool, choose the “Audio Upload” tab. Next, select the “Online Recording” option to record the voiceover for the talking photo. When you record the voiceover of the talking photo, hit the “Apply” button.
Step 4. Opt for Your Preferred Background and Audio and Export
Continue to set the “Background” for your talking head video. Following this, you can also add the “Background music” of your choice into your creation to make it interesting. Once done, click the “Export” button and select the appropriate resolution to save it across your computer.
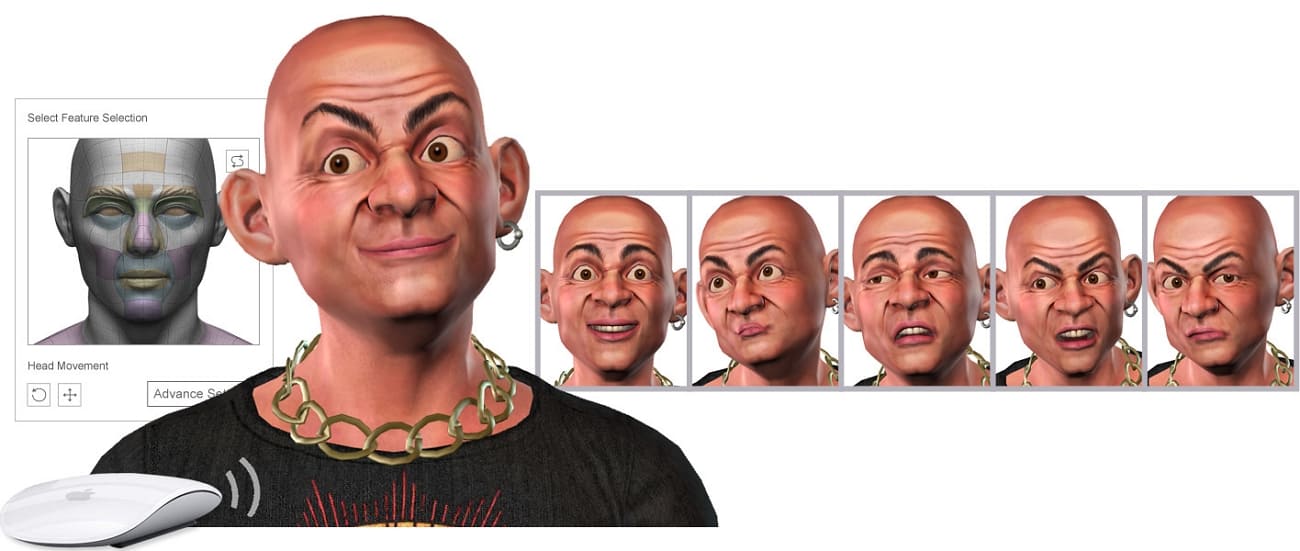
Part 3. More Details About 3D Talking Face With Personalized Pose Dynamics
With the AI revolution, you can create lifelike 3D avatars that can mimic human expressions and movements well. According to research studies,3D talking face technology is highly effective in enhancing user interaction. Several innovations have been introduced in this field, such as:
- Enhanced facial recognition accuracy.
- Improved replication of facial expressions.
- Development of more realistic and dynamic avatars.
- Advancements in gesture recognition capabilities.
- Integration of personalized pose dynamics for lifelike movements.
These improvements have changed how we communicate online. They keep getting better, making our digital interactions more realistic and exciting. Plus, they’re always getting even more advanced, pushing the limits of what’s possible in virtual communication.
We can expect even more exciting innovations in3D talking face technology in the future. These may include advancements in artificial intelligence, leading to even more realistic and responsive avatars. Additionally, improvements in hardware and software integration could enable more seamless interactions.
Image name: details-of-making-the-perfect-talking-face-content-12.jpg
Image alt: 3d talking face personalization
Conclusion
Talking face is the phenomenon that gives life to your photo. We have enlisted several tools to help you generate the talking face video. However, the most reliable and potential tool amongst them for this creativity is Wondershare Virbo. This tool provides different options for talking photo voiceover. Also, you can generate a3D talking face with a pose dynamic through Wondershare Virbo.
Get Started Online Free Download
Download/Install/Register/Uninstall | Wondershare Virbo
Download/Install/Register/Uninstall
02 Register
03 Update
04 Uninstall
1. Download & Install
If you don’t have Virbo yet, click the button below to download it, and then follow the instructions to finish the installation process.
Download to try now:
For Win 7 or later(64-bit)
2. Register
❶ Install and open the program. Click the Login button in the upper right corner.
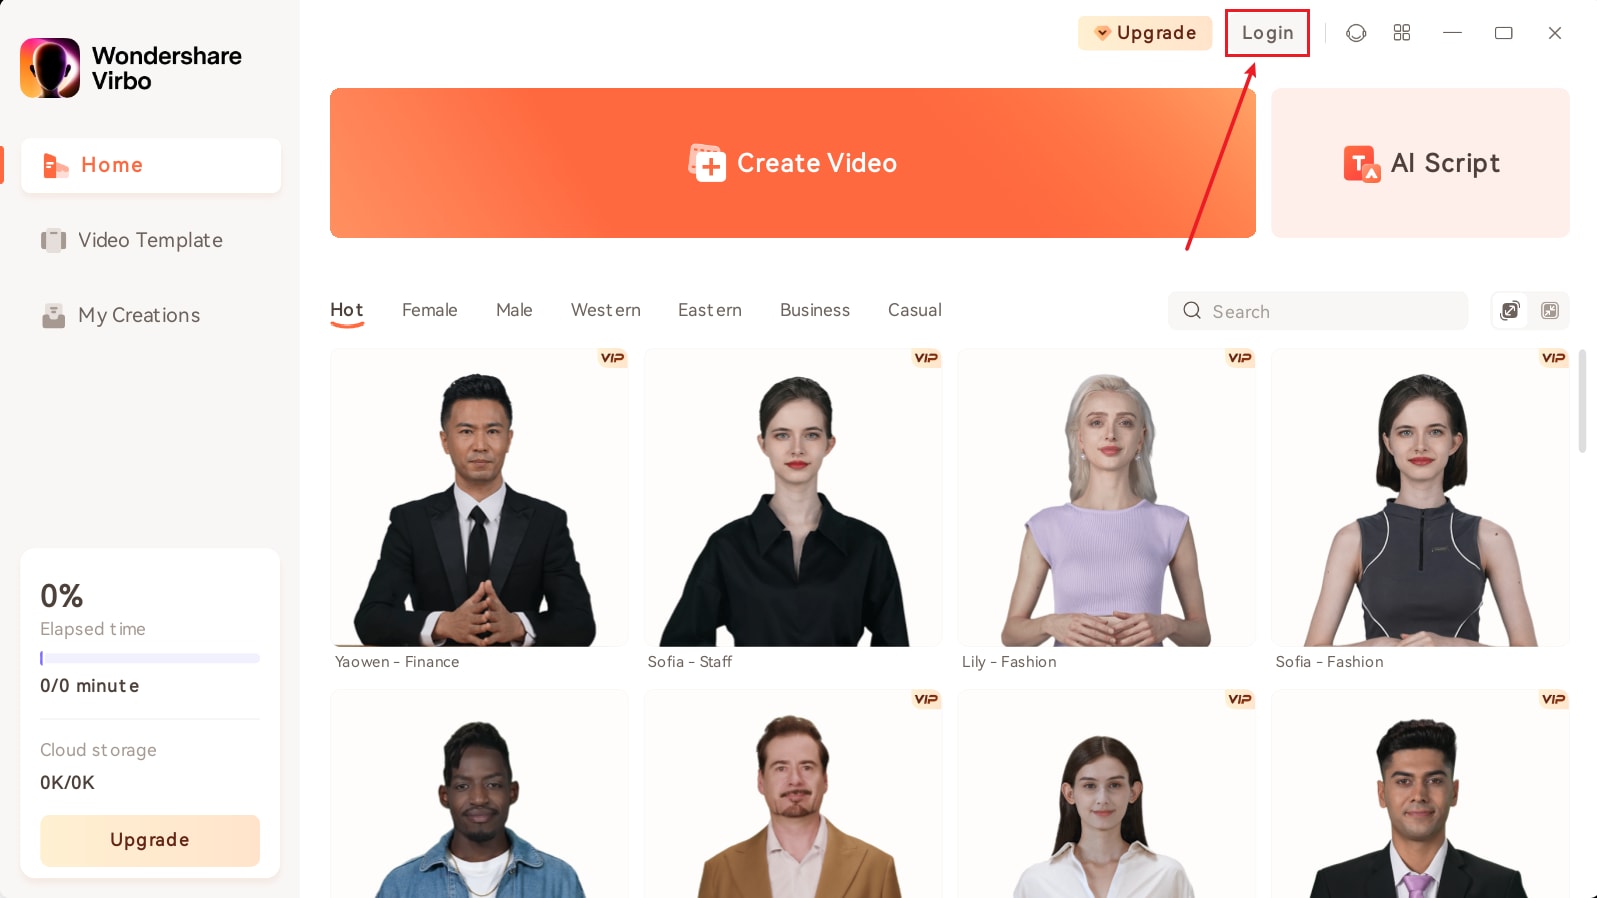
Login Virbo
❷ Log in with your Wondershare ID (the email you used to place the order) and your password in the pop-up login panel. Find your Wondershare account and password in the confirmation email you receive after the purchase. You can also sign up and log in with your Google account.
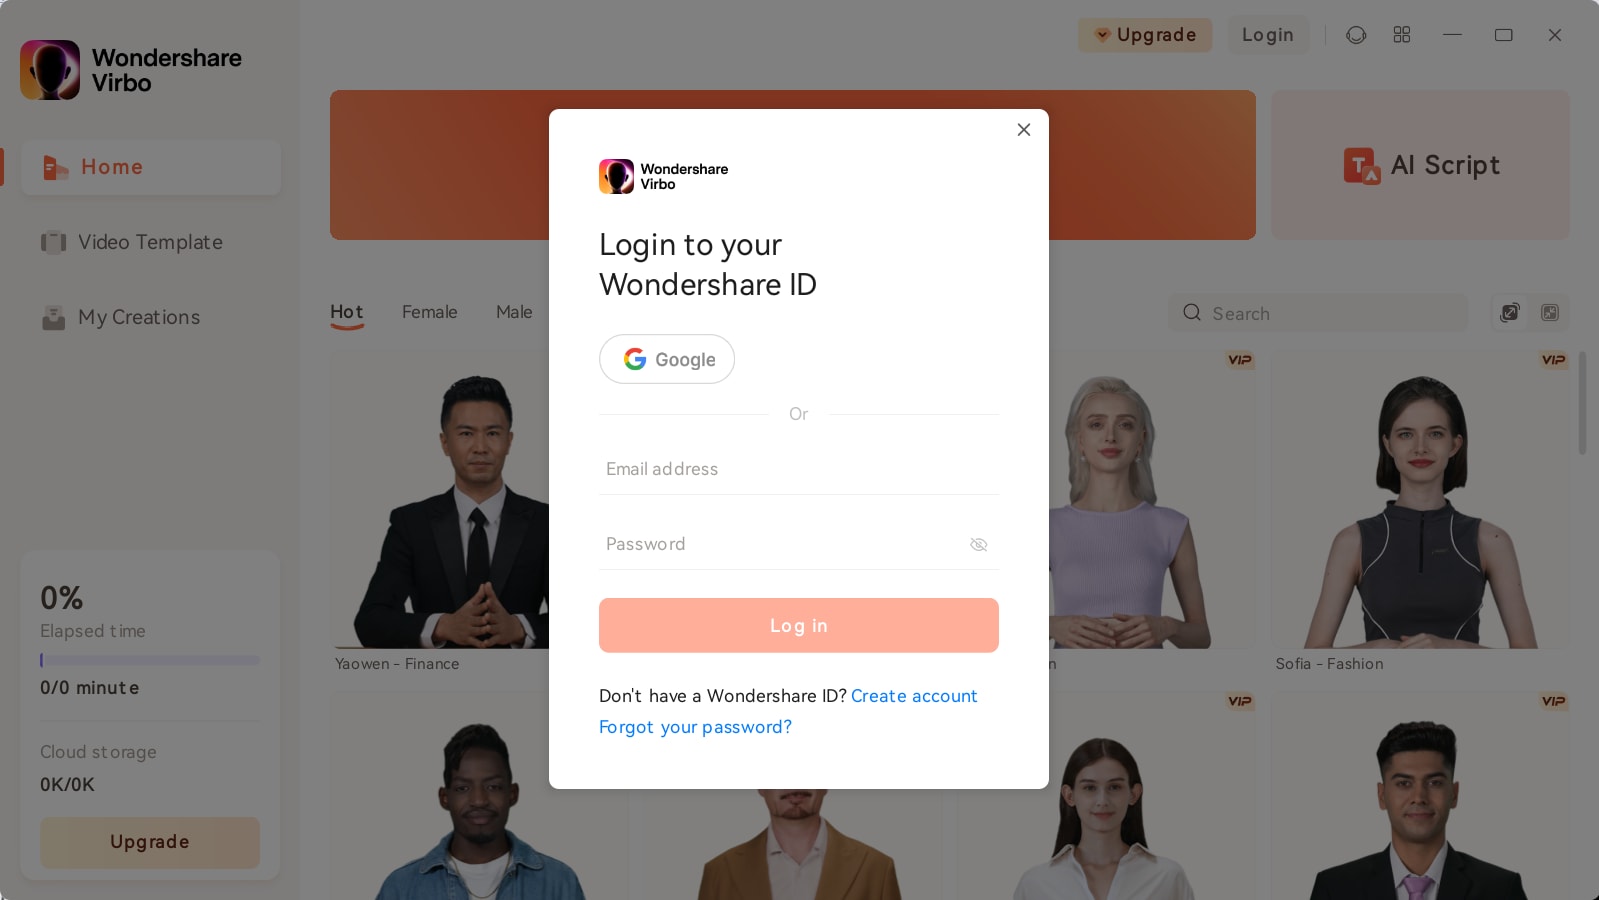
Log in with Wondershare ID
❸ After a successful login, click the Avatar icon to verify your activation status.
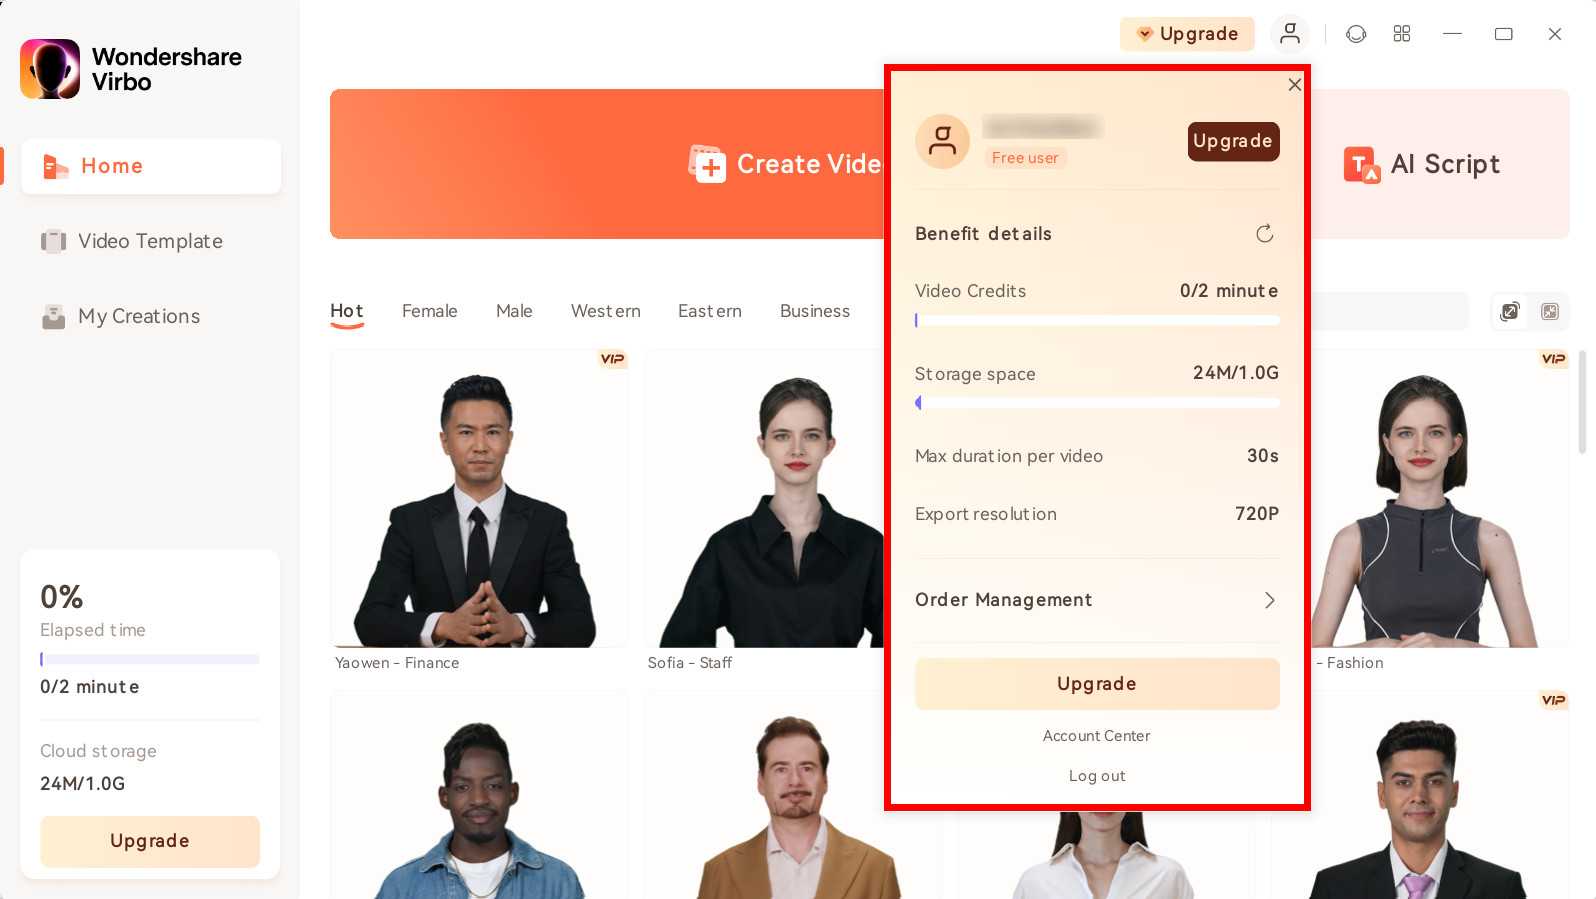
Check Your Activation Status
3. Update
If you want to keep Virbo up to date, click Help Center at the upper right corner, and then click Check for Updates.
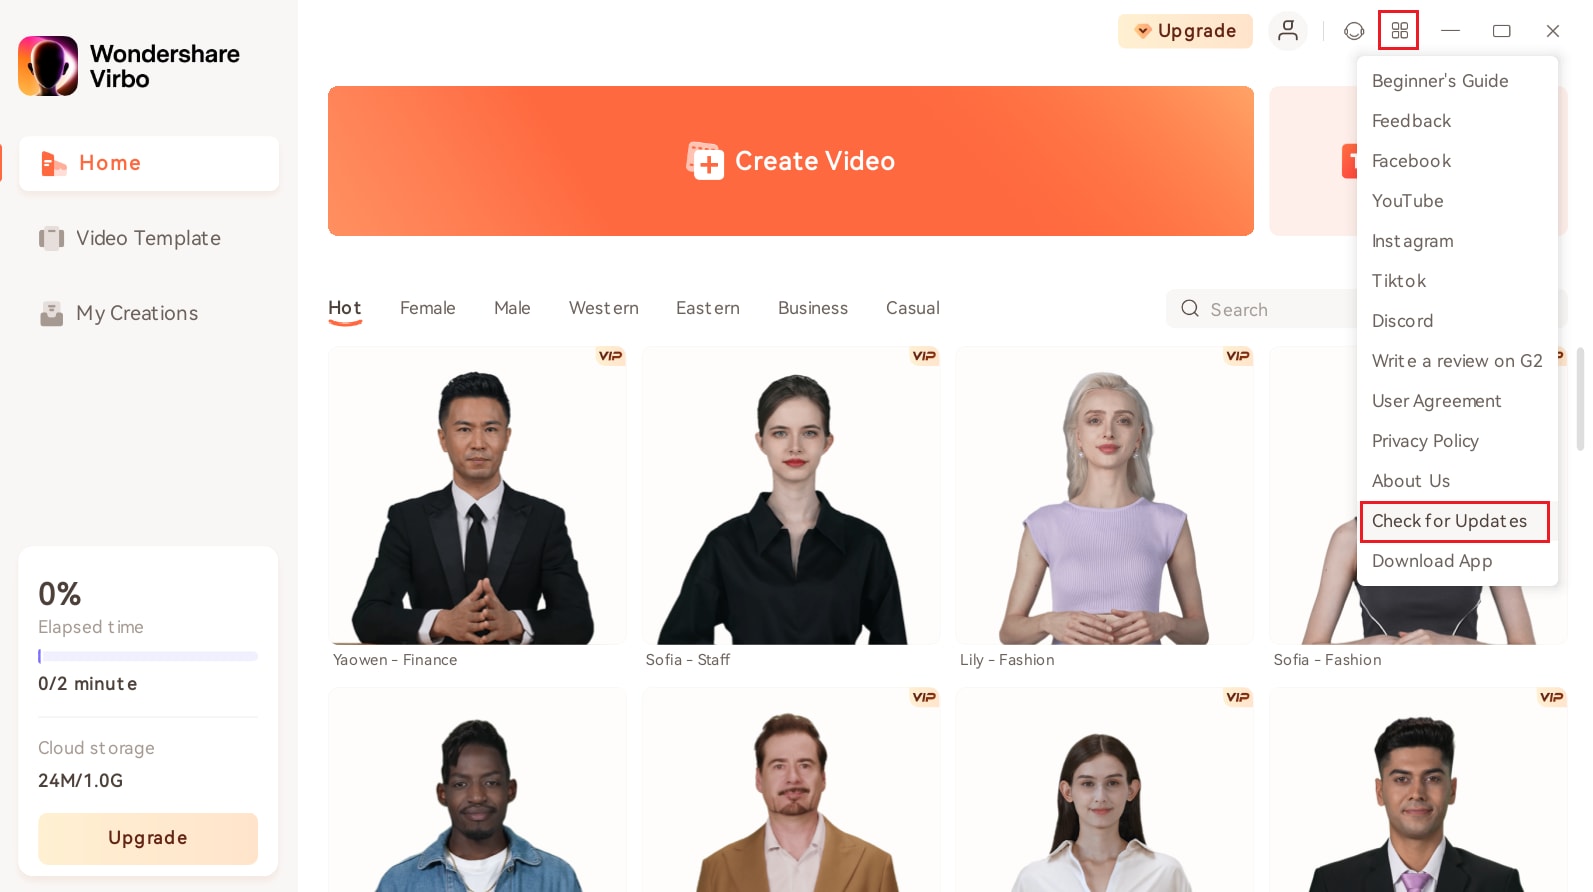
Check for Updates
4. Uninstall
Right-click Virbo icon, click Open File Location and double-click unins000.exe to uninstall.

Uninstall Virbo
02 Register
03 Update
04 Uninstall
1. Download & Install
If you don’t have Virbo yet, click the button below to download it, and then follow the instructions to finish the installation process.
Download to try now:
For Win 7 or later(64-bit)
2. Register
❶ Install and open the program. Click the Login button in the upper right corner.
Login Virbo
❷ Log in with your Wondershare ID (the email you used to place the order) and your password in the pop-up login panel. Find your Wondershare account and password in the confirmation email you receive after the purchase. You can also sign up and log in with your Google account.
Log in with Wondershare ID
❸ After a successful login, click the Avatar icon to verify your activation status.
Check Your Activation Status
3. Update
If you want to keep Virbo up to date, click Help Center at the upper right corner, and then click Check for Updates.
Check for Updates
4. Uninstall
Right-click Virbo icon, click Open File Location and double-click unins000.exe to uninstall.
Uninstall Virbo
Also read:
- [New] Cinema’s Best Bits Select Snippets for Edits
- [New] In 2024, The Hidden Truths About YouTube Earnings
- 2024 Approved Facebook Videos; Vertical or Horizontal?
- 2024 Approved The Ultimate Encyclopedia Reacting Effectively on YouTube Vids
- 2024 Approved Video Translator
- Best 5 Viral Video Marketing Techniques For Big Sellers
- Digital Photo Management Incorporating Dates Seamlessly
- Easier Ways to Transform MP4 Files Into MOV Format
- In 2024, Unveiling Burst Function in GoPro Cameras
- New 2024 Approved Is Coqui Voice Cloning Worth the Hype? A Comprehensive Review
- New Best Celebrity Voice Generator Tools to Transform Your Voice for 2024
- New Best Toolbox to Translate YouTube Videos to English Subtitles
- New Create An AI Avatar Video
- OBS Camera Not Working Problem [Solved]
- Update DEX v3.16.0.1 - Instantly Access New Features & Download From Official Site!
- Title: Updated 2024 Approved 7 Best Explainer Video Makers You May Like
- Author: Sam
- Created at : 2025-02-07 23:28:16
- Updated at : 2025-02-14 20:34:42
- Link: https://ai-voice-clone.techidaily.com/updated-2024-approved-7-best-explainer-video-makers-you-may-like/
- License: This work is licensed under CC BY-NC-SA 4.0.