

New In 2024, Installation and Registration | Wondershare Virbo
Installation and Registration | Wondershare Virbo
For iOS
1. System Requirements
To consume Virbo for iOS, you need to fulfill the following requirements. The overall speed and performance of the tool are entirely based on the device, its memory, and storage space. The following are the minimum system requirements:
- System: Requires iOS 13.0 or later.
- Equipment: Can work with iPhone 7+ or later models.
- Available Space: 9MB of free space (200MB preferable)
2. Download and Installation
- Launch the App Store on your iOS device and look for “Wondershare Virbo” in the Search toolbar.
- Tap the “Get” button against the tool from the results.
- Continue to select the “Install” button that appears on the pop-up window to proceed with the installation.
- As it is installed, choose “Open” to launch the program.
- Once it launches, you need to accept the “Privacy Policy” and “End User License Agreement” by tapping the “Agree” button.
For Android
1. System Requirements
To use Wondershare Virbo on your Android device, you must fulfill the following requirements. As stated before, the speed and performance of the program are entirely based on the device, its memory, and available space:
- System: Android 7.0 (Nougat) and later.
- Required Chipset: ARMEABI-V7A, ARM64-V8A
- Available Space: 200MB of Storage Space is needed.
2. Download and Installation
- You need to select the download link that appears on your Android smartphone.
- The installation package will download on your device, which can be tapped for further installation.
- To start using Virbo, select the “Agree” option against the “Privacy Policy” and “End User License Agreement” for the tool.
Create Video with PPT | Wondershare Virbo
Create Video With PPT
Wondershare Virbo is a comprehensive video-making facility offering a wide set of possibilities to its users. It has recently extended its productivity by offering the option of creating videos out of PPT. With such diverse options to convert PowerPoint to video, you can develop the best visuals for your audience from the available content. Following is a comprehensive step-by-step guide to converting PPT to video with Virbo.
02Add Avatars and Voiceover To the PPT Video
03Perform Other Edits to Video
04Preview And Export Final PPT Video From Virbo
Step 1. Start By Importing Your PPT File
After launching Wondershare Virbo on your desktop, continue to select the “Create Video“ button. As this opens a pop-up, select the “Import PPT“ option on the bottom-left to add your PowerPoint file.
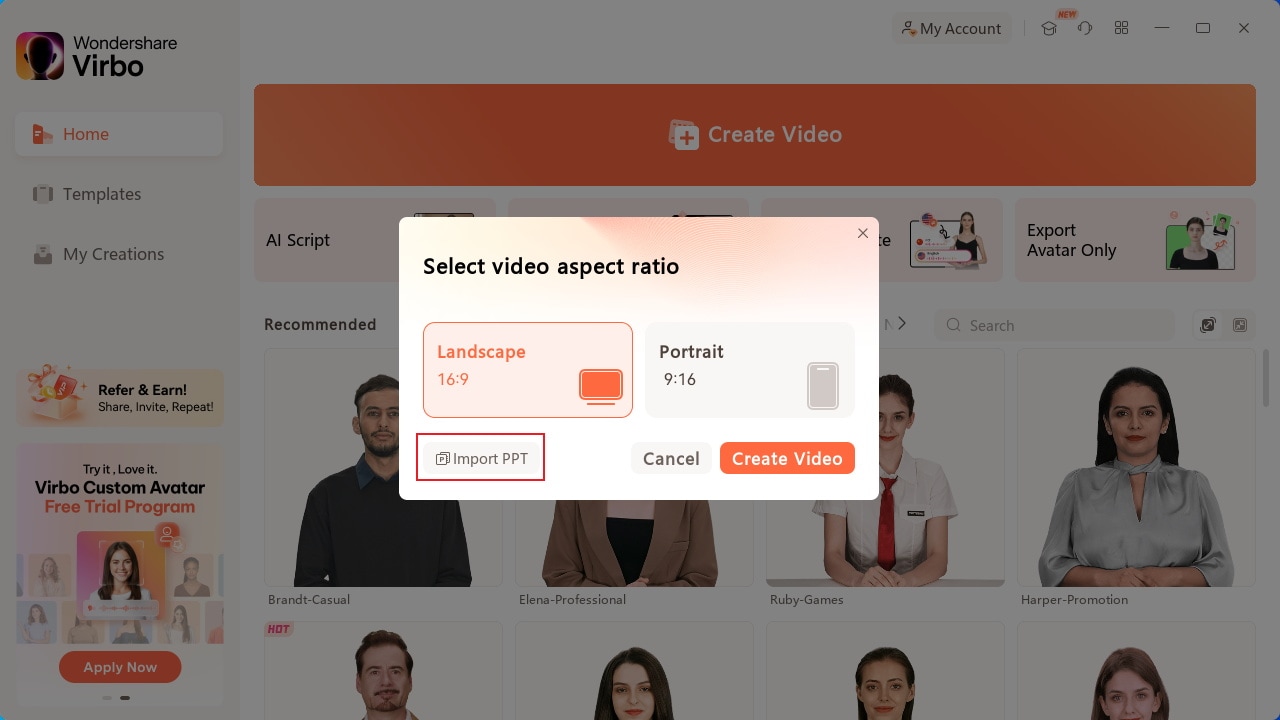
Choose Import PPT
Step 2. Add Avatars and Voiceover To the PPT Video
As you’ve imported your PPT file successfully, define whether you want to extract your script from the file or not. Click “Create Video” to redirect to the next window, which outlines the PowerPoint file as a video.
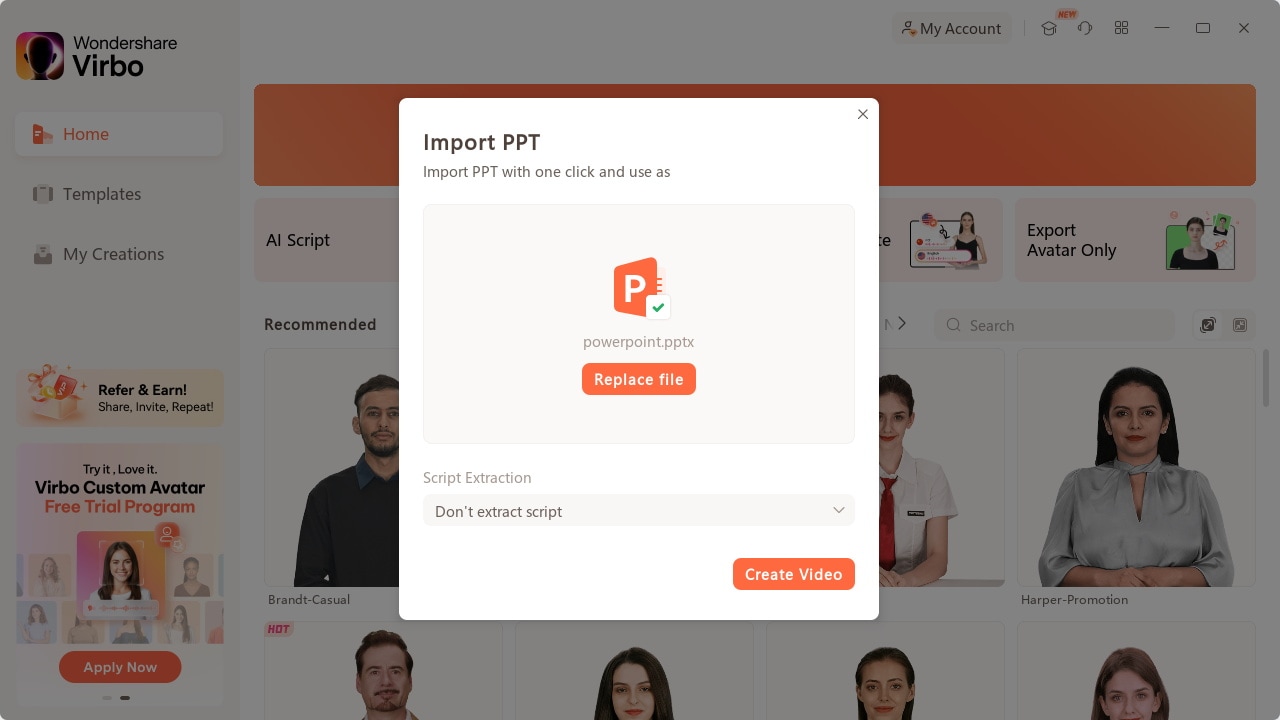
Import PPT
Here, you need to define a proper avatar according to your video, which can be done using the “Avatars“ button on the top toolbar.
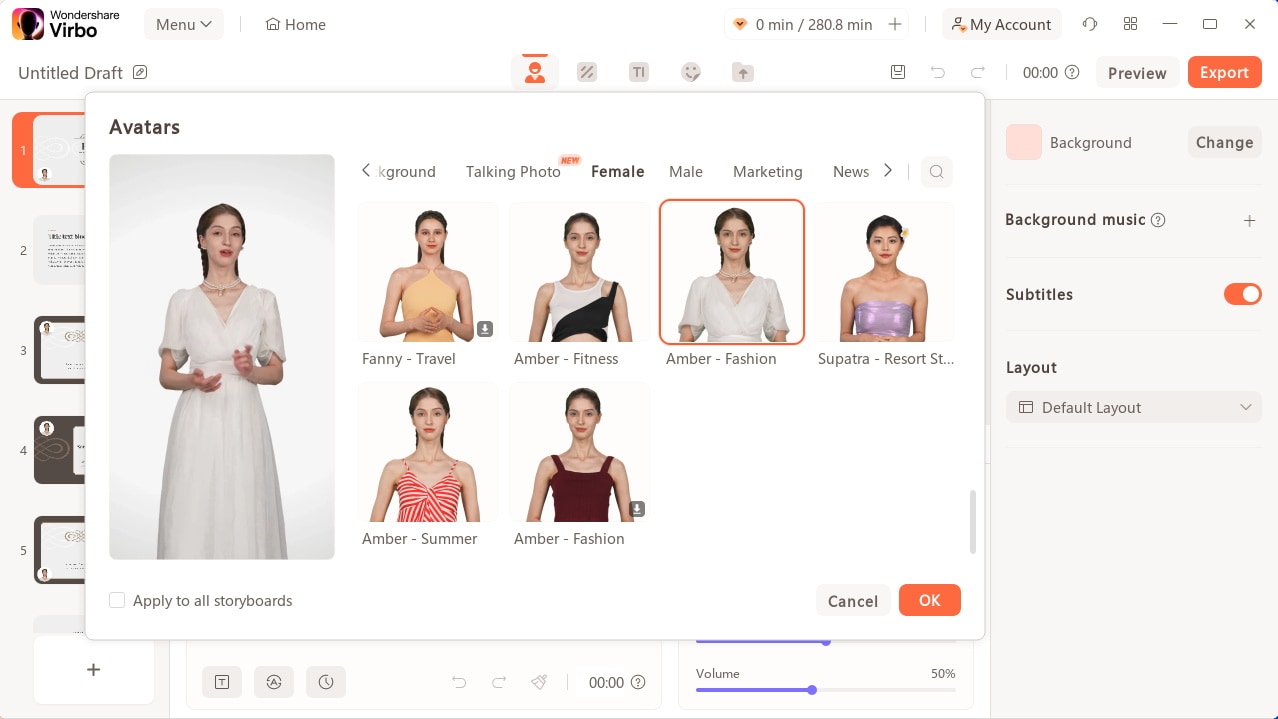
Select Avatars
Consequently, you need to add a proper voiceover that will assist you in explaining the PowerPoint file within the video. For that, lead to the “Text Script” or “Audio Upload” section to add the appropriate voiceover. Define your voice from the available list and set its parameters, or upload your pre-recorded voice to add along with the avatar.
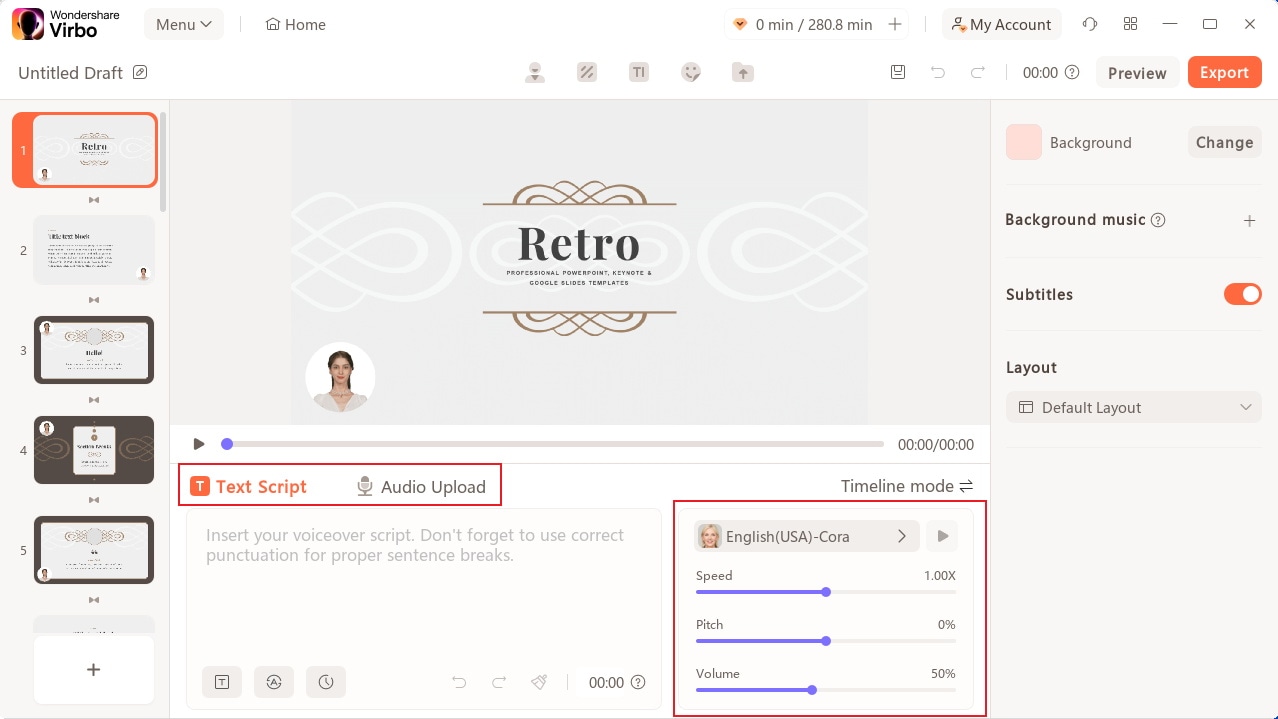
Add Voiceover
Step 3. Perform Other Edits to Video
After selecting the avatar and voiceover for the video, you can perform other edits as well. Change the background of the video or add music in the background according to your choice. If you want to display the subtitles across the video, enable the “Subtitle“ option. Furthermore, for more advanced settings in your video, you can define a proper “Layout“ or add stickers and edit text style on the top toolbar.
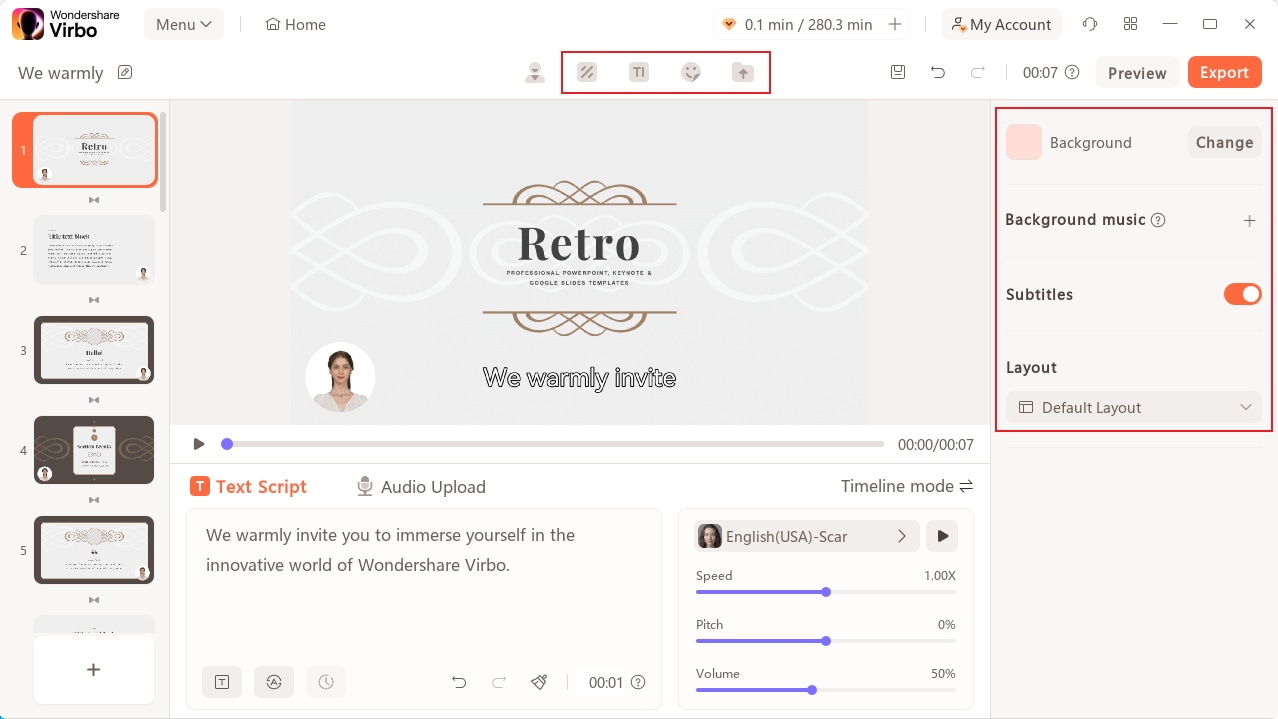
Edit Video
Step 4. Preview And Export Final PPT Video From Virbo
Once you finish all the edits, click the “Preview“ button on the top right corner to preview the video.
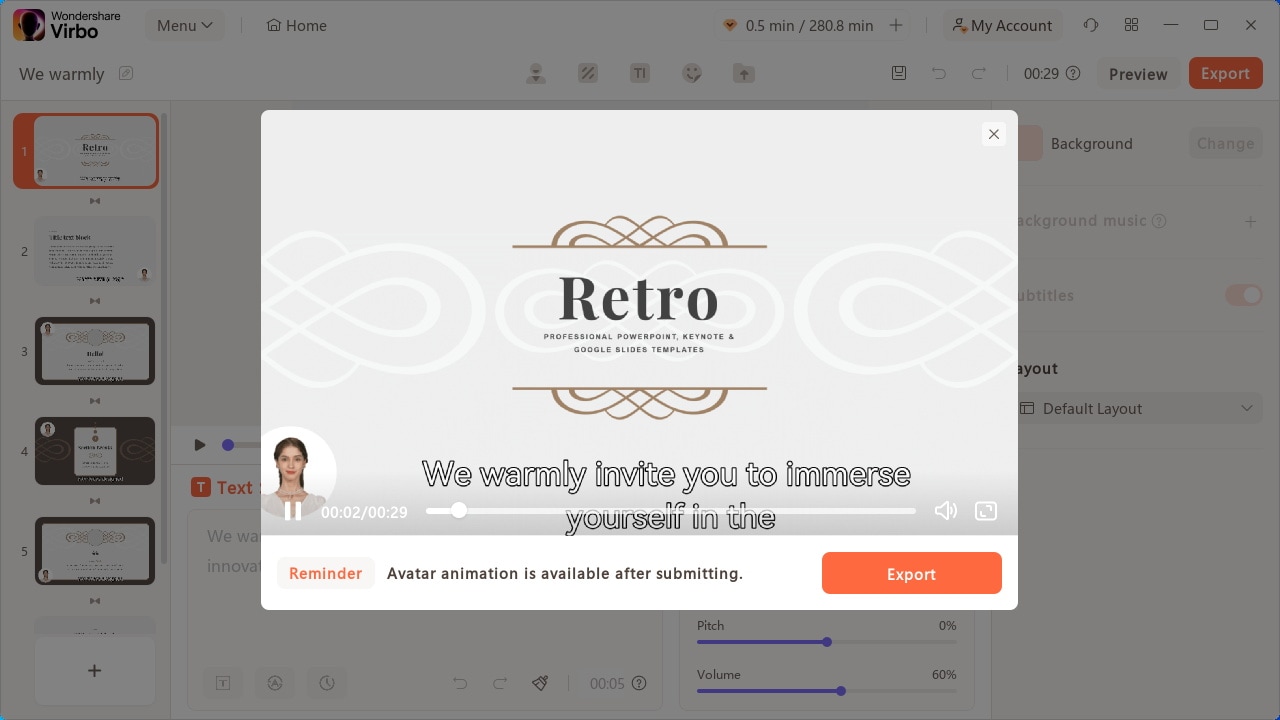
Preview Video
If you are satisfied with the video after previewing, click the “Export“ button to save this video.
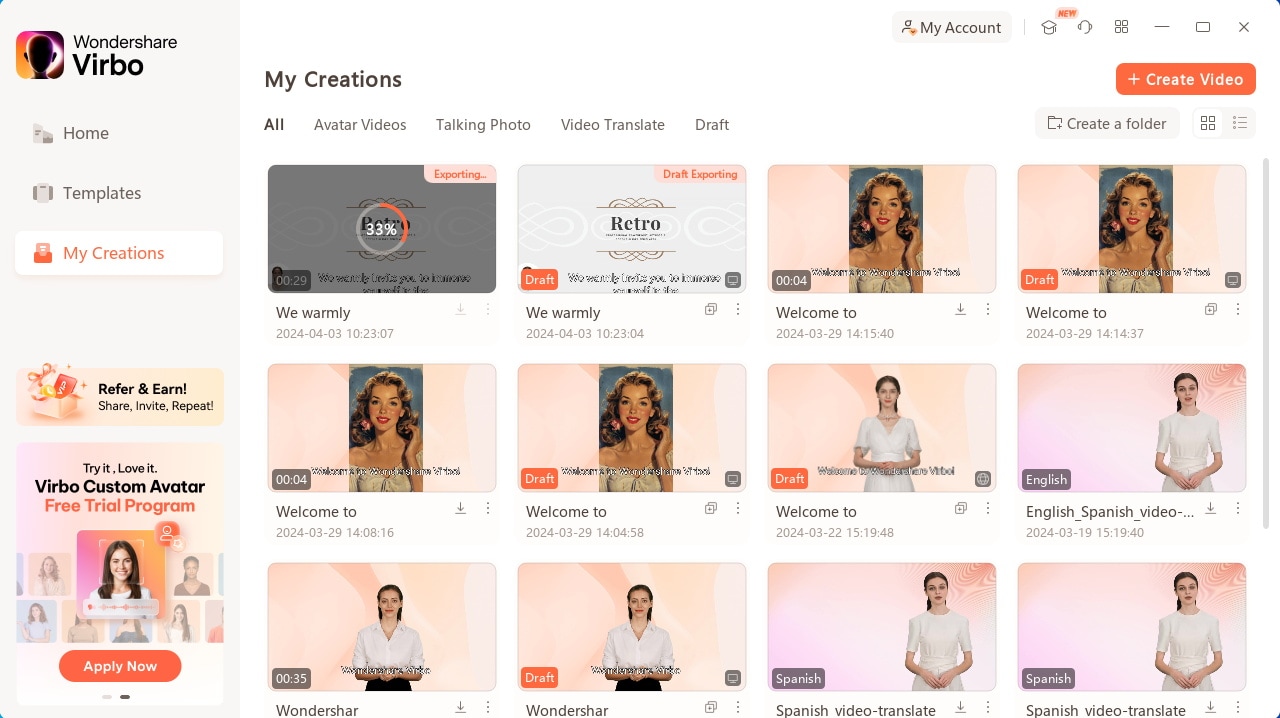
Export Video
02Add Avatars and Voiceover To the PPT Video
03Perform Other Edits to Video
04Preview And Export Final PPT Video From Virbo
Step 1. Start By Importing Your PPT File
After launching Wondershare Virbo on your desktop, continue to select the “Create Video“ button. As this opens a pop-up, select the “Import PPT“ option on the bottom-left to add your PowerPoint file.
Choose Import PPT
Step 2. Add Avatars and Voiceover To the PPT Video
As you’ve imported your PPT file successfully, define whether you want to extract your script from the file or not. Click “Create Video” to redirect to the next window, which outlines the PowerPoint file as a video.
Import PPT
Here, you need to define a proper avatar according to your video, which can be done using the “Avatars“ button on the top toolbar.
Select Avatars
Consequently, you need to add a proper voiceover that will assist you in explaining the PowerPoint file within the video. For that, lead to the “Text Script” or “Audio Upload” section to add the appropriate voiceover. Define your voice from the available list and set its parameters, or upload your pre-recorded voice to add along with the avatar.
Add Voiceover
Step 3. Perform Other Edits to Video
After selecting the avatar and voiceover for the video, you can perform other edits as well. Change the background of the video or add music in the background according to your choice. If you want to display the subtitles across the video, enable the “Subtitle“ option. Furthermore, for more advanced settings in your video, you can define a proper “Layout“ or add stickers and edit text style on the top toolbar.
Edit Video
Step 4. Preview And Export Final PPT Video From Virbo
Once you finish all the edits, click the “Preview“ button on the top right corner to preview the video.
Preview Video
If you are satisfied with the video after previewing, click the “Export“ button to save this video.
Export Video
Create Talking Cartoon Images Using Top Tools
Cartoon conversation images are a modern technique to convey messages effectively. People stick around because they learn best by seeing things in books or social media. Also, people like cartoons because they tell stories in pictures that are easy to understand and enjoy.
Cartoons have come a long way, from cave paintings and symbolic drawings to AI-powered conversational videos. This article will teach you the best ways to create chatting cartoon images.
Part 1. Make Realistic Talking Cartoon Conversation Avatars With Wondershare Virbo
Standing out as an influencer today can be difficult since you should always look for new trends to boost engagement. If you’re struggling to stay on top of the rapidly changing trends, Wondershare Virbo is clearly right here for you. It allows you to add audio clips to your photos to engage people emotionally and send personal messages.
You can also add personalized background music to your talking cartoon images and give your viewers a unique experience. Virbo’s talking photo feature has made static images a thing of the past. This new feature gives you high-quality AI audio to send your message as clearly as possible. Thus, you can go viral with this amazing tool in just a few simple steps.
Top Features of Wondershare Virbo
- Virbo Talking Photo offers you a wide range of high-quality avatars to bring to life. If that is not enough, you can upload any image you would like to convert to the avatar.
- The text-to-speech feature of this tool allows you to transform your text into an audio message in several languages and accents.
- You can also upload your voice as an audio clip. Within a few seconds, you can have your own talking images cartoon.
Steps of Using the Talking Photo Feature in Wondershare Virbo
Wondershare Virbo makes your life easier with its various features. You can easily create and edit videos with its Talking Photo feature. If you want to interact with the audience globally, follow the steps to create AI-avatar videos:
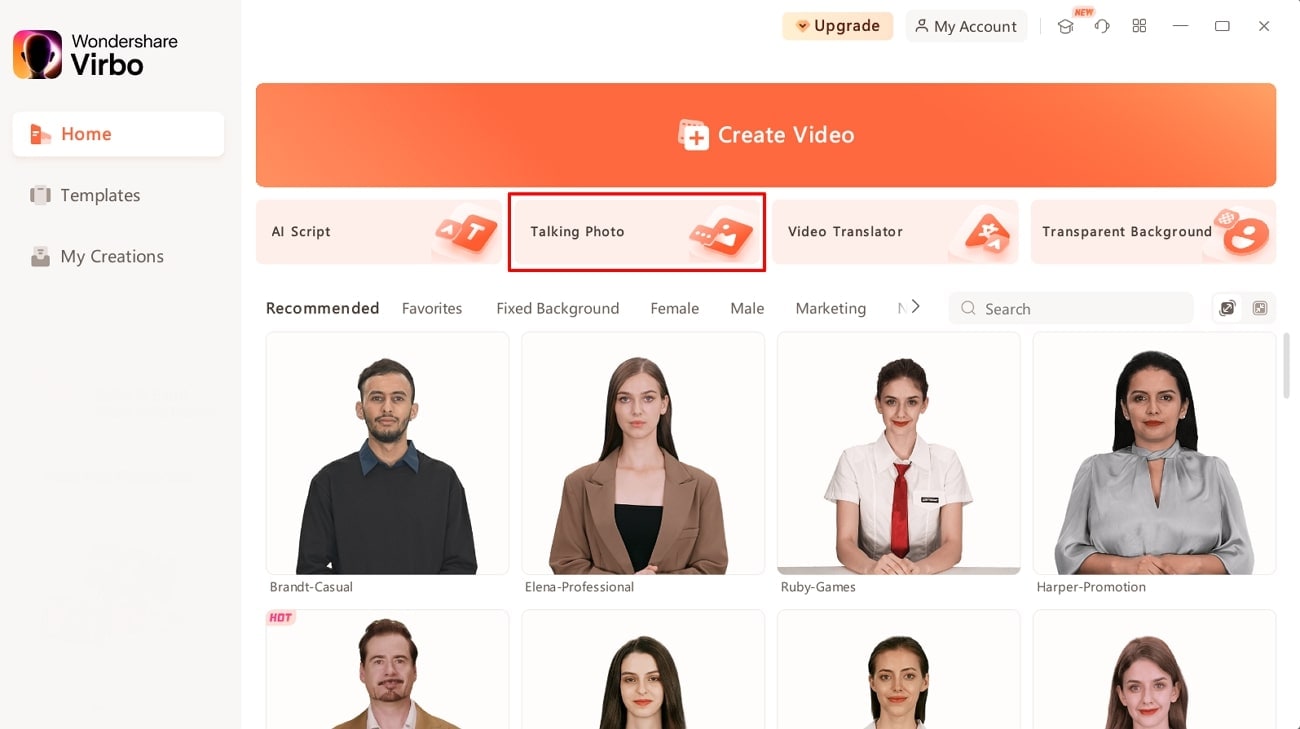
Step 1. Open the Platform and Select Talking Photo
First, open Wondershare Virbo to enter its interface. Once you open the platform, hit the “Talking Photo” feature in the “Home” tab.
Get Started Online Free Download
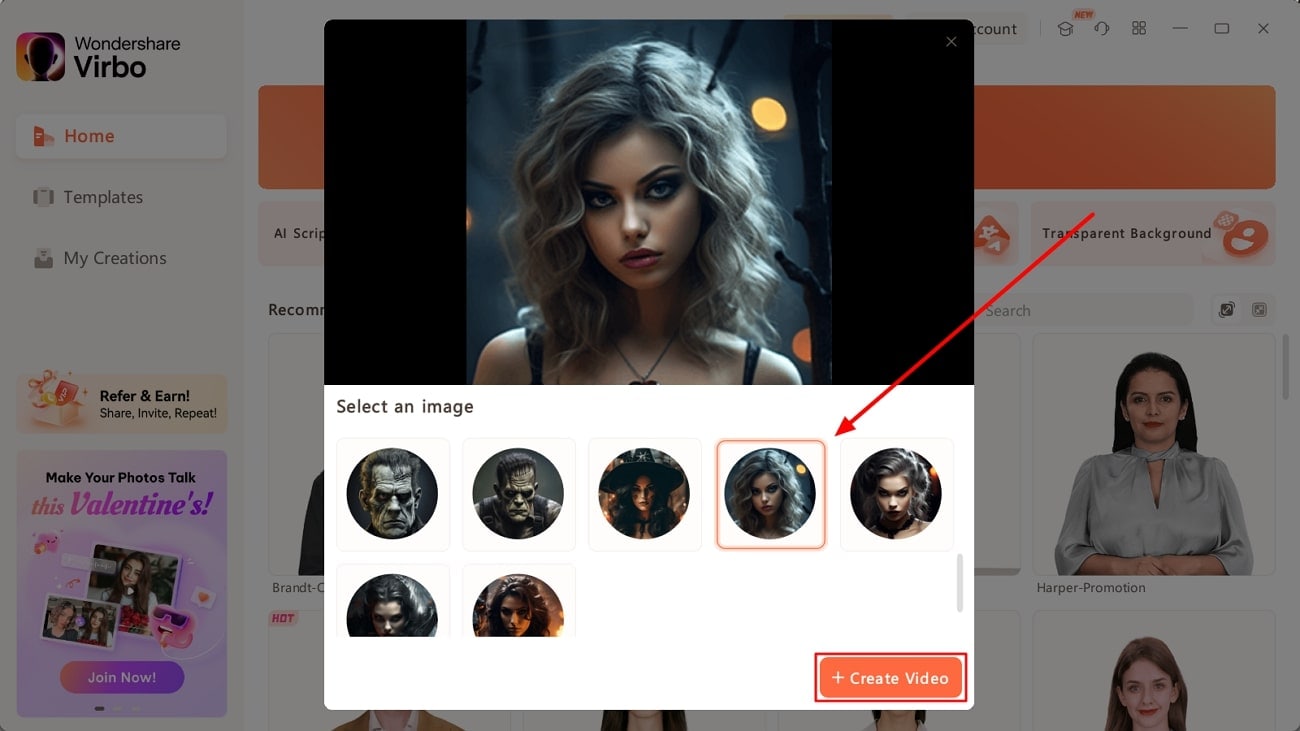
Step 2. Import the Image for Creating Video
After clicking the feature, a window will pop up on your device with the “Select an Image” option. Here, select the image of your choice and click on the “Create Video” option below to generate a video.
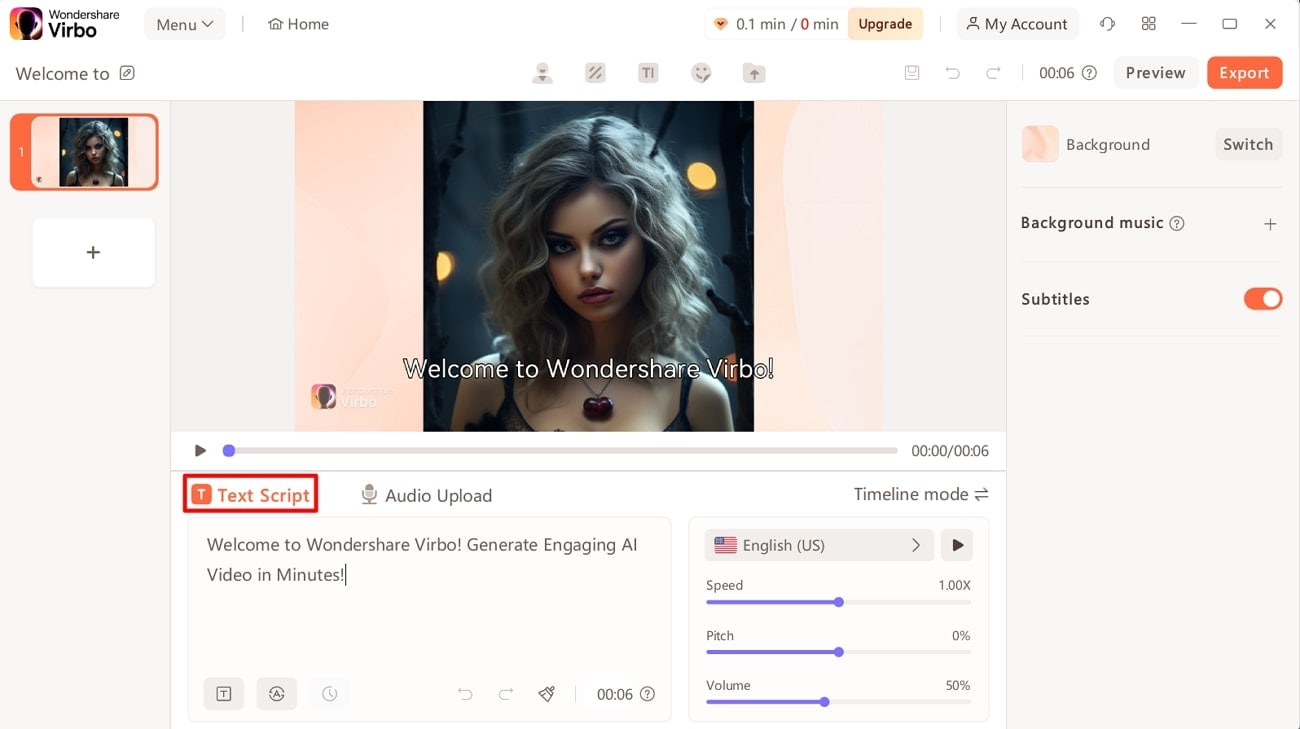
Step 3. Write a Script for Your Video
Once you pick the avatar, locate the text box on the left side of the window. Write an engaging script to convey a message through your realistic, talking animated avatars.
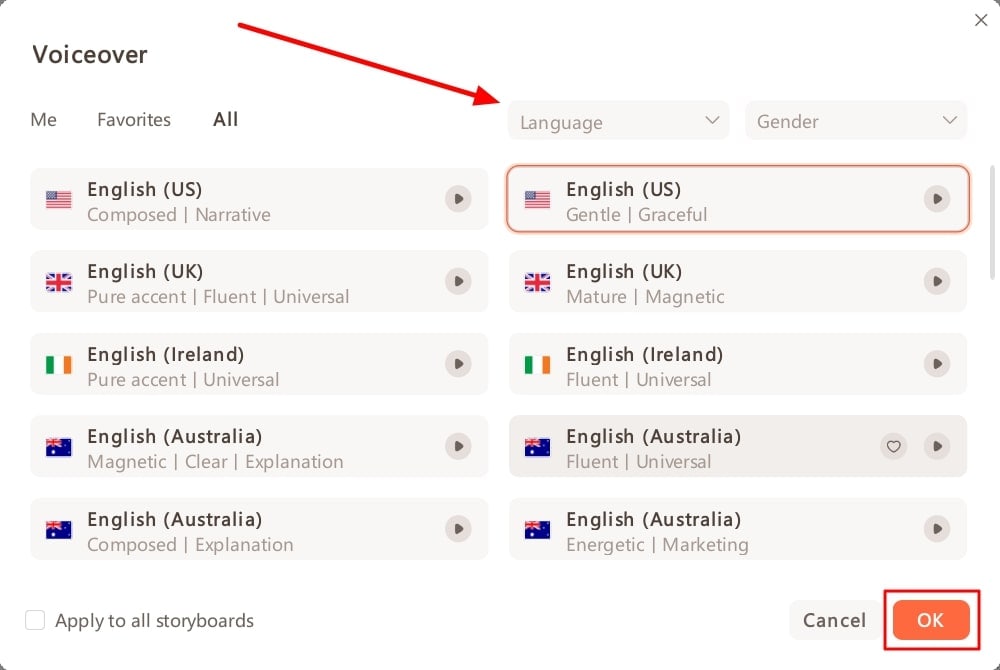
Step 4. Select Your Desired Language and Accent for Creating a Realistic Avatar
Start by clicking on the language menu to access a set of settings. Within this window, select the gender for the voiceover from the dropdown menu. Afterward, you’ll be able to choose your preferred language and accent. Upon making these selections, click the “OK” button to proceed.
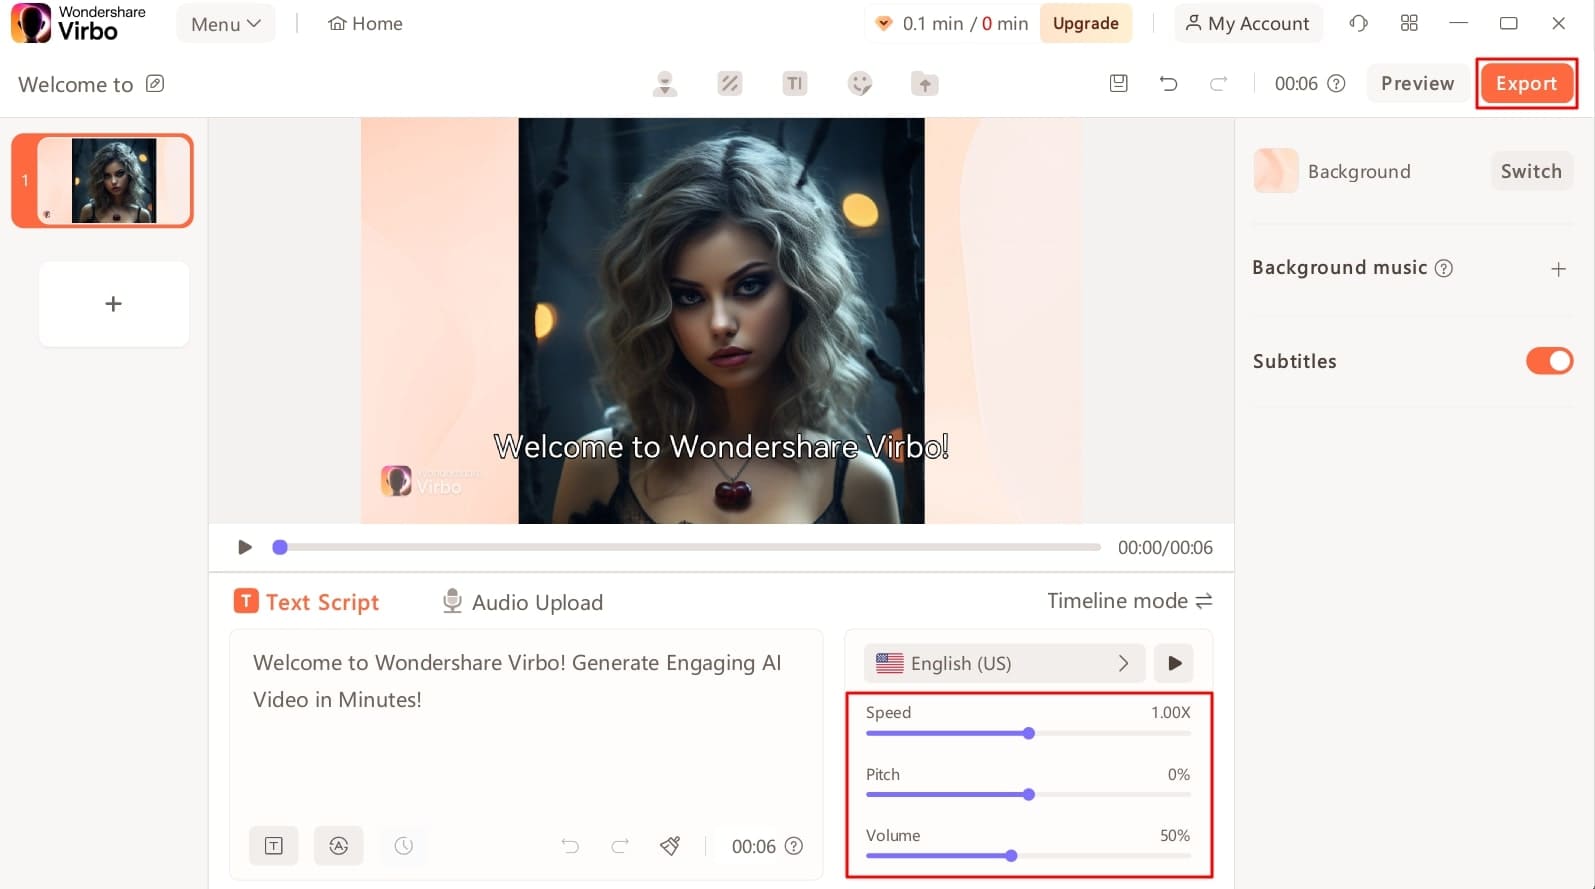
Step 5. Customize the Settings and Export the Talking Animated Video
Now, fine-tune the voiceover’s speed, pitch, and volume using the sliders. Once adjustments are complete, you can save this realistic animated video by clicking the “Export” button.
Part 2. How To Make Chatting Cartoon Images With Side Faces?
As we discussed, chatting cartoon images have emerged as vital for engaging with the audience. However, it is not easy to generate side pose animated images using conventional tools. Users can face difficulty in finding a tool to create such images. Nevertheless, you don’t have to worry about this problem, as we have identified a suitable tool for you.
If you are also looking to create speaking cartoon images, Kapwing can prove to be a handy tool in this regard. This tool’s animated video maker feature offers thousands of side-face animations and effects to make content more interesting.
Key Features of Kapwing
- You can simply prompt AI to generate side pose animated videos.
- It allows you to set custom backgrounds for your talking cartoon images.
- Kapwing even allows users to make creative memes with its built-in meme generator.
Guide To Make Side Face Chatting Cartoons via Kapwing
With the simple interface of this tool, you can bring your character to life in no time. Follow the steps below and make a perfect animation of conversation cartoon images.
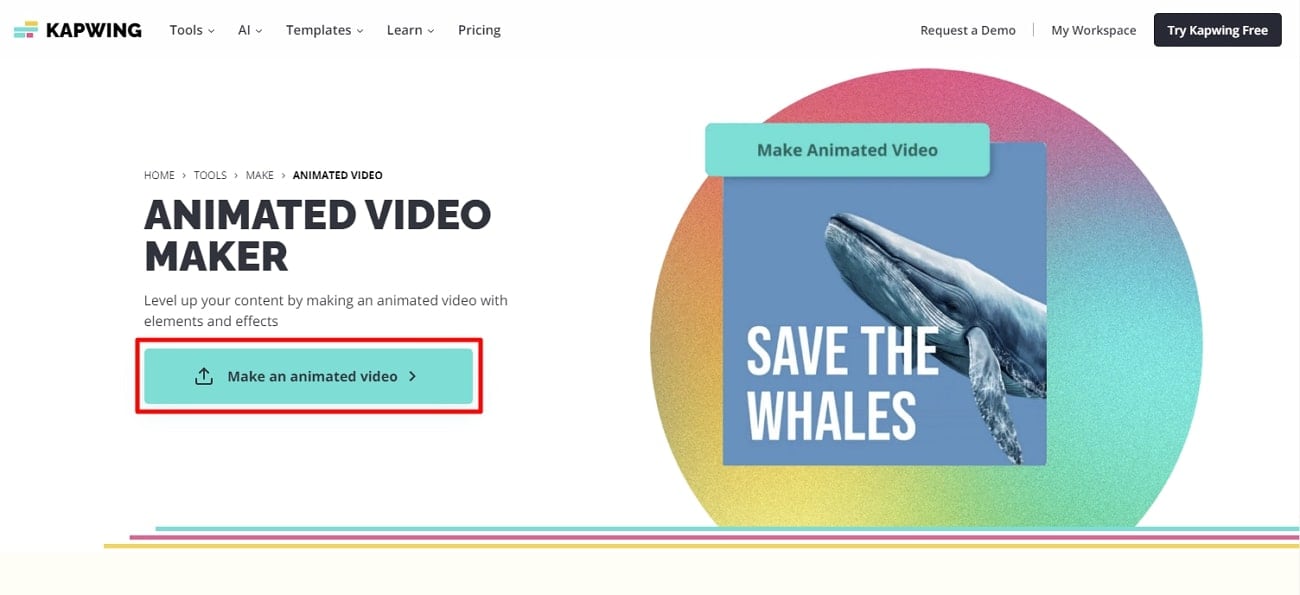
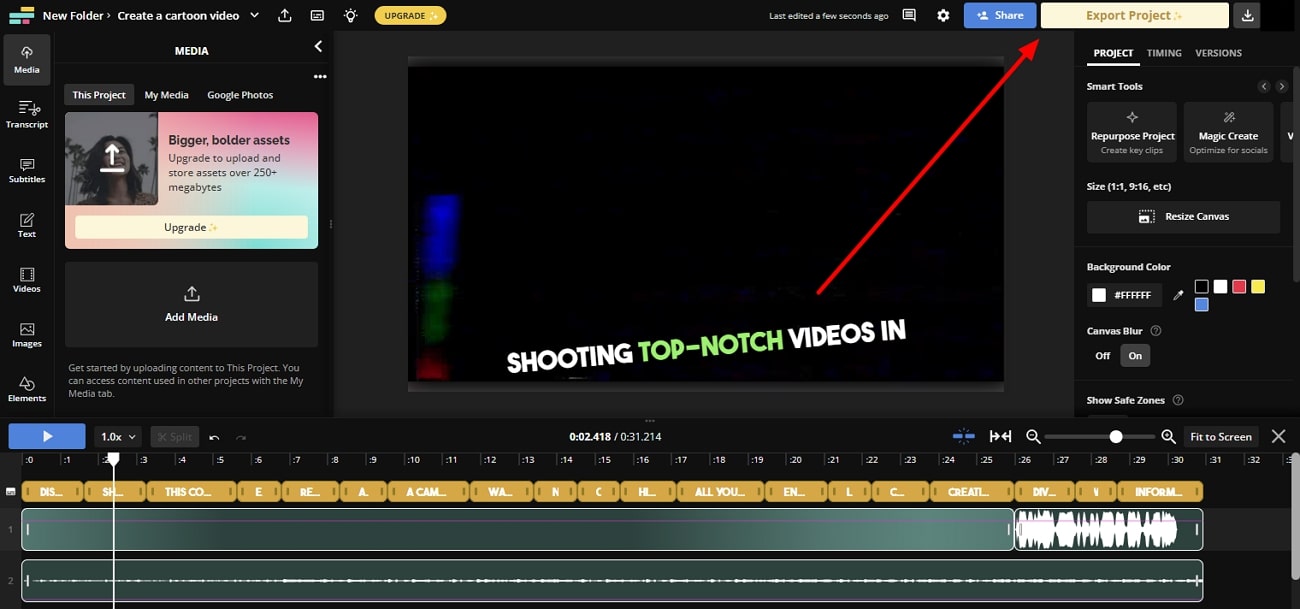
Step 1. After accessing the Kapwing website, select the “Animated Video Maker” feature from the “Tools” section. Click the “Make an animated video” button to launch the editing interface.
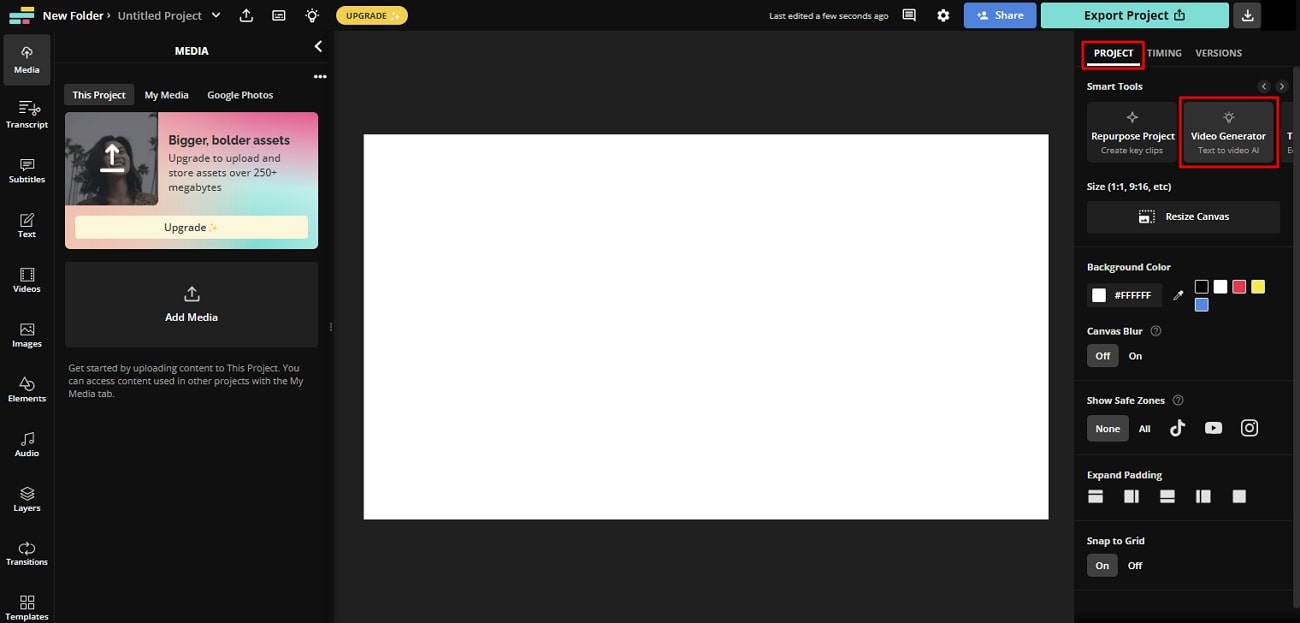
Step 2. Once you get to the editing interface, select the required canvas aspect ratio for your project. Then, head to the “Smart Tools” section from the “Project” tab and choose the “Video Generator” feature.
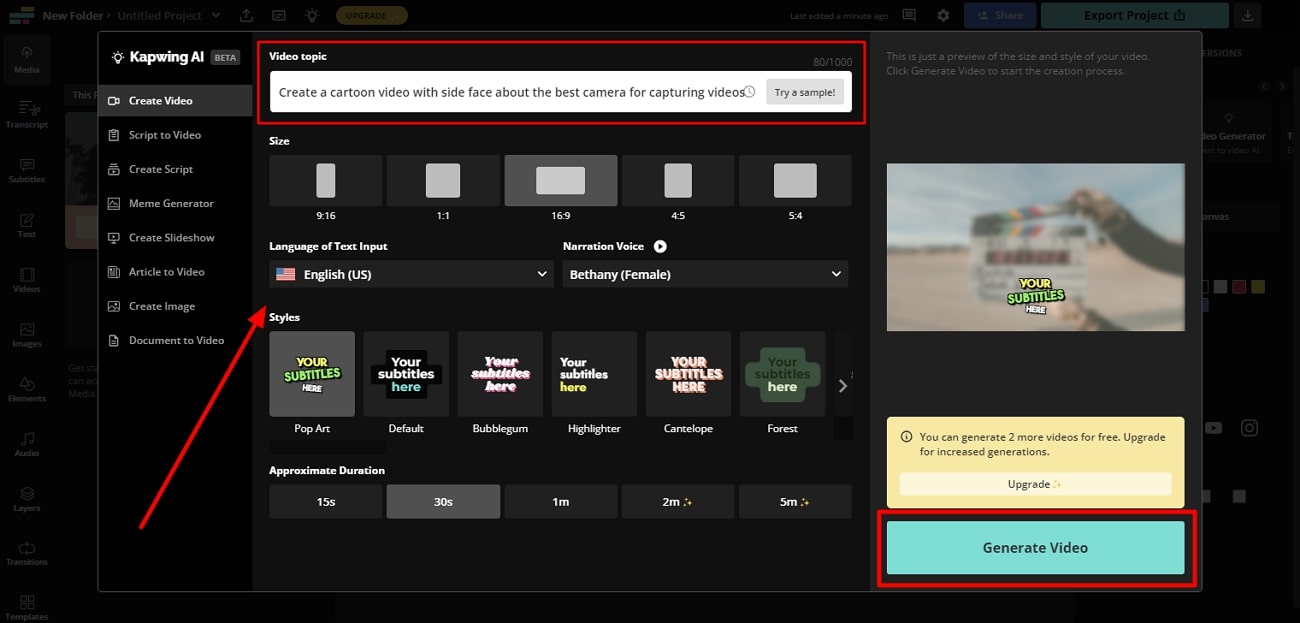
Step 3. Type the relevant command in the prompt box to generate a video for side-face chatting cartoons. You can also set the language, voice, and video duration. Once you’ve set all the respective parameters, click the “Generate Video” button.
Step 4. After that, a pop-up window will appear to show the generating process. When it ends, click the “Export” button to save your project to your device. You can also share it across social media using the “Share” button.
Part 3. How To Make Chatting Cartoon Images With Simple Lines?
Brush Ninja is an online animation maker that helps to showcase your creativity. It has a pack of innovative features to turn you into an artist. You can make hand-drawn animations with multiple frames. Also, you can create desired GIFs with ease and confidence. It is one of the best open-source libraries for creating vector drawings with digital brushes.
Key Features of Brush Ninja
- With the online editor of Brush Ninja, you can draw and paint freely.
- Users can explore different brushes and colors to make 2D speaking cartoon images.
- This tool allows you to introduce multiple frames and sound effects for appealing animations.
Steps To Create Animations With Brush Ninja
Want to add animations to your casual or working tasks? Follow these steps individually to create impressive animations using the Brush Ninja tool:
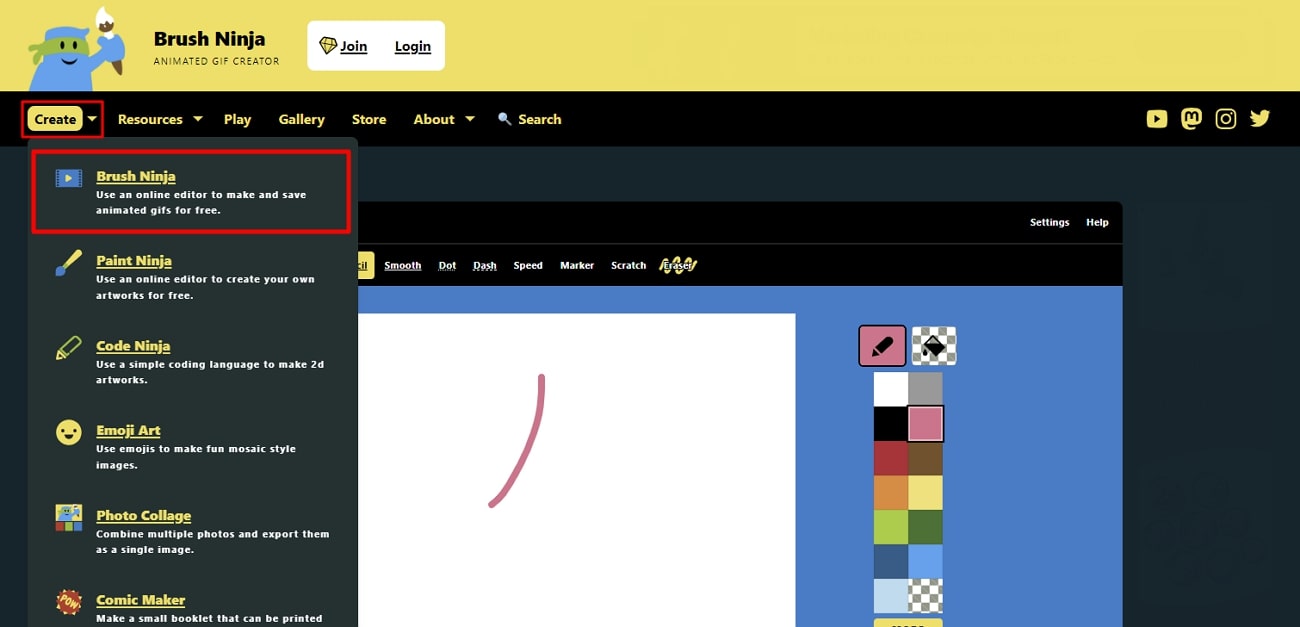
Step 1. Initially, visit the official website of the Brush Ninja tool. On the site’s main interface, click on the “Create” dropdown option to see available free art tools. Then, select the “Brush Ninja” tool from the list.
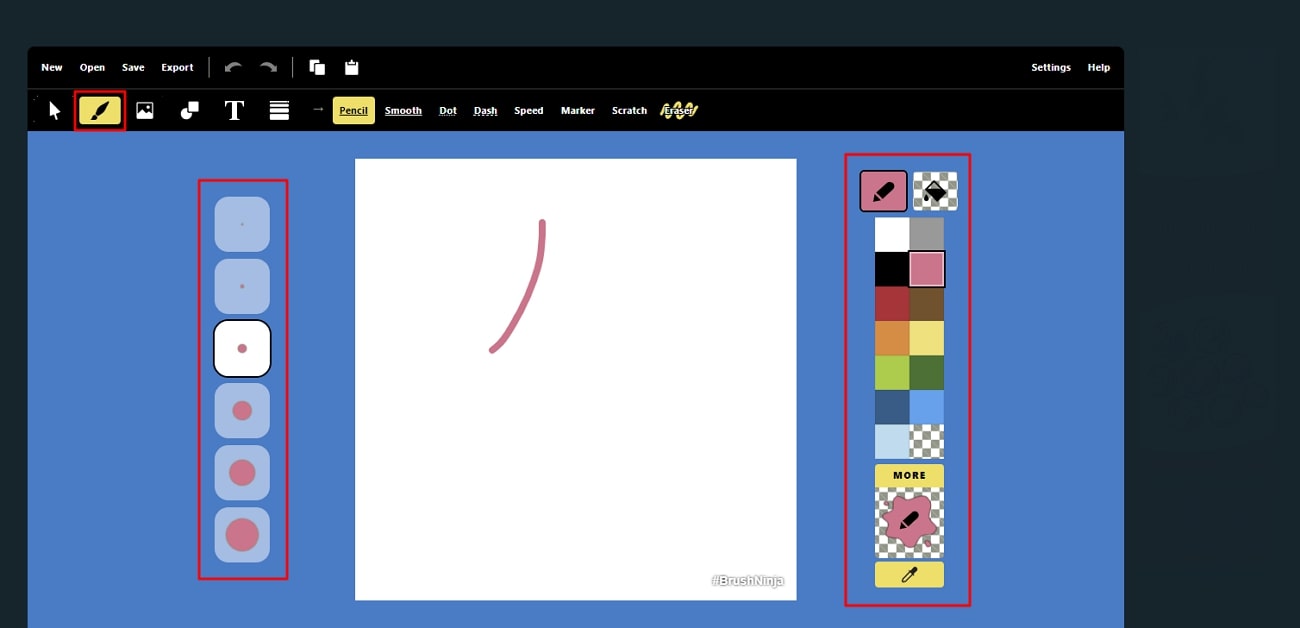
Step 2. After going into the tool, select “Brush Type” from the given options, including pencil, marker, and more. Then, set the “Brush Size” from tiny to huge size options on the left side. After that, choose “Brush Color” from the available colors on the right side.
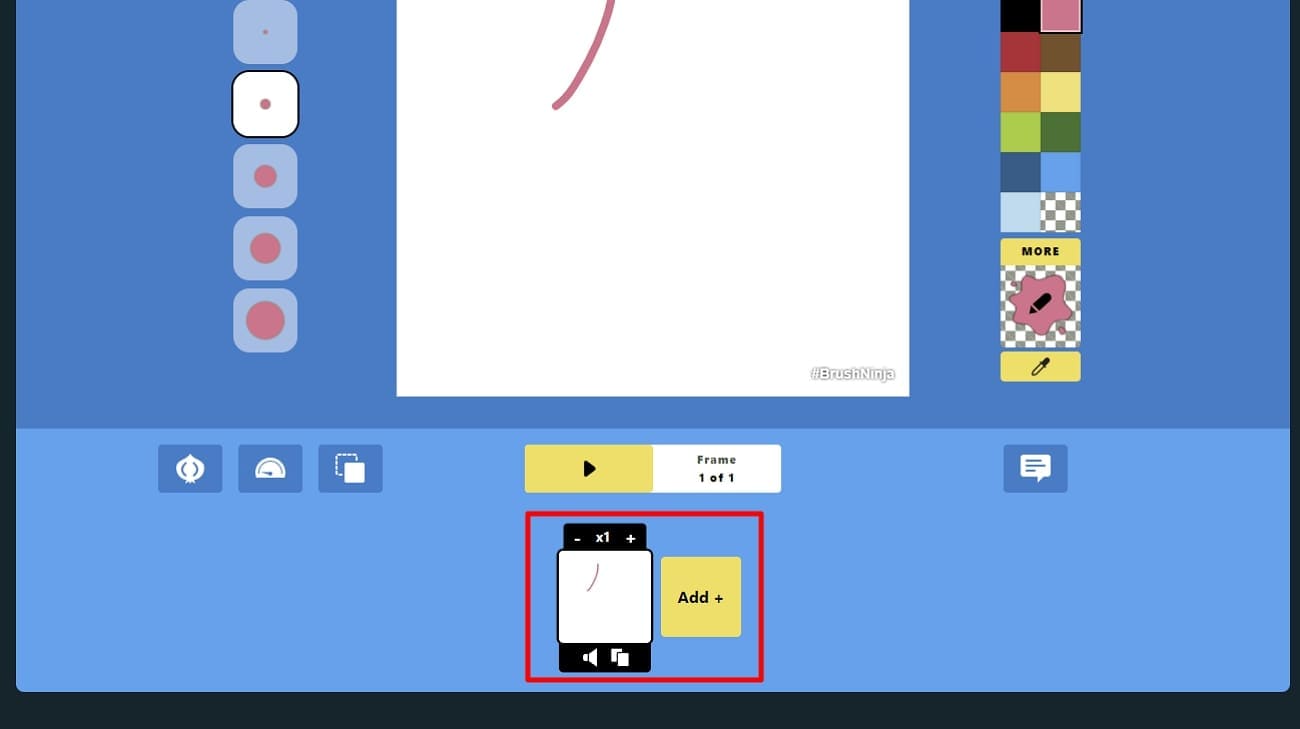
Step 3. With these selections, draw on the white canvas. Scroll slightly and hit the “Add +” button to add more frames. Also, you can check or delete them from the display. Moreover, there is also an option to duplicate frames.
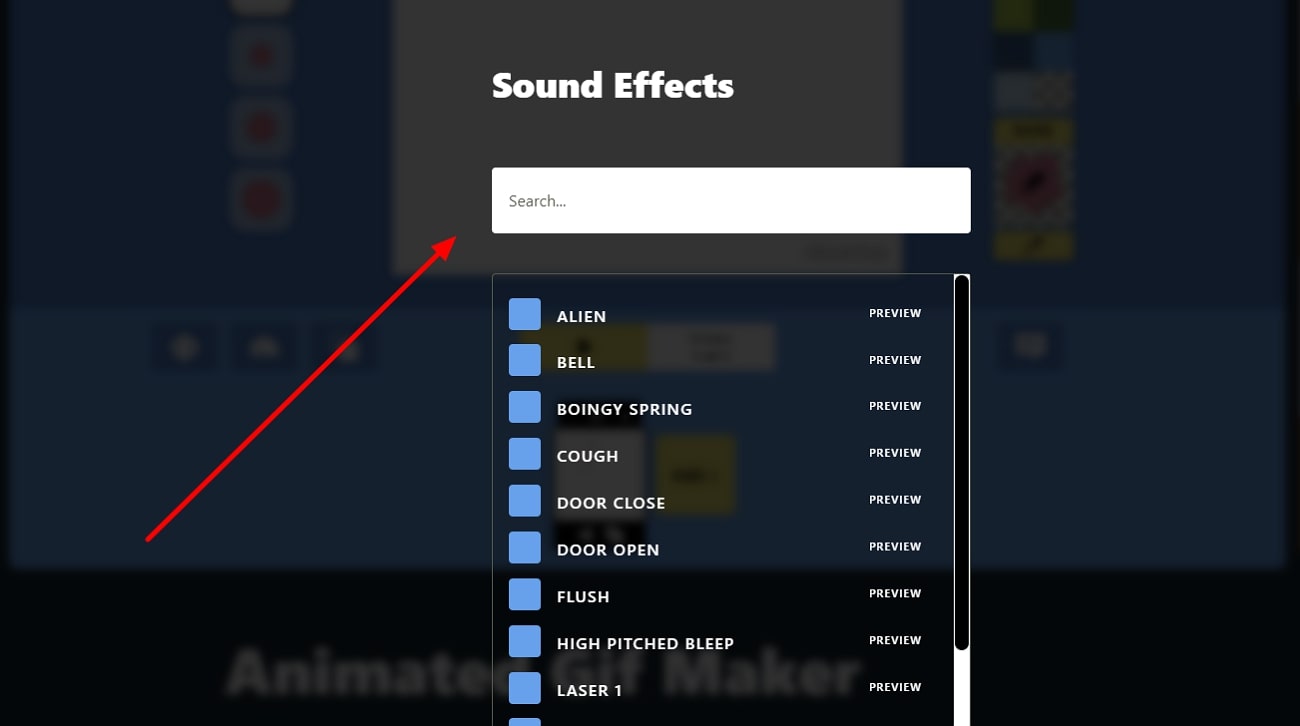
Step 4. Then, it is time to add sound effects. For that, click on each frame’s “Sound” icon. In the “Sound Effects,” you can select the best-suited option for each frame. You can also listen to these sound effects before exporting.
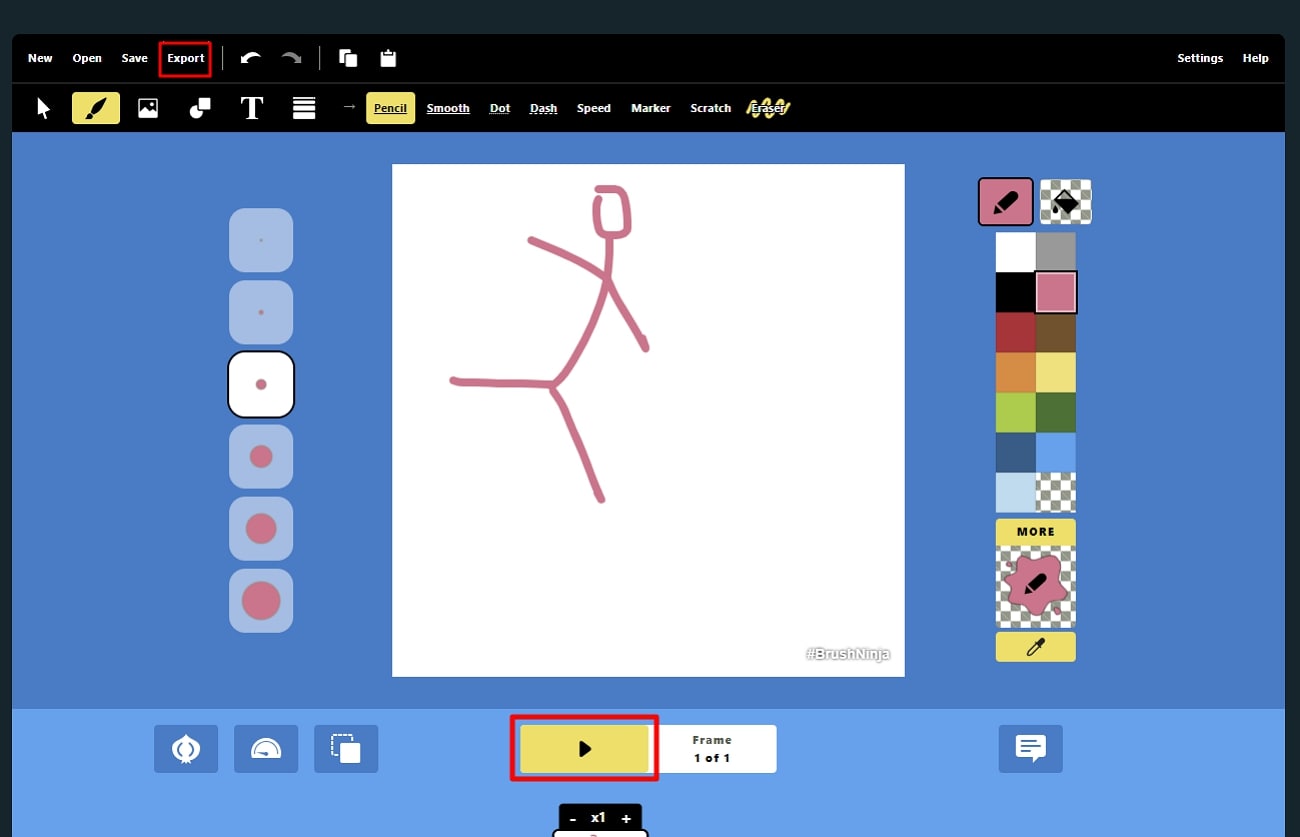
Step 5. Lastly**,** you can preview your creation by clicking the “Play Animation” icon. If everything is fine, hit the “Export” option in the tool’s top bar to save the animation.
Conclusion
All in all, cartoon conversation images are a popular form of visual entertainment everyone enjoys. This guide has discussed some of the effective tools to create talking cartoon images. Moreover, we have introduced you to the creativity of making side-face conversations and hand-drawn animations.
However, if you want to cartoonize your content with a professional touch, Wondershare Virbo is the ultimate choice. This tool provides users with realistic AI avatars to generate cartoon images that satisfy their artistic sense.
Eric Miller Eric Miller Apr 16, 24 Share article: Eric Miller Apr 16, 24 Share article:_ ](https://tools.techidaily.com/wondershare/virbo/download/)[](javascript:;)
You May Also Like
Registration and Login
Registration and Login
Streamline your access and enhance your user experience with step-by-step guides on seamless registration and secure login processes. Elevate your streaming journey with Virbo AI Live Streaming. Get started now!
02Logout
Registration and Login
1 To commence your journey, kindly navigate to the product homepage where you can initiate the process by completing your account login.
Login
2 Embrace the convenience of multiple login methods available, encompassing traditional email login and the seamless integration of Google authentication.
Logout
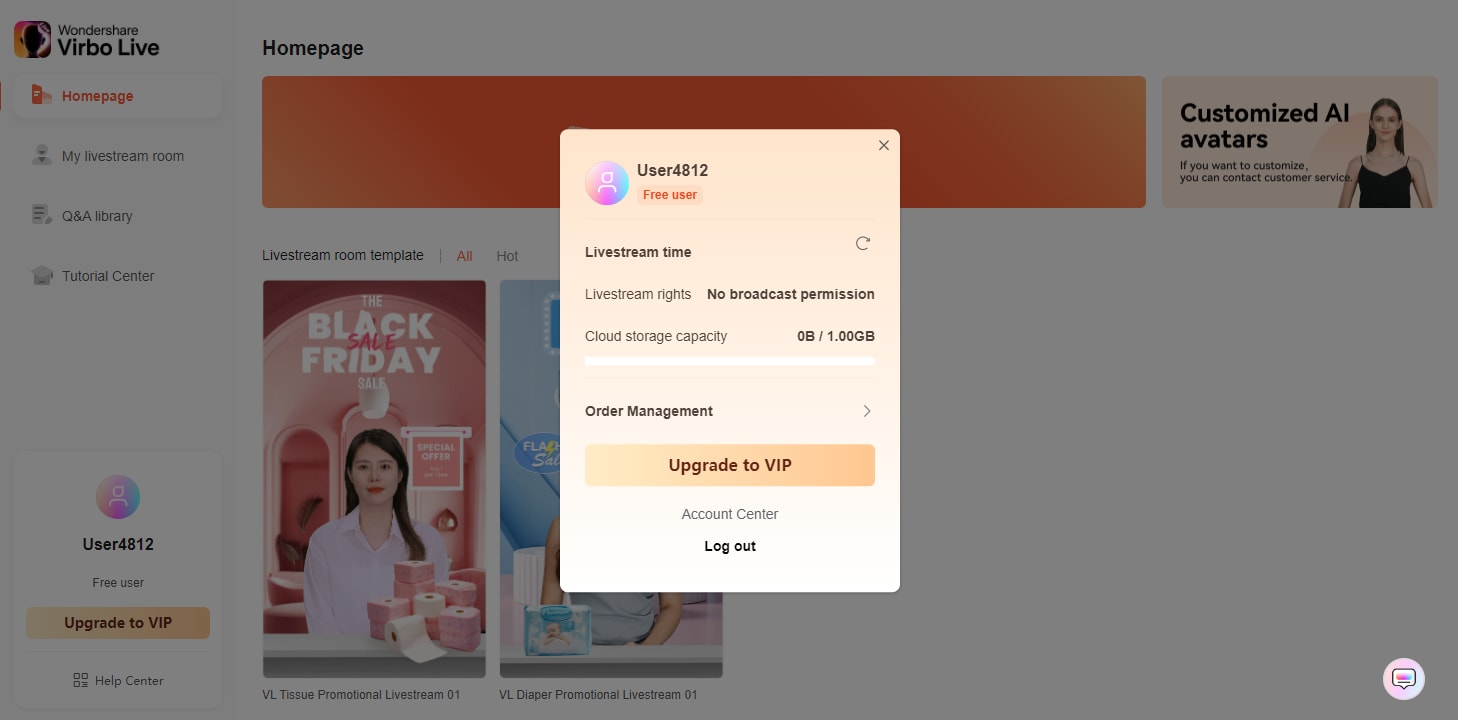
1Click on the user profile picture at the bottom left corner of the product homepage.
2In the pop-up window, simply click on “Logout.”
Logout
Authorization Refresh
1To refresh your authorization, click on the user profile picture at the bottom left corner of the product homepage. In the pop-up window, next to “Rights Details,” click on the “Refresh” icon. This will renew your authorization.
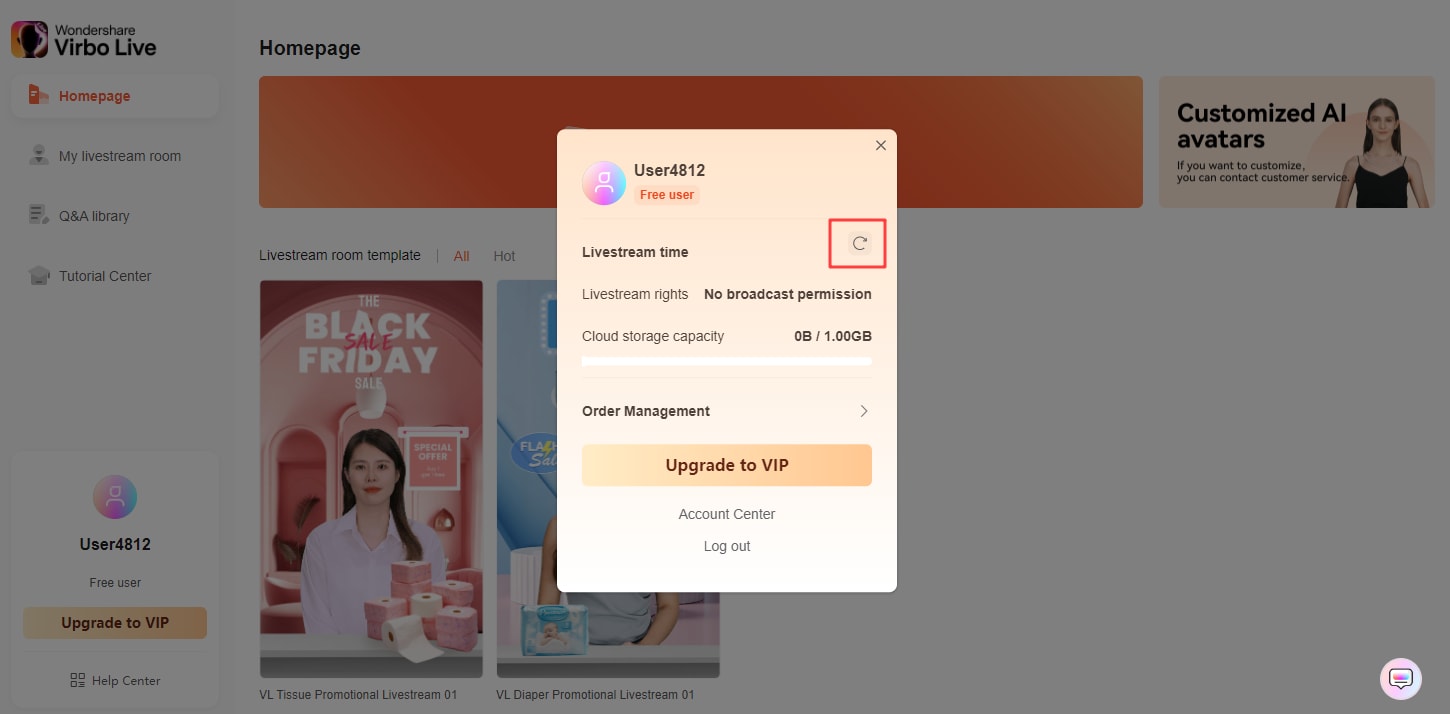
Authorization Refresh
02Logout
Registration and Login
1 To commence your journey, kindly navigate to the product homepage where you can initiate the process by completing your account login.
Login
2 Embrace the convenience of multiple login methods available, encompassing traditional email login and the seamless integration of Google authentication.
Logout
1Click on the user profile picture at the bottom left corner of the product homepage.
2In the pop-up window, simply click on “Logout.”
Logout
Authorization Refresh
1To refresh your authorization, click on the user profile picture at the bottom left corner of the product homepage. In the pop-up window, next to “Rights Details,” click on the “Refresh” icon. This will renew your authorization.
Authorization Refresh
A Guide on Starting Private Live Streams on YouTube
In today’s digital age, live streaming has become a powerful tool for connecting with audiences in real-time. This method has especially been crucial for businesses looking to get into live selling or gamers wanting to stream their games. But say, for example, that you want to keep your stream private, accessible only to select viewers; how do you do that?
Here’s where private live streaming comes in. This option allows you to share your content with specific individuals, ensuring a more intimate and controlled environment. This guide will teach you how to set upprivate YouTube streams and give you special tips to let AI help you with your streams with Wondershare Virbo.

Part 1: What Do You Need To Get Started With YouTube Private Live Streaming?
Before diving into the exciting world of private live streaming, here is the equipment to ensure a smooth and seamless experience.
- YouTube account. First things first, you’ll need a YouTube account. This is your gateway to the platform and your key to unlock the world of live streaming.
- A capable PC. Next, prepare your PC and the command center for your private stream. While specific requirements vary depending on the complexity of your stream, here are some general recommendations:
- Processor: Intel Core i5 or equivalent (or newer)
- RAM: 8GB or more
- Graphics Card: Dedicated GPU recommended for enhanced performance
- Internet Connection: A stable and fast internet connection with sufficient upload bandwidth (consider at least 3 Mbps for standard definition)
- A streaming tool. Now, you’ll need a streaming tool to capture your video and audio and send it live to YouTube.Wondershare Virbo is recommended, especially for live-selling purposes. Other options include OBS and similar stream apps for other purposes.
With these essential elements in place, you’re on your way to launching your private YouTube adventure.
Part 2: How To Start a Private YouTube Live Stream?
Ready to share your talents or ideas with a select audience? Dive into the steps to create aprivate live stream on YouTube by following the guide below. It’s pretty straightforward.
- Step 1: Access YouTube Studio.Head to your YouTube Studio page (studio.youtube.com) and log in using your Google account linked to your YouTube channel.
- Step 2: Prepare for live streaming**.** ClickCreate in the top left corner of the Studio dashboard, and selectGo Live from the dropdown menu. Alternatively, click the camera icon next to your profile picture and chooseGo Live.

- Step 3: Now, set your visibility. Before starting your broadcast, ensure your stream is private. Under theVisibility setting, click the dropdown menu and choosePrivate . This option restricts viewership to individuals you specifically invite.

- Step 4: There are two methods existing for inviting viewers:
- Email Invitations: Click onShare Privately and enter the email addresses of individuals you wish to grant access. You can also choose to notify them via email.
- Link sharing: Although not recommended for complete privacy, you can copy the stream link and share it directly with trusted individuals. Remember, anyone with the link can access the stream, even uninvited guests.

- Step 5: Once everything is set and your viewers are invited, clickGo Live to launch your private YouTube stream. Remember, only invited individuals using their YouTube accounts can view your content.
Additional Tips for Private YouTube Live Streams
Here are some additional tips that you can follow before starting aprivate YouTube stream :
- Test streaming. Consider using a test stream before inviting viewers to ensure everything runs smoothly.
- Giving guidelines to your viewers. Encourage guests to use their YouTube accounts for optimal viewing experience and security. Further, you can add house rules, especially for more intimate streams or live selling/auctions.
- Exploring advanced privacy settings. Explore advanced privacy settings within YouTube Studio for further control over viewer permissions.
- Using AI . Tools like Wondershare Virbo can help integrate AI into your private YouTube streams. This way, you won’t always have to glue your eyes on your stream. Discover more about this feature in the following section.
By following these steps and keeping privacy in mind, you can effectively host engaging live streams on YouTube, connecting with your chosen audience in a controlled and intimate setting. Remember to personalize your content, interact with your viewers, and enjoy the unique experience of private live streaming.
Part 3: Breaking the Limitations of Live Streams With Wondershare Virbo
Live streaming constantly evolves, offering creators new ways to connect with audiences. While traditional live streams require your physical presence, imagine having an engaging and interactive stream running 24/7, even when you’re not there. This is great, especially forprivate YouTube streams , where the need to engage the select viewers becomes more apparent.
EnterWondershare Virbo , a revolutionary tool that leverages AI to create realistic and captivating live streams around the clock.
Introducing Wondershare Virbo
Gone are the days of relying solely on manual effort to keep your audience engaged. Virbo Live transcends these limitations, offering:
Get Started Online Free Download
- 24/7 content delivery. Whether taking a break or focusing on other tasks, Virbo Live ensures your stream continues with AI-powered content, keeping viewers entertained and informed.
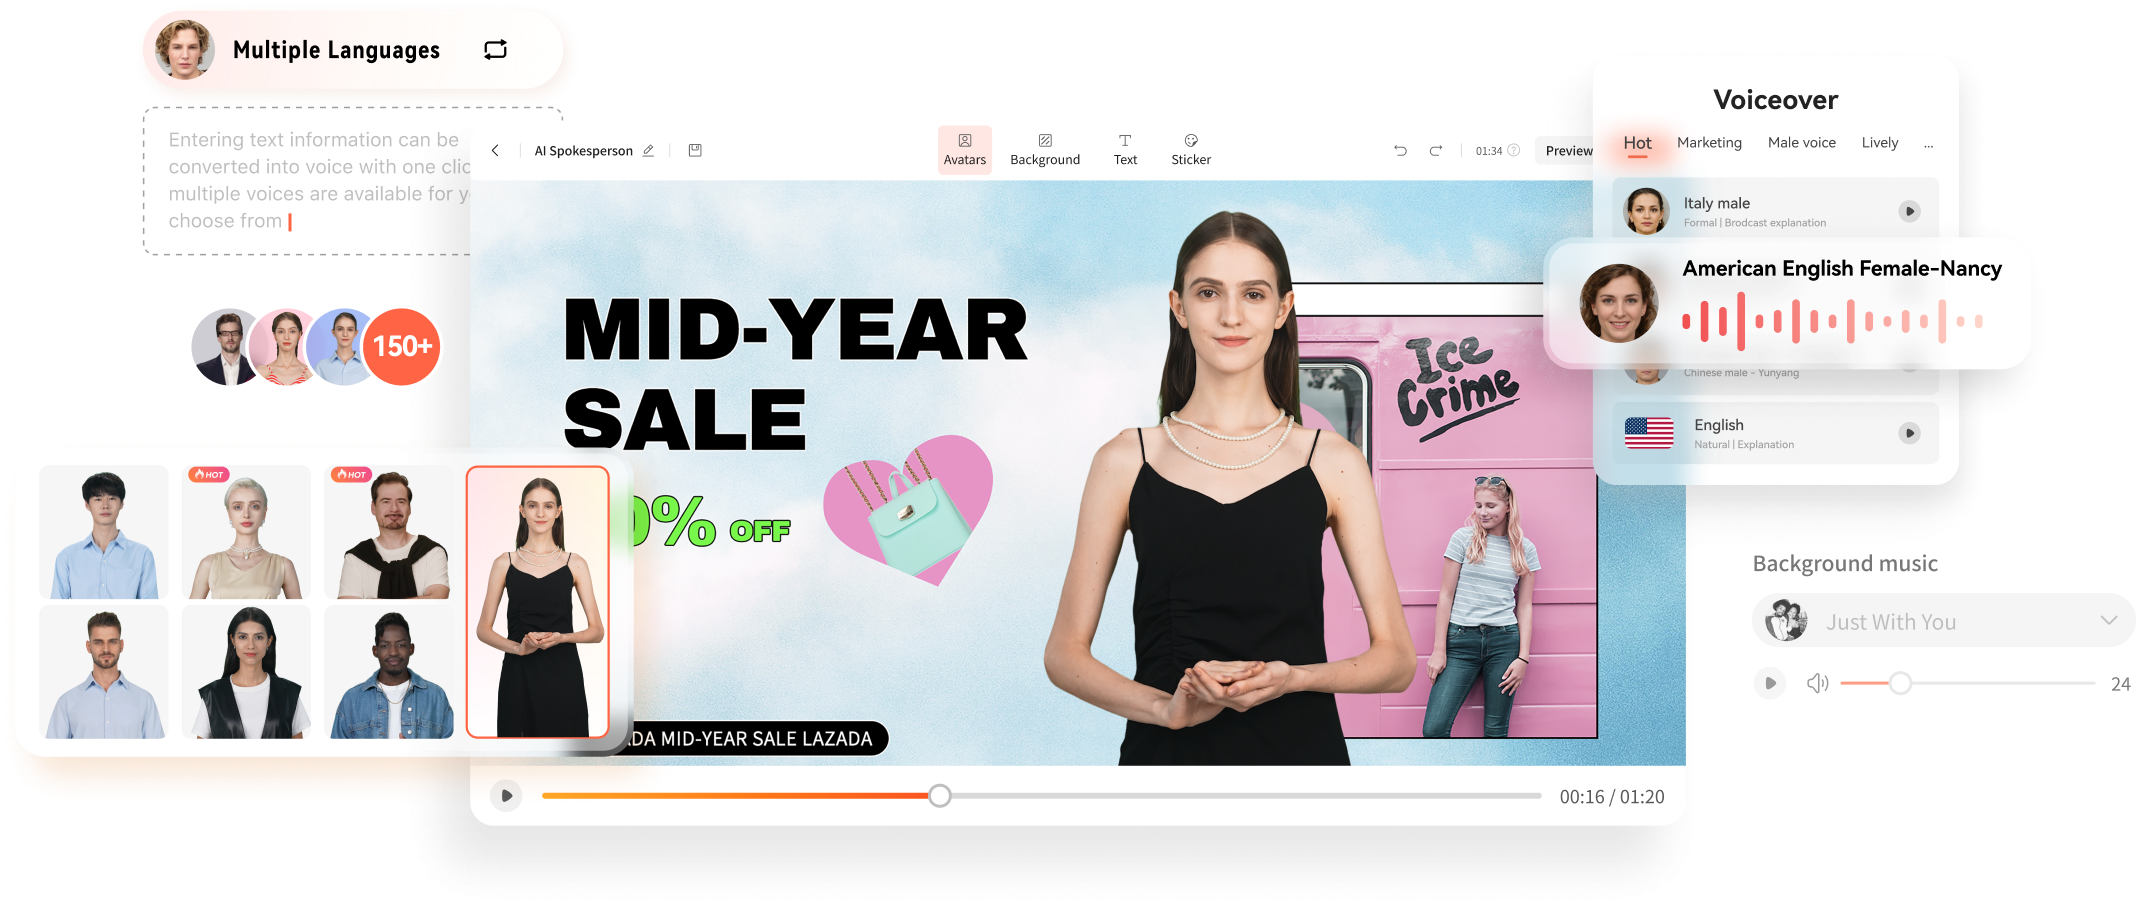
- Virtual host template library. No more scrambling for guest hosts or struggling with solo presentations. Virbo Live’s diverse library of 150+ customizable AI avatars can be your virtual co-host, presenter, or even a captivating character, interacting with viewers, answering questions, and conducting interviews.
- Content creation is made easy with templates. Forget starting from scratch. Virbo Live provides 180+ professionally designed video templates across various themes and styles, saving you time and effort. Plus, enjoy a library of royalty-free music to add the perfect soundtrack.
- Engaging AI voices. Bring your content to life with 120 AI voices, offering a variety of tones and accents, ensuring your message resonates with a global audience.
Integrating AI into Your Live Stream
Adding Virbo Live to your existing setup is simple and intuitive. Add Virbo as a live OBS window and use the YouTube stream key. Here’s a step-by-step guide:
- Step 1: InstallWondershare Virbo or access the web app.
Get Started Online Free Download
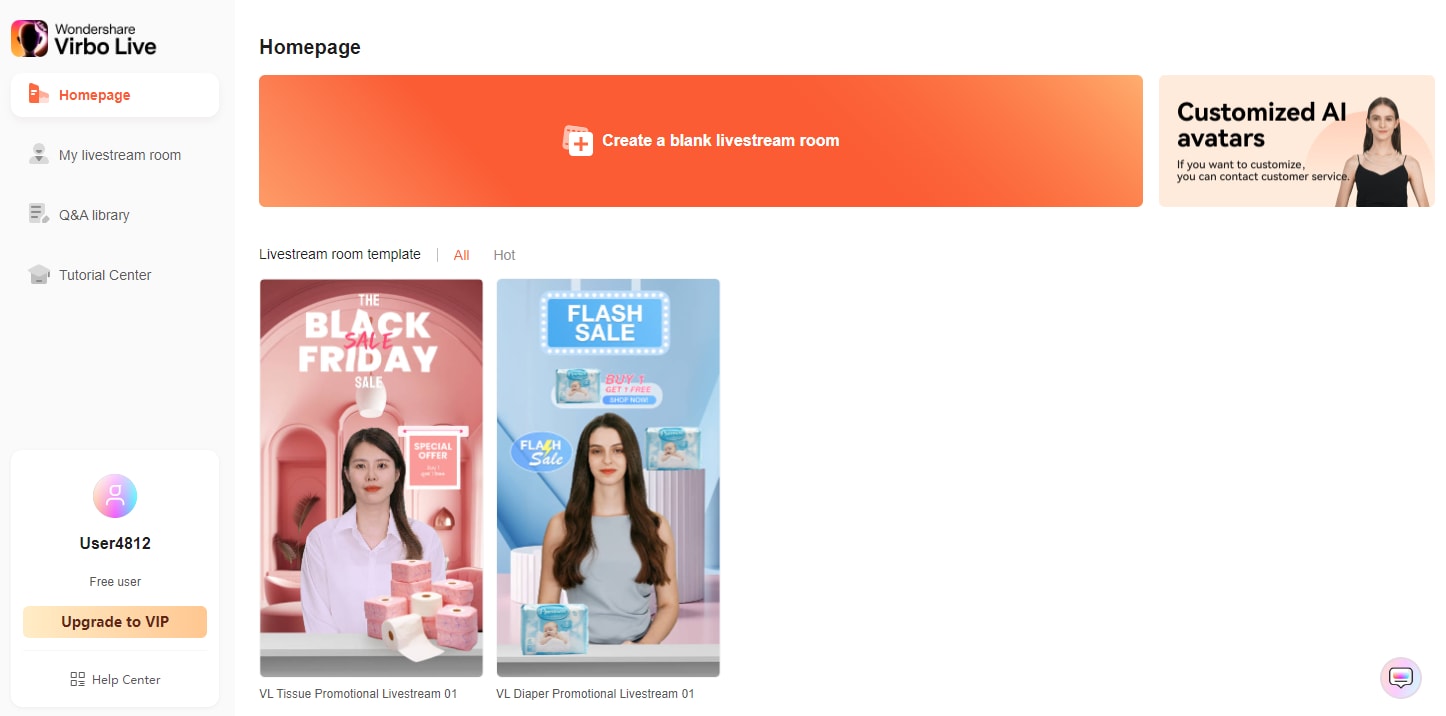
- Step 2: ClickCreate a Blank Livestream Room to customize your stream’s interface.

- Step 3: Choose from templates, backgrounds, AI avatars, and stickers to create a visually engaging environment.

- Step 4: UnderScript Lines , write the script your AI host will deliver throughout the stream. UseAI Interaction to set responses for specific questions andHuman interaction for actual responses from your end.

- Step 5: Once everything is set, clickStart Livestream and connect it to your preferred platform through OBS. Paste your streaming key for seamless integration.
Use-Cases for Wondershare Virbo and Private YouTube Live Streaming
Virbo Live empowers you to explore new avenues in content creation. Imagine using it for:
- E-commerce shopping. Showcase products with AI hosts demonstrating their features and answering customer questions in real-time, even outside business hours.
- Educational live tutorials. Host interactive learning experiences with AI tutors delivering engaging lectures and responding to student inquiries.
- Live Q&A sessions. Let your AI host manage large-scale Q&A sessions and field questions and keep the conversation flowing smoothly.
With Wondershare Virbo Live, the possibilities are endless. Unleash your creativity, explore new ways to connect with your audience, and experience the power of 24/7private YouTube streams . Remember, this is just a starting point – personalize your content, experiment with different features, and discover the unique potential Virbo Live brings to your streaming journey.
Conclusion
In today’s digital age, live streaming has become a powerful tool for connecting with audiences in real-time. YouTube live streaming offers a versatile platform to share your passions and connect with a select group of viewers. This article has guided you through setting up aprivate live stream on YouTube , ensuring your content reaches only your guests.
Remember, key considerations include enabling private streaming within YouTube Studio, inviting viewers via email or link sharing, and personalizing your content to create an engaging experience. If you want to take your live streams to the next level, consider Wondershare Virbo, a user-friendly tool designed to simplify private live streaming on YouTube with the help of AI.
Best 5 TikTok Voice Generators You Should Try
TikTok text to speech generators are becoming a more widely used tool for producing voiceovers in a variety of applications. These computer systems transform written text to speech that may be altered to seem younger, older, or more accented. TikTok voice generator are commonly used to make speech simulations for virtual assistants, audiobooks, and videos because to their capacity to produce realistic voice simulations.
Fortunately, you no longer need to record your own or other people’s speech. Now, text can be directly converted into speech using AI voice generator. You may utilize a variety of AI voice generators for your personal or professional needs. However, some are superior than others. In this article, we’ll evaluate the overall effectiveness, usability, and features of three top AI voice generation software.
Taking this further, here are the finest five AI based TikTok voice over generators. Let’s get to know these tools so you can decide the best fit.
Part 1. Use Text to Speech Generator on TikTok
If you’ve ever navigated through TikTok, you may have noticed the artificial voice that sometimes goes with subtitles. The text-to-speech option is a fantastic method to give your movies some more context, utilize a voiceover if you’re not confident narrating yourself, and more. As an accessibility tool, text-to-speech enables TikTok producers to add an automatic voice to read aloud subtitles that have been typed down.
Steps to Use Text to Speech Generator on TikTok:
Let’s delve into the steps required to use TikTok’s text to speech generator:
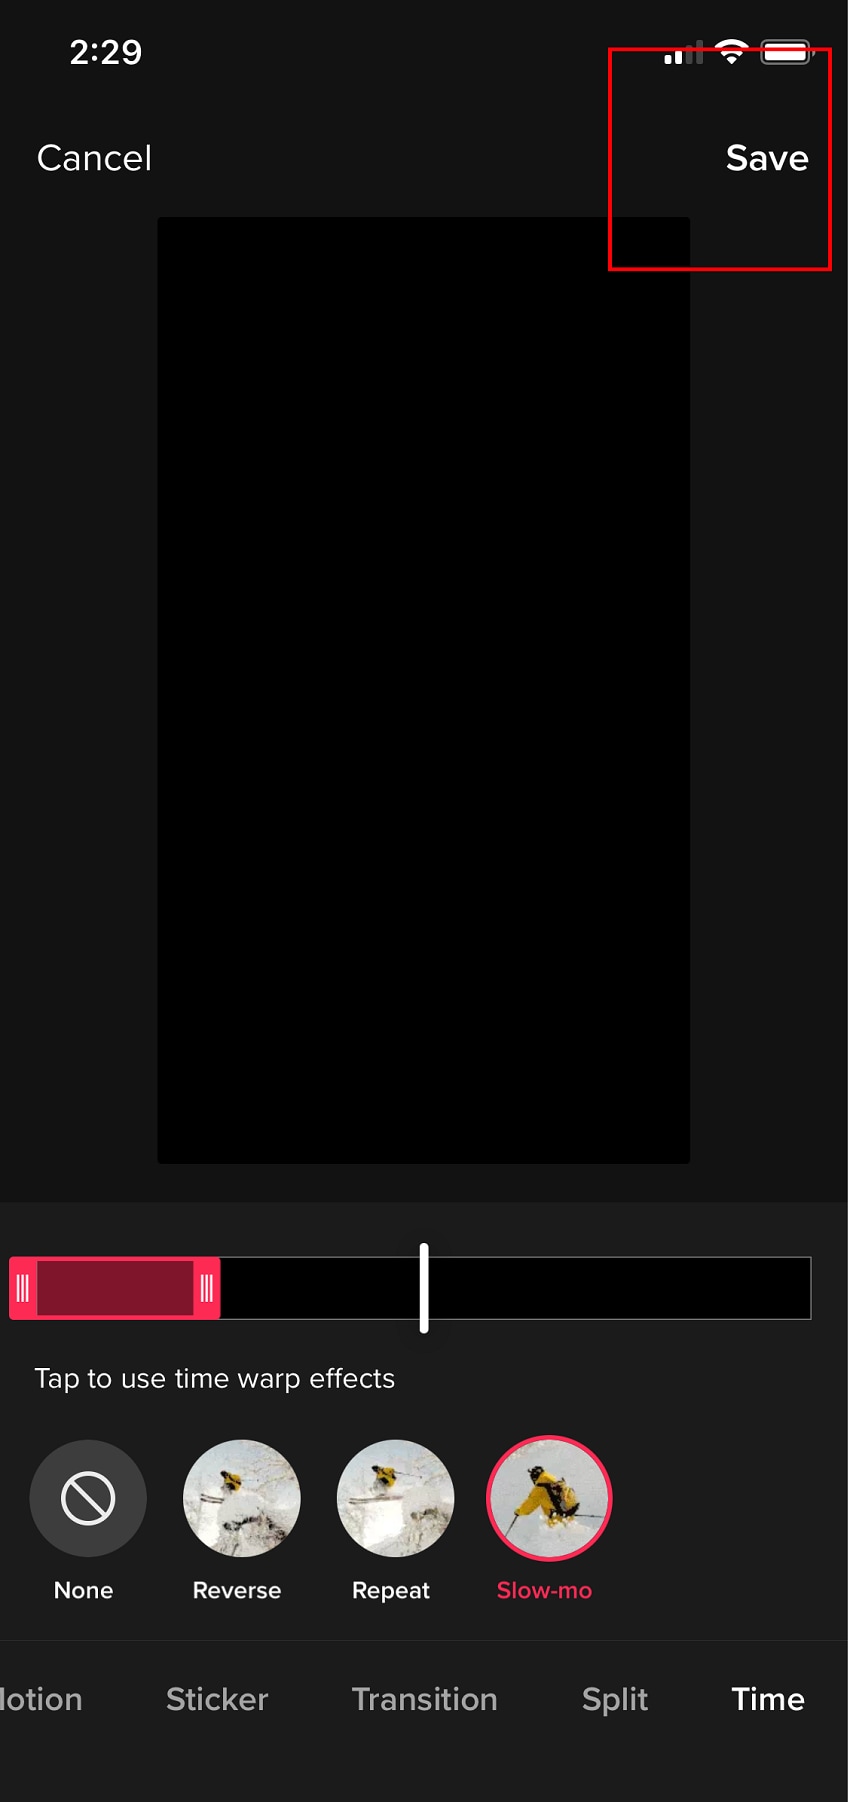
Step 1. To use text-to-speech on your next TikTok, just record or submit a video as normal up to the point of editing. For text to be added to your video, use the “+” symbol.
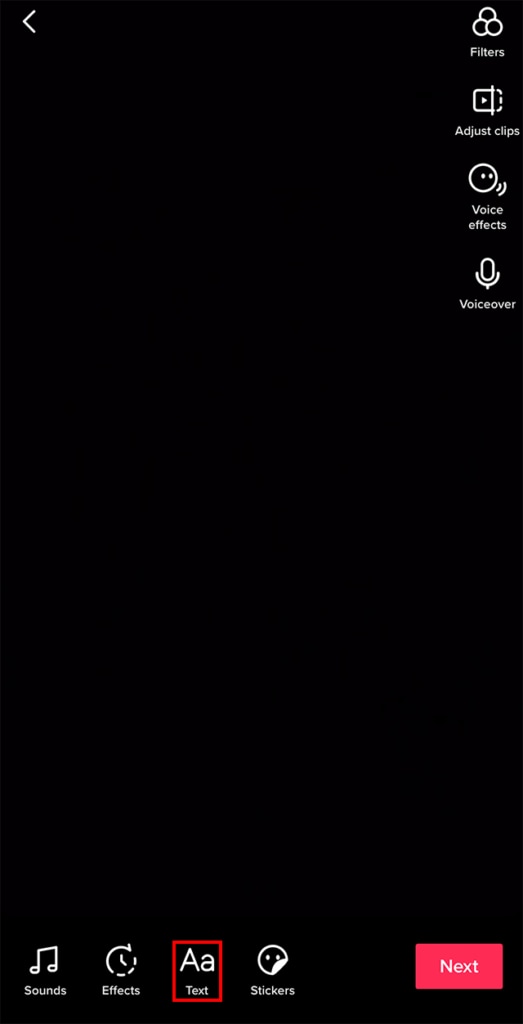
Step 2. In the next step, click the symbol from the left that resembles a talking head to choose text-to-speech. Once you’ve chosen the symbol, a little tick should appear next to it to show that text-to-speech has been implemented.

Step 3. After selecting your text, pick Change voice from the drop-down menu. Then, you’ll witness a collection of the most well-known voices.
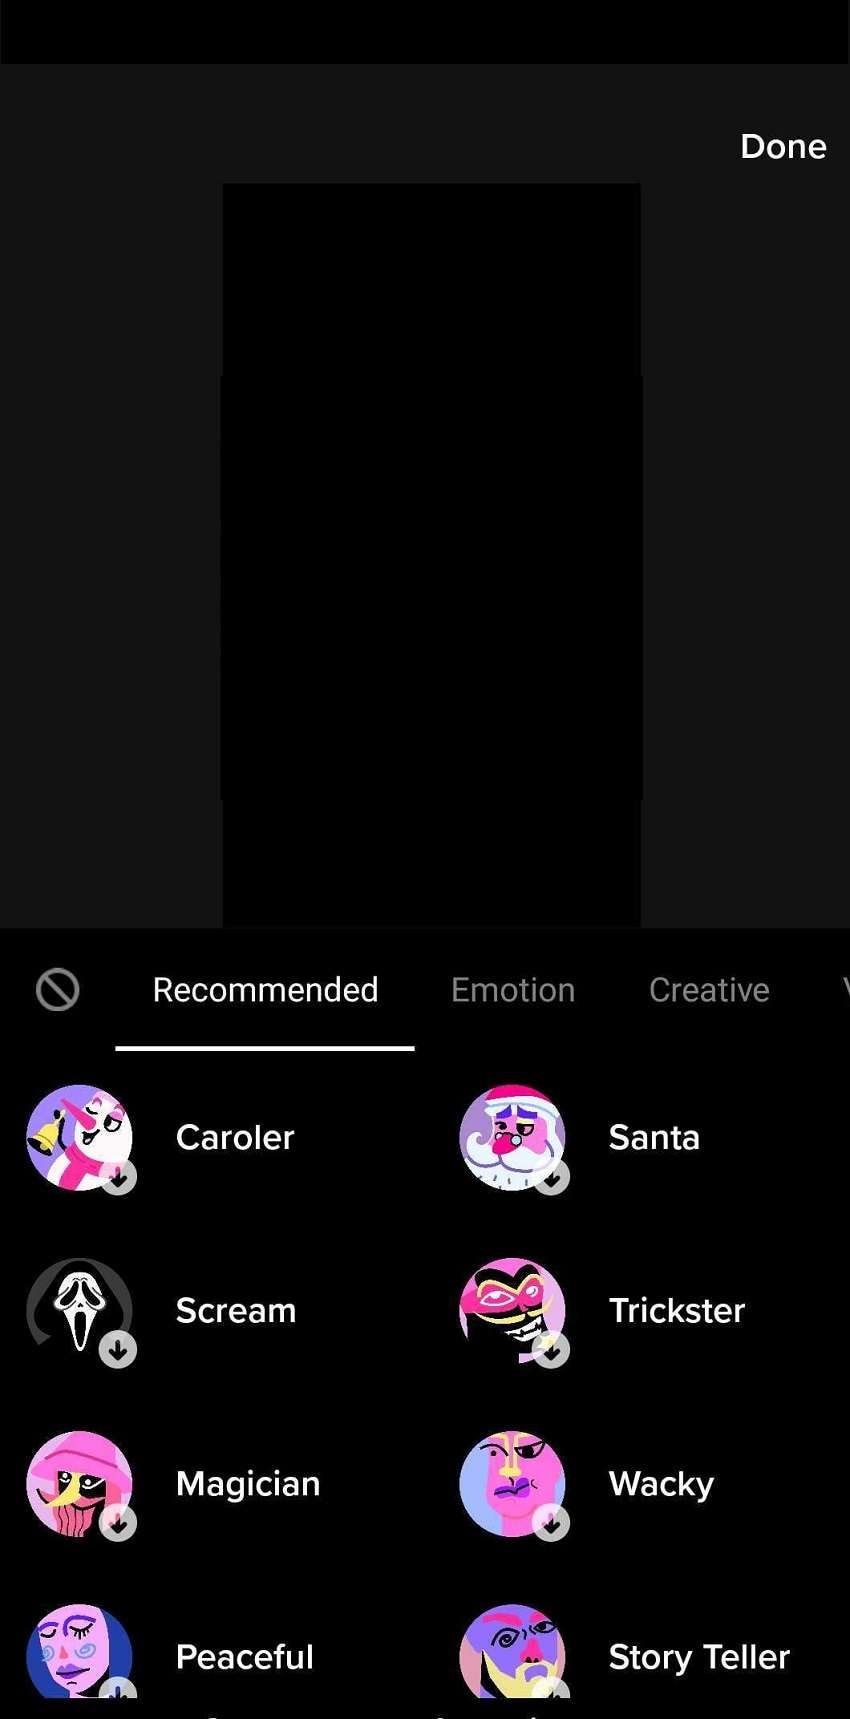
Step 4: After choosing your preferred voice, clickSave in the upper right corner. Save the audio clip if you like the way it sounds so you may use it in next videos.
Part 2. Try best 5 TikTok voice generators
Are you curious as to how you may utilize this functionality. We have five excellent examples that demonstrate how businesses just like yours are currently using TikTok text-to-speech.
1.TikTokTTS
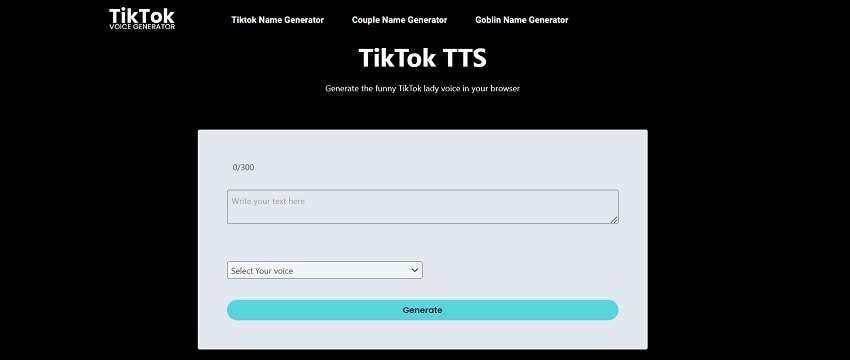
The Text-to-Speech function on TikTok is a fantastic accessibility feature for persons who have reading and vision problems as well as a tool for producing entertaining video. It’s not as difficult as it seems to add text-to-speech to a TikTok video, and it only takes a few minutes of your time. Just make use of the TikTok smartphone app. If you’re searching for an AI speech generation tool, TikTok is a fantastic solution.
Its robust online text-to-speech editor makes it simple to turn your content into audio. The audio may then be modified by adding different speech patterns and pronunciations. The process of converting input text into audio is often real-time, requiring just a few minutes. In addition, TikTok gives users the option to customize pre-existing speech models or choose from a library of them to get the desired outcomes.
Key Features
- You can create conversation-like voiceovers by using different voices;
- TikTokTTS has a large library of languages, accents, and AI voices;
- You can customize and use emotional speaking styles;
- With TikTokTTS, you can turn your text into audio and video with an AI presenter;
- You can also listen to the AI voice narrating your text before creating the audio and video;
2.TikTok Voice Generator
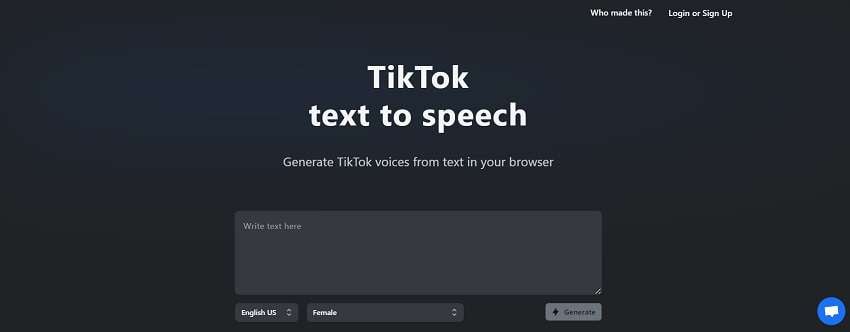
TikTok Voice Generator is ideal for you if you’re interested in utilizing AI for voiceover projects but still want to utilize your own voice. You may upload, write, talk, and create your very own AI voice using the web-based platform, which is built from your genuine voice. While it does provide a variety of voices for you to choose from, TikTok Voice Generator may assist you in creating a voice that is genuinely distinctive.
From text or your own speech, you may create your own AI voice using TikTok Voice Generator. You may generate unique and customized audio for your next piece of content using their editor, which enables you to add inflections, emotions, and language conversions.
Key Features
- TikTok Voice Generator supports unlimited projects, users, and audio downloads,
- It has a quick voice cloning online,
- It supports real-time caption generation for more accessible videos.
- You can generate and produce unique AI voices using your audio recordings.
3.Speechify
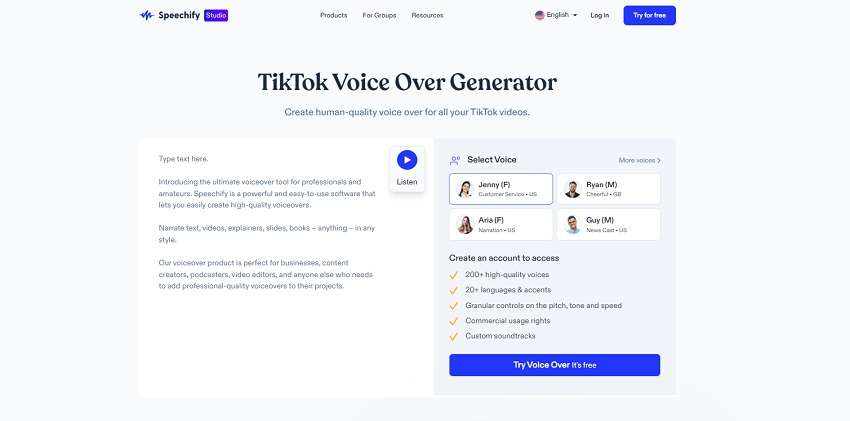
Speechify converts written text into high-quality, natural-sounding audio. Voice speed may be changed, and you can choose from a number of voices and dialects, among other options. Speechify can import documents from a variety of sources. It allows you a great deal of control over the voices themselves in addition to enabling you to create believable AI voices.
Additionally, Speechify merges many Voice AI technologies into a single, user-friendly program for robotic voices. The Speechify platform can highlight text while it is being read, if that is what you prefer. You have complete control over every aspect of speech, including language choice, accent, pace, and intonation. Additionally, the UI is user-friendly, so getting started won’t be difficult.
Key Features
- Speechify produces voiceovers of the highest caliber in a variety of languages;
- It is compatible with Apple and Android devices as well as Chrome;
- Speechify has advanced tools for highlighting, taking notes, and importing
- You can also generate robotic voices using AI-based cutting-edge technology.
- Speechify can modify playback and listening rates to boost output
4.Text to Speech Robot

For individuals seeking excellent AI-generated voice, Text to Speech Robot is a fantastic solution. The tool is simple to use and delivers excellent outcomes. Additionally, it provides a wealth of customizing possibilities, enabling users to produce synthetic voices that sound authentic and genuine. The user interface is simple to use and contains all the tools you want for editing both audio and visual content.
Using Text to Speech Robot, you can choose from a variety of male and female voices on Robot platform to create the ideal voice for your project. In order to convert text into computer-generated audio recordings that may be utilized for podcasts, videos, and other media, it makes use of advanced artificial intelligence technologies.
Key Features
- Text to Speech Robot enables you to adjust the synthesized voice’s pitch and pace.
- Both the editor and app are simple to use.
- The generated voice quality by Text to Speech Robot is really good.
- It regularly refreshes its voice collection, giving you access to the newest and best voices.
5.Wavel.AI
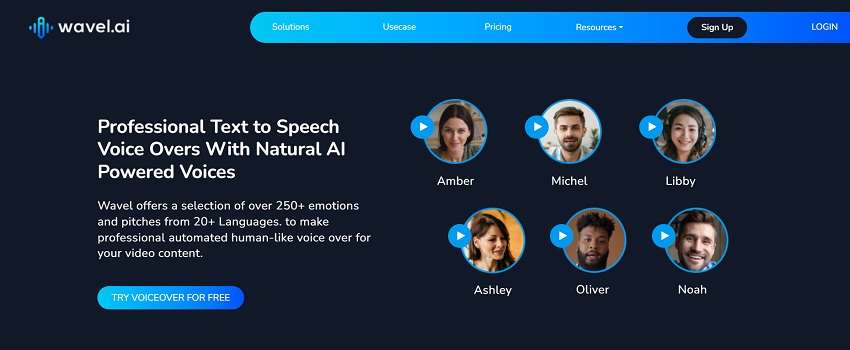
One of the greatest tools for AI voice generating in video making is Wavel.ai. From the convenience of your online browser, the editor enables you to cut, combine, import, and record video clips. Their text-to-speech function lets you input text and create AI-generated voiceovers for your video projects in addition to editing videos. You can also modify the speed, cut, and clip the audio created after inputting your text in the Wavel.ai editor.
To assist you make accessible videos for your audience, you may also use your voice to produce subtitles. The most sophisticated tools for modifying and utilizing AI voices are not available on Wavel.ai since it is not a platform that generates AI voices independently. However, the platform might help individuals who want the option of AI-generated voiceovers for their videos.
Key Features
- It can control voice speed, style, pitch, and volume.
- ai has 250+ emotions pre-installed and ready-to-use in voiceovers
- ai provides real-time feedback is provided through the Speaker Coach tool to enhance voiceovers.
- It can generate real-time subtitles to make videos that are more accessible.
Part 3. Impacts on TikTok Content Creation
AI voice generators will only grow and broaden as AI technology develops more. By include the TikTok voice generator in your video marketing plan, you’re making an investment in a flexible, scalable solution.
1. Virality and Trending Content
Utilizing the TikTok voice generator, you may modify your voiceovers to better appeal to the tastes of your target audience. Around 88% of users, according to TikTok research, believe that sound is a crucial component of the TikTok experience. Hence paving the way to create a viral content using TikTok text to speech generator.
2. Influencer and Creator Utilization
TikTok’s voiceover generator feature makes it simple for content producers to make sure their videos appeal to a larger audience while also offering a more inclusive experience overall. With the use of TikTok’s voice over feature, users may offer an instruction or narrate a tale via their video without having to actually talk. It works well as a means of conveying a message without manually documenting it.
3. Accessibility and User Experience
The text to speech tool on TikTok enables producers to produce material in a variety of languages and dialects as well as to add various voice effects to make the video more engaging and interesting. This enables content producers to reach a larger audience and make their work more accessible and enjoyable for all users.
Bonus Tips – Your best text to speech generator for TikTok
Considering the bonus top to create text to speech using the easiest tool, Virbo is your best bet. The Virbo Text-to-Speech is one of them. Because it saves video makers from having to record their own voiceovers or utilize third-party text-to-speech applications, TikTok is one of the most popular editing tools. You don’t need any training or specialized expertise to utilize Virbo Text to Speech because of its user-friendly interface.
Get Started Online Free Download
If you often have difficulties with TikTok’s native text-to-speech feature, then Virbo is the tool you should look for. It is an AI-based software available for both Windows and Mac OS. In addition to text to speech generator, Virbo provides you additional functionality and freedom to record innovative voiceovers for your TikTok videos that are of a high quality.
Key Features
Here are some of the top-notch features of Virbo that makes it stand out from the competitors:
- Accessibility:
It is accessible on different devices. Virbo makes sure that users who may have trouble recording their own voiceovers or those with speech-related problems can still participate in content production by offering an automated voice function.
- Engagement:
Virbo text-to-speech generator can offer a distinctive element to your TikTok text to speech videos thereby boosting engagement and shareability.
- Productivity:
By instantaneously converting text input into voice, Virbo’s text-to-speech function streamlines the video production process, saving you a ton of time.
- Handy Usage:
With Virbo, you can utilize the ready-to-use voiceover templates to generate your favorite TikTok voiceover. It has a variety of genres as well as characters to be chosen from.
- Creativity:
Virbo TikTok voice generator gives you the option to choose from a variety of voices and accents in place of your own voice, giving you more creative options.
- Video Editing:
Virbo enables you to edit your TikTok videos in addition to TikTok voiceovers. It has Avatar editor as well as text editor to polish your TikTok videos handily.
Generate Engaging
AI Video in Minutes!
Easily convert text into professional spokesperson videos in over 120+ voices & languages in minutes.
Generate AI Video Free Generate AI Video Now
google-play ](https://app.adjust.com/1187btki%5F11xz9mlt ) app-store ](https://app.adjust.com/1187btki%5F11xz9mlt )

Conclusion
The sophistication of AI speech generators is rising, and a number of businesses claim that their AI is appropriate for voice cloning. TikTok currently boasts more than one billion monthly active users, making it one of the most widely used social media platforms globally. Even while the technology is still in its infancy, it’s not impossible to picture a day when artificial intelligence-generated sounds are almost indistinguishable from human voices!
Although there are numerous AI speech generators available, the ones we’ve selected here have the greatest functionality, adaptability, and usability. It might be challenging to choose the best solution given the wide range of choices. Virbo is superior than the other two TikTok voice generators because of its adaptability, wealth of AI voices and resources, and simplicity of sharing.
Top 4 Elon Musk Voice Generator Programs to Make You Sound Like the Billionaire
If you’re reading this post, then you probably want to change your voice to sound more like Elon Musk. This might be because you want to prank your friends online, create inspirational tutorials, and more.
Thankfully, you can achieve this quickly with anElon Musk voice generator . These are programs that have been extensively trained to morph your voice into celebrities, professionals, and other characters.
So, in this post, you will discover the best freeAI voice generator for Elon Musk to make your voice more captivating. Make a pick!
Part 1. Who Is Elon Musk and Why Is He Famous?
Elon Musk is one of the most loved celebrity characters today. But who exactly is he? Elon Reeve Musk is an American businessman born in June 1971. He is the founder of multi-billion-dollar businesses, including Tesla and SpaceX.
Elon Musk is known for his passion for conserving the environment, with his Tesla company engaged in the mass production of electric vehicles. He has also made public his intention for space exploration and colonize Mars. Elon Musk is currently the richest person worldwide, with a more than $240 billion valuation.

Part 2. Top Reasons to Change Your Voice to Elon Musk
So, why should you change your voice to sound like Elon Musk? The American business mogul is known for his innovative ideas and financial advice, making him a popular subject in internet memes and parodies. Below are some of the reasons to get an AI voice generator for Elon Musk:
- Prank friends with audio on apps like WhatsApp, Skype, Facebook, etc.
- Create motivational and educative podcasts.
- Attract more listeners to your audio due to the Elon Musk sound effect.
- Convert text to speech if you have speech problems.
Part 3. Best 4 Elon Musk Voice Generators
Searching and finding the bestElon Musk AI voice generator can sound like a simple task of hand-picking the right option on Google or any other search engine. However, this can be challenging because the best program must tick boxes like simplicity, voice variety, output quality, and more. Below are the three helpful options to use:
1.VoxMaker

VoxMaker is an excellent voice cloning tool for Windows PCs. With it, you can make your favorite characters say anything, thanks to the text-to-speech service that supports 46+ languages. You can create audio with voice characters like Obama, Elon Musk, Donald Trump, and Spongebob. This program also lets you create Elon Musk’s voice in Spanish, English, French, and more. In addition to converting text to speech, you can upload audio in MP3, WAV, and other formats.
Key features
- 40+ voice cloning languages.
- Smooth text-to-speech conversion.
- Input and output audio in multiple formats.
- 3,000+ output voice effects.
- Customize voice pitch, accent, volume, tone, and speed.
2.MetaVoice Studio
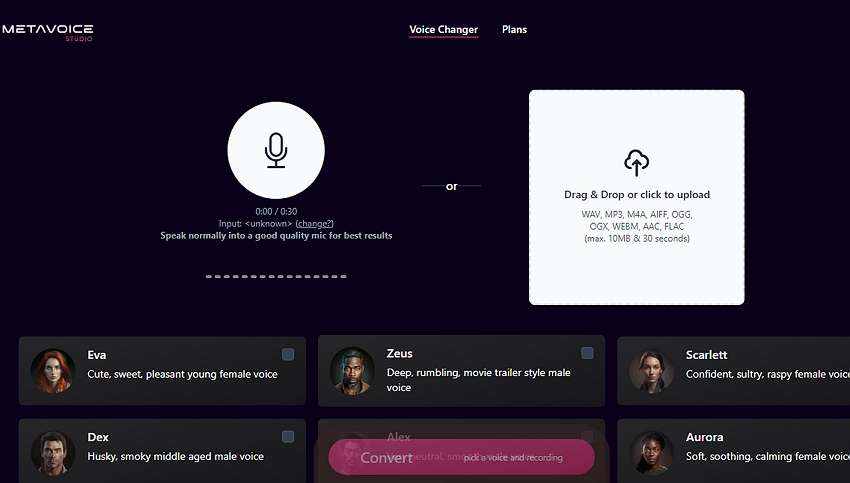
MetaVoice Studio is one of the most straightforward online AI voice changer apps. The program offers excellent cross-platform compatibility on iPhone, iPad, Windows, Mac, and Android. After firing up the program, all it takes is a single click to launch your microphone to record a voice. You can also upload 30-second audio in formats like MP3, WAV, OGG, M4A, and more. Now select your favorite voice effect and let the AI do the dirty work.
Key features
- Smooth online Elon Musk voice generator.
- Supports multiple input and output formats.
- Upload 30-second audio for free.
- Eight voice avatars for free users.
- Free 5-minute total conversion monthly.
- Pocket-friendly premium subscriptions.
3.Celebrity Voice Changer AI
If you’re an Android user, you can transform your voice to Elon Musk remotely using this top-rated app. The app uses advanced AI capabilities to deliver authentic-sounding voices of your favorite celebrities. For example, you can transform your voice into Elon Musk, Eminem, Drake, Andrew Tate, Donald Trump, and more. However, you’ll need Android 5.0 or newer to use this app.
Key features
- Multiple celebrity voices, including Elon Musk.
- Smooth text-to-speech converter.
- Personalized birthday wishes.
- Export created celebrity voices to other apps.
4.AI Voice Generator – Celebrity
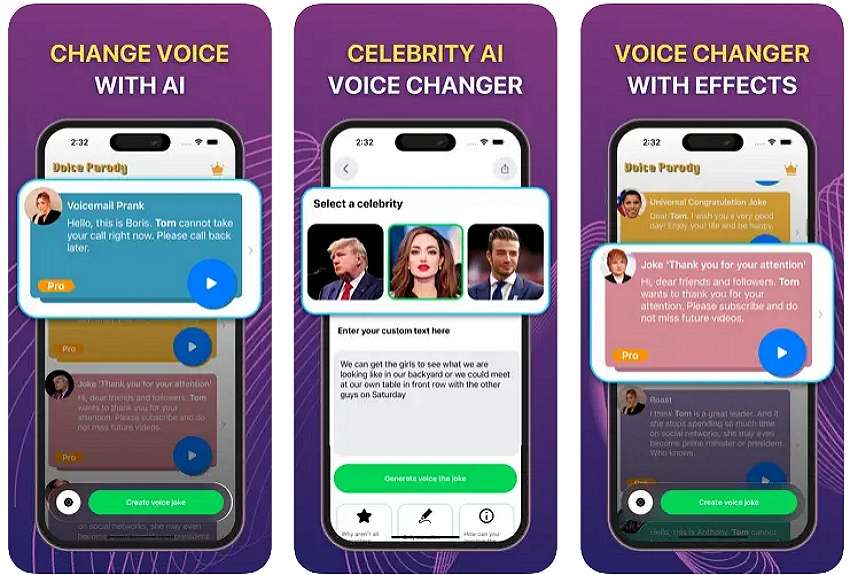
iPhone and iPad users can add more fun and humor to their voices using AI Voice Generator – Celebrity. It’s a simple-to-use app that uses advanced AI technology to create authentic celebrity voices that will leave everyone in awe. This app can transform your voice into celebrities like Elon Musk, Donald Trump, David Beckham, and more. Moreover, you’ll get tens of anime voices to crack jokes with your friends on social media.
Key features
- Numerous output voices.
- 50+ anime voice-cloning effects.
- Free to use with premium purchases.
Bonus tip: How to Easily Transform Text to AI Voice [Recommended]
If you cannot find what you’re looking for from the options listed here, tryWondershare Virbo ! This is one of the most straightforward celebrity voice changers for desktops. It houses a powerful AI-powered text-to-speech conversion service, allowing users to create voices in 120+ languages. Here, you’ll find the ideal voice characters for creating educational materials, marketing campaigns, customer services, podcasts, and more.
Below is how to create an irresistible celebrity voice using Wondershare Virbo:
Step 1. Install Wondershare Virbo on your computer, then run it. This should take just a few seconds, depending on the speed of your processor.
Get Started Online Free Download
Step 2. Next, choose the perfect celebrity character to add to your video. For example, click Female, then select William – Business before clickingCreate Video .

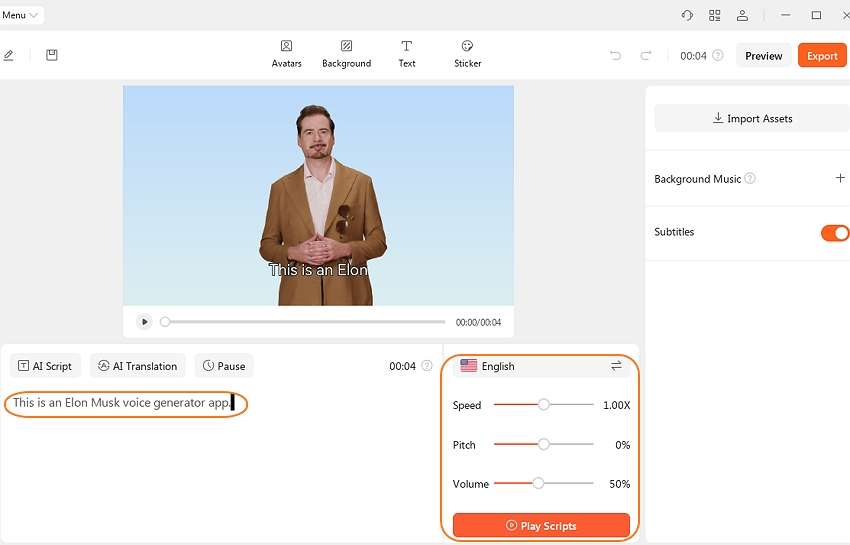
Step 3. Now enter the text to convert it into a celebrity voice. Once you’ve entered enough text, click Play to preview the sound. You can then proceed to adjust the speed, pitch, and volume. Virbo also allows you to change the language if needed.
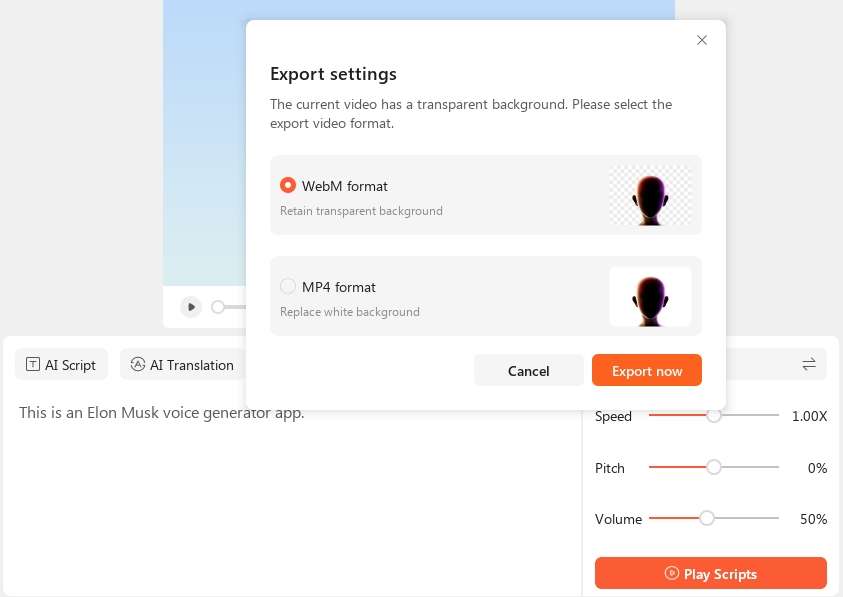
Step 4. Preview the video again to change the background, add stickers, remove subtitles, and more. If satisfied, tap the Export button to save the video in MP4 or WebM formats. Enjoy!
Conclusion
Now you know how to convert your voice to Elon Musk and other celebrity voices with simple steps. Although all the apps listed on this page will do the job, we advise using Wondershare Virbo to enjoy a simple, feature-rich platform with 120+ voice effects. It’s the perfect AI tool for creating videos for entertainment, studies, fitness, business, and more. Give it a shot!
FAQs
1. What is Elon Musk AI voice?
Elon Musk AI voice is a voice generated using an AI-powered program. These programs are often trained extensively using deep machine learning/ML and Artificial Intelligence/AI to deliver the most realistic celebrity voices.
2. Can I use the AI voices generated on Wondershare Virbo for commercial purposes?
Yes, you can use the voices generated by most Elon Must AI voice generators for commercial purposes. However, we advise reading the pricing plans and the T&Cs of the AI voice generator to choose the ideal plan with commercial rights.
3. What are some of the applications for Elon Musk AI-generated voices?
There are multiple uses for AI-generated voices these days. For example, you might have speech problems and want to share audio online. You can also use an AI voice generator in multiple industries, including customer support, journalism, digital marketing, and more.
Also read:
- In 2024, Text to Speech
- Updated Want to Clone Voices in Real-Time? Explore These GitHub Repositories for 2024
- New In 2024, Unlocking Global Audiences Top Video Language Converters
- Becoming a Pro in TikTok Live Shopping Your Complete Guide
- Updated In 2024, Easy Tutorial How to Record and Send Talking Emoji for iPhone
- Updated 2024 Approved How to Make an Explainer Video Step by Step Guide
- Updated In 2024, Best 5 Viral Video Marketing Techniques For Big Sellers
- 2024 Approved Download/Install/Register/Uninstall | Wondershare Virbo
- Updated Translate Video From English to Arabic with Ease
- New In 2024, AI Avatars | Online
- Translate Audio/Video Content From Spanish to English and Vice Versa for 2024
- New In 2024, Translate Live Video Making It Possible With The Best Tool
- Updated 2024 Approved What Is an AI Tool?
- New 10 Best Text-to-Video AI Generators to Create Engaging Videos for 2024
- New Best Text-to-Audio Converters of All Times for 2024
- Updated In 2024, 10 Best Free AI Video Generators with Innovative and Advanced Algorithms
- New Best 10 Free and Best Text-to-Speech Generators for 2024
- New 2024 Approved How to Translate YouTube Videos Without CC
- New In 2024, Video Translator | Wondershare Virbo Online
- Updated 2024 Approved Voice Translation English to Bangla Online and Offline Apps
- New 2024 Approved A Comprehensive List of The Top SpongeBob Voice Generators
- Updated In 2024, Best 7 Whiteboard Explainer Videos to Inspire You
- Updated YouTube Live Selling Boost Your Sales With These Tips for 2024
- Must-Read Top 10 AI Realistic Avatar Generators
- In 2024, Top 11 Deepfake Voice Apps and Software You Need to Know About
- Updated 2024 Approved Top List Best Livestream Shopping Apps Of
- New What Are AI Tools, In 2024
- New Create AI Avatar Videos | Wondershare Virbo Online
- New 2024 Approved Best 4 Eminem Voice Generator Apps for PC, Mac, Mobile, and Online
- Top 5 Udemy Subtitle Translation Tools for Seamless Auto Translations
- Updated How to Translate Audio/Video Content From Spanish to English and Vice Versa, In 2024
- 2024 Approved Translate Live Videos With The Best Video Translator
- What Is Sora by OpenAI Everything You Need To Know for 2024
- Updated Generate Video with Talking Photo Feature
- 2024 Approved How To Create Video From Text Easily Step-by-Step
- New Best 10 Free AI Video Generators with Innovative/Advanced Algorithms
- New 2024 Approved What Is AI Voice? | Wondershare Virbo Glossary
- Updated Exploring The Best Text-to-Speech Online Tools To Use
- Updated Best YouTube Video Into Text Converters A Comprehensive Guide
- New 8 Types of Explainer Videos with Best Examples
- New Voice Translation English to Bangla Online and Offline Apps
- New What Is AI Influencer? | Wondershare Virbo Glossary
- Updated Ready To Dive Into Photo Talking Videos? Heres What You Need To Know
- How Do I SIM Unlock My Apple iPhone 6s Plus?
- A Guide Infinix Hot 40 Pro Wireless and Wired Screen Mirroring | Dr.fone
- Hassle-Free Ways to Remove FRP Lock on Tecno Camon 20with/without a PC
- In 2024, How to Unlock Nokia C02 Phone without PIN
- App Wont Open on Your Oppo Reno 11F 5G? Here Are All Fixes | Dr.fone
- How to Reset a Oppo Reno 10 Pro 5G Phone That Is Locked | Dr.fone
- How to recover old videos from your Edge 2023
- How to Fix Life360 Shows Wrong Location On Vivo Y78 5G? | Dr.fone
- How do I reset my Motorola Moto G Stylus (2023) Phone without technical knowledge? | Dr.fone
- In 2024, Can I Remove the Apple Watch Activation Lock By Apple iPhone XS Max without the Previous Owner?
- Which is the Best Fake GPS Joystick App On Apple iPhone X? | Dr.fone
- In 2024, How Do You Get Sun Stone Evolutions in Pokémon For OnePlus Ace 2? | Dr.fone
- What are Location Permissions Life360 On Samsung Galaxy XCover 7? | Dr.fone
- In 2024, The Most Useful Tips for Pokemon Go Ultra League On Samsung Galaxy F54 5G | Dr.fone
- 10 Free Location Spoofers to Fake GPS Location on your OnePlus Ace 2V | Dr.fone
- Fix Oppo F23 5G Android System Webview Crash 2024 Issue | Dr.fone
- In 2024, A Working Guide For Pachirisu Pokemon Go Map On Samsung Galaxy S24 Ultra | Dr.fone
- In 2024, Forgotten The Voicemail Password Of Xiaomi Redmi Note 12T Pro? Try These Fixes
- Top 10 Password Cracking Tools For Realme
- In 2024, Easy Fixes How To Recover Forgotten iCloud Password On your iPhone 14 Plus
- In 2024, Unlock Your Samsung Galaxy S23 FE Phone with Ease The 3 Best Lock Screen Removal Tools
- In 2024, How to Transfer Apps from Infinix Hot 30 5G to Another | Dr.fone
- How to get back lost contacts from 100 Pro.
- Title: New In 2024, Installation and Registration | Wondershare Virbo
- Author: Sam
- Created at : 2024-06-08 05:32:42
- Updated at : 2024-06-09 05:32:42
- Link: https://ai-voice-clone.techidaily.com/new-in-2024-installation-and-registration-wondershare-virbo/
- License: This work is licensed under CC BY-NC-SA 4.0.
