
:max_bytes(150000):strip_icc():format(webp)/audio-books-56a324b93df78cf7727c00f5.jpg)
New Diverse Template
Diverse Template
Template
Virbo’s template feature collects a wide range of ready-made and exquisite video templates for users to choose from, eliminating the hassle of creating videos from scratch. With just a few simple clicks, you can easily create a sophisticated video that guarantees your satisfaction.
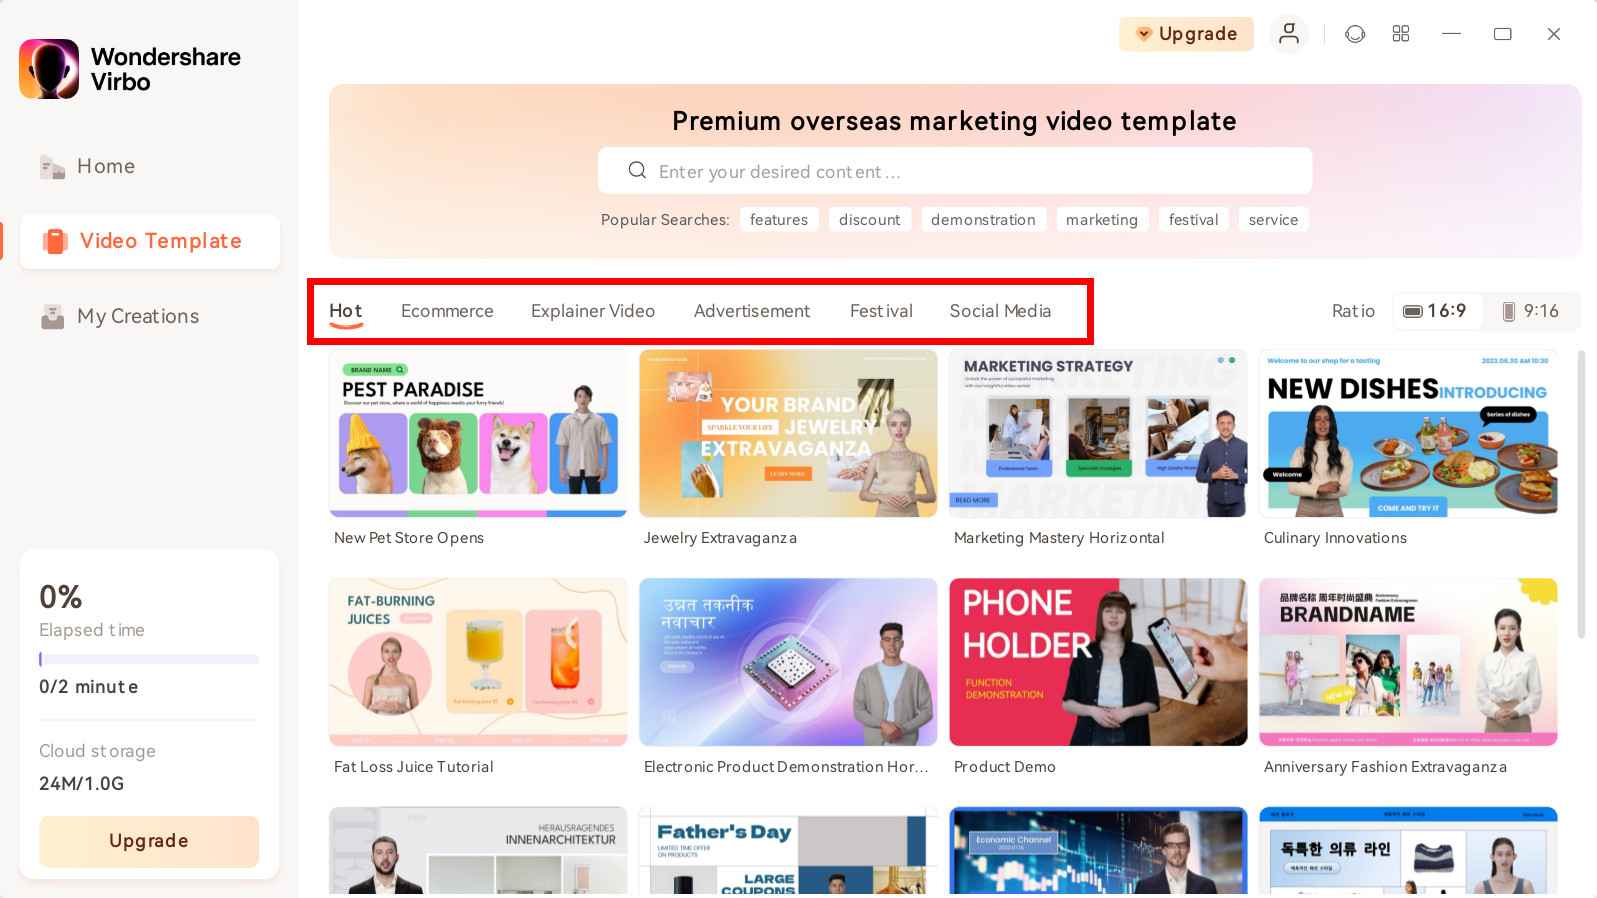
Step 1. Choose Template
On the main interface of Virbo, you can click on the “Video Template” tab to switch to the template display area. Above the templates, there are six categorized sections: Hot, Ecommerce, Explainer Video, Advertisement, Festival, and Social Media.
Choose Template
There is also a ratio selection switch beside it, where you can choose your preferred video aspect ratio.

Choose Aspect Ratio
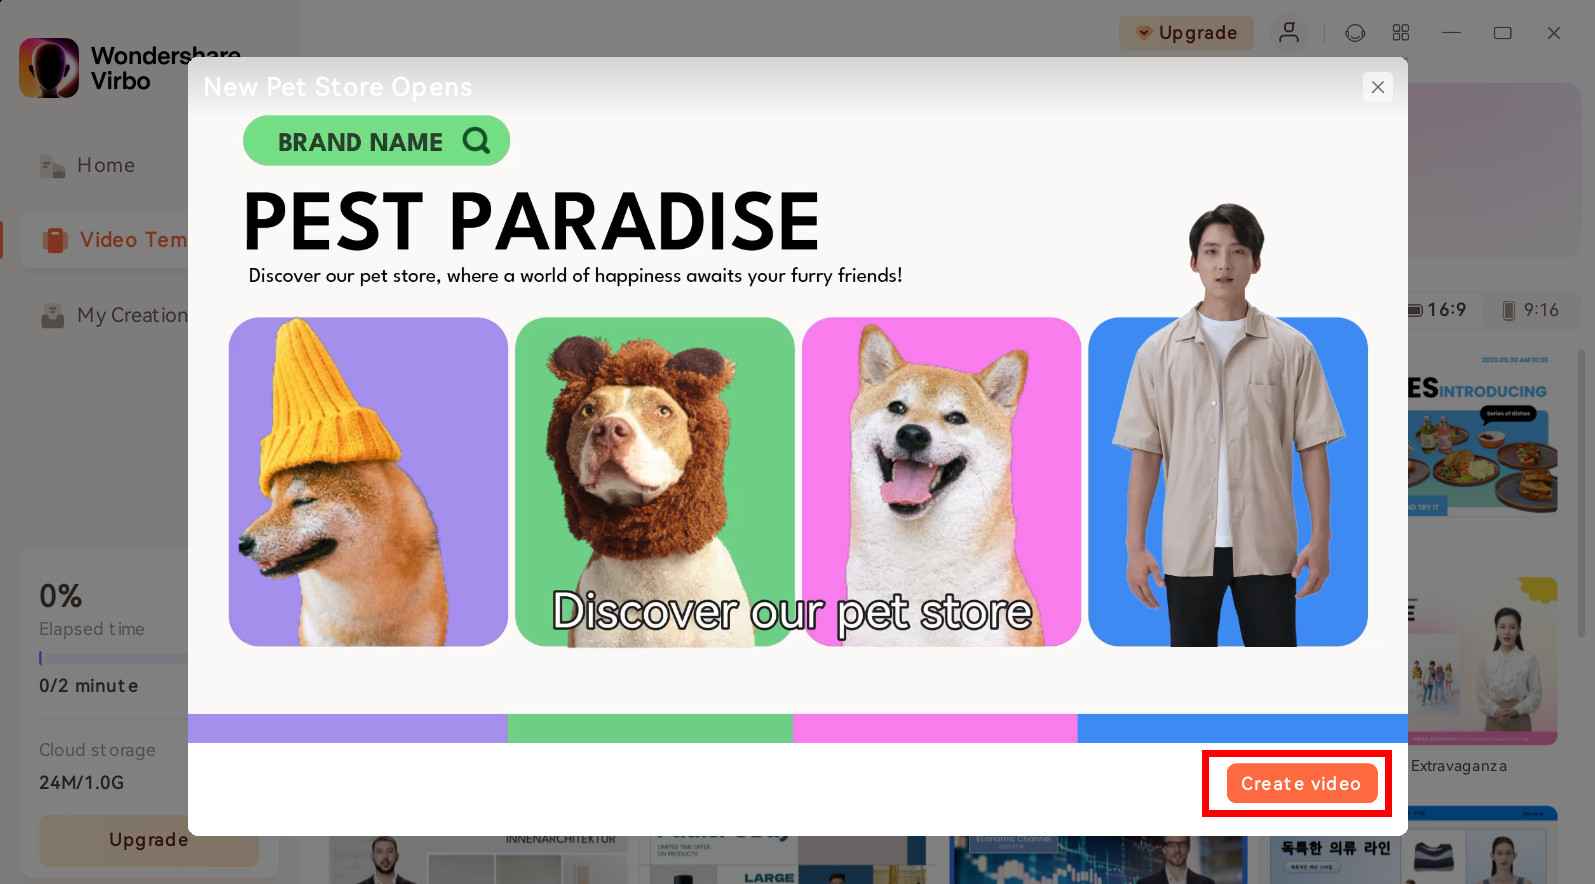
Step 2. Create Video
After selecting your preferred template, click and preview it. Then, in the bottom right corner, click the “Create Video” button to proceed to the editing interface.
Create Video
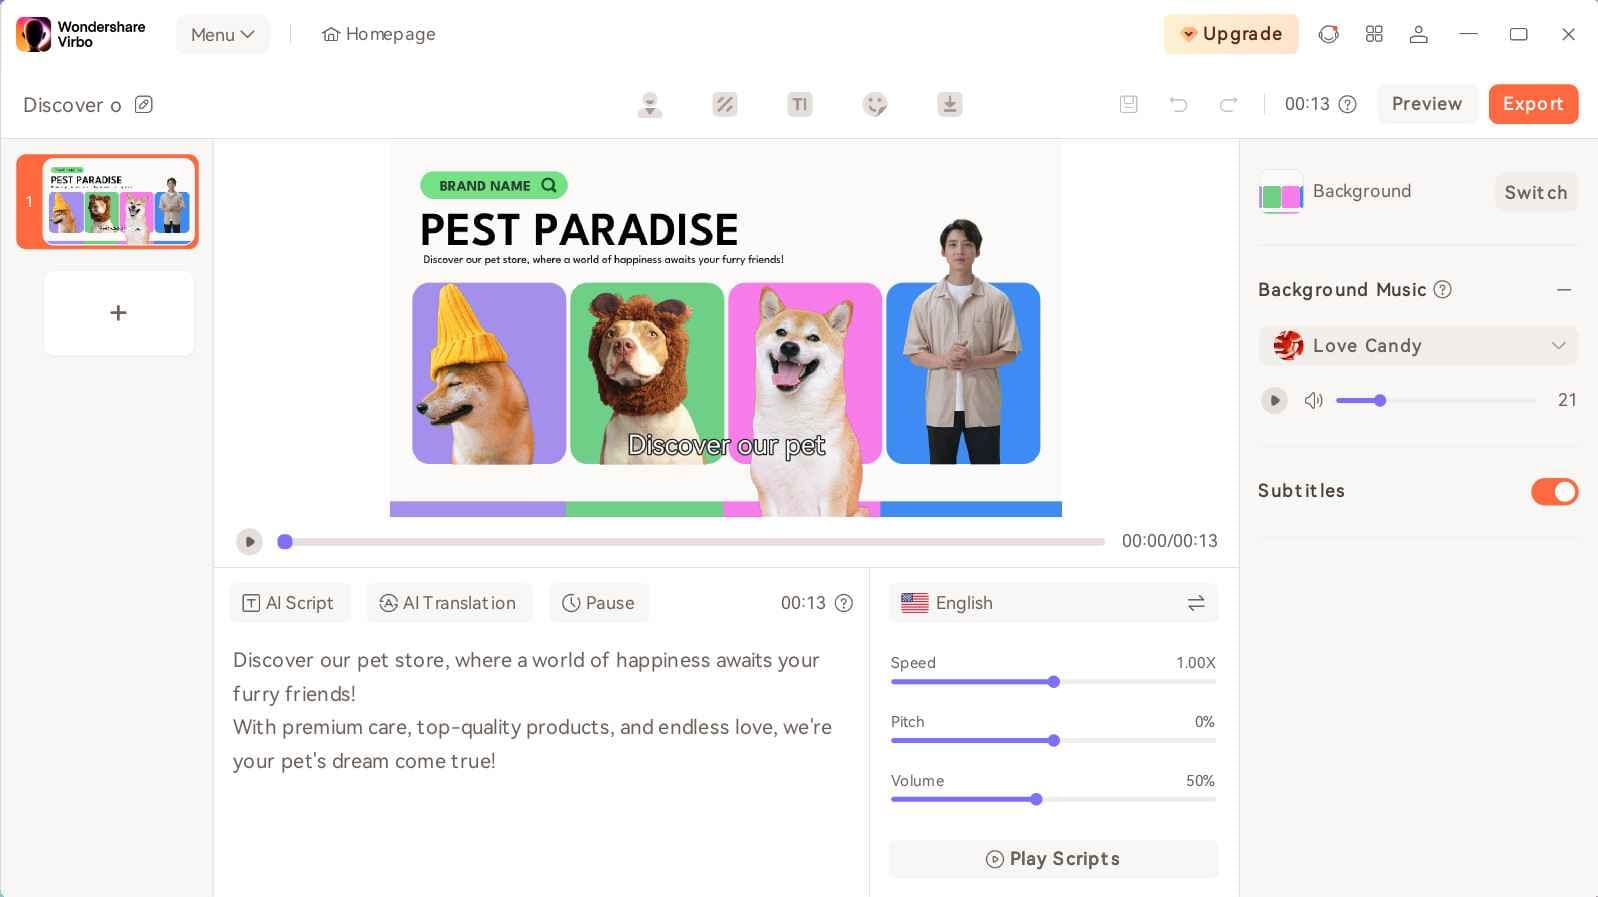
Step 3. Edit Video
In the editing interface, you can enter the script text and adjust elements like voiceover and avatar. You can also change the background and add stickers, among other options.
Edit Video
FAQs about Diverse Templates
1Are These Avatars Based On Real Humans?
Yes, these avatars are all based on video footage using real actors.
2Can the Generated Videos with Digital Presenter Be Used for Commercial Purposes?
For free users, videos are not allowed to be used for commercial purpose. For subscribed users, all materials provided in the software are commercially available, and the produced videos containing digital humans are also available for commercial use. Subscribe now>
3Can I Control Avatars’ Gestures or Expressions?
For personalized avatars on Virbo, you can enjoy the liberty to craft gestures and expressions to your liking. Click now to explore Virbo’s Customization Service!
Step 1. Choose Template
On the main interface of Virbo, you can click on the “Video Template” tab to switch to the template display area. Above the templates, there are six categorized sections: Hot, Ecommerce, Explainer Video, Advertisement, Festival, and Social Media.
Choose Template
There is also a ratio selection switch beside it, where you can choose your preferred video aspect ratio.
Choose Aspect Ratio
Step 2. Create Video
After selecting your preferred template, click and preview it. Then, in the bottom right corner, click the “Create Video” button to proceed to the editing interface.
Create Video
Step 3. Edit Video
In the editing interface, you can enter the script text and adjust elements like voiceover and avatar. You can also change the background and add stickers, among other options.
Edit Video
FAQs about Diverse Templates
1Are These Avatars Based On Real Humans?
Yes, these avatars are all based on video footage using real actors.
2Can the Generated Videos with Digital Presenter Be Used for Commercial Purposes?
For free users, videos are not allowed to be used for commercial purpose. For subscribed users, all materials provided in the software are commercially available, and the produced videos containing digital humans are also available for commercial use. Subscribe now>
3Can I Control Avatars’ Gestures or Expressions?
For personalized avatars on Virbo, you can enjoy the liberty to craft gestures and expressions to your liking. Click now to explore Virbo’s Customization Service!
Live Chat With WooCommerce: Leading Into the Live Selling World
E-commerce has reached an unprecedented level of fame all around the world. It provides convenience for buying and selling goods through accessible platforms.WooCommerce is one of those leading platforms that offer a satisfying e-commerce experience. Also, this platform is well-known for its exceptional functionality and infrastructure, which makes online selling easy.
What if you want aWooCommerce live chat feature to interact with your customers? This article presents benefits and ways to integrate live chat with WooCommerce to interact with customers. You can also learn about an innovative live-streaming platform that boosts your live sales.

Part 1. Overviewing WooCommerce E-Commerce and Its Utility in the Market
WooCommerce is a powerful e-commerce platform renowned for its adaptability. Its scalable nature allows you to start businesses of all sizes. The advanced customization options of WooCommerce make things effortless for users. Moreover, it provides a flexible selling experience, whether you’re selling products or services. Irrespective of its functionality, thelive chat WooCommerce feature is absent from the platform.
People can use WooCommerce as a plugin for WordPress, the leading content management system. This open-source plugin helps users customize their online stores. By doing so, it allows sellers to meet their branding requirements. Also, you can manage inventory, order processing, payment gateways, and shipping details. Moreover, it provides a built-in geo-location support to detect customer’s address.

Features of WooCommerce
Many businesses are using WooCommerce for online stores throughout the world. Its impressive usability and accessibility help users in different e-commerce aspects. Provided are some features of WooCommerce that make it special for brand owners:
1. Inventory Management
It provides multiple inventory management options to track stock levels. You can receive notifications for short or out-of-stock products. Moreover, you can sort or filter products by price, popularity, ratings, latest, and more.
2. Pre-installed Payment Methods
To simplify payment processes, WooCommerce provides pre-installed payment gateways. You can choose any payment method, including Cash on Delivery, PayPal, and Credit Card payments.
3. Sell Anything
With WooCommerce, you can sell anything from real products to digital downloads. Moreover, this 100% open-source plugin allows you to sell anywhere with its global support.
4. Mobile Friendliness
WooCommerce ensures that your store looks equally beautiful on desktop and smartphone. Store owners can even turn their existing stores into mobile apps without custom coding.
Part 2. How To Add Live Chat Feature in WooCommerce?
Live chatting is an essential function for interacting with the audience for trustworthiness. Unfortunately, WooCommerce doesn’t provide a dedicated live chat feature. If you want to use this service, integrate it separately with a third-party source. For this purpose, you can use a reliable plugin that enables WooCommerce online chat.
LiveChat is a renowned customer service platform that provides a superb live experience. It helps to chat with customers and share their data with CRM. Moreover, the AI chatbots help to greet your store visitors with automated responses. They allow you to capture more leads and increase sales. Ultimately, LiveChat helps boost your store’s overall revenue.
Comprehensive Guide to Setting Up the LiveChat Plugin on WooCommerce
Using the LiveChat plugin is a good option to get alive chat for WooCommerce . The query is how to set up the plugin across your WooCommerce store. For this, the provided step-by-step resolves all queries involving setting up the LiveChat plugin:
- Step 1. First, you have to access the WordPress dashboard to enter the “Plugins” section. Then, hit the “Add New” button and write “LiveChat WooCommerce” to search for this plugin. Look for the “WordPress Live Chat Plugin for WooCommerce – LiveChat” in the results that appear. Once identified, click the “Install Now” button to proceed.

- Step 2. Upon installation, you need to hit the “Activate” widget. After that, sign up with your account on the “Integrate with LiveChat” screen.

- Step 3. When the log-in and installation process is complete, a chat widget appears on the website. Then, click on “Go to LiveChat” to start live chatting.

- Step 4. If you want to change the settings, select the “LiveChat” option in the WordPress dashboard. Next, hit “Settings” and turn on or turn off the desired options.

Part 3. Wondershare Virbo Live: Assisting Quality Livestream Selling
Live selling has set marketing expectations high for the sellers. Therefore, you should use an efficient live selling tool to stay competitive. To meet the standards,Wondershare Virbo Live is an intuitive and interactive live streaming tool to enhance your streaming quality. Most sellers don’t have the knowledge to market their items on WooCommerce. For this purpose, this simple and easy-to-use medium will help sellers grow revenue.
Moreover, this tool is compatible with all major social media platforms. This allows you to integrate live streams with YouTube, Facebook, Instagram, and more. You don’t need to download the platform as it supports cloud-based service. Another exciting feature is that you can introduce AI avatars or VTubers to your live sessions. Overall, this is the best live-streaming platform with AI-powered features.
Key Highlights of Wondershare Virbo Live
- The smart AI streamer allows you to translate text for dubbing into different languages. It helps accommodate a wider audience of different regions, ethnicities, and cultures.
- Wondershare Virbo Live helps create scripts for live selling. Its built-in AI Smart Script feature allows you to type or generate a script with instant prompts.
- Users can also change live stream templates and backgrounds. Moreover, it allows the addition of creative stickers for better customer engagement.
Get Started Online Free Download
Step-by-Step Guide to Creating a Streaming Room in Virbo Live
Many live-streaming tools exist, but Wondershare Virbo Live is the most recommended. It provides innovative AI-powered functions to facilitate users in a single platform. Here’s how you can create your streaming room using this tool:
- Step 1. Generate a Blank Live Streaming Room
Access the Virbo Live tool from its official website. You must select the “Create Stream Room Now” button from the display. On the new screen, navigate and select the “Create a Black Livestream Room” option. Upon doing so, you will get access to several live-streaming settings.

Get Started Online Free Download
- Step 2. Integrate Microphone for Human-Like Interaction
Now, press the “Human interaction” tab on the left of your screen to integrate the mic with this tool. You have to hit the “Turn Microphone on to Take Over” button under the “Microphone” sub-section. Also, you can move to the “AI Interaction” tab to create an automated Q&A session.

- Step 3. Customize Live Stream Template and Background
Wondershare Virbo Live presents different templates and backgrounds for users. Click on the “Background” tab from the top navigation bar to try stunning backgrounds. You can also select the “Template” tab to explore various templates for quick live streaming setup.

- Step 5. Pick Suitable AI Avatars for Your Live Event
To add more fun, hit the “AI Avatars” tab from the top navigation bar. This section shows creative avatars with different outfits and poses. You can choose the suitable one that demonstrates your personality. After selecting the avatar, you can preview it on the right side of the screen.

- Step 6. Start Your Livestream After All Settings
After customizing all the features according to your desire, click on the “Start livestream” button at the top right of the screen. The results will be displayed across the respective selection as you decide which platform you’ll be using for the livestream.

Part 4. Discussion: Why Should We Shift To Live Selling?
Live chatting services add more energy to your live events. As discussed, theWooCommerce online chat feature is essential to engage with potential customers. Some people still feel doubtful about whether they will get benefits or not. This section clarifies some potential benefits of shifting to live selling that users can get in the overall market:
- Build Connections: Live streams add a human touch in the live selling that connects viewers emotionally. So you can easily build relationships to increase your brand awareness.
- Successful Selling: People can understand what to expect from a product during the live stream. So, it results in successful live selling and reduced delivery returns.
- Global Audience: Unlike traditional selling strategies, live selling helps reach international audiences. You can showcase products or services from anywhere to gain worldwide customers.
- Digital Experience: Live selling is far ahead of the offline world. For this digital experience, shoppers don’t need to find reliable physical stores. Also, the digitalized live shopping experience is more entertaining and profitable.
Conclusion
This ultimate guide provides an overview of WooCommerce and its features. We have also explained a way to enableWooCommerce live chat . Moreover, we have introduced a live-streaming tool that can integrate with other social platforms. With Virbo Live, users can optimize their streams with features like AI avatars, script generation, and much more.
Top 10 AI Subtitle Translators for Content Creators That Anyone Can Use
According to the Linguistic Society of America, there are over 7,000 languages in the world. In such a diverse world, there’s one way for any content creator to reach as many as possible: Subtitles. Yes, with subtitles, you can reach even those people who do not understand your language. There’s one problem, though. Manually subtitling is time and effort-consuming. It’s also prone to mistakes. Solution?AI Subtitle Translator tools. These handy tools quickly and efficiently change spoken content into written text in multiple languages. So, if you’re searching for the best subtitle translator to make your content stand out, we’re here to help. Read on to find out the 10 best AI subtitle translators available today!
Part 1. How AI Subtitle Translators Work
AI subtitle translators generally use ASR and Machine Learning technologies to carry out the task. Automatic speech recognition technology converts spoken audio into text. The developers train these systems on vast amounts of audio data for text identification. Once the speech is transcribed, AI translation engines convert the text into the target language. Here is the complete breakdown of how these subtitle translators work:
- Input: You provide the video or subtitle file containing the source language. For this, some translators allow you to paste the URL of videos. However, some require you to import the whole video or SRT file.
- Speech Recognition: The AI system extracts the audio and converts it into text. In the case of only subtitle files, the systems will recognize the language of the uploaded SRT.
- Machine Translation: The transcript is then fed into the machine translation engine. Afterward, the MT engines translate the text into the desired language.
- Output: The translated text is displayed as subtitles synchronized with the video’s audio. You will also be able to translate SRT into your desired language as a separate file.
Part 2: How to Choose a Good Subtitle Translator?
Now, you have understood howAI translates subtitle files for you. Let’s analyze the factors you need to consider while choosing a suitable subtitle translator.
1. Supported Languages
You need to consider a translator that supports various input and output subtitle languages. Preferably, a suitable AI subtitle translator will support all the famous languages in the world.
2. Contextual Understanding
A good subtitle translator should understand the context of the content. So, choose a translator that comprehends cultural nuances for natural-sounding translations.
3. Customization Options
Users should look for a translator that provides different options to customize subtitles. Using such a tool will allow you to personalize the font and color of subtitles.
4. Supported File Formats
If you want to choose the best AI subtitle translator, consider the file formats it supports. An ideal translator will support various video, audio, and subtitle formats.
Part 2. Top 10 AI Subtitle Translators You Can Use
Now, you should know how to choose good subtitle translators, we will introduce 10 AI subtitle translators for you in the following part.
1. Wondershare Virbo
Translate Online Download APP Now Free Download
Wondershare’s Virbo is primarily an AI Avatar video generator. But it has a fantastic feature set, which includes anAI subtitle translator . No need to manually type out translations. You can use Virbo’s advanced AI solution to create subtitles and subtitle translations in 20+ languages, including English, Arabic, Hindi, Thai, Spanish, French, Korean, and Japanese among others.
Free Trial: Available
Unique Features
- Match translated audio and subtitles to video with its advanced lip-sync feature
- Allow you to download the SRT subtitle file along with the video (Online version)
- Proofread translated subtitles before processing video content (Online version)
- Support different video formats, such as MP4 and MOV, for video translation
Step-by-Step Guide to Translate Video Subtitles with Wondershare Virbo
After getting to know about its features, it is time to understand the workings of the Virbo video translator. For this purpose, you can refer to the simplified guide provided below:
Step 1: Access the Video Translator Feature within Virbo
After downloading Wondershare Virbo, launch this AI subtitle translator on your system to start the process. Now, click on the “Video Translator” button to enter its Video Translator window.

Step 2: Import Your Video for Subtitle Translation
Afterward, hit the “Click to Upload Video” button to import the video you want to translate. For this purpose, you can import an MP4 or MOV video file in under 5 minutes.

Step 3: Adjust the Subtitle Translation Settings
Once you import the video file, choose the original and translated language for the task. Within its advanced settings, enable the “Subtitle” and “Lip-Sync” options for an optimized translation process. Finally, hit the “Translate this Video” button to finish the process.

Translate Online Download APP Now Free Download
2. SubtitleBee

SubtitleBee is another great subtitle translator. It has a very friendly interface, allowing quick text edits and subtitle customization. SubtitleBee also lets you choose between different fonts, change styles and colors according to your preferences. It’s auto-subtitling tool is particularly handy for YouTube videos, as you can just enter the video link and leave the rest to SubtitleBee.
Free Trial: Not Available
Unique Features
- Automatically adds captions and subtitles
- Allows subtitle customization
- Supports 120 languages
- Has a drag-and-drop editor
3. Bing Microsoft Translator

Microsoft’sBing Translate is a very interesting choice. You can use it absolutely free of cost to translate texts, subtitles or entire webpage into a different language. It can translate into all the major languages of the world. But the only problem is that you would have to provide text to translate as it cannot generate subtitles from a video.
Free Trial: Totally Free
Unique Features
- Supports almost all languages of the world
- Can translate entire web pages or text into different languages
- Absolutely free of costAI translate subtitles
- Integrates with MS Office and Edge
4. Flixier

Flixier is a powerful video editing platform. It offers a range of options to streamline your content creation workflow, including team collaboration, auto subtitle creation,AI subtitle translation , and customization among others. With Flixier, you can automatically create, edit and translate subtitles in over 30 languages as per your needs. Oh, and it supports all major subtitle formats like SRT, VTT SCC, etc.
Free Trial: Available
Unique Features
- Very fast and accurate online subtitle translator
- Supports 30+ languages of the world
- Can translate SRT, VTT, SUB, DFXP and SCC file types
- Allows manual edits to subtitle
5. VEED

VEED is a very popularAI subtitle translator . With an accuracy rate of 95%, VEED empowers you to tailor content for global audiences with ease. It’s fast, it’s accurate, and it supports on-the-go functionality. What’s more, you can directly add the translated text to your video or download them as subtitles for offline editing. Like other AI translators on this list, VEED is incredibly simple and easy to use – even for non-techies.
Free Trial: Available
Unique Features
- Lets you edit multiple languages
- Supports 100 languages
- 95% translation accuracy rate
- Supports Customization
6. Simplified

A relatively new tool,Simplified expands your global reach by easily creating and translating subtitles. It’s incredibly easy to use, offering individual as well as collaborative features to get the job done. Beyond subtitles, Simplified offers a range of other useful tools for content creators. These include, AI Writer, Video Animator, Text-to-Speech, Voiceovers, and Video Editor, etc.
Free Trial: Available
Unique Features
- Auto subtitle generator and translator
- Can work with SRT files or Videos
- Collaborative team features
- Plenty of other tools for simplified content creation
7. Nova

Nova AI subtitle translator is another great option for audio and video content. Once the text has been generated, it’s easily accessible in the subtitle panel, giving you options to edit and meet your needs. Moreover, you can also personalize how you interact with Nova.ai by creating distinct phrases and creating your own unique style.
Free Trial: Available
Unique Features
- 97% subtitle accuracy rate
- Supports 75 languages of the world
- Allows subtitle downloads in SRT and TXT files
- Subtitle sync feature
8. Media.io

Media.io is one of the oldest AI subtitle translators and still remains one of the best. The best thing about Media.io is that you don’t need to download software on your PC/device. Simply upload your video on Media.io’s online platform, translate your subtitles and you’re done. You can also preview different alterations before finalizing or downloading your content.
Free Trial: Available
Unique Features
- Supports 90 languages
- Generates highly accurate subtitles
- Offers cross-platform compatibility
- Supports almost all video formats
9. Subly

This is the first timeSubly has made it to our top 10 list, and not without a reason. Subly has added some fantastic new features along with support for translating subtitles into 73 different languages. ThisAI subtitle translator now also allows quick adjustments like font, color, appearance and size, etc. Subly also has a subtitles app with which you can easily turn audio into videos by adding photos and logos.
Free Trial: Not Available
Unique Features
- Supports 73 languages
- Team Collaboration feature
- Allows subtitle export in TXT, SRT and VRT formats
- Auto video translation
10. Smartling

Smartling is a cloud-based translation solution for businesses. It provides content localization and translation services in over 150 languages. What’s unique about Smartling is that it uses a combination of AI and human translators to give you the most accurate translation possible. Smartling is known for its Translation Management System that can integrate with various CMSs and other tools for a hassle-free translation solution.
Free Trial: Available
Unique Features
- Supports over 150 languages
- Easy integration with different CMS and tools
- Translation memory and terminology management services
- Automates workflows
Part 3. AI Subtitle Translation: Challenges & Limitations
Even though AI has made strides in improving translations, there are still some limitations. Below are 4 major challenges:
- AI subtitle translator tools often struggle with contextual nuances, resulting in glaring misinterpretations.
- Capturing and translating idiomatic expressions accurately still poses a significant challenge for AI systems.
- AI lacks cultural understanding, leading to translations that sometimes don’t align with cultural differences.
- Diverse speech patterns or accents often affect the accuracy of AI-generated subtitles.
- AI tools still face difficulties with complex sentence structures
Some AI translators like Wondershare Virbo offer high translation accuracy and support proofreading, it’s essential to acknowledge the broader context. AI can help us save time and improve translation efficiency, but human oversight and intervention remain crucial for ensuring the quality and appropriateness of translated subtitles, particularly in contexts where accuracy and cultural sensitivity are paramount.
Bonus Tip: How to Make Your Social Media Content Stand Out
How do you use Wondershare Virbo to create new videos? You can get your hands on over 150 AI avatars to make content for social media via Wondershare Virbo. You can also create AI scripts for your videos using this tool.
After creating scripts, creators get to add voiceovers to their videos. Now, let’s see how to utilize all these features to create AI video to stand out from your competitors:
Step 1: Start Creating a Video on Wondershare Virbo
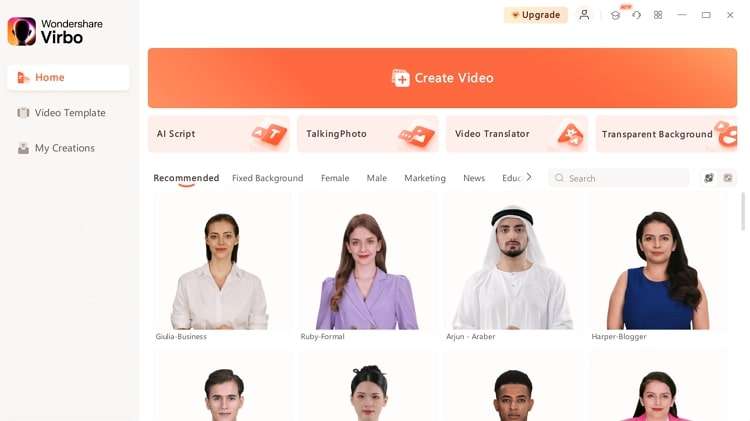
Upon installing Wondershare Virbo on your computer, launch this tool to start generating content. On its main interface, press the “Create Video” button and choose the aspect ratio to enter the AI video generator.

Step 2: Choose AI Avatar and Background for Your Video
Now, click on the “AI Avatar” icon on the top toolbar to access the Avatars drop-down menu. From this menu, choose your desired AI avatar for the video. Similarly, you can choose the background and add stickers to personalize the visuals.

Step 3: Write a Script for Your Social Media Content
Afterward, write the script for your social content in the “Text Script” text box. Moreover, you can get help from an “AI Script” writer to make writing more engaging.

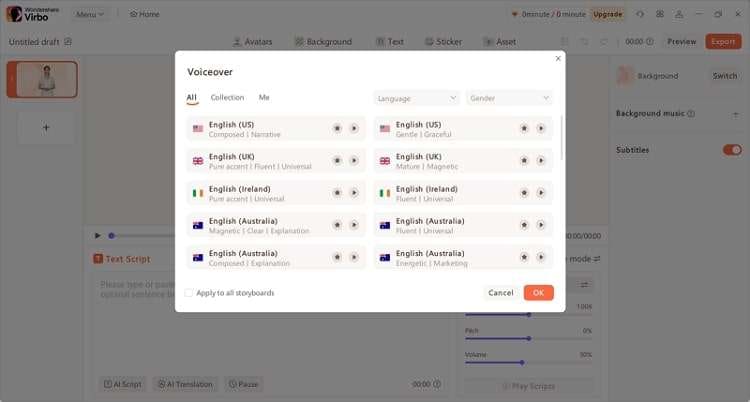
Step 4: Select Voiceover Language and Adjust Narration Settings
Once you finalize the script, choose your desired voiceover language and gender for AI narration. Then, adjust the “Speed,” “Pitch,” and “Volume” settings for your voiceovers. Finally, hit the “Export” button to post this video on your social platforms.

Try It Online Download APP Now Free Download
Conclusion
So, these are the top subtitle translators available today. These tools simplify the translation and transcription of video content and help boost its global reach. Each tool brings its unique features and advantages to the table. However, Wondershare Virbo stands out as the bestAI subtitle translator when we consider its overall usefulness. It uses advanced AI to give you accurate translations, boasts a friendly interface, and saves an incredible amount of time. Give it a try, and let us know what you think!
Try It Online Download APP Now Free Download
What Is an AI Headshot Generator? | Wondershare Virbo Glossary
Part 1. What is an AI headshot generator?
An AI headshot generator is a software or application that utilizes artificial intelligence (AI) to create realistic and high-quality headshot images of individuals. These generators use deep learning techniques to produce lifelike portraits from scratch, often employing convolutional neural networks (CNNs) and generative adversarial networks (GANs).
Users typically provide input to the AI headshot generator, such as specifying certain attributes or characteristics they want in the generated image, like age, gender, ethnicity, facial expression, and more. The AI then processes this input and generates a corresponding headshot that matches the desired criteria.
These generators can be used for various purposes, including creating profile pictures, avatars, character images for games or storytelling, and even for artistic or creative projects. It’s worth noting that while these generators can produce impressive results, they might sometimes unintentionally perpetuate certain biases present in the training data, which is an important consideration when using such tools.
Part 2. Can AI-created headshots be used in professional occasion?
Certainly! AI-generated headshots have become increasingly sophisticated and can be employed in various professional settings. Here are some points to consider when using AI-created headshots for professional occasions:
1. Quality and Realism
Before utilizing AI-generated headshots in a professional context, ensuring that the images’ quality and realism meet your standards is crucial. The headshots should look natural and professional, without any apparent distortions or artifacts.
2. Consistency
AI-generated headshots can offer a consistent visual aesthetic across your team’s profiles or marketing materials. It can help establish a cohesive brand identity and create a polished impression.
3. Time and Cost Efficiency
Generating headshots with AI can be quicker and more cost-effective than scheduling and conducting photoshoots for every individual. It is particularly useful when working with large teams or for time-sensitive projects
4. Personal Data Privacy
When using AI to generate headshots, you don’t need to collect personal photographs of your team members. It can help address privacy concerns arising from collecting and using private photos.
5. Ethical Considerations
Considering any ethical implications of using AI-generated content is essential. Transparency is critical—let your audience know if the images are AI-generated, not actual photographs.
6. Diversity and Inclusion
AI-generated headshots should reflect diversity and inclusivity. Ensure that your tool has been trained on a diverse dataset to avoid unintentional biases in gender, ethnicity, age, etc.
7. Customization
Some AI headshot generators allow customization, such as adjusting facial expressions, hairstyles, and other features. This can help tailor the generated images to match your brand’s unique style.
8. Legal Considerations
Be aware of copyright or licensing issues related to the AI-generated images. Ensure you have the right to use and distribute the photos for your intended purposes.
Ultimately, the decision to use AI-generated headshots in professional settings depends on your specific needs and the industry in which you operate. As AI technology improves, these generated images will likely become even more convincing and versatile for various applications.
A Detailed Guide to Making Your Pictures Speak
In today’s digital era, visual communication flourishes as a highly effective way to convey messages across diverse contexts. With smartphones and social media on the rise, the demand for engaging visual content has surged.
Visual communication effectively shares information with diverse audiences. When combined with audio, it enhances the experience even more. Audio adds depth and emotion, guiding attention to details. Whether it’s music or someone speaking, the audio complements the visuals seamlessly.
Adding audio strengthens visual communication and fosters a stronger connection with audiences through their senses. In this article, we’ll explore how to use visual communication effectively. We aim to provide you with a guide on how tomake your pictures talk .
Part 1. AI Talking Photo Technology Benefits
AI-talking photos are revolutionizing how we communicate visually, merging images with audio narration to create immersive storytelling experiences. These photos offer personalized interactions that meet the preferences of users and enhance accessibility for all.
Thus, talking photos has become a cornerstone in modern communication across various industries, from advertising to education. With technology continually advancing, the potential for AI talking photos to deliver impactful messages is ever-expanding.
For a more comprehensive understanding, here’s a breakdown of the benefits of AI talking photo technology. Below are the following:
● Enriched Narratives
With AI-talking photos, storytelling reaches new heights that enable photographs to articulate themselves. Bymaking your pictures talk , the stories they tell become more engaging and immersive.
● Customization and Personalization
Users can now personalize their storytelling experience by narrating the stories behind their AI-generated photos using their voices.
● Accessibility and Inclusivity
AI talking photos also address the needs of individuals with visual impairments by providing audio descriptions of the images. This feature significantly enhances the accessibility of visual content, ensuring that everyone, regardless of their visual abilities, can engage with and enjoy the stories being told through the photos.
● Creating Lasting Memories
Throughmaking your image talk , they possess the ability to transform fleeting moments into enduring memories. The addition of audio narration enhances the emotional resonance of the images, making them more vivid and memorable.
● Facilitating Artistic Expression
AI talking photos provide a versatile platform for artistic expression, allowing users to experiment with various narratives, voices, and styles. The possibilities are endless, from personal storytelling to creative projects.

Part 2. Difficulties in Talking Photo Technology

Despite its potential,making your photos talk encounters numerous challenges that hinder its seamless integration and effectiveness. Here, we outline some difficulties you might encounter:
● Unnatural Mouth Shape
Despite advancements in facial recognition and animation, creating natural-looking mouth movements in talking photos remains a significant challenge. The technology often struggles to accurately replicate the intricate movements and subtleties of human speech.
● Unnatural AI Voice
Another obstacle lies in the synthesis of natural-sounding AI voices. While text-to-speech (TTS) technology has advanced significantly, AI-generated voices can still sound robotic or unnatural. They often lack the nuances and inflections of human speech. Crafting a voice that is clear and emotionally resonant poses a significant challenge, as it involves capturing human expression and intonation nuances.
● Lack of Lip Non-Actuation in Multi-Person Conversation Photos
In multi-person conversation photos, accurately synchronizing lip movements poses a complex challenge. Coordinating lip movements and distinguishing speakers is challenging, especially in dynamic group settings with diverse expressions and speech patterns.
● Technical Limitations
Real-time lip-syncing and audio processing require a lot of computer power. Handling large amounts of data while keeping quality needs efficient algorithms. Additionally, it’s hard to balance performance and resources in talking photo technology.
● Ethical and Privacy Concerns
Besides technical hurdles, ethical and privacy issues arise with talking photo technology. Manipulating visual and auditory content raises concerns about misinformation, privacy breaches, and potential misuse of digital media.
Part 3. How to Create a Talking Picture with A Powerful Tool - Wondershare Virbo on Mobile/Online
In the current dynamic digital landscape, the merging of visuals and audio has reshaped our methods of communication and connection. Talking photos, with their capability to infuse images with voices and feelings, lead this transformative shift.
Wondershare Virbo stands as a testament to innovation in visual storytelling that offers a powerful platform that redefines how we engage with images and sound. With its cutting-edge technology, it effortlessly merges audio with visuals and surpasses the constraints of traditional static imagery. This breakthrough allows creators to transform ordinary photos into captivating narratives that resonate with depth and emotion.
Enter the realm of visionary storytellers and explore Virbo—a tool worth discovering to enhance your storytelling to new heights! Users can utilize it for mobile or online which ensures accessibility and convenience for their needs. Moreover, exploring Virbo online offers the same excitement and fluidity as using it on a desktop that guarantees an engaging experience on either platform. To create a talking photo on mobile/online, follow the steps outlined below:
Get Started Online Free Download
For Mobile
To create a talking photo on mobile, follow the steps outlined below:
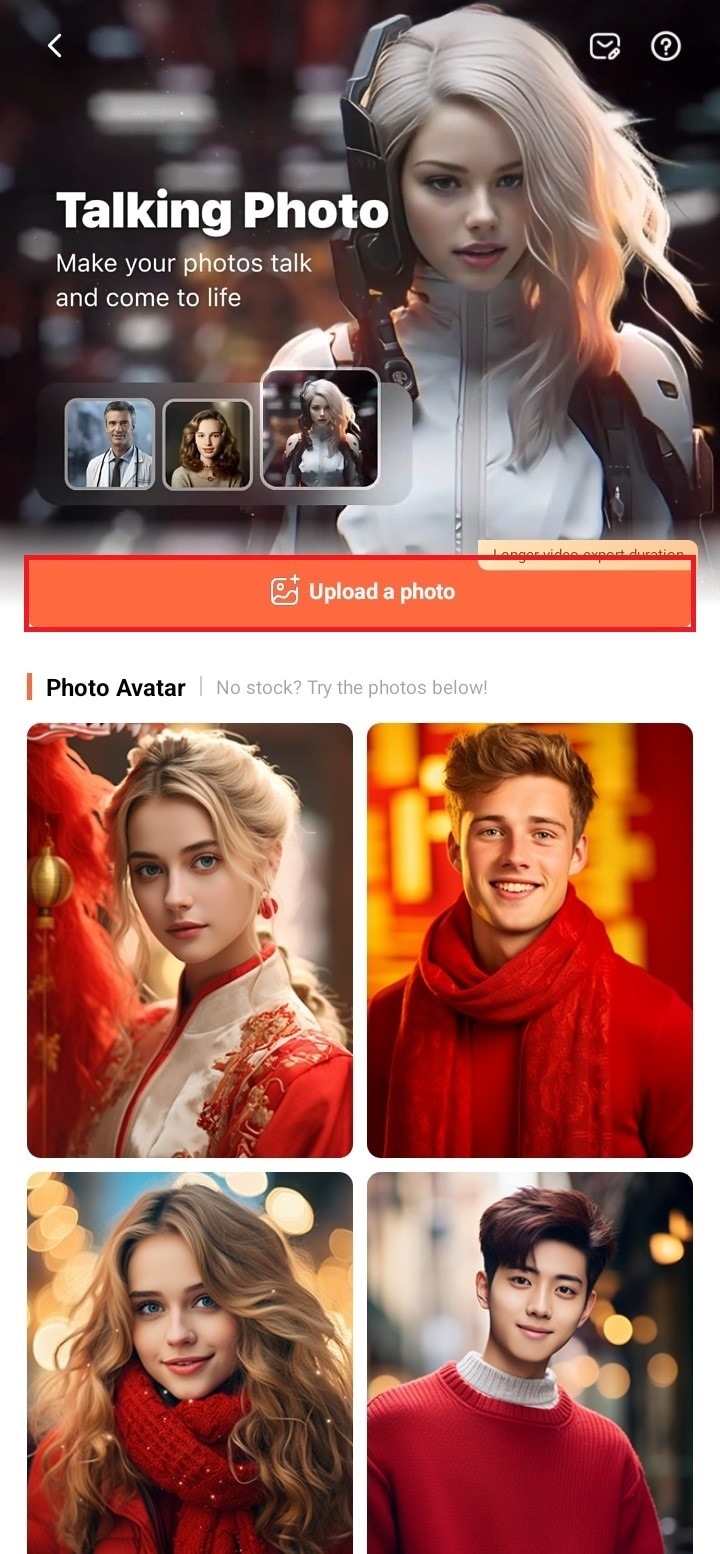
- Download and open the Wondershare Virbo app and select the talking photo feature to access the operational interface.
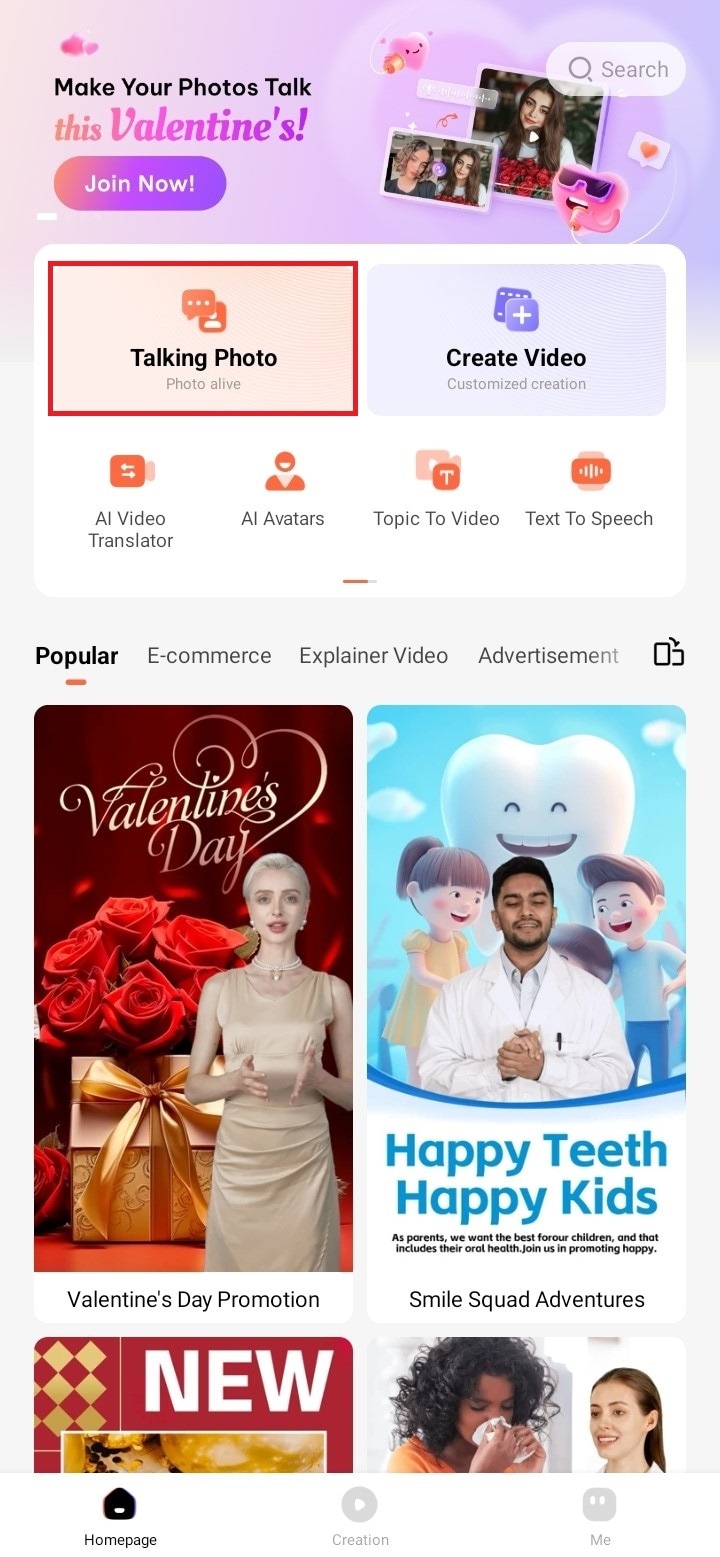
- Choose the AI-generated talking photo that best suits your preference, or you can select to upload your image.
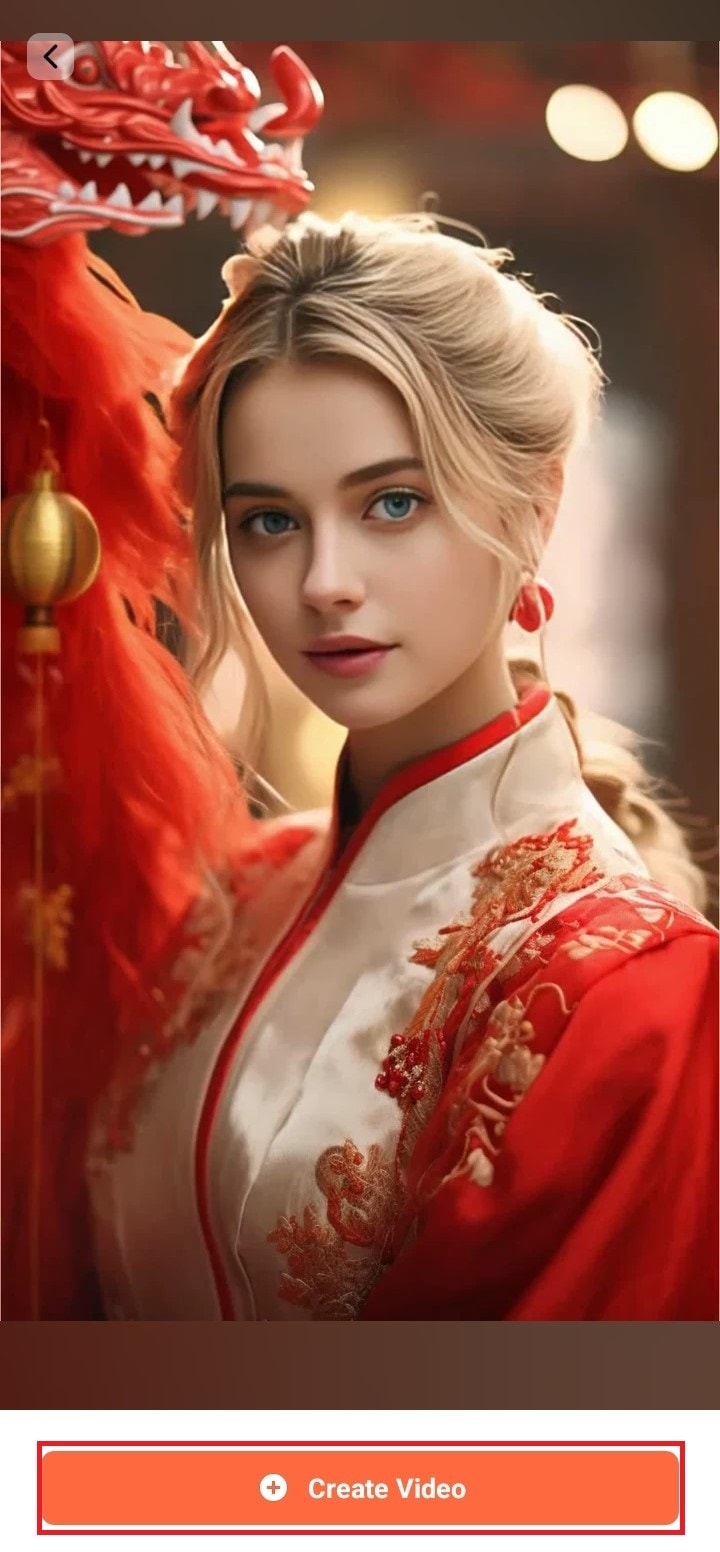
- Once you’ve chosen the AI talking photo you prefer, simply click on theCreate Video button located below.
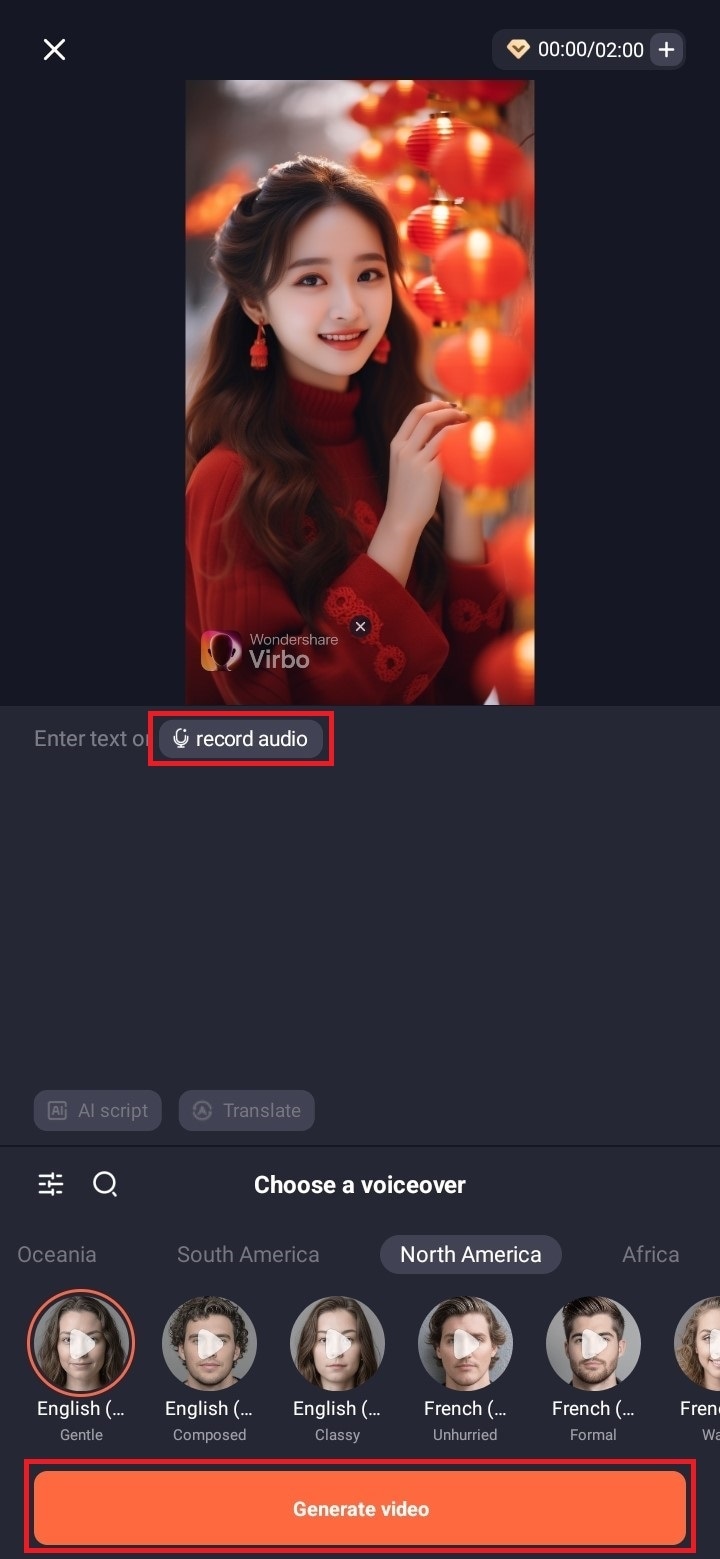
- Input your text and select a voiceover from the options below to create the audio for your video. Alternatively, you can record your voice by selectingrecord audio . When finished editing, tapGenerate Video to export it.
For PC
Tomake pictures talk online or on your PC, here are the following steps:
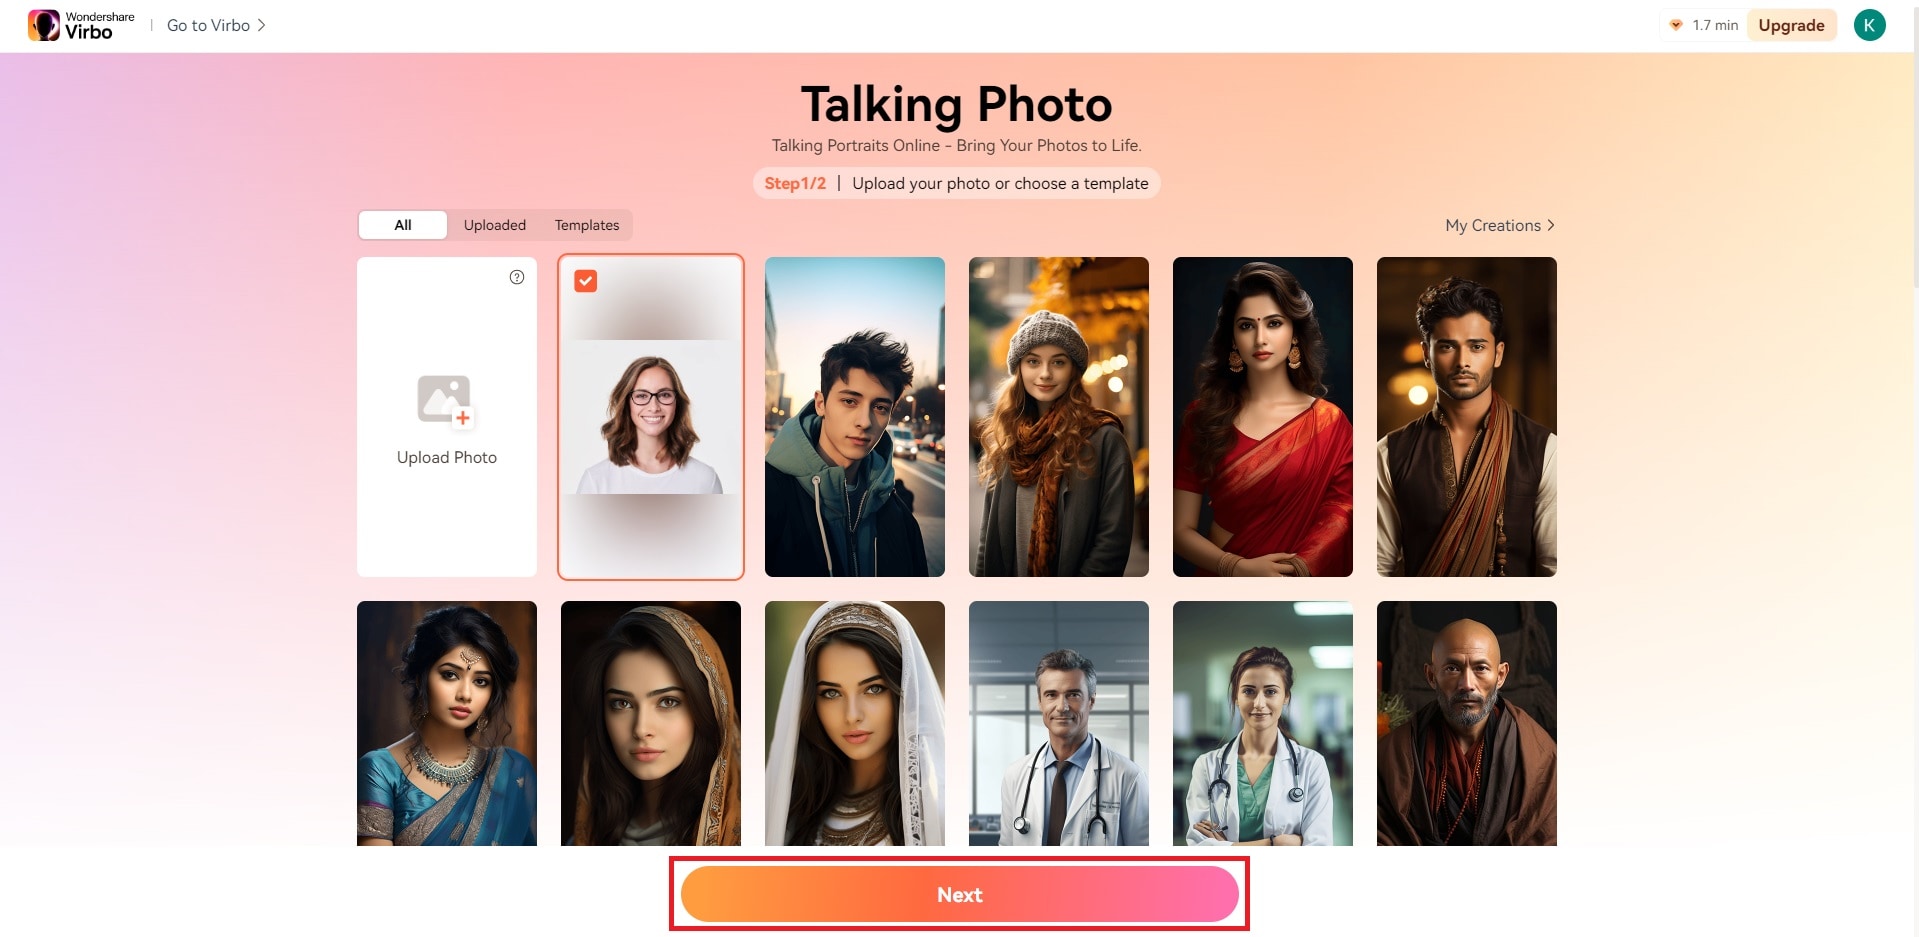
- Launch the Virbo on itswebsite and click the Talking Photo option.
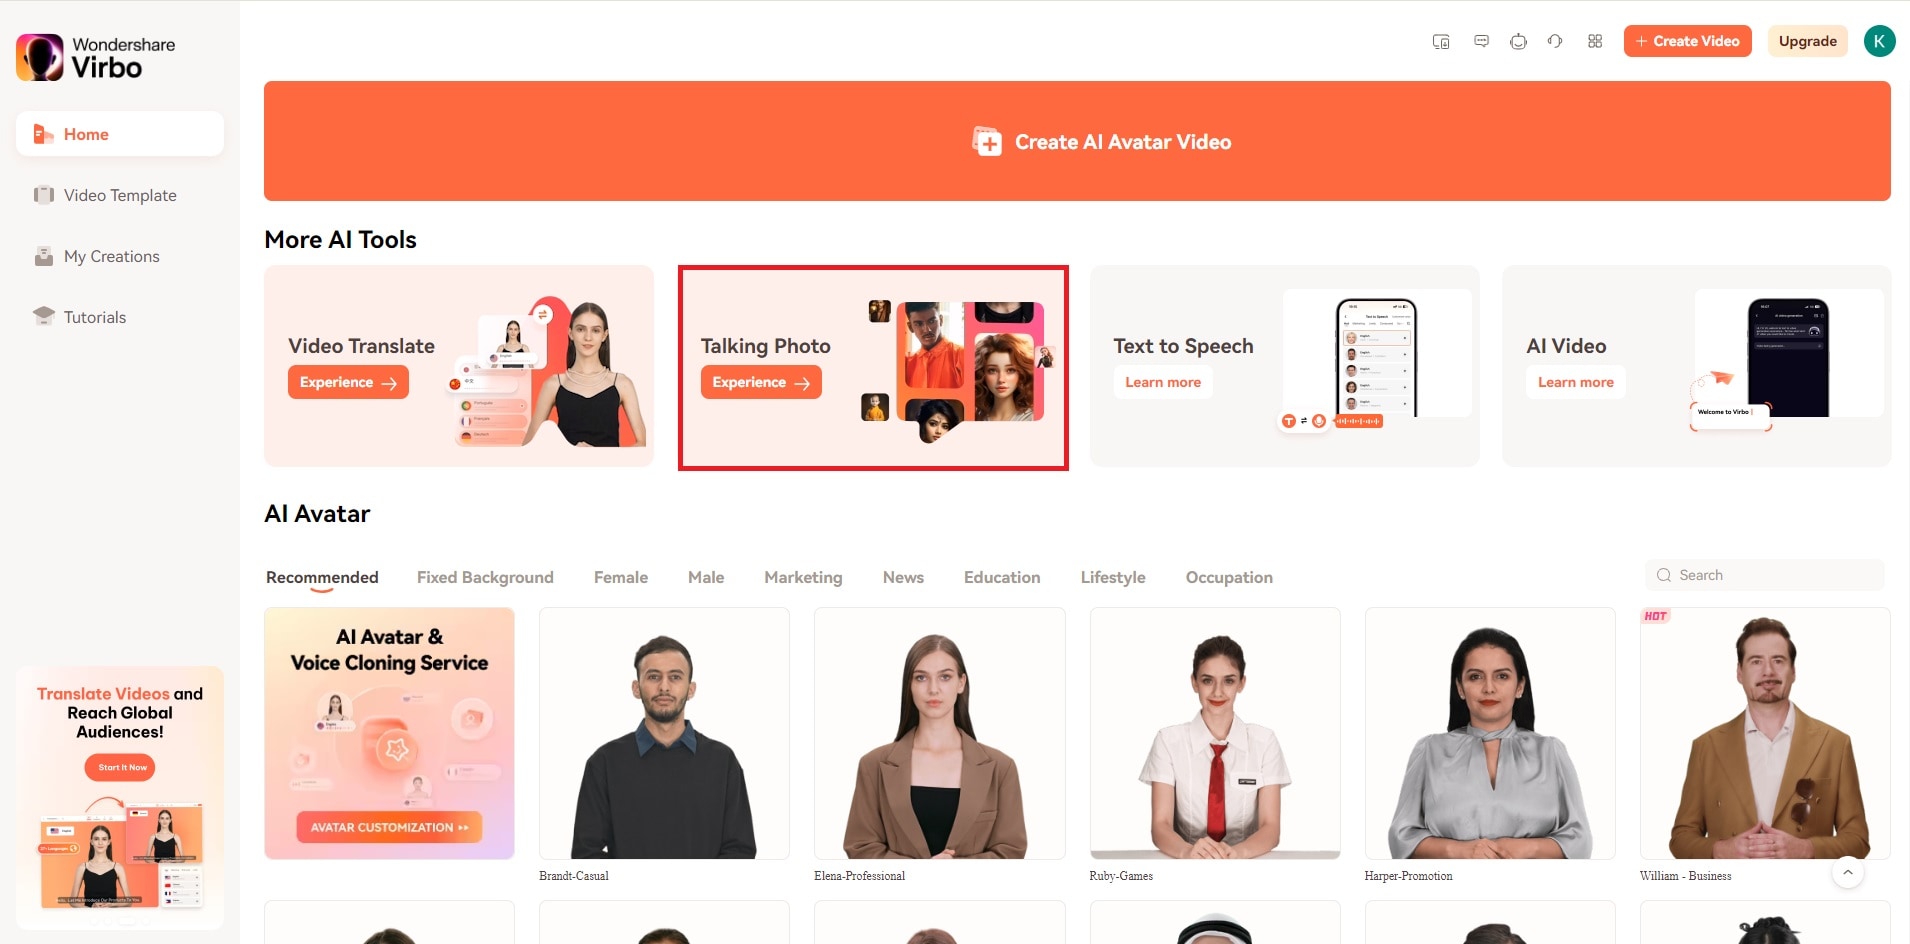
- You’ll encounter two options: either select from the images provided by this talking photo app or upload an image from your computer.
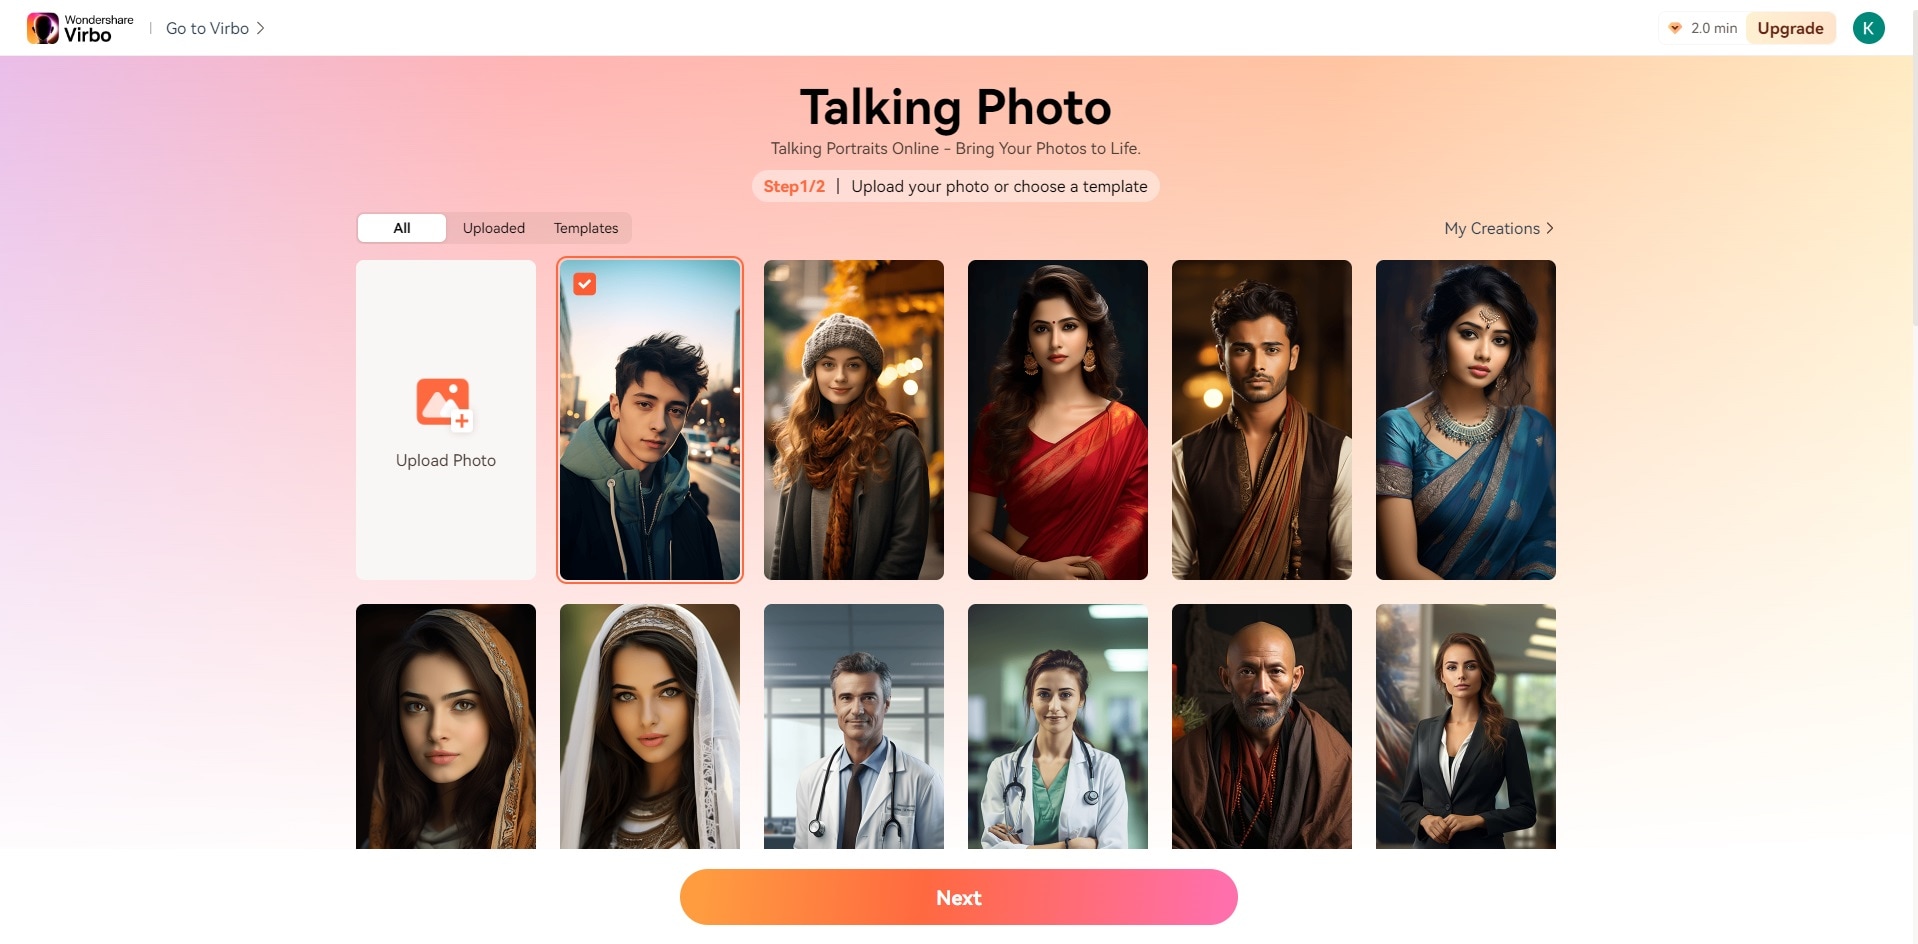
- To upload an image, click on theupload photo icon and review the User Agreement and Privacy Policy of Wondershare Virbo. Check the box to agree with the terms.
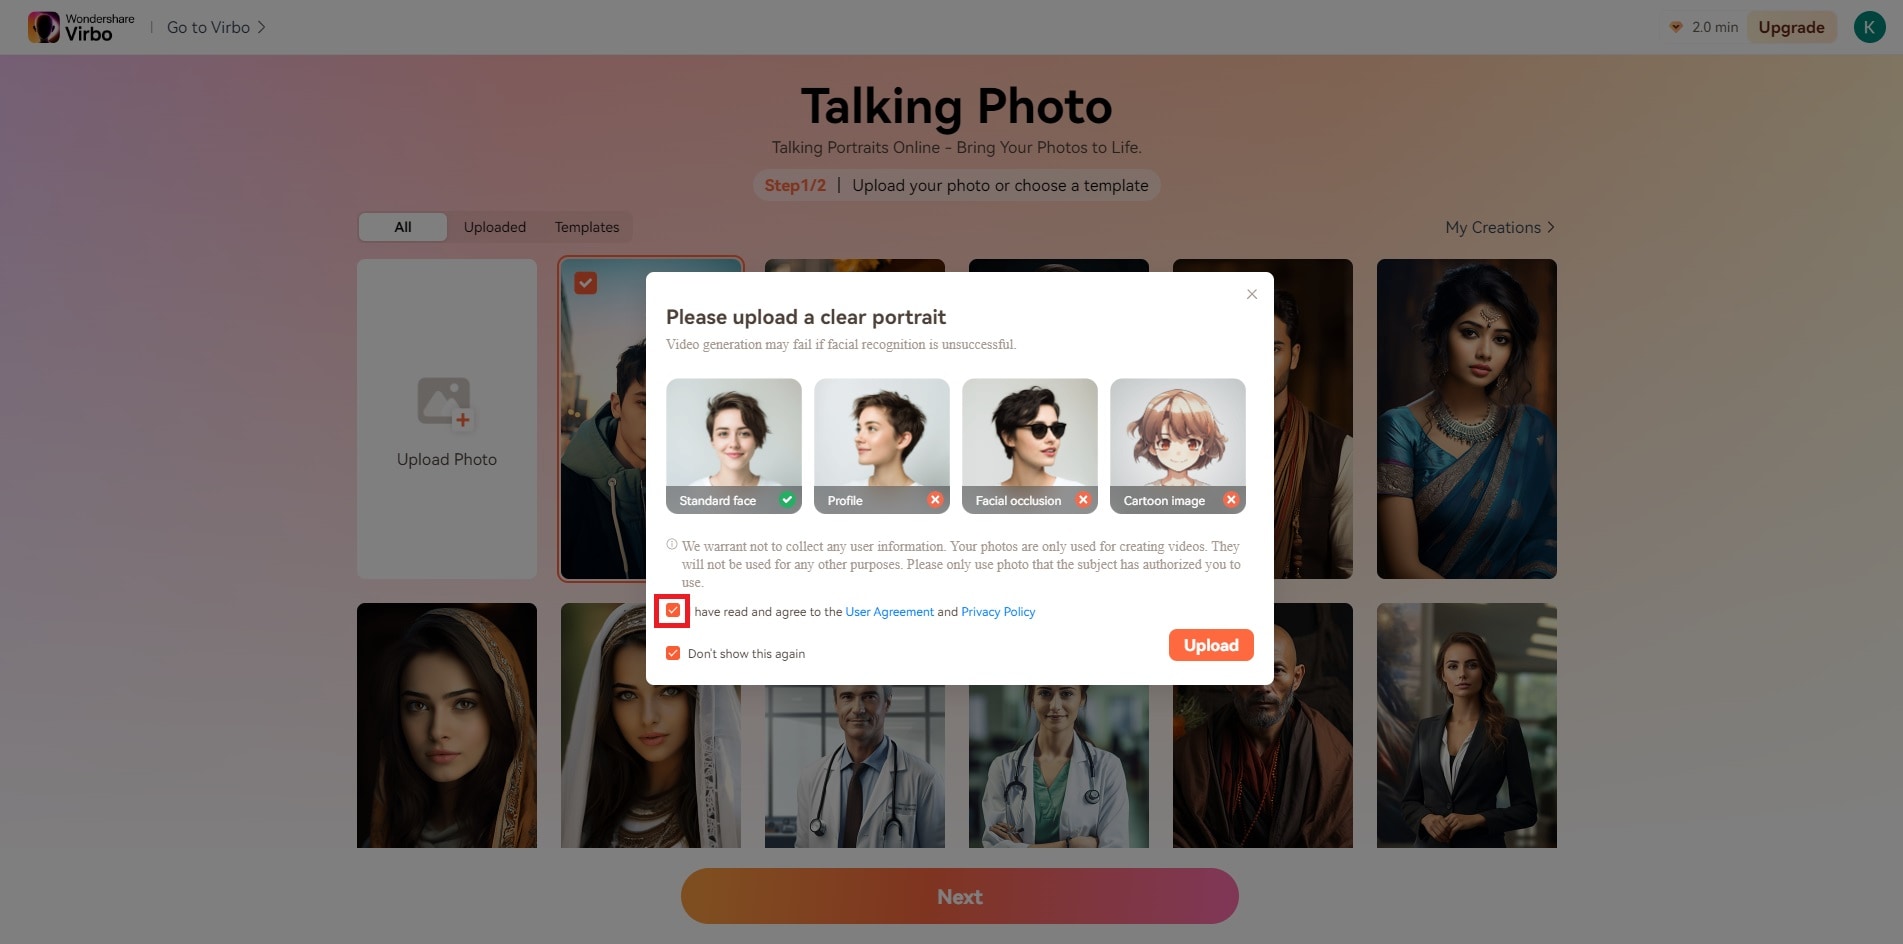
- Click the Upload button to select your image from the computer and open it. Tip: Choose a photo with just one person’s face in it.
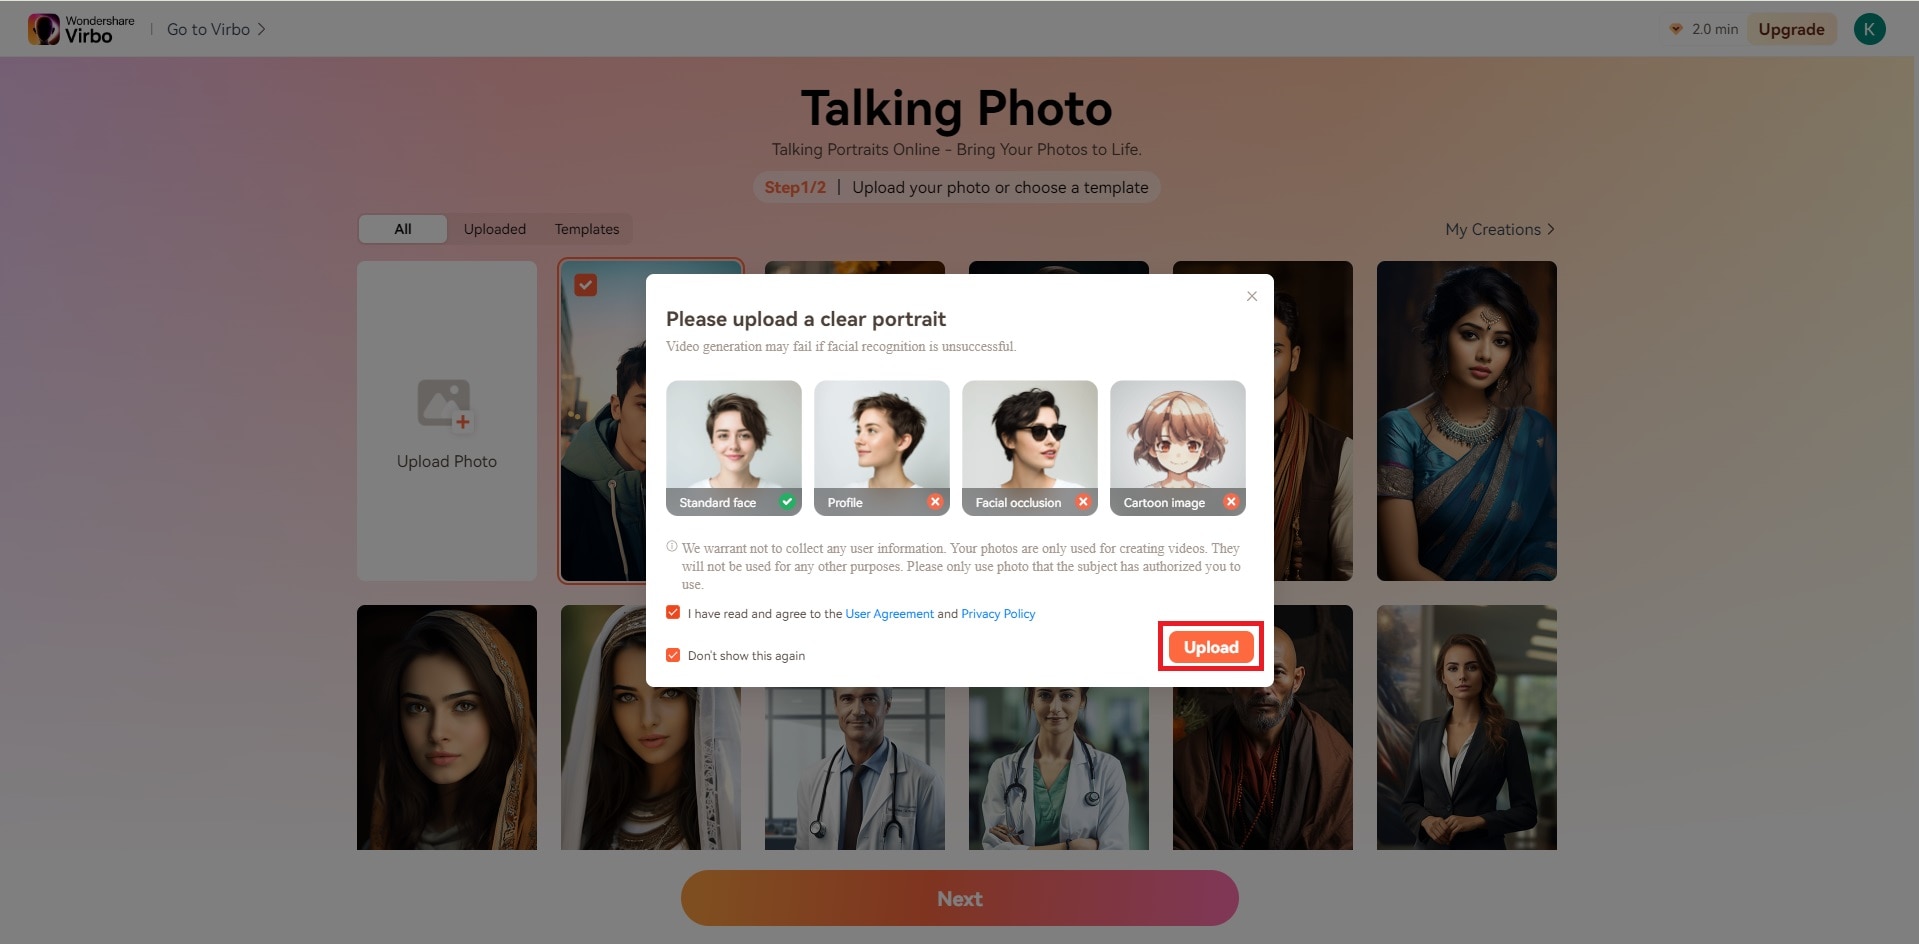
- Once uploaded, move your cursor to the Next button. Allow the app to set up your studio.
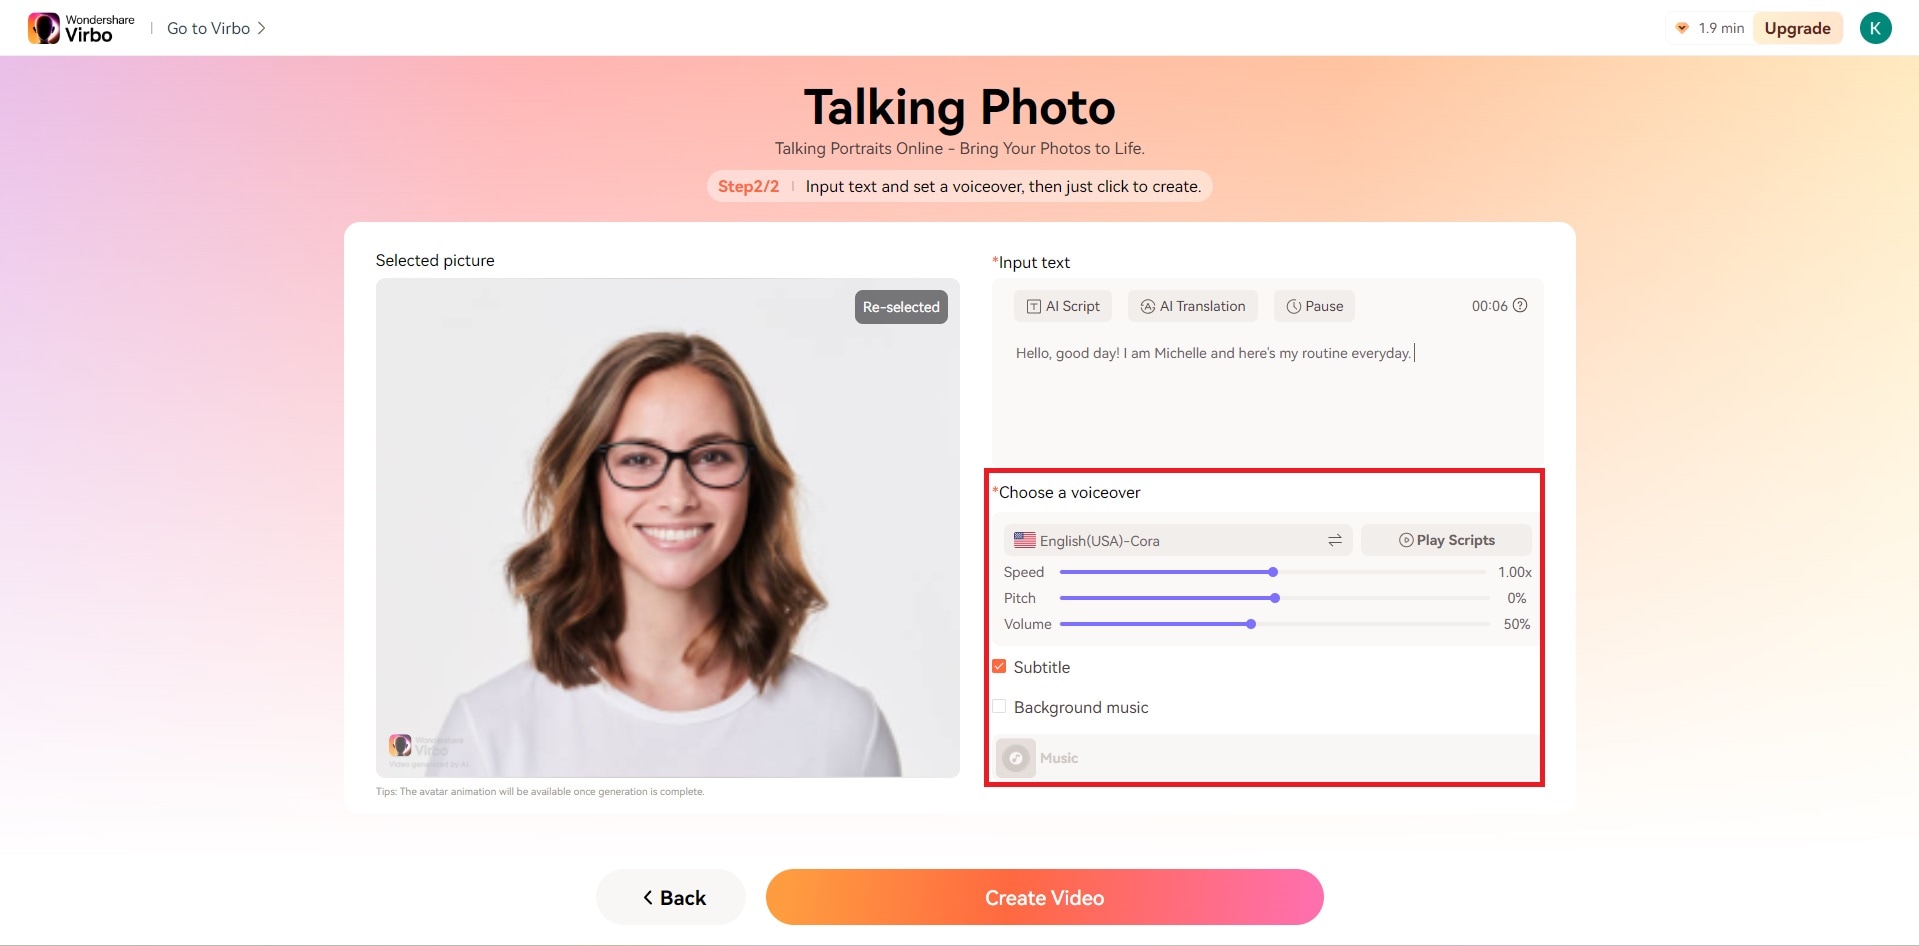
- When ready, enter the text you wish your photo to speak within the Text Script section. After inputting your script, adjust your voiceover settings from the section located at the bottom right of the page.
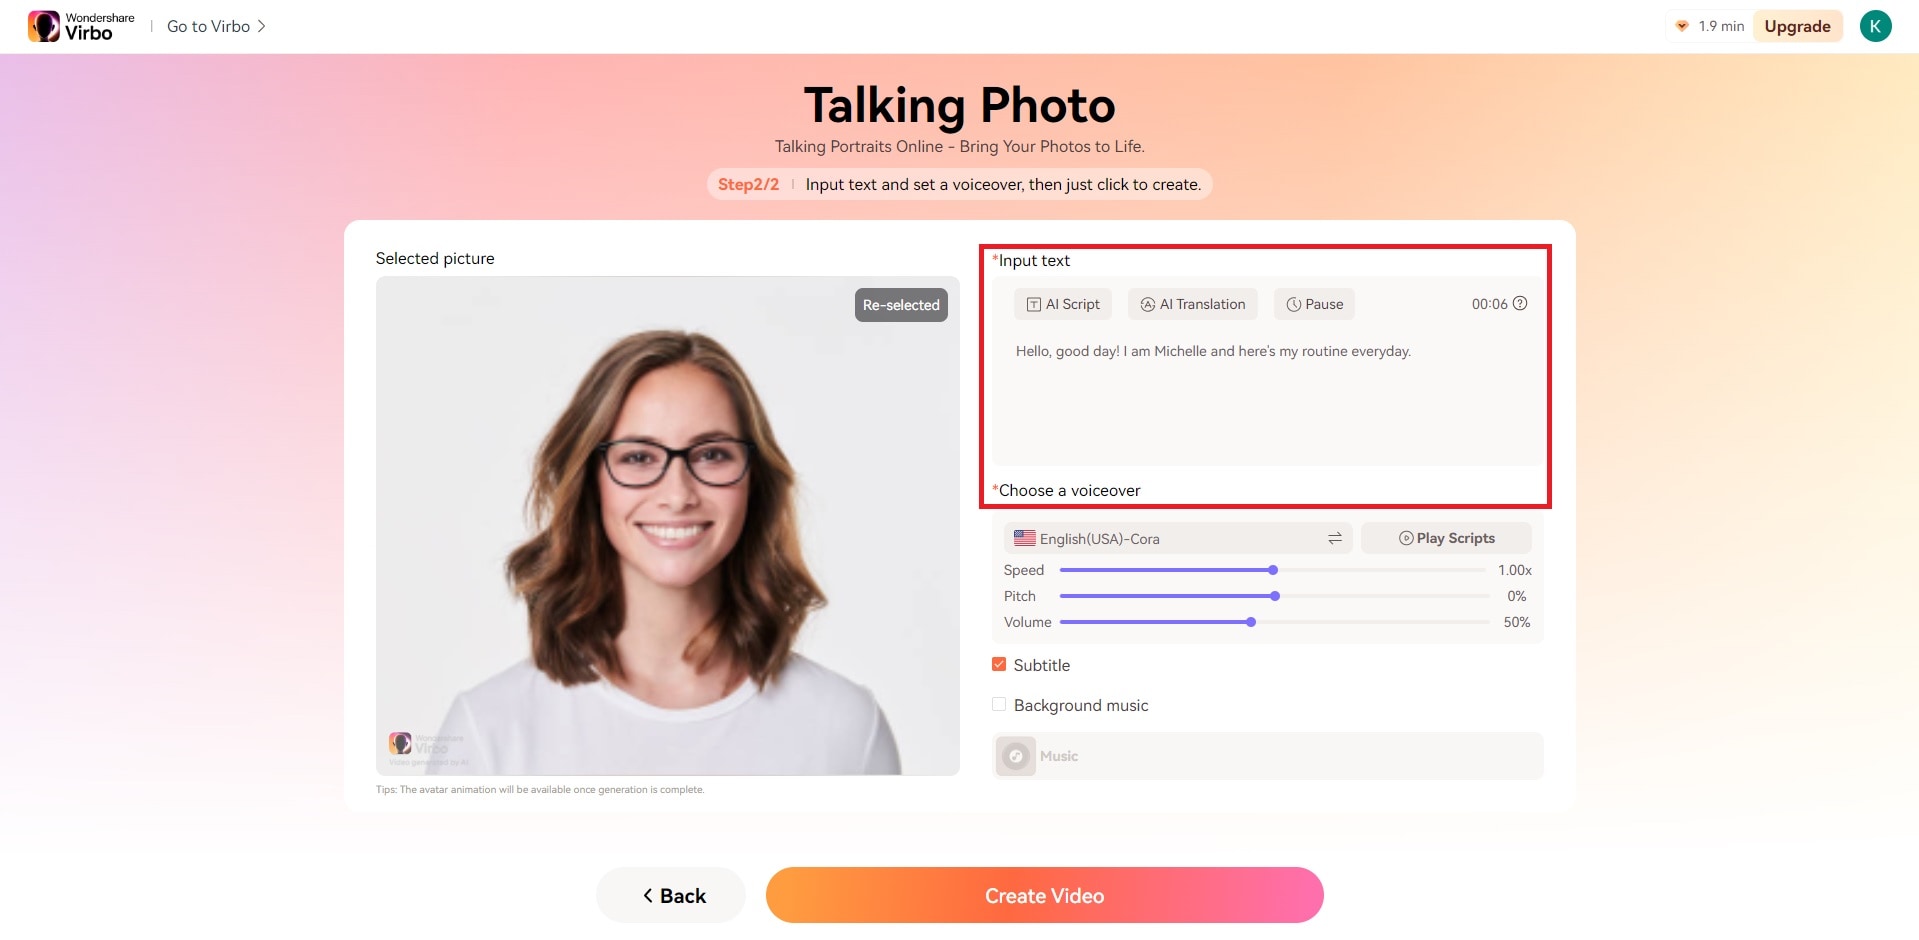
- Here, you can modify the speed, pitch, and volume of the audio. Select the language and gender of your voice and then click OK.
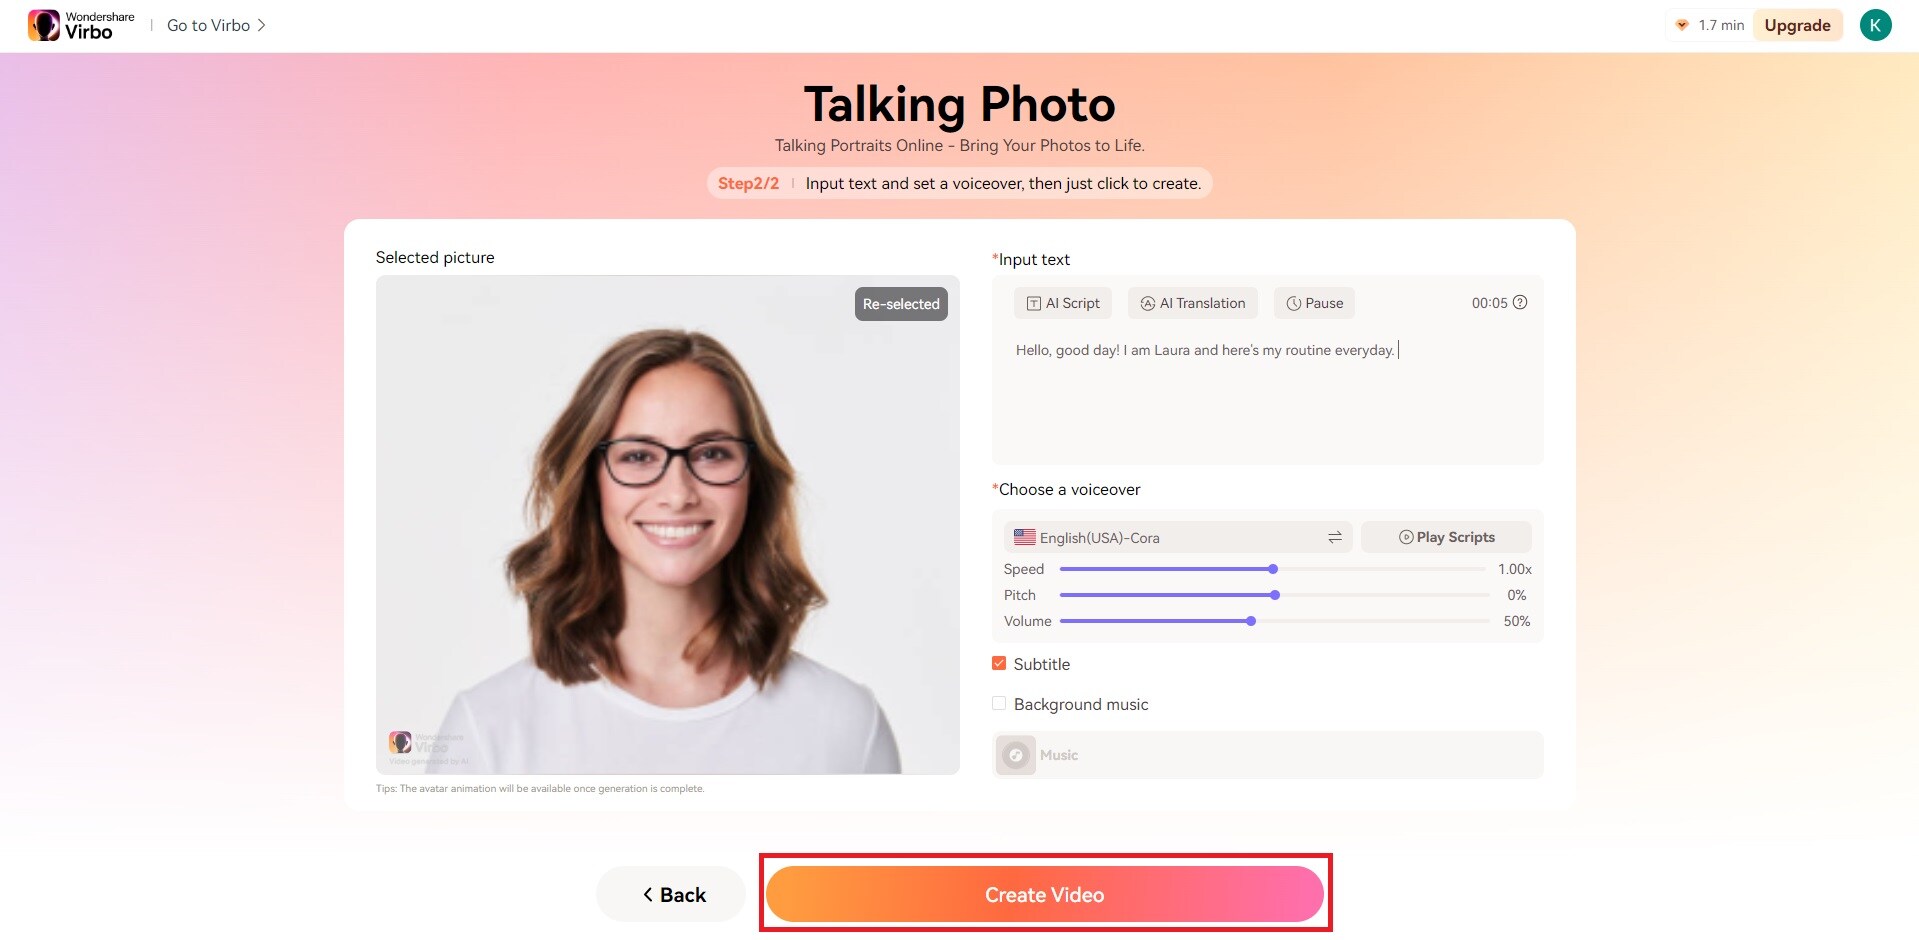
- Experiment with various voices and scripts to discover the perfect match for your photo. When finished editing, click the Create Video button.
Conclusion
Recognizing the importance of embracing new technology is vital in today’s fast-paced environment. We must acknowledge and integrate these advancements into our lives seamlessly.
One standout feature worth highlighting is Virbo’s Talking Photo functionality. This feature not only adds an extra layer of depth to capturing memories but also enhances communication by incorporating audio into images. By incorporating Virbo’s Talking Photo feature into our daily routines, we can enhance our interactions and experiences, underscoring the significance of embracing cutting-edge technologies.
Text to Speech
Text-to-Speech
Select the accent you want for your video and create the perfect AI video by selecting your specific voiceover.
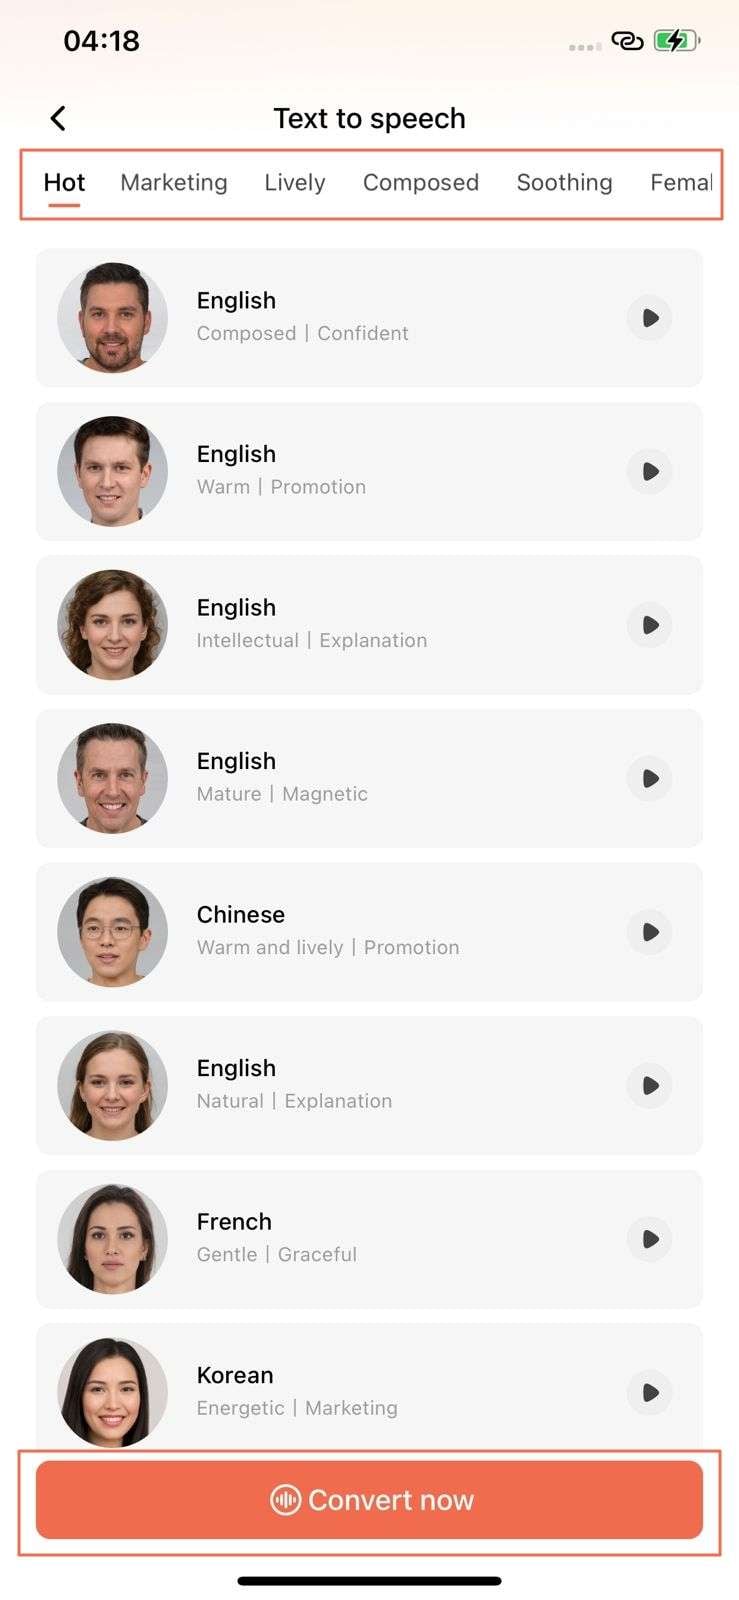
Step 1: As you select the option of “Text to Speech” on the home interface of the application, a category of voiceovers will appear on the screen. Select the respective category and use the filters of “Gender”, “Country”, “Language” and “Emotion” to continue. On selecting one, choose “Convert now” to lead next.
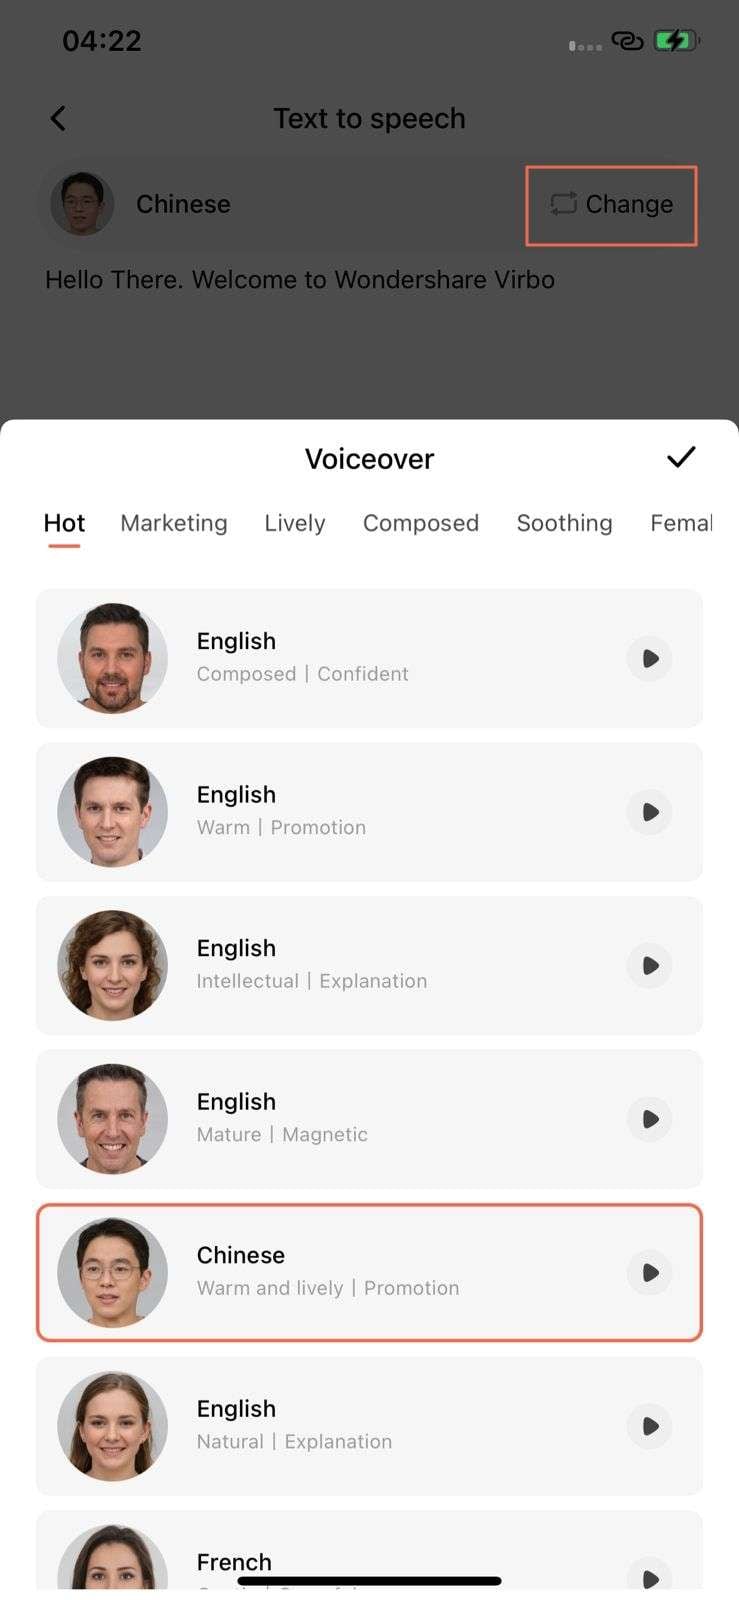
Step 2: Select any particular language from the options to create a new screen. Here you can type in the script you want to voiceover using the selected speech style. You can also change the speech style using the “Change” button.
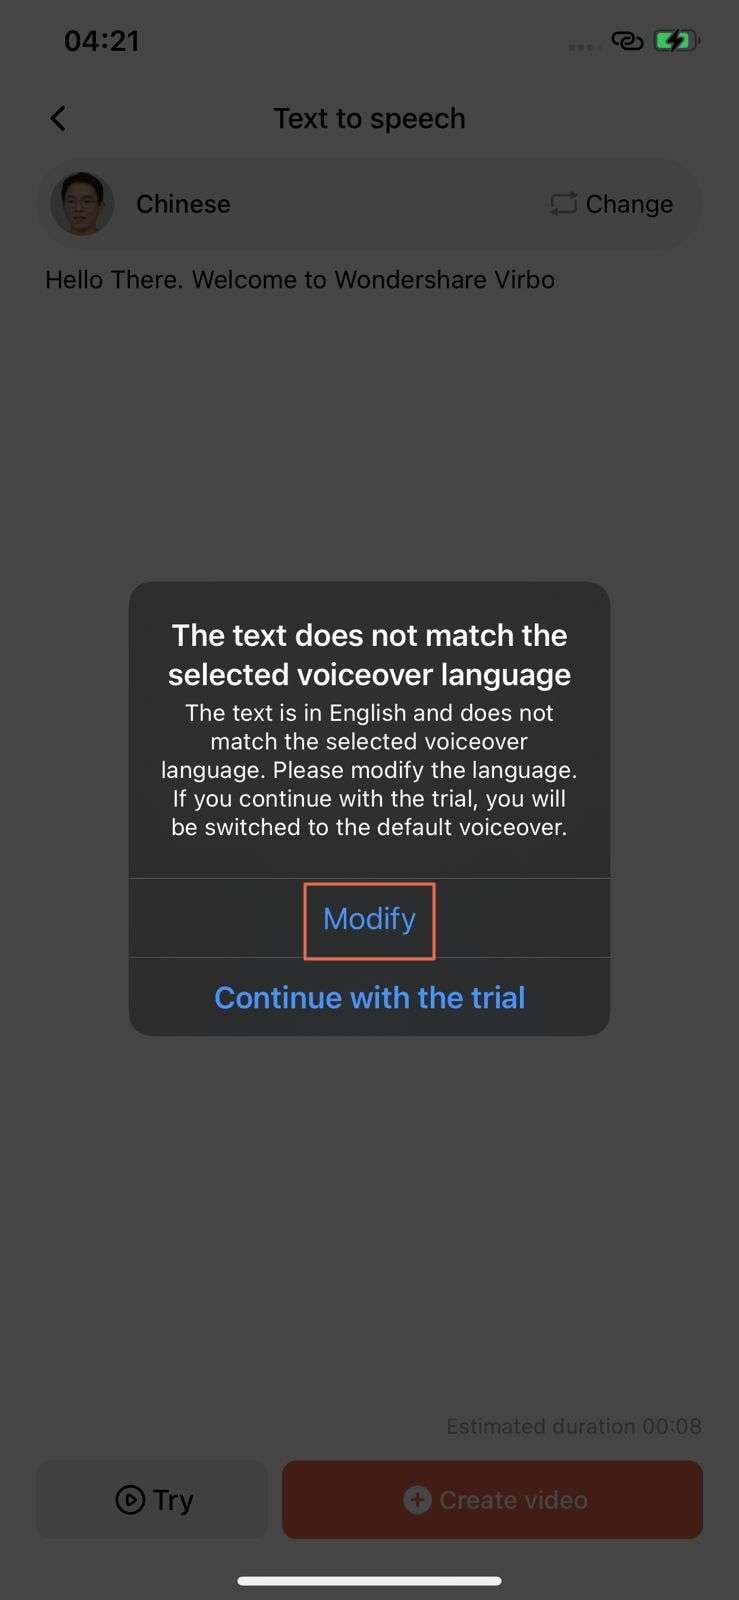
Step 3: If the text does not match the speech-language, it will display a prompt on the screen. You can select the option of “Modify” to make respective adjustments.
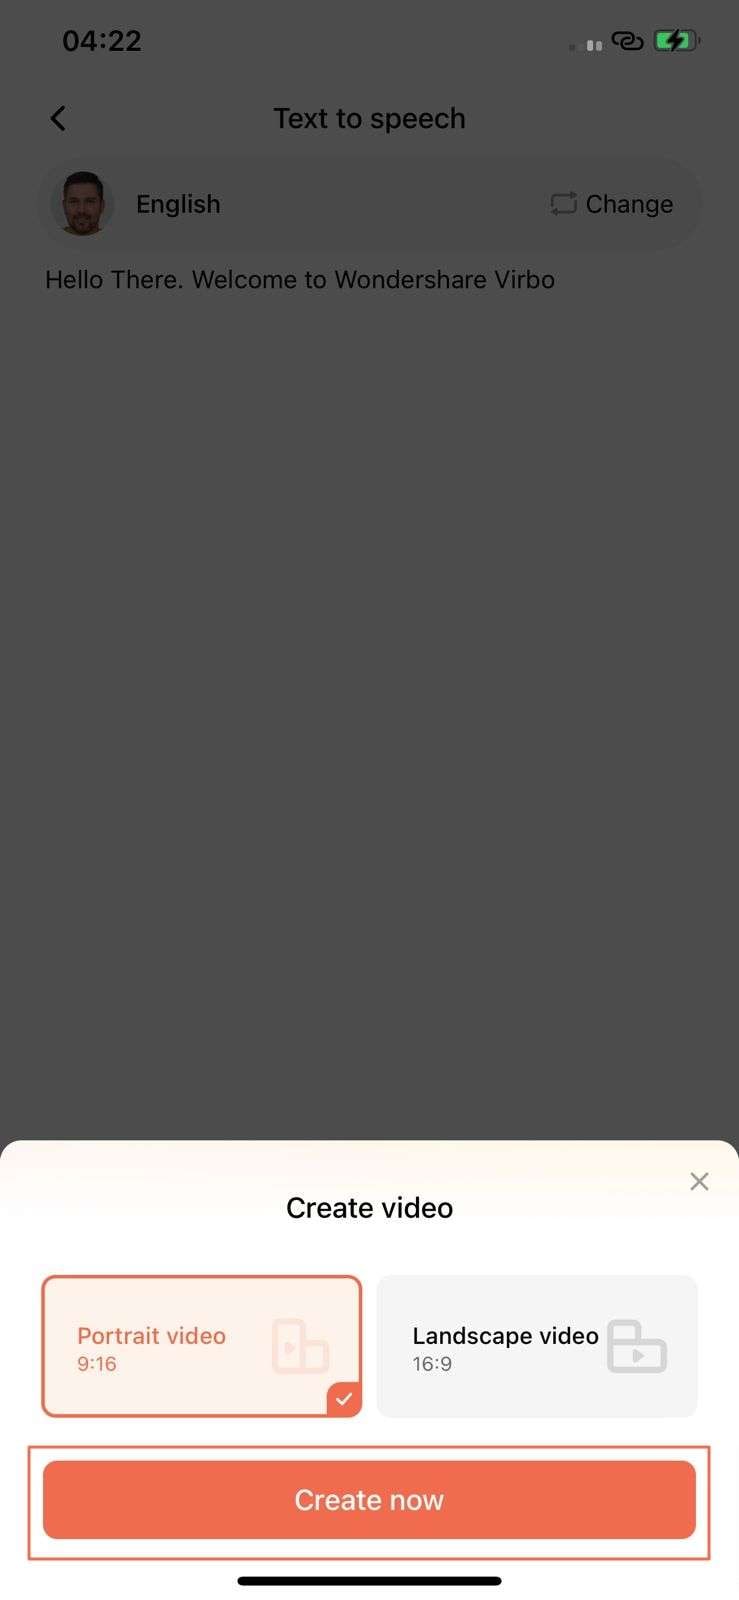
Step 4: Continue with the “Create Video” button to proceed with the final process of making the AI video. Select the orientation of the video and tap “Create now” to continue.
Step 5: As you lead into the video creation page, make the required changes to your video using the options available on the panel. Once done, choose “Preview” to observe the changes and select “Export” to save the final result.

Text-to-Speech
Select the accent you want for your video and create the perfect AI video by selecting your specific voiceover.
Step 1: As you select the option of “Text to Speech” on the home interface of the application, a category of voiceovers will appear on the screen. Select the respective category and use the filters of “Gender”, “Country”, “Language” and “Emotion” to continue. On selecting one, choose “Convert now” to lead next.
Step 2: Select any particular language from the options to create a new screen. Here you can type in the script you want to voiceover using the selected speech style. You can also change the speech style using the “Change” button.
Step 3: If the text does not match the speech-language, it will display a prompt on the screen. You can select the option of “Modify” to make respective adjustments.
Step 4: Continue with the “Create Video” button to proceed with the final process of making the AI video. Select the orientation of the video and tap “Create now” to continue.
Step 5: As you lead into the video creation page, make the required changes to your video using the options available on the panel. Once done, choose “Preview” to observe the changes and select “Export” to save the final result.
Revolutionize Creative Tasks With Proficiency: AI Voice Cloning
One of the prominent applications of artificial intelligence is in the field of AI voice cloning. It eliminates bad-quality audio in a snap and replaces it with natural-sounding AI voices. Where production houses used to pay millions to voice actors, they can now use voice clones. This article will discuss the rise of voice cloning, its applications, and a relevant tool.
Part 1: A Basic Definition of AI Voice Cloning
AI voice cloning refers to the techniques that enable users to generate deepfake voices from a sample. If you provide a sample that fulfills data requirements, AI will generate a voice you can customize. At the core, vast training datasets make the backbone of these tools. This data enables AI to analyze samples, recognize frequencies, and generate an exact AI voice.
For the perfect voice cloning, neural networks like Convolutional Neural Networks (CNNs) or Recurrent Neural Networks (RNNs) collaborate. They ensure the level of similarity and focus on elements like tone, emotion, and accents.
The next step involves the integration of Text-to-Speech (TTS) technology in these AI voice cloning-free tools. This means you can clone the voice of Taylor Swift and use TTS technology to make it say whatever you want.
Part 2: Understanding Things That AI Voice Cloning Can Execute
Now that you are familiar with voice cloning AI technology and how it works, let’s discover its practical scope. This section discusses how AI voices are of use in the current market:
- Entertainment Industry: Voice cloning tools reduce the financial burdens of hiring professional voice actors. With advanced algorithms, they can do emotional voice expressions. AI technology is devoid of human errors and enhances voiceover productivity.
- Interactive Customer Support: These tools benefit all customer care sites covering various industries. Advanced voice recognition can bring realistic expressions in AI voices. This means AI voices will interact with customers just as any other human providing interactive solutions.
- Gaming and Education Industry: eBooks can become 10 times more interactive with these tools. Online learning and gaming experiences have become more interactive. Tutors and gamers can create voice clones for once and use them via TTS tech later.
- Multilingual Voice Dubbing: The majority of voice cloning tools have multilingual integration. This means that documentaries, eBooks, films, and everything can be dubbed. The multilingual compatibility broadens the scope of voice-focused industries and services.
- Content Generation: These AI voice cloning tools have become integral in the creative industry. Creating vlogs, tutorials, and explainer videos with voiceovers became a trend. You can use this technique to clone your voice and create voiceovers from texts.
Generate Engaging
AI Video in Minutes!
Easily convert text into professional spokesperson videos in over 120+ voices & languages in minutes.
Generate AI Video Free Generate AI Video Now


Part 3: [Review] The Best AI Voice Cloning Tool: Wondershare Virbo
Wondershare Virbo is an AI-driven software designed to fulfill the creative requirements of content creators. The tool features a sophisticated display with a self-explanatory interface and smooth navigation. It clones your voice and exhibits video creation capabilities. Virbo’s advanced AI functionality enables users to generate engaging scripts and compelling dialogues for videos.
Furthermore, it has a video translator feature that can dub your videos in other languages along with subtitles. Its “Talking Photo” feature can help you craft creative portfolios or profiles. Furthermore, the tool has 300+ AI avatars proficient in 300+ languages and voices. These gender-based avatars have custom fashion attire options, accents, and ethnicities.
01 AI Voice Feature – Wondershare Virbo
Besides many of its features, you can employ Virbo’s AI voice feature with language selection options. Whether you are seeking narrative, fluent, or universal tones, it has got you covered. Its realistic collection of AI voices is designed to fit versatile situations. In addition to conversational tones, the tool has gender-based voice selection options.
Upon adding an AI voice, speed, pitch, and volume adjustment options exist. The AI voice feature uses Text-to-Speech advancements to help you craft voiceovers. The clarity and quality of these AI voices, alongside realistic AI avatars, engage the audience.
Get Started Online Download APP Now Free Download
02 Step-by-Step Guide To Using AI Voice Feature in Wondershare Virbo
As you are aware of this exceptional AI clone software and its AI voice feature, let’s explore it in its interface:
Step 1 Launch Wondershare Virbo and Create a Video
After completing the installation process, launch the software on your device. You can also try to use its online service for effective video creation. Once you reach its main interface, click the “Create Video” button.
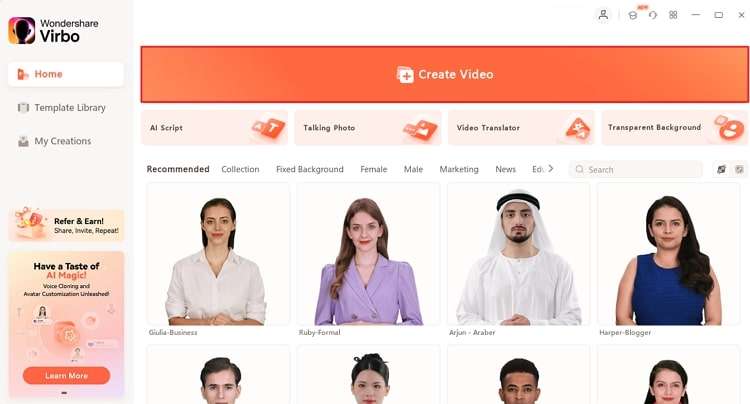
Get Started Online Download APP Now Free Download
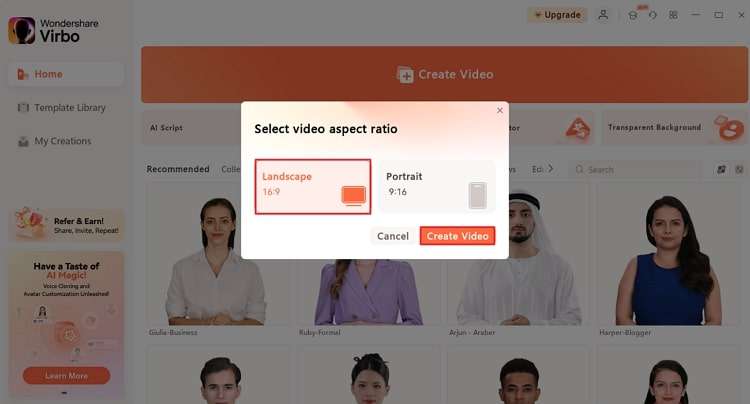
Step 2 Select Video Aspect Ratio to Start
In the new pop-up window, choose a ratio for your video, either “Portrait” or “Landscape.” After selection, click the “Create Video” button.
Get Started Online Download APP Now Free Download
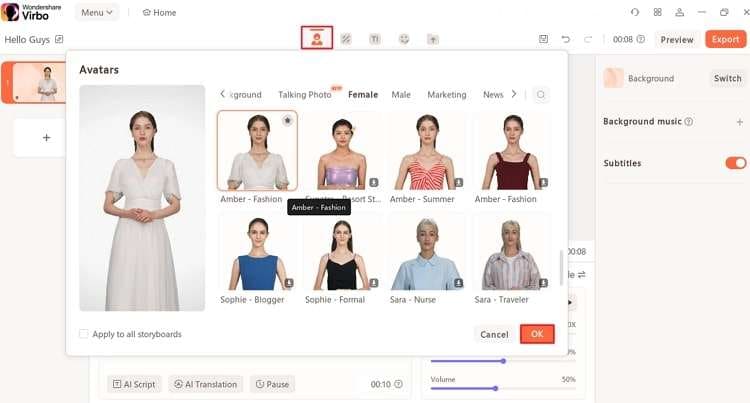
Step 3 Select an AI Avatar for Video
Once you enter the video creator, navigate towards the top toolbar. Click the “Avatars” option, choose an avatar from the dropdown window, and press “OK.”
Get Started Online Download APP Now Free Download
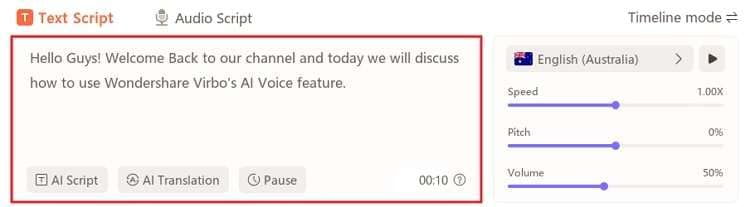
Step 4 Write or Add a Script for Voiceover
If you already have the video script, copy and paste it into the “Text Script” section. You can also employ the “AI Script” function for automated scripts or the “Audio Script” feature. Once you have added a script, you’ll be able to observe subtitles in the preview window.
Get Started Online Download APP Now Free Download
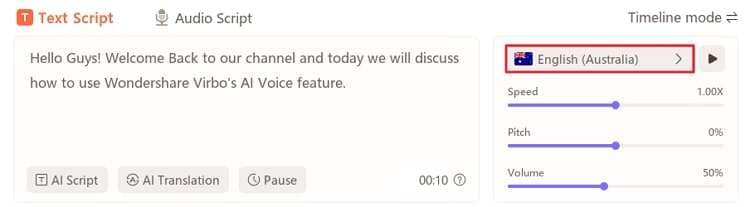
Step 5 Access AI Voice Feature
Navigate towards the voice section below the preview window and click the navigation displaying the AI voice being used in the video.
Get Started Online Download APP Now Free Download
Step 6 Adjust Voiceover Settings
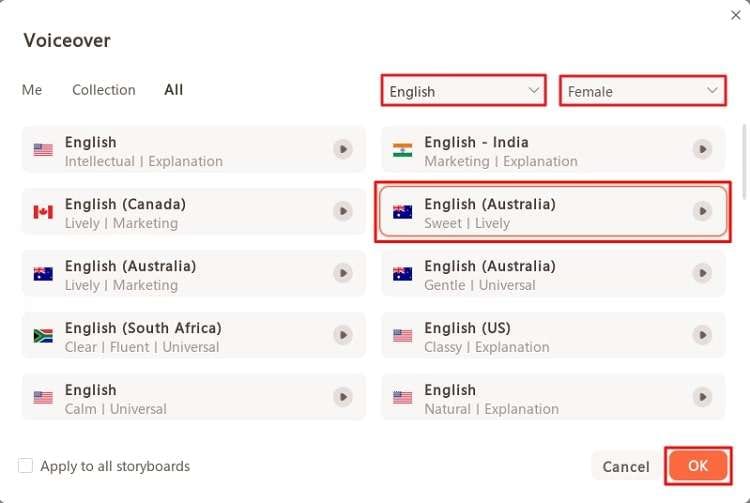
Once you have access to the Voiceover window, choose a gender and language that suits the notion of your video. Choose the voiceover style and click “OK.” Afterward, play your video, and you’ll be able to hear the AI voice you selected.
Get Started Online Download APP Now Free Download
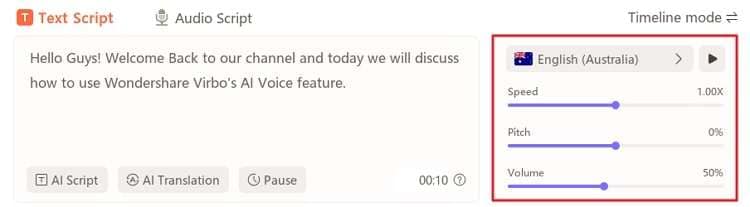
Step 7 Adjust General Voice Settings
From the voice settings section, use “Speed,” “Pitch,” and “Volume” tabs to manage audio quality. Hit the “Player” button to observe the results and export the final video.
Get Started Online Download APP Now Free Download
Conclusion
This article provided brief research on the underlying concept of AI voice cloning and how it works. As per our findings, voice cloning tools are ruling several industries. If you wish to use an effective tool that offers voice cloning, we recommend Wondershare Virbo . Besides voice cloning, it is loaded with natural-sounding AI voices ready to turn passive viewers into active leads.
Also read:
- Updated Reaching a Wider Audience Using Video Translation in Tamil for 2024
- New What Is an AI Video Generator, In 2024
- Updated 2024 Approved Translate Audio/Video Content From Spanish to English and Vice Versa
- New In 2024, AI Voice | Online
- New In 2024, Live Chat With WooCommerce Your Gateway to Successful Live Selling
- New Register | Online
- Updated Unlocking Global Audiences Top Video Language Converters for 2024
- New Cloning Voices With Hugging Face Features, Guidance, Alternatives for 2024
- Voicemod AI Review Transforming Your Voice in Real Time
- New 2024 Approved Top 10 Solutions for Movie Subtitle Translation Making Things Perfect
- New Material Preparation for 2024
- New Generate Video with Talking Photo Feature
- Updated Generate Video with Talking Photo Feature for 2024
- New Best YouTube Video Into Text Converters for 2024
- New Best Video Language Changers to Make Your Videos Accessible for 2024
- Updated In 2024, The Most Recommended Natural AI Hindi Voice Generator
- 2024 Approved The Best Translator to Translate Videos Online
- New How to Create Marketing Videos Ultimate Guide
- Updated 2024 Approved Best YouTube Video Into Text Converters A Comprehensive Guide
- Updated In 2024, Live Shopping Success Secrets Unveiling Strategies From Real Case Studies
- Updated 2024 Approved What Is AI Voice Text to Speech? | Wondershare Virbo Glossary
- Updated AI Portrait Generator Getting Closer to the Artistic Marvels for 2024
- Updated Top 10 AI-Talking Avatars Revolutionizing Communication for 2024
- Best Hatsune Miku AI Voice Generators for All Times for 2024
- New Registration and Login | Virbo AI Live Stream
- In 2024, How to Track WhatsApp Messages on Vivo Y02T Without Them Knowing? | Dr.fone
- In 2024, How to Bypass iPhone SE (2022) Passcode Easily Video Inside | Dr.fone
- Life360 Circle Everything You Need to Know On Apple iPhone 14 Pro Max | Dr.fone
- Undeleted lost videos from Civi 3 Disney 100th Anniversary Edition
- Is GSM Flasher ADB Legit? Full Review To Bypass Your Infinix GT 10 ProFRP Lock
- What To Do if Your Honor 90 Auto Does Not Work | Dr.fone
- Is pgsharp legal when you are playing pokemon On Realme 11X 5G? | Dr.fone
- Proven Ways to Fix There Was A Problem Parsing the Package on Motorola Edge 2023 | Dr.fone
- How to Remove an AirTag from Your Apple ID Account On iPhone SE (2022)?
- In 2024, How To Change Motorola Edge 40 Neo Lock Screen Password?
- 3 Effective Ways to Unlock iCloud Account Without Password On Apple iPhone 14 Plus
- Guide How To Unbrick a Bricked Asus ROG Phone 8 Pro Phone | Dr.fone
- Latest Guide on iPad 2/3 and Apple iPhone 11 Pro Max iCloud Activation Lock Bypass
- 8 Solutions to Solve YouTube App Crashing on Xiaomi Redmi A2 | Dr.fone
- How to Fix Unfortunately, Contacts Has Stopped Error on Honor Magic 6 Pro | Dr.fone
- In 2024, How to Track a Lost Apple iPhone X for Free? | Dr.fone
- In 2024, About Vivo Y100i FRP Bypass
- Title: New Diverse Template
- Author: Sam
- Created at : 2024-05-19 03:34:54
- Updated at : 2024-05-20 03:34:54
- Link: https://ai-voice-clone.techidaily.com/new-diverse-template/
- License: This work is licensed under CC BY-NC-SA 4.0.
