

New Create AI Avatar Video for 2024
Create AI Avatar Video | Online
Create AI Avatar Videos
To begin crafting your AI avatar video, simply click the “Create Video” button found on the homepage.
Step 1. Create a Project
Click “Create Video” to start creating a new video.
![]()
Create a Project
Choose your preferred video aspect ratio: opt for a landscape or portrait video, depending on your requirements. Then, click on “Create Video.”
![]()
Choose Aspect Ratio
Step 2. Choose Avatar & Voiceover
After entering the user interface, select “Avatars” to choose an AI avatar for your video. Click on the displayed avatar on the screen, and an action bar will appear on the left side, allowing you to customize the style and placement of your video persona.
![]()
Choose Avatar
Input the text you plan to include in the video. You can modify the avatar’s speed, pitch, and volume using the controls displayed on the right-hand side.
![]()
Play Scripts
Step 3. Edit Video
You can also modify the background, select text style, or add adorable sticker to the video.
![]()
Edit Video
Moreover, click on “Music” to select the soundtrack for your video. You can choose from extensive music library and customize the volume to suit your preferences.
![]()
Choose Background Music
Step 4. Export Video
When you’ve achieved the desired video effect, simply click on the “Export” button to generate your video. This straightforward process results in the creation of a brand new video featuring the Virbo AI avatar.
![]()
Export Video
Launching Your Live Room | Virbo AI Live Stream
Launching Your Live Room
Explore step-by-step instructions on decorating your space, uploading local images and videos, adding engaging AI interactions, etc. Elevate your streaming experience and captivate your audience with a seamlessly executed live room. Dive into our comprehensive guide now!
02Uploading Local Images and Videos
07AI Intelligent Script Generation
11Starting/Ending the Live Broadcast
Decorating Your Live Room
Decoration Guidance
- Click on the product homepage and create a blank live room to initiate a new live session.

Create a blank live room
- Upon creating a blank live room, the live room editing page will open. The left side serves as the operation area, the right side as the canvas area, and the materials area is located above.

Livestream room navigation
- Click on the templates to use pre-designed combinations of background, virtual hosts, and stickers.

Select a template
- Customize the background from the background library. During the live broadcast, only one background can be used.

Livestream room customization
- Choose a virtual host from the virtual host library. Only one virtual host can be used during the live session.
![]()
Choose a virtual host
- Add stickers from the sticker library. Multiple stickers can be used during the live broadcast.
- After selecting materials, adjust their position and size in the canvas area. Right-click to modify layers, copy, or delete materials.
Uploading Local Images and Videos
Upload background images or videos
- Upload: Click Background -> Upload Background -> Select file to upload. Materials will be displayed in “My Background” after uploading.

Upload Background
- Apply: Click Background -> My Background, then click on the material to use it on the canvas.
- Delete: Hover over the material and click the delete icon to remove it.

Delete Background
Note
Background upload requirements:
- Image and video dimensions should be 9:16
- Image formats: JPG/JPEG/PNG
- Video formats: MP4/MOV
- Resolution should not exceed 1080P
- Video duration should not exceed 30 minutes
- File size should not exceed 1GB
Upload sticker images or videos
- Upload: Click Sticker -> Upload Sticker -> Select file to upload. Materials will be displayed in “My Sticker” after uploading.

Upload Sticker
- Apply: Click Sticker -> My Sticker, then click on the material to use it on the canvas.
- Delete: Click Sticker -> My Sticker, hover over the material, click the delete icon to remove it.

Delete Sticker
Note
Sticker upload requirements:
- Image and video dimensions are flexible.
- Image formats: JPG/JPEG/PNG
- Video formats: MP4/MOV
- Resolution should not exceed 1080P
- Video duration should not exceed 30 minutes
- File size should not exceed 1GB
Text-Driven Live Room
Script Guidance
- Input script text: Copy and paste your script into the script dialogue box.

Text Scripts Inset
- Choose a matching tone: Click the voice-over entrance above, select a suitable tone, and preview it.
- Preview: Click the “Preview” button below the text to listen.
Audio-Driven Live Room
Audio Guidance
- Upload audio: Click Script -> Audio -> Upload local voice and upload the local file.

Upload Audio
- Preview audio: After uploading, click to preview the audio.

Preview Audio
- Audio sorting: Hold and drag to sort the audio files.

Audio sorting
- Audio sorting: Hold and drag to sort the audio files.

Modifying Live Room Name
Method Guidance
- Method 1: Click the edit button in the upper-left corner of the edit page to rename the live room.

Rename Livestream Room
- Method 2: Product homepage -> My Live Rooms -> Click on the more options for an individual live room -> Choose Rename.
Adding AI Identification
Step Guidance
- On the live room editing page, click on the checkbox before the AI identification to enable or disable it.
AI Intelligent Script Generation
Generation Guidance
- Click the “AI Intelligent Script” button below the script, a popup will appear.
- Enter your product name (mandatory), selling points (optional), promotional information (optional), select language and style, then click generate.

AI Script
- The generated result can be further modified, click “Use” to add it to the script dialogue box.
AI Translation
Translation Guidance
- Click the “AI Translation” button below the script, a popup will appear.
- Place the text to be translated on the left, click the middle arrow to select the language for translation (e.g., English), and click translate.

AI Translation
- The generated result can be further modified, click “Use” to add it to the script dialogue box.

AI Translation Result
Manual Interaction
Microphone Interaction
- Operational Flow:
- Click Manual Interaction -> Microphone, and select the microphone device.
- Speak into the microphone and observe the sound wave status.
- Open “Start Live,” wait for the appearance of the virtual host image, and click “Open Mic Takeover.” The virtual host’s mouth will be closed, and your voice will drive the virtual host to speak.
- After speaking, click “End Takeover,” and the virtual host will resume reading the scripted dialogue.
- Click Manual Interaction -> Microphone, and select the microphone device.
- Grant Browser Microphone Access:
- Google Chrome:
*Open Chrome, click the settings icon in the top right.
* Click “Settings,” open the settings page. Select “Privacy and Security” and then click “Site Settings.”
*Enter the site settings page, click “Microphone.”
* On the microphone authorization page, select that the site can request the use of your microphone.
* After these settings, when the browser needs to use the camera or microphone, a device request box will pop up on the page. Select “Allow.” - Mozilla Firefox:
*Open Firefox, click the settings icon in the top right, and click “Settings.”
* Open the settings page, click “Privacy & Security,” and find “Microphone Permissions.” Click “Settings” next to “Microphone.”
*Enter the settings page, add the site that requests the use of your microphone to the list, and click “Save Changes.”
* After these settings, when the browser needs to use the camera or microphone, a device request box will pop up on the page. Select “Allow.” - Sogou Browser:
*Open Sogou Browser, click the settings icon in the top right, and click “Options.”
* Open the options page, click “Advanced,” find “Privacy - Browsers on the Mac System:
*Locate “System Preferences” on your Mac dock and click the icon. Once opened, find “Security & Privacy” and click to open.
* On the “Security & Privacy” page, select “Privacy,” then click on “Microphone” and set the applications that need to use the microphone to “Allow.”
- Google Chrome:
Text Interaction
- Click on “Artificial Interaction” and enter interaction scripts in the input box below.
- Click “Add Text” to add it to the interaction list. After starting the live broadcast, each interaction script will have a send button.

Text Interactionn
- Click “Send” to trigger the AI to speak according to the interaction script.
Intelligent Interaction
Note
The current intelligent interaction feature only supports Alibaba International. If you are streaming on other platforms, you can skip this step.
Setting Entrance
- On the live broadcast page, click on “Intelligent Interaction,” select the live platform, and the supported intelligent interaction features will be randomly displayed.
Q&A Library Settings
- Creating a New Q&A:
- On the product homepage, click on Q&A Library - Add Q&A, and a popup window will appear.
- Fill in the rule name, keywords, reply text, and upload a reply video. Click Save.
Note
Rule Name: Name the rule for easy identification.
Keywords: If a viewer’s question in the live room contains any of these keywords, it will trigger the AI to answer.
Reply Content: You can add up to 5 replies. Include variables like [Viewer’s Nickname] and [Viewer’s Country] for personalized responses.
Sequential Reply: Replies in sequence when triggered.
Random Reply: Randomly selects a reply when triggered.
Reply Video: If configured, the video will be displayed at the specified position until the AI’s reply ends.
- Adjusting Q&A Activation Status:
- Click Q&A Library - Switch to close or open the Q&A rule. When closed, the Q&A rule will not take effect after the live broadcast starts.
- Turning on Q&A Library Switch in the Live Room:
- On the live broadcast editing page, click Intelligent Interaction - Platform, select “Alibaba International,” and turn on the Q&A Library switch. This must be done after starting the live broadcast and capturing the barrage for the function to work.
Greeting Rules Settings
- Greeting Content: You can add up to 5 replies, including variables like [Viewer’s Nickname] and [Viewer’s Country].
- Sequential Reply: Replies in sequence when triggered.
- Random Reply: Randomly selects a reply when triggered.
- On the live broadcast editing page, click Intelligent Interaction - Platform, select “Alibaba International,” turn on the Greeting switch, and click the edit icon to open the editing window. Fill in the reply text and click Save.
Sending Business Cards and Product Catalogs
- On the live broadcast editing page, click Intelligent Interaction - Platform, select “Alibaba International,” turn on the “Send Business Cards” switch, and turn on the “Send Product Catalogs” switch.
Note
These functions will only take effect after starting the live broadcast and capturing the barrage.
How to Start Live Barrage Capture
- Start Broadcasting in Virbo Live
- Follow the steps for “Start/End Broadcast” on the live broadcast editing page.
- Install the Plugin in Chrome
- Ensure Chrome is up to date, then download the plugin from the provided link . After downloading, unzip locally.
- Configure the Plugin in Chrome
- Open Chrome, go to Settings - Extensions - Manage Extensions, enable Developer mode, click “Load Unpacked,” and select the unzipped folder. Enable “Allow in incognito mode” in the plugin details.
- Copy the Live Control Page Link
- Copy the link of your live control page (web version) from the live platform. Paste the link into the live broadcast editing page under Intelligent Interaction - Live Room Link Input, then click “Start Capturing.”
Note
Alibaba International currently supports automatic Q&A, automatic greetings, automatic business card sending, and automatic product catalog sending. You can turn on the corresponding switches and then configure the detailed settings for each item.
Starting/Ending the Live Broadcast
Starting the Live Broadcast
- On the live broadcast editing page, click “Start Broadcasting.”
- The AI live broadcast window will appear shortly after, displaying the AI live broadcast.
Using Your Broadcasting Partner or OBS
Note
Keep the AI live broadcast window open on the desktop during the broadcast, or it will not broadcast properly.
- Open your broadcasting partner or OBS, add a window, select the Wondershare VVB (Live Version) live window.
- Click “Start Broadcasting.” Use Alt + mouse to crop out the web bar or use the zoom function to remove it.
- During the live broadcast, you can only modify the “Artificial Interaction” function; other broadcast settings cannot be changed.
Ending the Broadcast
- When concluding the live broadcast, initiate the termination of the live stream on the platform’s broadcasting partner first, followed by clicking the “End Live” button on Virbo Live to finalize the shutdown process.
02Uploading Local Images and Videos
07AI Intelligent Script Generation
11Starting/Ending the Live Broadcast
Decorating Your Live Room
Decoration Guidance
- Click on the product homepage and create a blank live room to initiate a new live session.
Create a blank live room
- Upon creating a blank live room, the live room editing page will open. The left side serves as the operation area, the right side as the canvas area, and the materials area is located above.
Livestream room navigation
- Click on the templates to use pre-designed combinations of background, virtual hosts, and stickers.
Select a template
- Customize the background from the background library. During the live broadcast, only one background can be used.
Livestream room customization
- Choose a virtual host from the virtual host library. Only one virtual host can be used during the live session.
![]()
Choose a virtual host
- Add stickers from the sticker library. Multiple stickers can be used during the live broadcast.
- After selecting materials, adjust their position and size in the canvas area. Right-click to modify layers, copy, or delete materials.
Uploading Local Images and Videos
Upload background images or videos
- Upload: Click Background -> Upload Background -> Select file to upload. Materials will be displayed in “My Background” after uploading.
Upload Background
- Apply: Click Background -> My Background, then click on the material to use it on the canvas.
- Delete: Hover over the material and click the delete icon to remove it.
Delete Background
Note
Background upload requirements:
- Image and video dimensions should be 9:16
- Image formats: JPG/JPEG/PNG
- Video formats: MP4/MOV
- Resolution should not exceed 1080P
- Video duration should not exceed 30 minutes
- File size should not exceed 1GB
Upload sticker images or videos
- Upload: Click Sticker -> Upload Sticker -> Select file to upload. Materials will be displayed in “My Sticker” after uploading.
Upload Sticker
- Apply: Click Sticker -> My Sticker, then click on the material to use it on the canvas.
- Delete: Click Sticker -> My Sticker, hover over the material, click the delete icon to remove it.
Delete Sticker
Note
Sticker upload requirements:
- Image and video dimensions are flexible.
- Image formats: JPG/JPEG/PNG
- Video formats: MP4/MOV
- Resolution should not exceed 1080P
- Video duration should not exceed 30 minutes
- File size should not exceed 1GB
Text-Driven Live Room
Script Guidance
- Input script text: Copy and paste your script into the script dialogue box.
Text Scripts Inset
- Choose a matching tone: Click the voice-over entrance above, select a suitable tone, and preview it.
- Preview: Click the “Preview” button below the text to listen.
Audio-Driven Live Room
Audio Guidance
- Upload audio: Click Script -> Audio -> Upload local voice and upload the local file.
Upload Audio
- Preview audio: After uploading, click to preview the audio.
Preview Audio
- Audio sorting: Hold and drag to sort the audio files.
Audio sorting
- Audio sorting: Hold and drag to sort the audio files.
Modifying Live Room Name
Method Guidance
- Method 1: Click the edit button in the upper-left corner of the edit page to rename the live room.
Rename Livestream Room
- Method 2: Product homepage -> My Live Rooms -> Click on the more options for an individual live room -> Choose Rename.
Adding AI Identification
Step Guidance
- On the live room editing page, click on the checkbox before the AI identification to enable or disable it.
AI Intelligent Script Generation
Generation Guidance
- Click the “AI Intelligent Script” button below the script, a popup will appear.
- Enter your product name (mandatory), selling points (optional), promotional information (optional), select language and style, then click generate.
AI Script
- The generated result can be further modified, click “Use” to add it to the script dialogue box.
AI Translation
Translation Guidance
- Click the “AI Translation” button below the script, a popup will appear.
- Place the text to be translated on the left, click the middle arrow to select the language for translation (e.g., English), and click translate.
AI Translation
- The generated result can be further modified, click “Use” to add it to the script dialogue box.
AI Translation Result
Manual Interaction
Microphone Interaction
- Operational Flow:
- Click Manual Interaction -> Microphone, and select the microphone device.
- Speak into the microphone and observe the sound wave status.
- Open “Start Live,” wait for the appearance of the virtual host image, and click “Open Mic Takeover.” The virtual host’s mouth will be closed, and your voice will drive the virtual host to speak.
- After speaking, click “End Takeover,” and the virtual host will resume reading the scripted dialogue.
- Click Manual Interaction -> Microphone, and select the microphone device.
- Grant Browser Microphone Access:
- Google Chrome:
*Open Chrome, click the settings icon in the top right.
* Click “Settings,” open the settings page. Select “Privacy and Security” and then click “Site Settings.”
*Enter the site settings page, click “Microphone.”
* On the microphone authorization page, select that the site can request the use of your microphone.
* After these settings, when the browser needs to use the camera or microphone, a device request box will pop up on the page. Select “Allow.” - Mozilla Firefox:
*Open Firefox, click the settings icon in the top right, and click “Settings.”
* Open the settings page, click “Privacy & Security,” and find “Microphone Permissions.” Click “Settings” next to “Microphone.”
*Enter the settings page, add the site that requests the use of your microphone to the list, and click “Save Changes.”
* After these settings, when the browser needs to use the camera or microphone, a device request box will pop up on the page. Select “Allow.” - Sogou Browser:
*Open Sogou Browser, click the settings icon in the top right, and click “Options.”
* Open the options page, click “Advanced,” find “Privacy - Browsers on the Mac System:
*Locate “System Preferences” on your Mac dock and click the icon. Once opened, find “Security & Privacy” and click to open.
* On the “Security & Privacy” page, select “Privacy,” then click on “Microphone” and set the applications that need to use the microphone to “Allow.”
- Google Chrome:
Text Interaction
- Click on “Artificial Interaction” and enter interaction scripts in the input box below.
- Click “Add Text” to add it to the interaction list. After starting the live broadcast, each interaction script will have a send button.
Text Interactionn
- Click “Send” to trigger the AI to speak according to the interaction script.
Intelligent Interaction
Note
The current intelligent interaction feature only supports Alibaba International. If you are streaming on other platforms, you can skip this step.
Setting Entrance
- On the live broadcast page, click on “Intelligent Interaction,” select the live platform, and the supported intelligent interaction features will be randomly displayed.
Q&A Library Settings
- Creating a New Q&A:
- On the product homepage, click on Q&A Library - Add Q&A, and a popup window will appear.
- Fill in the rule name, keywords, reply text, and upload a reply video. Click Save.
Note
Rule Name: Name the rule for easy identification.
Keywords: If a viewer’s question in the live room contains any of these keywords, it will trigger the AI to answer.
Reply Content: You can add up to 5 replies. Include variables like [Viewer’s Nickname] and [Viewer’s Country] for personalized responses.
Sequential Reply: Replies in sequence when triggered.
Random Reply: Randomly selects a reply when triggered.
Reply Video: If configured, the video will be displayed at the specified position until the AI’s reply ends.
- Adjusting Q&A Activation Status:
- Click Q&A Library - Switch to close or open the Q&A rule. When closed, the Q&A rule will not take effect after the live broadcast starts.
- Turning on Q&A Library Switch in the Live Room:
- On the live broadcast editing page, click Intelligent Interaction - Platform, select “Alibaba International,” and turn on the Q&A Library switch. This must be done after starting the live broadcast and capturing the barrage for the function to work.
Greeting Rules Settings
- Greeting Content: You can add up to 5 replies, including variables like [Viewer’s Nickname] and [Viewer’s Country].
- Sequential Reply: Replies in sequence when triggered.
- Random Reply: Randomly selects a reply when triggered.
- On the live broadcast editing page, click Intelligent Interaction - Platform, select “Alibaba International,” turn on the Greeting switch, and click the edit icon to open the editing window. Fill in the reply text and click Save.
Sending Business Cards and Product Catalogs
- On the live broadcast editing page, click Intelligent Interaction - Platform, select “Alibaba International,” turn on the “Send Business Cards” switch, and turn on the “Send Product Catalogs” switch.
Note
These functions will only take effect after starting the live broadcast and capturing the barrage.
How to Start Live Barrage Capture
- Start Broadcasting in Virbo Live
- Follow the steps for “Start/End Broadcast” on the live broadcast editing page.
- Install the Plugin in Chrome
- Ensure Chrome is up to date, then download the plugin from the provided link . After downloading, unzip locally.
- Configure the Plugin in Chrome
- Open Chrome, go to Settings - Extensions - Manage Extensions, enable Developer mode, click “Load Unpacked,” and select the unzipped folder. Enable “Allow in incognito mode” in the plugin details.
- Copy the Live Control Page Link
- Copy the link of your live control page (web version) from the live platform. Paste the link into the live broadcast editing page under Intelligent Interaction - Live Room Link Input, then click “Start Capturing.”
Note
Alibaba International currently supports automatic Q&A, automatic greetings, automatic business card sending, and automatic product catalog sending. You can turn on the corresponding switches and then configure the detailed settings for each item.
Starting/Ending the Live Broadcast
Starting the Live Broadcast
- On the live broadcast editing page, click “Start Broadcasting.”
- The AI live broadcast window will appear shortly after, displaying the AI live broadcast.
Using Your Broadcasting Partner or OBS
Note
Keep the AI live broadcast window open on the desktop during the broadcast, or it will not broadcast properly.
- Open your broadcasting partner or OBS, add a window, select the Wondershare VVB (Live Version) live window.
- Click “Start Broadcasting.” Use Alt + mouse to crop out the web bar or use the zoom function to remove it.
- During the live broadcast, you can only modify the “Artificial Interaction” function; other broadcast settings cannot be changed.
Ending the Broadcast
- When concluding the live broadcast, initiate the termination of the live stream on the platform’s broadcasting partner first, followed by clicking the “End Live” button on Virbo Live to finalize the shutdown process.
AI Video Translator | Online
AI Video Translator
It can be challenging and expensive for content creators to create a single video in multiple languages. To overcome this problem, Virbo has an innovative AI Video Translator feature that you can also use online.
02Perform the Video Translation
04Download the Translated Video
Step 1. Choose the Video Translate Feature
From the dashboard of Wondershare Virbo Online , choose the “Video Translator” feature under the “More AI Tools” section.
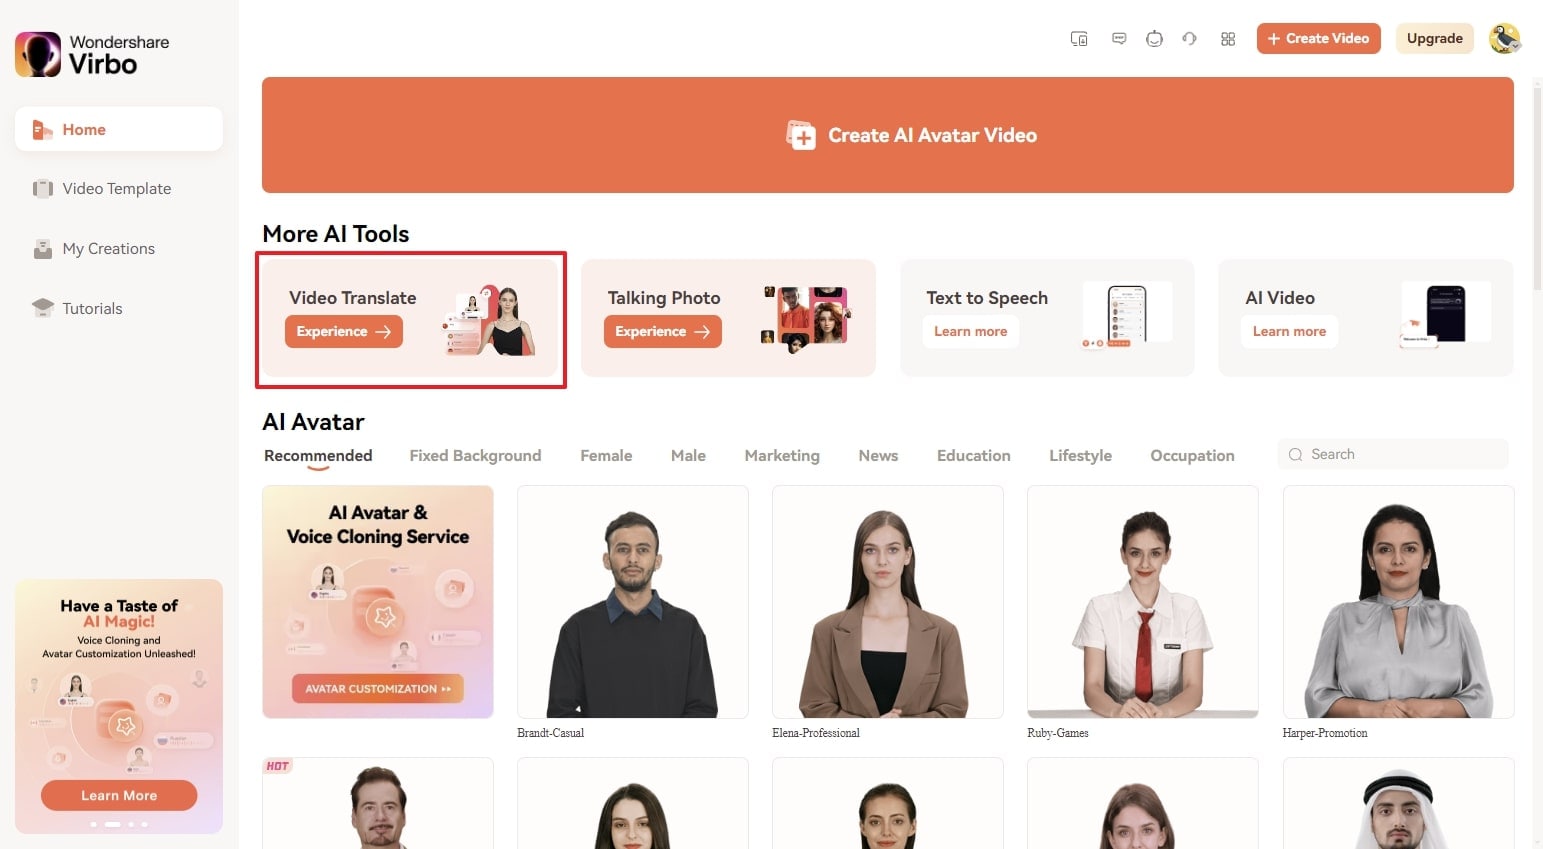
Choose Video Translator
Step 2. Perform the Video Translation
- To upload the video file for translation, press the “Click to upload video“ button, or you can use the drag-and-drop feature.
- Specify the “Original Video Language” and the “Target Language” and enable the required “Advanced Settings,” which are Lip-Sync, Subtitles, and Proofread Video Script.
- Finally, click the “Translate this video” button to change your video voice in the target language.
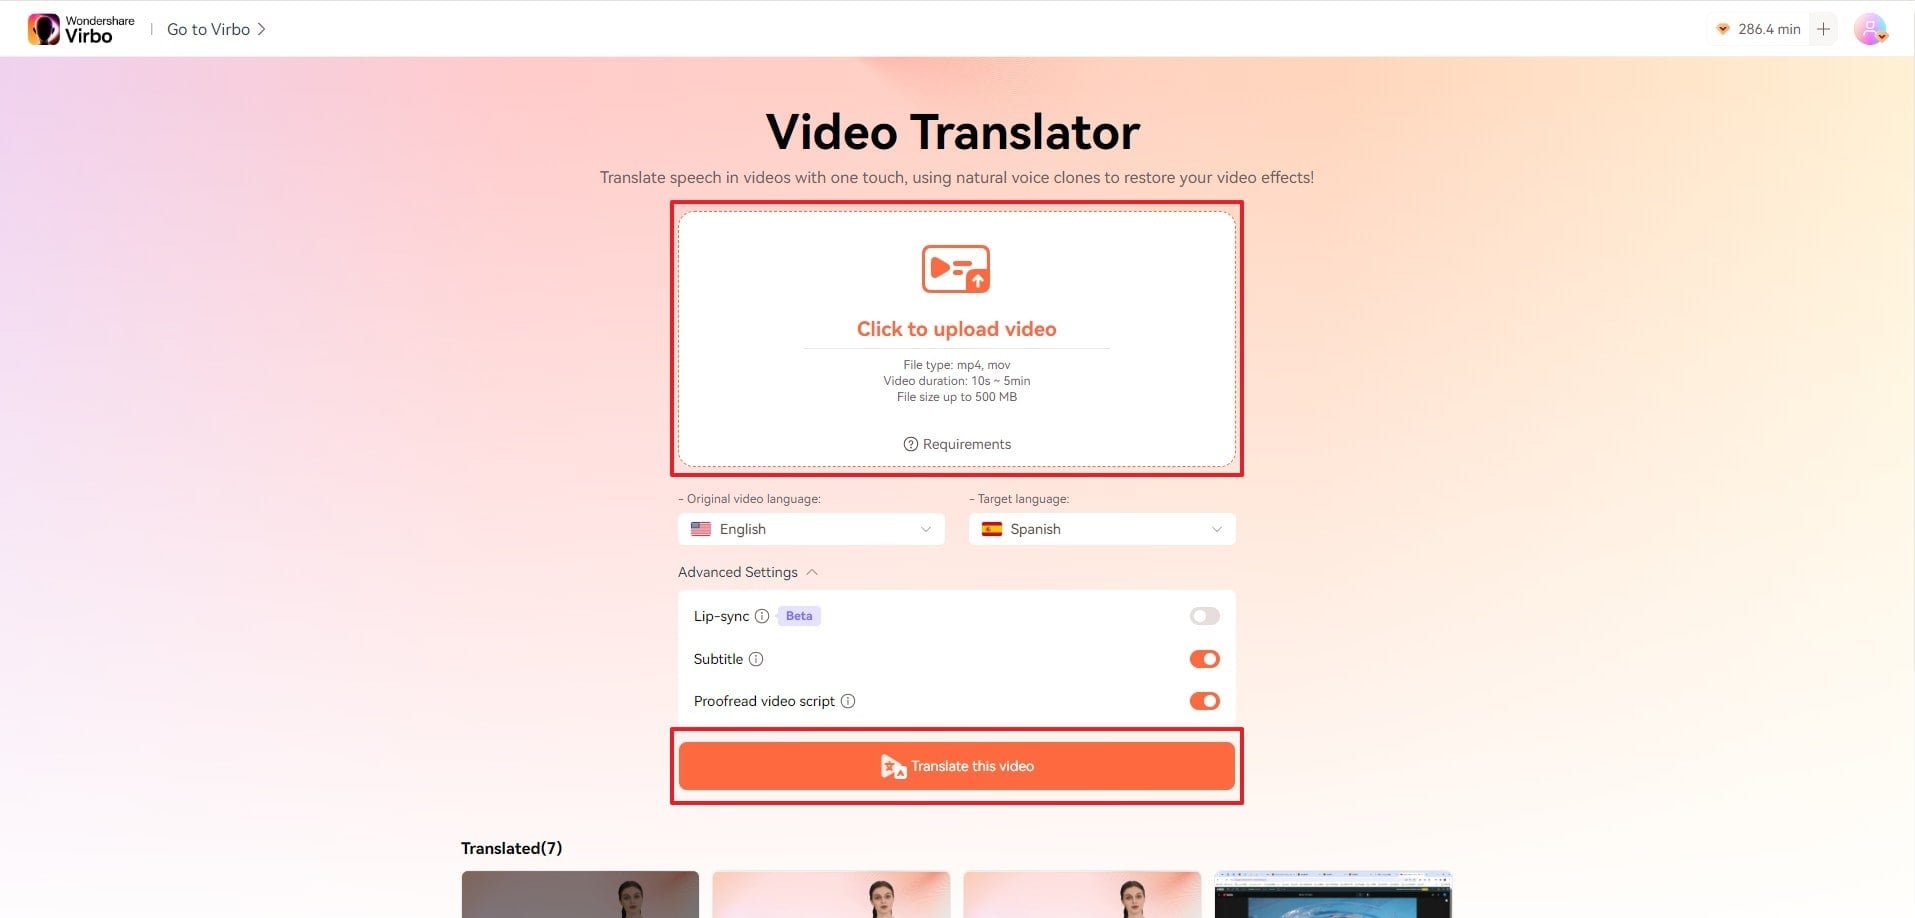
Perform Video Translation
Step 3. Proofread the Video Script
Proofread the translated video script to avoid any mistakes in the video. You can also export the subtitles file by tapping the “Download SRT” button. And then, click “Translate Video“
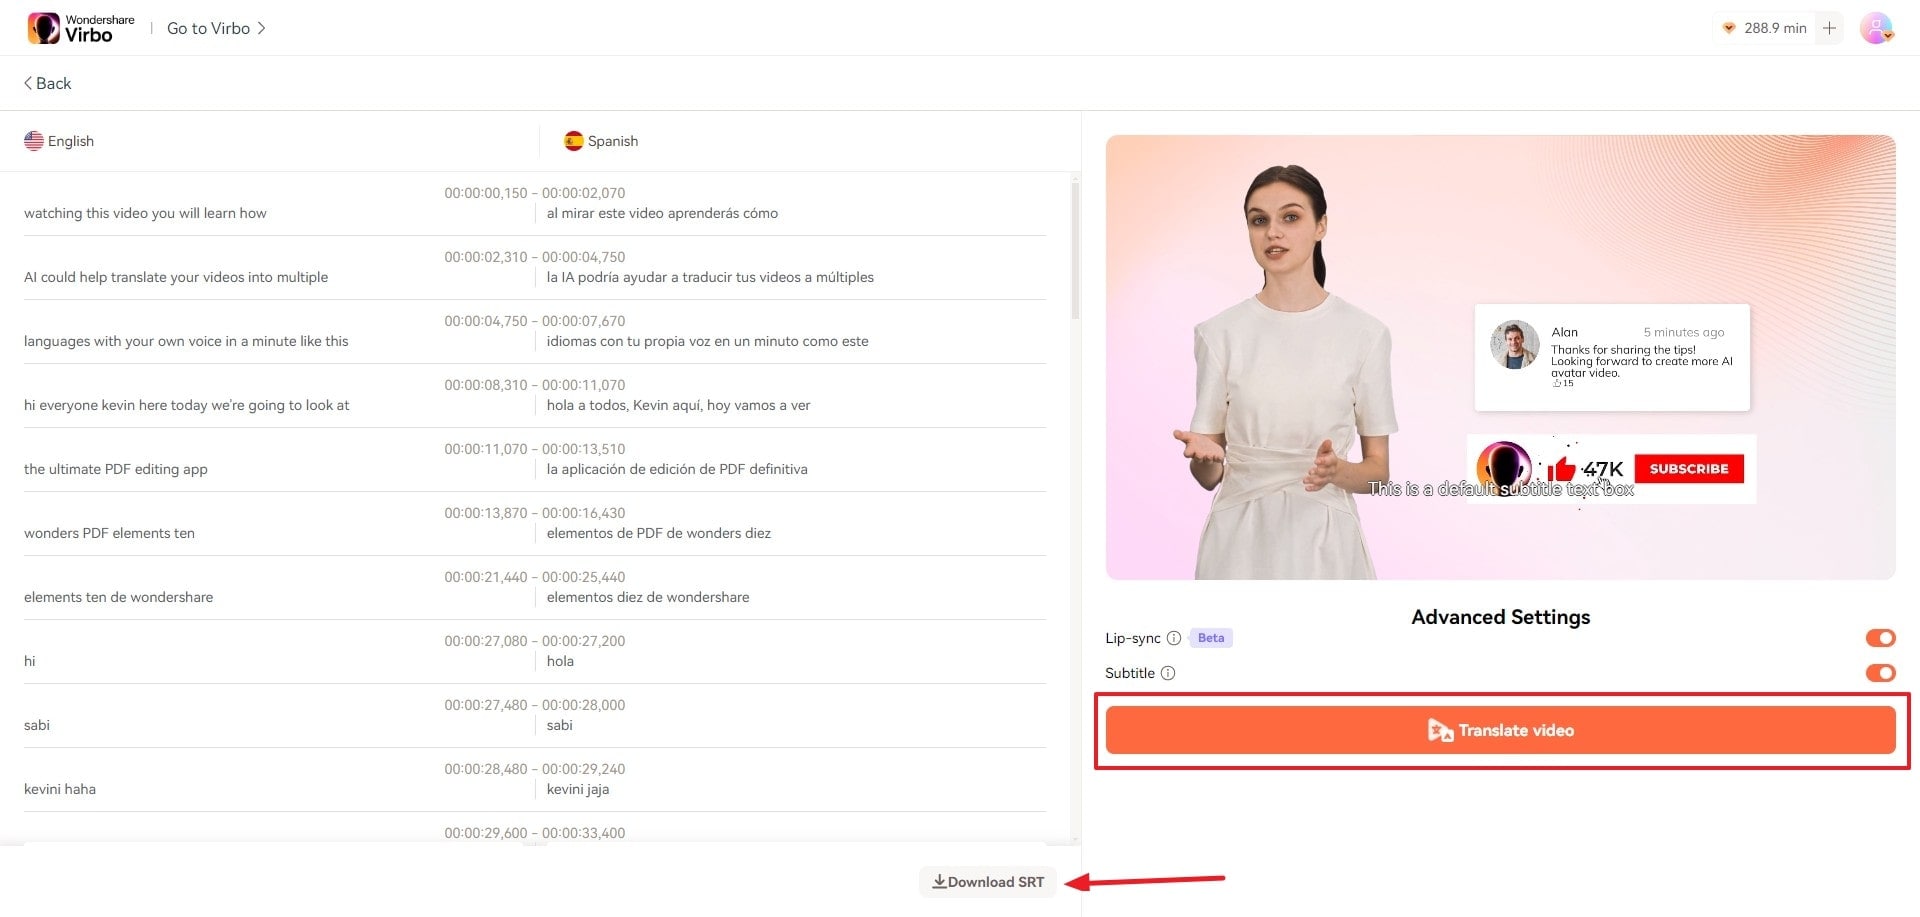
Proofread Script
Step 4. Proofread the Video Script
Preview the final version of the translated video and press the “Download Video” button to get it exported to your device.
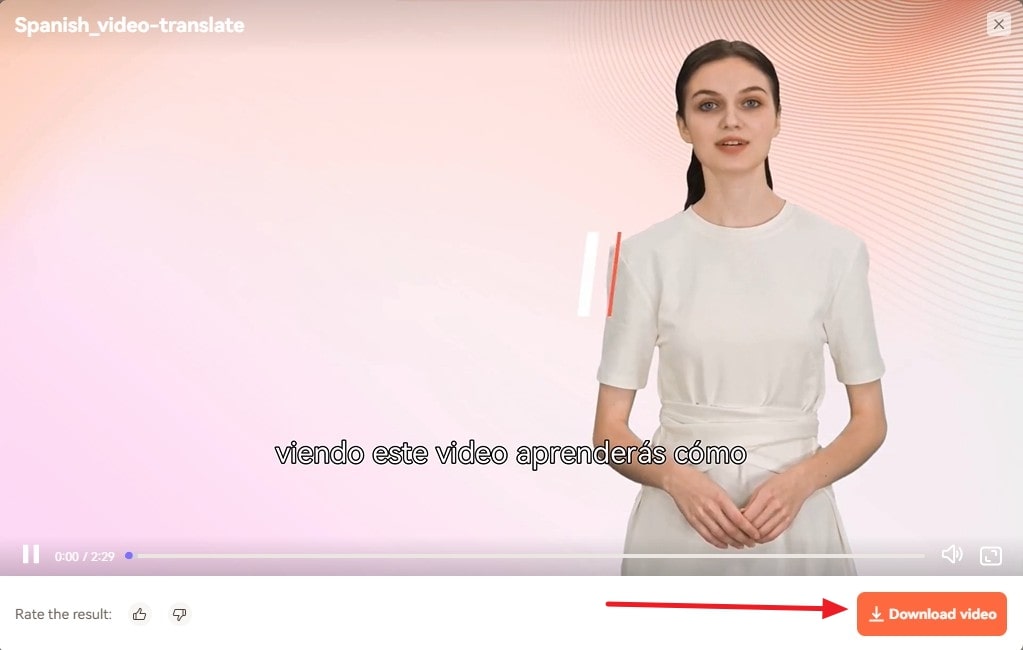
Download Video
FAQs about Video Translator
1Can I edit and export auto-generated subtitles?
Of course! You have the flexibility to modify and customize the generated subtitles to suit your preferences, and once done, you can seamlessly export the edited subtitle file.
2Is there a fee for using the Video Translator feature?
The Video Translator feature follows the Virbo subscription plan. This means that unsubscribed users can export a multilingual video of up to 2 minutes for free within 512MB storage space. For more information, please refer to the Virbo Subscription Plan>
3How accurate is the translation output?
The translation accuracy delivered by the Video Translator feature is remarkably high, thanks to the empowering capabilities of AI technology. The system utilizes advanced algorithms and machine learning to ensure precise and contextually relevant translations, enhancing the overall quality of the translated content.
02Perform the Video Translation
04Download the Translated Video
Step 1. Choose the Video Translate Feature
From the dashboard of Wondershare Virbo Online , choose the “Video Translator” feature under the “More AI Tools” section.
Choose Video Translator
Step 2. Perform the Video Translation
- To upload the video file for translation, press the “Click to upload video“ button, or you can use the drag-and-drop feature.
- Specify the “Original Video Language” and the “Target Language” and enable the required “Advanced Settings,” which are Lip-Sync, Subtitles, and Proofread Video Script.
- Finally, click the “Translate this video” button to change your video voice in the target language.
Perform Video Translation
Step 3. Proofread the Video Script
Proofread the translated video script to avoid any mistakes in the video. You can also export the subtitles file by tapping the “Download SRT” button. And then, click “Translate Video“
Proofread Script
Step 4. Proofread the Video Script
Preview the final version of the translated video and press the “Download Video” button to get it exported to your device.
Download Video
FAQs about Video Translator
1Can I edit and export auto-generated subtitles?
Of course! You have the flexibility to modify and customize the generated subtitles to suit your preferences, and once done, you can seamlessly export the edited subtitle file.
2Is there a fee for using the Video Translator feature?
The Video Translator feature follows the Virbo subscription plan. This means that unsubscribed users can export a multilingual video of up to 2 minutes for free within 512MB storage space. For more information, please refer to the Virbo Subscription Plan>
3How accurate is the translation output?
The translation accuracy delivered by the Video Translator feature is remarkably high, thanks to the empowering capabilities of AI technology. The system utilizes advanced algorithms and machine learning to ensure precise and contextually relevant translations, enhancing the overall quality of the translated content.
Translate Videos Like a Pro with Subtitle Cat: Your Essential Guide
When it comes to video content creation, you need to consider your audience. At a time when reaching a global audience is a major concern, having multilingual subtitles is a necessity. Tools likeSubtitles Cat allow you to translate your videos to subtitles that appeal to different audiences. With accurate subtitles, you will be able to increase user engagement and viewership. The Subtitle Cat translate allows you to quickly and accurately generate subtitles in different languages. In this article, we will provide an overview of Subtitle Cat Com and how to use the tool in your video projects.
Part 1. Overview of Subtitle Cat as a Video Translating Tool
Subtitle Cat is an online video translation tool. The powerful tool is designed to simplify the process of adding subtitles to videos. With the use ofCat Translator Google capabilities, the online tool works to generate translated subtitles in seconds. Users can streamline the process of translating subtitles to reach a wider audience. This helps in bridging the language barrier and making video content more accessible.

Compatibility
- Online tool
Key Features
- Automatic Speech Recognition (ASR): Automatically generates subtitles from spoken voice in videos using an advanced ASR technology. By automating the process, subtitle Cat translates videos easily without the need for manual transcription.
- Multi-lingual Capabilities: Subtitle Cat is designed to translate subtitles for films in various languages. With a base of over 100 languages, the Cat takes subtitles files in their original language (.srt) for quick conversions to any other language.
- User-Friendly Interface: An intuitive user interface that allows you to easily edit and customize subtitles. Subtle Cat offers accurate results with higher readability for your audience. You also get the option to split or merge lines and adjust font styles to your liking.
- Machine Translation (MT): Automatic generation of subtitles into various languages using the highly integrated MT engine. This allows Subtitle Cat to facilitate multilingual communication across different types of videos.
Pros
- An easy-to-use online platform for quick video subtitle translation
- An efficient tool that saves time and cost that would have been spent on manual transcription and translation
- Highly accurate subtitle translations using advanced ASR and MT technologies
- A user-friendly and intuitive interface for quick subtitle editing
- A highly flexible tool that supports different types of videos and subtitle formats
Cons
- Machine translation is sometimes limited and may produce unnatural-sounding results that require human editing
- The customization options offered by Subtitle Cat are limited
Part 2. Step-by-Step Guide: Translating Videos with Subtitle Cat
UsingSubtitle Cat to translate videos is completely free. You can start with a video file like a movie, find the subtitles, and translate it to the desired language. Known as the cat that translates subtitles, the platform is designed to offer users a seamless translation experience. No technical expertise is needed as you only upload your subtitles and the Cat does the translation for you. Here is a step-by-step guide to follow:
Step 1 Visit Subtitle Cat
The first step is to visit theSubtitle Cat website and search for the movie you are interested in translating. Type in the name of the video and click search. Sometimes, you may not find what you are looking for. Just head onto the internet with your favorite search engine, and search for the subtitle file of the video or film you are interested in. Download the .srt file your file and then upload it to Subtitle Cat.

Step 2 Explore the Substiles Index
Subtitle Cat offers a list of subtitles that you can with. Browse through the latest subtitles or the results of your search from Step 1 and click on the desired one. If you uploaded the .srt file in the previous step, it will automatically appear in the search result ready to be translated.

Step 3 Select a Language for Translation
From the list of available language subtitles, click on the one that you are interested in and translate. This will prompt Subtitle Cat to translate the subtitles into that language.

Step 4 Download Translated Subtitles
The Cat subtitle translate is often quick and takes only a few seconds for the tools to generate subtitles in the requested language. Once the translation process is complete, download your new subtitle file for your video. The file contains the subtitles for your video file. However, you will need the .srt file, the video file, and a video player to view it. Add the .srt vile to your video player (VLC, Movie and TV app in Widows, or video player in Mac). This will display the new subtitles when you play the video.

Part 3. Best Alternative with Subtitle Cat: Wondershare Virbo
When it comes to translating the subtitles of your video, you want a tool that is easy to use and effective. One of the best alternatives toSubtitle Cat isWondershare Virbo . This video translation tool offers similar functionalities to Subtitle Cat but with a better experience and results. Here is a quick comparison between the two alternatives.
Translate Video Online Download APP Now Free Download
1. All-rounded Analysis on Wondershare Virbo and Subtitle Cat
01 Compatibility
Wondershare Virbo is compatible with Windows, and phone devices while Subtitle Cat is an online tool
02 Key Features
In addition to ASR and MT, Virbo also offers advancedsubtitle editing features. Users can manage time codes, adjust font styles, translate specific segments of their subtitles, and use collaborative tools such as project sharing and real-time editing.
03 Wider Format Use
Virbo supports a wider range of video and subtitle formats, allowing users to cater to a broad spectrum of audiences.
04 Instantly View Subtitles
Virbo translates and adds subtitles to your video on the same platform. You do not have to download the .srt file and then upload it again in a different software. Everything is done on the Virbo software, and the exported file is ready for viewing.
Comparing the two subtitle translation tools indicates that one is superior to the other. While Subtitle Cat boats of a user-friendly interface and affordability, Virbo stands out with a comprehensive feature set. Users can work with a wider range of video formats and collaborate with others on projects. Based on the above comparison, it is evident that Wondershare Virbo is better than Subtitle Cat.
2. Unlock Smooth Video Translating Experience with Wondershare Virbo
Using Wondershare Virbo to translate subtitles is quite easy. The software comes with AI-powered capabilities to automatically translate subtitles, saving you the time and effort you would have spent in manual transcription and translation. Simply upload your video, and select the language you want to translate your subtitles to, and the software will do the rest. To give you a complete picture of how the software works, here is a step-by-step process to follow.
Translate Video Online Download APP Now Free Download
Step 1 Download Virbo to Your Device
Start by downloading Virbo to your phone or PC. Virbo is also available online and can be used directly on the website. You can register a new Wondershare account using your email or login with social media.

Step 2 Launch AI Video Translator Feature
On the menu section of the Virbo window, locate the “Video Translator” feature and click on it. This will launch the feature, prompting you to take the next step.

Step 3 Upload Your Video
Once the Video Translator window pops up, click on “Upload the video” you want to work with. Virbo’s free plan requires uploads to be 30s to 5min long in MP4 or MOV formats, and a file size of up to 200 MB. Select the original language and a target language that you want your new subtitles to be in.
Click “Translate” to start the translation process. Virbo will detect the human spoken language in the video and generate the translated video subtitles.

Step 4 Export Video with Translated Subtitles
Virbo will translate the video subtitles to the desired language within a few seconds. The process is automated and no manual tweaking is needed. Click on “Export” to generate the video with new subtitles.

Translate Video Online Download APP Now Free Download
Conclusion
Translating the subtitles of your video is advantageous in many ways. It makes your videos more accessible and useful to your audience. A tool likeSubtitle Cat helps to make the translation faster and easier. However, for more accurate results and use across different types of videos, we recommend using WonderShare Virbo. The video translation software comes with AI-powered features that make subtitle translation more efficient and effective.
Exploring the Magic of AI Selfie Generators
Part 1. What is an AI Selfie Generator?
An AI Selfie Generator is a groundbreaking tool that employs advanced AI algorithms, often based on deep learning and neural networks, to create realistic and artistic selfies. These generators analyze facial features, expressions, and patterns from a vast dataset of human faces, resulting in stunning self-portraits that resonate with authenticity.
Part 2. Benefits of AI Selfie Generators
Expressive Versatility
AI Selfie Generators offer a range of styles and filters that allow users to transform their selfies into various artistic renditions, enhancing personal expression.
Effortless Enhancement
Say goodbye to complex editing tools. AI Selfie Generators effortlessly enhance selfies, ensuring optimal lighting, skin tone correction, and other refinements.
Time-Saving Creativity
Generating captivating selfies is quick and efficient, sparing users from spending hours on manual editing.
Part 3. Common Scenarios for AI Selfie Generators
Social Media Engagement
AI-generated selfies can grab attention on social media platforms, boosting user engagement and interaction.
Creative Exploration
Artists and designers use AI Selfie Generators to experiment with unique visual styles, leading to captivating artworks.
Personal Branding
Influencers and content creators can establish a consistent and striking visual identity by utilizing AI-generated selfies.
Part 4. Free AI Selfie Generator - Wondershare Virbo
Experience the wonder of Wondershare Virbo - an AI Selfie Generator that stands out for its user-friendly interface and diverse creative asserts. Virbo’s avatar studio empowers users to transform their selfies into stunning visuals with just a few clicks, enhancing facial features, correcting imperfections, and adding artistic flair.
Conclusion
The era of AI Selfie Generators has arrived, redefining how we capture and present our digital selves. With their ability to effortlessly enhance and transform selfies, these tools are changing the way we express ourselves online. As you journey through this realm of AI-powered creativity, remember that the power to create captivating, authentic, and artistic selfies is now at your fingertips.
Cloning Voices in Real-Time With Top GitHub Repositories
The advancements in AI technology have gone beyond our imagination. The AI can generate realistic images and read text aloud with the TTS tool. Also, real-time voice cloning technology has made a significant impact in today’s world. You can transform plain text into lifelike AI-generated speech in various languages. It perfectly mimics the voice of another person and can read the text with accuracy.
Moreover, it uses neural networks and speech synthesis that can assist in complex domains. In this article, we’ll explore some repositories of real-time voice cloning GitHub.
Part 1: An Introduction to Real-Time Voice Cloning
Real-time voice cloning uses generative models to create real human voices. The building blocks are speech synthesis, voice embedding, and waveform generation. Also, the AI is trained to gather data on a set of human voice samples to generate authentic results. It gathers and learns how we talk - our pitch, rhythm, and voice quirks.
This voice cloning technology works on four models that enable real-time voice cloning. These models are text-to-Mel coder, speaker encoder, synthesizer, and vocoder. Real-time voice cloning software has been integrated into various tools and platforms.
Generate Engaging
AI Video in Minutes!
Easily convert text into professional spokesperson videos in over 120+ voices & languages in minutes.
Generate AI Video Free Generate AI Video Now


Functions of Real-Time Voice Cloning
- Real-time voice clone AI as a virtual assistant can sound like your desired celebrity. You can customize your assistant’s voice with voices like Lady Terresa or Elon Musk.
- Entertainment industries use real-time voice cloning softwareto create character voiceovers. From video games to animated movies, this technology makes it easy. Also, this creates an immersive and engaging environment for players and viewers.
- This technology provides a voice to all the speech-disabled people. The tool can provide a synthetic voice to these people and improve their lives. Also, people with speech impairment can regain their confidence by having the ability to communicate.
- Businesses can improve their customer service by using real-time voice cloning online. They can strengthen their brand name by giving their chatbot a synthetic voiceover. This way, your customers will be engaged with the chatbot and can relate to it.
Part 2: Finding The Best Real-Time Voice Cloning from GitHub
GitHub has many repositories that can help users perform various tasks. You can find different projects to reshape real-time voice creation. It offers one-shot cloning, better style transfer, and smooth text-to-speech models. Now, let’s explore a repository for real-time voice cloning to make voices sound natural.
Top-Rated Real-Time Voice Cloning Tools From GitHub
- Real-Time Voice Cloning (CorentinJ)
- PaddleSpeech
- Multi-Tacotron Voice Cloning
- Coqui TTS
- Multilingual Text-to-Speech (Tomiinek)
- One-Shot Voice Cloning CMsmartvoice
- Voice-Synthesis (smoke-trees)
- VoiceSmith (dunky11)
- Voice Cloning App by BenAAndrew
- Unet-TTS
Get Started Online Download APP Now Free Download
1. Real-Time Voice Cloning (CorentinJ)
Users can explore this repository to clone their voice within 5 seconds. This real-time voice cloning GitHub repository is an implementation of the SV2TTS framework. SV2TTS uses a three-stage deep learning process to carry out voice cloning. This implementation creates a digital voice representation from a brief audio sample. Then, it utilizes this sample to generate diverse speech from the given text.
- Install Requirements:
To install it on your system, it’s better to have a stable GPU for a smooth experience. Other than this, you should have at least Python 3.5 for the repository to function properly. Also, it is necessary to install ffmpeg files to process audio files.
2. PaddleSpeech
It is an exceptional open-source toolkit on the Paddle-Paddle platform. With this simple toolkit, you can perform a variety of audio-related tasks. It employs new cutting-edge technology and production-ready streaming ASR and TTS systems. Plus, this repository provides fast-processing models to the users. PaddleSpeech also utilizes self-defined linguistics to adapt to the Chinese context.
This repository aims to inspire industrial and academic fields through its several modules. These may include Automatic Speech Recognition, Keyword Spotting, Speech Translation, etc. PaddleSpeech also combines its task with various other fields, including NLP and Computer Vision.
3. Multi-Tacotron Voice Cloning
Multi-Tacotron is the ultimate in voice cloning with multilingual implementation. You can make use of this repository for Russian and English languages. This repository builds upon real-time voice cloning online with a four-stage learning framework. With a few seconds of audio, it crafts a numerical representation of a voice. Furthermore, it uses this audio to condition a text-to-speech model.
For cloning the English language, the original implementation is enough. You don’t require a high-tier GPU to run this toolbox; even a low-tier one will work well. There are also some pre-trained models for datasets that you can download with ease.
4. Coqui TTS
You can explore the finest text-to-speech toolkit with Coqui. Boasting high-performance models, it covers TTS tasks effortlessly. This repository extends its ability with speaker encoder for various Vocoder models. With swift model training and multi-speaker TTS support, it stands out for efficiency. TTS version 2 now has 16 more languages and better overall performance.
Moreover, TTS can now work smoothly with even less than 200ms latency. More than 1100 languages are supported with pre-trained models of this repository. Plus, all TTS models are ready to use with efficient model training.
5. Multilingual Text-to-Speech (Tomiinek)
This repository available on GitHub is an implementation of Tacotron 2. It supports code-switching, voice cloning, and parameter-sharing for versatile experiments. You can utilize training data and source code for optimized voice cloning. Also, it compares three models for multilingual synthesis. This repo also has samples generated by a monolingual vanilla Tacotron.
Additionally, multilingual Text-to-Speech comes with a convolutional encoder with parameters that are language-specific. There are also some interactive demos that introduce code-switching abilities and provide multilingual training on the model.
6. One-Shot Voice Cloning CMsmartvoice
One-shot voice cloning with Unet-TTS features a powerful speaker and style transfer capabilities. The repository generates text sounds with provided inferencing code and pre-training models. Its model training focuses on neutral emotion to avoid strong emotional speech. Also, it addresses the challenges of out-of-domain style using the Unet network and AdaIN layer.
Users are not required to use reference speech if they plan to do one-shot voice cloning. Also, the requirement to manually enter statistics of duration is no longer essential. Only Linux users can install it with the correct TensorFlow and TensorFlow-addons versions.
7. Voice-Synthesis (smoke-trees)
This approach creates a numerical representation of a voice from a few seconds of audio. Then, it uses this audio for text-to-speech synthesis. SV2TTS excels with deep learning and uses a speaker encoder, synthesizer, and voice coder. It clones voices in real time with zero-shot learning. The repository identifies voices, and the synthesizer generates Mel-spectrograms from the text. Finally, the vocoder turns them into lifelike waveforms.
All you need to do is feed this repository your voice sample or custom voice, and it can synthesize a clone of it for you. You can also use a microphone to input your text commands through speech. There are also instructions given if you want to work with your own models on different datasets and language mediums.
8. VoiceSmith (dunky11)
VoiceSmith is an easy-to-use repository requiring no coding experience. It fine-tunes a pipeline based on Delightful TTS and UnivNet for single or many speakers. Users can opt from a proprietary 5000 speaker dataset with automatic text normalization. Windows and Linux are supported, and an NVIDIA GPU with CUDA support is for faster training. Docker is essential for seamless operation for users exploring real-time voice cloning online.
- Install Requirements:
A RAM of less than 8GB may not work well with it, so it’s better to use at least 8GB RAM. To use this repository on Linux, you are advised to install Docker Engine. Users also get to play around with an emotional 60-speaker dataset-trained model.
9. Voice Cloning App by BenAAndrew
This Python or Pytorch repository empowers users for effortless voice synthesis. You can enjoy automatic dataset creation, multi-language support, and easy remote training. It allows you to build datasets and proceed further by using a training model. The tool offers new datasets and lets you extend existing datasets for voice cloning. This simple approach elevates your experience of real-time voice cloning on GitHub.
In future improvements, this repository is expected to support AMD GPU for better performance. Also, it claims to improve its batch size estimation. You can run it on Windows 10 or Ubuntu 20.04 operating system with at least 5GB of required disk space.
10. Unet-TTS
Unet-TTS excels in unseen speaker and style transfer for one-shot voice cloning. It works in seconds to produce target audio through voice synthesis without fine-tuning. There are various speaking styles embedded in a seamless way. Its algorithm works on a skip-connected structure to capture speaker and utterance features. Users can get precise inferences of complex voice characteristics and speaking styles.
However, it’s still a challenging task to perform out-of-domain transfer. According to the similarity evaluation, the new model excels in speaker embedding and style modeling. The new model can also discover utterance-level details from the reference audio.
Part 3: Master the Art of AI Voice with Wondershare Virbo
If you want to create AI voices for your content creation purpose, there is a solution. Wondershare Virbo provides real-time voice cloning services to you. With the help of this tool, you can create lifelike AI voices from text. You can create AI voices in different languages for your podcast with this tool.
The tool is diverse as it allows you to choose the gender of your created voice. Users can easily input text to generate the AI voices. It is cost-effective and provides high-quality audio. An influencer or a content creator can engage viewers through this real-time voice clone tool. This tool matches all your needs related to voice clone services.
Key Features of Wondershare Virbo
- AI Streamer: You can increase the sales of your online shop with the newly released live streaming tool. It provides AI-avatar to increase revenue during live shopping. With 24/7 AI streaming and multilingual avatars, you can transform the live experience.
- AI Script Generator:The user can use this feature of the tool to generate a script for the video. With this auto-generated script functionality, users can generate scripts instantly. Also, it provides the option to select the language of the video script.
- AI Video Translator: Virbo allows you to break the language barrier with this feature. The AI video translator feature can translate video content into 20+ languages. This is an affordable way to convert the content to other languages.
- AI Talking Photo: Social media influencers can impress their follower with AI talking photo features. It allows you to add voice clips to any photo to make them interactive. You can use this new way of storytelling to engage your viewers.
Comprehensive Step Guide to Use Virbo’s AI Voice Feature
Now, you get familiar with all the features of the tool besides voice cloning. The tool is an all-in-one platform to generate and share content. Let’s go through the following easy steps to use this tool.
Step 1 Install Wondershare Virbo and Create a Video
Start the process by launching and installing Virbo on your desktop. You can also get direct access to Virbo’s exceptional platform online through a browser. Then, click the “Create Video” button on the main interface of this tool. Afterward, choose the video aspect ratio of the video and press the “Create Video” button again.

Get Started Online Download APP Now Free Download
Step 2 Add the Text Script for the Video Setting
Now, with your chosen avatar, you get access to a new window. After this, in the “Text Script” section, write your personalized narrative. Then, you can adjust the volume, pitch, and speed of your cloned voice.

Get Started Online Download APP Now Free Download
Step 3 Change the Voiceover Setting and Export the Video
Afterward, press the “Language” button over the volume setting to change the AI avatar voice. Next, you get the pop-up window to choose the gender, language, and narrator of the video. Once you are done with these changes, click the “OK” button. Finally, save the video with cloned voice by hitting the “Export” button on the top right corner.

Get Started Online Download APP Now Free Download
Conclusion
In the end, we have learned that real-time voice cloning software can help you in various areas of life. This AI technology is used in business industries and for personal experience. For this purpose, it is only a matter of finding the best software for voice cloning. Wondershare Virbo is your best option for real-time voice cloning online to generate human-like voices.
Best 5 AI-Powered Script to Video Makers
The dynamic landscape of content creation is being reshaped by AI. The fusion of artificial intelligence and video production has unleashed a new era of creativity and efficiency. The world ofscript-to-video AI maker tools has witnessed remarkable advancements. These top-notch tools have revolutionized the way we transform ideas into visuals.
If you are looking for the top script-to-video generator, this article will significantly help you. Below, you can discover the top 5 AI-powered tools that have leaped in 2024. Explore the creative abilities of these tools to bring your scripts to life and redefine your storytelling experiences.
Part 1: What are the Benefits of Using a Script to Video AI Maker?
Before diving into the topscript to video AI tools, let’s understand why they are important. Using a script-to-video maker AI offers a wide range of benefits. These tools can significantly streamline content creation. Here are some key benefits of using these AI programs:
1. Saving Cost and Time
If you choose tocreate a video from a script with AI , one of the major benefits is cutting time and costs. AI tools are rapid in generating text-to-speech outputs. This means you can save precious time required in traditional video production methods.
Conventional video production can also be costly. Hiring scriptwriters, actors, videographers, editors, etc., can be hefty on the wallet. AI-powered tools drastically reduce these needs. Thus, you can produce cost-effective content without compromising on quality.
2. Diversity in Content
A goodAI video generator from script offers options to make your content diverse and inclusive. You can choose from a range of language and accent options. This helps your content to reach the audience on a global scale.
With advanced AI tools, you can also choose from a diverse range of avatars and characters. It allows your videos to encompass various ethnicities, genders, and physical abilities. This demonstrates a commitment to acknowledging the richness of various cultures.
3. Accessibility and Consistency
If you lack the resources for high-end video production, you can use ascript-to-video maker for free . These tools allow top-quality content to be within everyone’s reach. Individuals and businesses can access AI video generators and fulfill their needs easily.
These tools also ensure consistency in your content. You can maintain the style, tone, and branding throughout your videos. This is particularly valuable for businesses striving to maintain a cohesive visual identity across their marketing materials.
4. Creative Inspiration
AI tools are perfect for enhancing the overall quality of your video content. Thesescript-to-video AI tools can automatically optimize the visual elements, animations, and transitions. You can also set the visuals according to the content of your script.
Furthermore, AI platforms also provide rapid iteration. If changes are needed in the content, you do not have to worry about re-shooting scenes. AI-powered tools enable quick revisions that can be done in a few simple clicks.
5. Collaborations and Customizations
Script-to-video AI tools offer a wide range of templates and editing options. Moreover, they allow users to tailor their videos to their specific project needs. You can also modify individual scenes or other media options. Many tools allow the integration of custom voiceovers and audio.
AI-powered script-to-video makers also facilitate collaborative workflows. They allow teams to work together seamlessly on projects. You can use remote collaboration and feedback integration to optimize your content.
Part 2: The Best 5 AI Tools to Create Captivating Videos by Using Scripts
After knowing the potential benefits ofscript-to-video maker AI , it is time to know the top tools. Investing in an efficient tool that can bring the best out of your content is important. Here are the 5 best AI tools to seamlessly convert script to video:
1. Virbo
Virbo by Wondershare is the perfect all-in-one solution for your video needs. This remarkable AI tool can easily convert text into professional-quality videos. With more than a hundred different choices for voices and languages, Virbo is the bestscript-to-video AI maker . The royalty-free assets and customizable templates further enhance its abilities.
Virbo offers efficient cross-platform support to users. You can use its powerful AI algorithm to create quality video content on any supported platform. Moreover, this tool contains a wide range of natural AI-generated voices. For diversity and inclusivity in your videos, Virbo offers a multitude of AI avatars. You can use its prowess to enhance your visual content significantly.
Main Features
- Virbo offers 150+ avatars for AI videos. You can easily customize these avatars to suit your various needs.
- There are over 180 different templates available on Virbo. Thus, you can create AI videos while saving time and energy.
- If you are unsure what to say, Virbo has got you covered. Its AI script generator allows users to create efficient scripts for videos.
- Virbo supports importing PPT, empowering you to effortlessly transform PPT into stunning and engaging videos.
Pricing Plans
| Monthly Plan | $19.9/month |
|---|---|
| Yearly Plan – Essential | $17.9/month |
| Yearly Plan – Pro | $21.9/month |
Generate Video Online Download APP Now Free Download
2. InVideo
If you want ascript to video maker AI free tool, you can try InVideo. It is a powerful web-based tool that can help simplify the video generation process. With thousands of ready-made templates, you can enhance your visual content as much as possible.
InVideo offers users a simple and quick solution for creating videos like a pro. Its powerful AI tools enable fast editing to boost productivity. From basic prompts to professional editing features, InVideo has all you might need.
Main Features
- InVideo offers more than 5,000 professionally crafted templates. You can utilize them for any use case and customize them according to your needs.
- The platform offers 8M+ stock media inside its powerful editor. You can directly access footage, audio, and image files for your content.
- There is a wide range of graphic assets available on InVideo. From basic functions of trimming and cropping to dynamic transitions, InVideo has got you covered.
Pricing Plans
| Business | $30/month |
|---|---|
| Unlimited | $60/month |
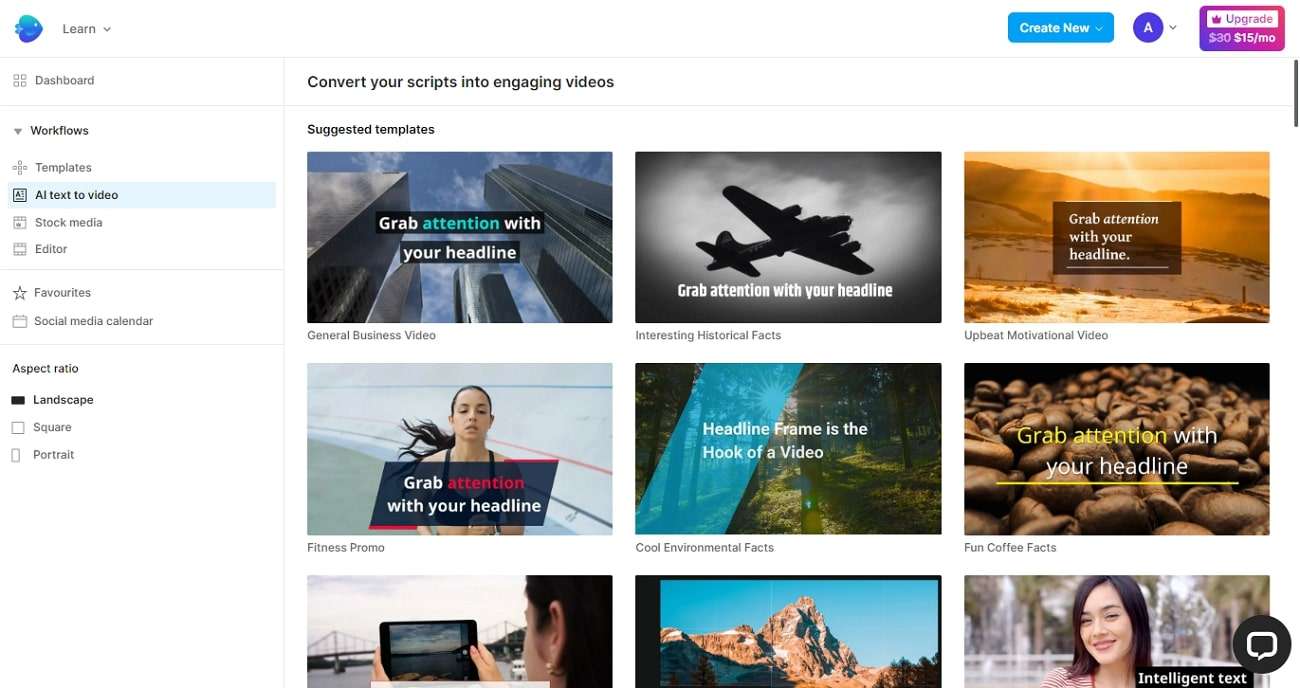
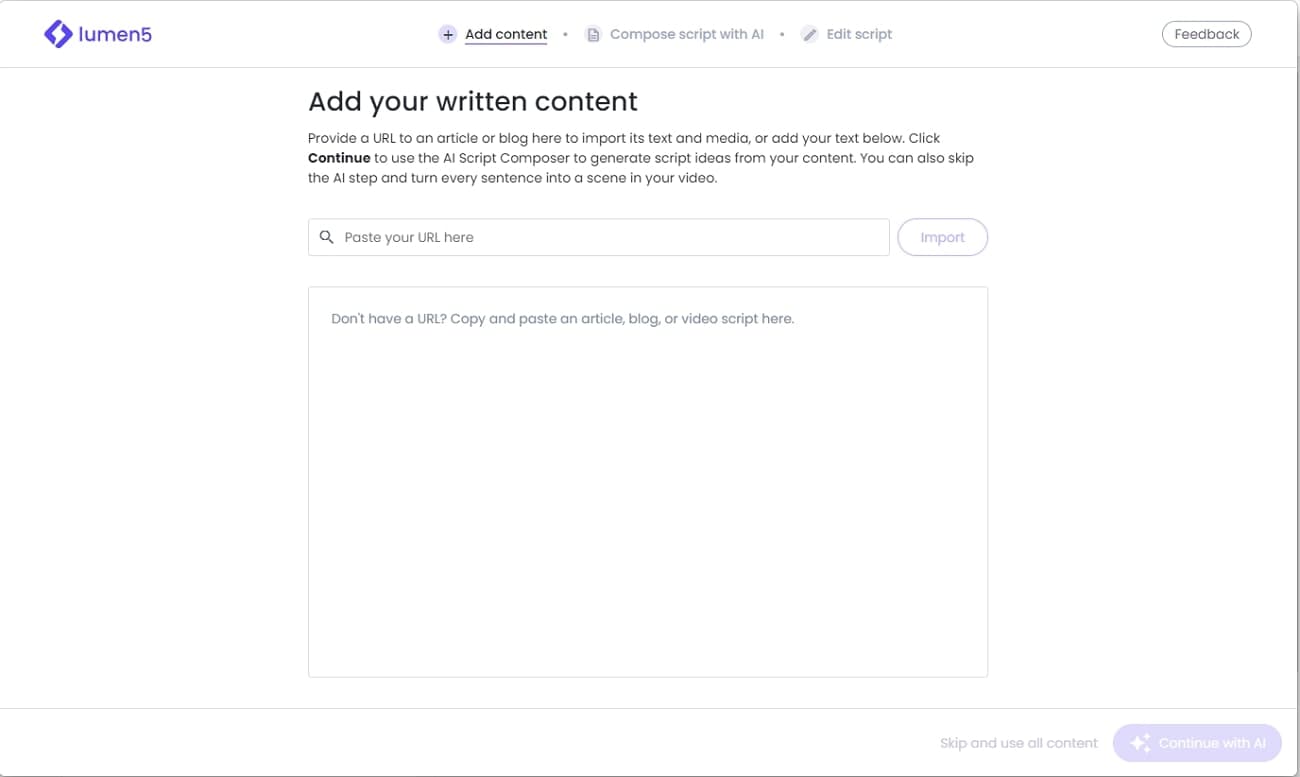
3. Lumen5
Another web-based tool that can also be used as aYouTube description generator AI is Lumen5. It is a resourceful platform to help creators make engaging video content. The tool offers an intuitive interface with easy-to-use features that make editing easy.
Lumen5 provides a broad library of assets. Thousands of images, videos, and audio are available to take your content to the next level. You can do everything from content marketing to communication and education with Lumen5.
Main Features
- Lumen5 offers around 500 million royalty-free assets. You can use its vast library of stock photos and videos to boost your content.
- The tool can help convert your blog posts or Zoom transcripts into captivating videos. Lumen5 can automatically obtain content from your link to create engaging visuals.
- You can automatically generate captions for your clips using Lumen5. Further options for customizing, such as fonts and colors, are also available on the online platform.
Pricing Plans
| Basic | $29/month |
|---|---|
| Starter | $79/month |
| Professional | $199/month |
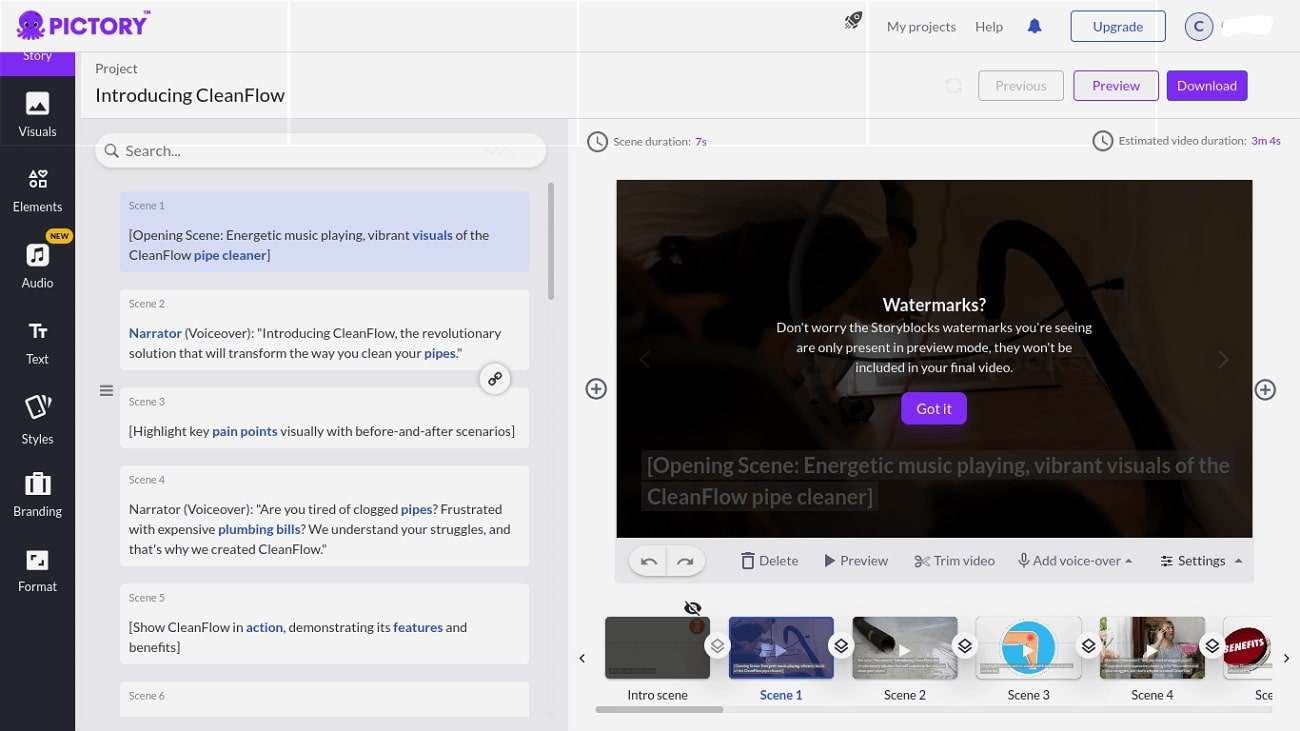
4. Pictory
Pictory is an efficientscript to video generator AI tool. It uses the power of artificial intelligence to make your video production fast and affordable. Pictory comes loaded with useful features to help you highlight the main parts of your long-form videos using AI.
The tool contains multiple stock assets to generate one-of-a-kind video content. From adding captions automatically to transforming blogs into videos, Pictory can help you do it all. This simple yet powerful tool can upscale your content in minutes.
Main Features
- Pictory offers some remarkable assets for AI videos. You can choose from over 3 million video clips, images, and 15,000+ audio tracks.
- To create highlight reels or YouTube Shorts, Pictory offers the perfect solution. You can use thisYouTube transcript AI tool to easily trim the best part of your long videos.
- You can extract text from videos or transcribe scripts in minutes using Pictory. Thus, you can text record webinars and Zoom calls easily.
Pricing Plans
| Standard | $23/month |
|---|---|
| Premium | $47/month |
| Teams | $119/month |
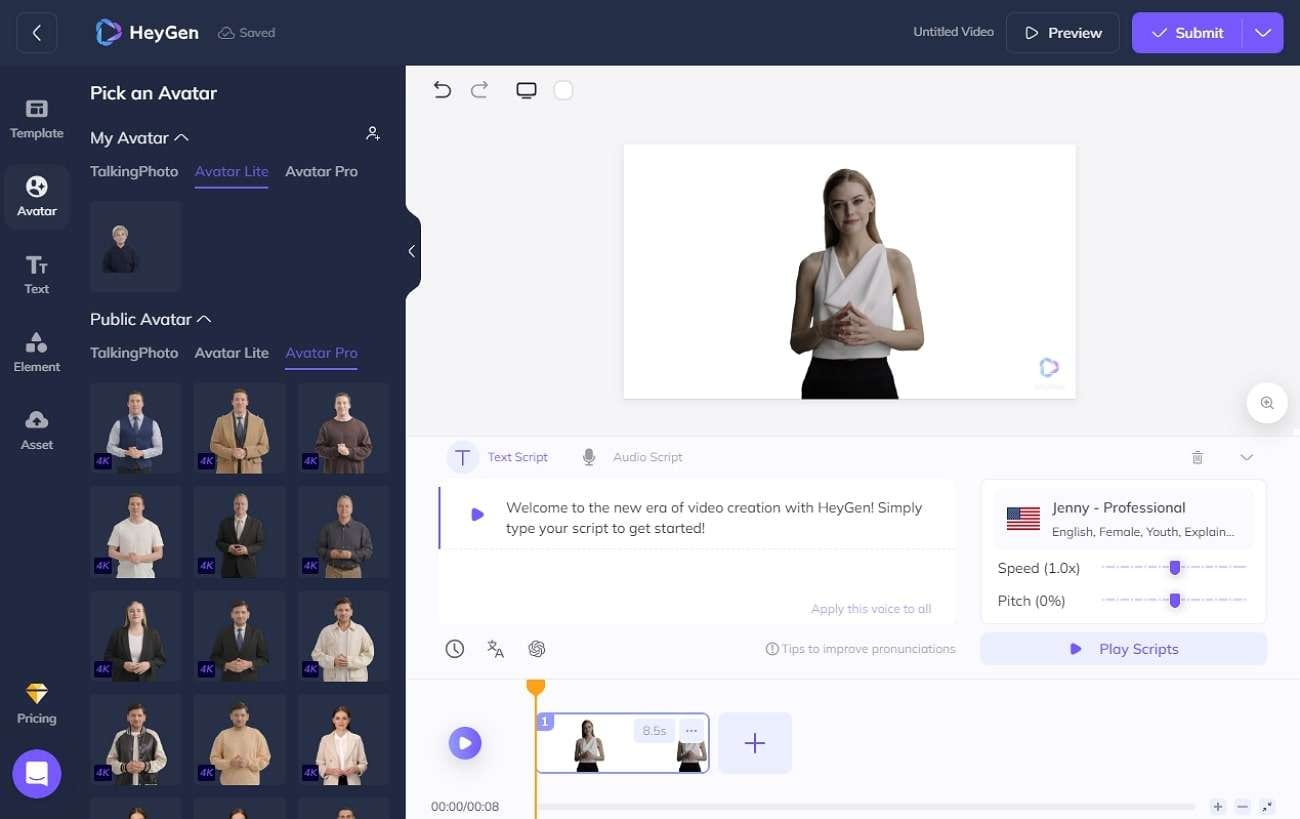
5. HeyGen
Another remarkable AI tool that can help breathe life into your scripts is HeyGen. ThisYouTube description generator AI for free tool can scale up your video production. HeyGen provides a quick and easy solution with customizable AI avatars and creative templates.
Within a few minutes, HeyGen can create top-quality AI videos. You can also change the clothes of your AI avatars to customize them according to your marketing campaign. It even allows you to swap the face of the AI avatar with yours to make the video more realistic and unique.
Main Features
- HeyGen offers more than 100 AI avatars you can choose from. You can also create your own characters from scratch using the tool.
- The platform offers remarkable multi-lingual support for videos. Users can choose from more than 300 voices available in 40+ languages on HeyGen.
- HeyGen offers a strong voice cloning feature. The powerful AI tool can perfectly replicate your voice in 8 languages with 2-10 minutes of audio input.
Pricing Plans
| Creator | $29/month |
|---|---|
| Business | $89/month |
Closing Words
In a world driven by digital engagement, it is imperative to harness the power of these AI tools. It is evident that these platforms provide a path to innovation and boundless creativity. These topscript-to-video maker AI tools are all you need in today’s fast-paced environment to make your content stand out.
However, if you want to know the best AI script-to-video tool, we recommend downloading Virbo or using it online. This tool comprises all the latest and innovative AI algorithms to make your videos stand out.
Generate Video Online Download APP Now Free Download
Also read:
- New Common Platforms for Live Streaming | Virbo AI Live Stream for 2024
- New Best 4 Elon Musk Voice Generators to Make You Sound Like the Billionaire for 2024
- Updated 2024 Approved A Comprehensive Guide for Free Video Translator Downloading
- Updated 2024 Approved A Step-by-Step Guide on How to Promote YouTube Channel
- In 2024, AI Avatar | Wondershare Virbo User Guide
- Updated 2024 Approved Live Commerce Success Stories Lessons Learned & Predictions for the Future
- In 2024, Top List Best Livestream Shopping Apps Of
- Updated In 2024, The Ultimate Guide to Learning All the Details About Voice Cloning
- New Create AI Avatar Video with AI Script | Wondershare Virbo for 2024
- New AI Voice | Wondershare Virbo Online
- New In 2024, The Best Translator to Translate Videos Online
- Updated 2024 Approved Top 10 Robotic Voice Generators (with Comparison Table)
- A Guide on Starting Private Live Streams on YouTube for 2024
- Top 10 Text-to-Video AI Generators to Create Engaging and Captivating Videos
- New In 2024, Top 5 AI Movie Script Generators
- Free MSNBC Live Online Stream for the Latest Shows for All Devices for 2024
- Gmail Not Working on Realme Narzo N53 7 Common Problems & Fixes | Dr.fone
- In 2024, 3 Facts You Need to Know about Screen Mirroring Realme C51 | Dr.fone
- In 2024, How to Get and Use Pokemon Go Promo Codes On Asus ROG Phone 8 Pro | Dr.fone
- In 2024, How to Transfer Contacts from Poco C50 to Other Android Devices Using Bluetooth? | Dr.fone
- Catch or Beat Sleeping Snorlax on Pokemon Go For Xiaomi Redmi A2 | Dr.fone
- In 2024, How to Display Apple iPhone 8 Plus Screen on PC Easily? | Dr.fone
- In 2024, Is Fake GPS Location Spoofer a Good Choice On Infinix Smart 8 Plus? | Dr.fone
- Restore Missing App Icon on Poco C50 Step-by-Step Solutions | Dr.fone
- In 2024, Everything You Need To Know About Unlocked iPhone 11 Pro Max | Dr.fone
- In 2024, How to Transfer Data from Oppo A1 5G to BlackBerry | Dr.fone
- 3 Easy Solutions to Hard Reset Oppo Reno 9A | Dr.fone
- 9 Best Free Android Monitoring Apps to Monitor Phone Remotely For your ZTE Nubia Z60 Ultra | Dr.fone
- How to Fix Android.Process.Media Has Stopped on Realme Narzo 60 5G | Dr.fone
- Forgot iPhone 15 Pro Max Password? – Here are the Best Solutions | Stellar
- How To Change Your SIM PIN Code on Your Honor X9a Phone
- How to Fix Android App Not Installed Error on Nubia Z50S Pro Quickly? | Dr.fone
- Title: New Create AI Avatar Video for 2024
- Author: Sam
- Created at : 2024-06-08 05:32:43
- Updated at : 2024-06-09 05:32:43
- Link: https://ai-voice-clone.techidaily.com/new-create-ai-avatar-video-for-2024/
- License: This work is licensed under CC BY-NC-SA 4.0.
