
New Best Toolbox to Translate YouTube Videos to English Subtitles
Best Toolbox to Translate YouTube Videos to English Subtitles
As we all know, English is the universal language spoken by the majority of people. If you are looking for the best translator that helps you to translate YouTube videos into English , stick to the article. This guide will help you to translate YouTube videos or any type of video in multiple languages. If we talk about YouTube videos, you can translate the captions, titles, descriptions, and videos without any hassle.
Part 1: Best Tool to Translate YouTube Videos to English Subtitles - Virbo
If you want to create catchy YouTube videos with less time and effort and make them accessible to people, then go for Wondershare Virbo . Expand your connectivity bytranslating YouTube videos into English and adding subtitles to them. Subtitles will help deaf people who can’t listen to your videos. Virbo is cross-platform which means you can access its functionality online also on desktop and mobile devices.

All-In-One Platform to Translate Videos
Have you ever wondered why you need a translator to translate the videos? People are living across the world and speak multiple languages. If you are creating YouTube videos, you must know it requires a lot of time to edit videos. You cannot translate videos manually because it is difficult to do.
Here, we add a plus point that Virbo offers you to upload your video to its interface and select its original and desired language to translate the video. As we know, English is the only language spoken by many people. Virbo also allows you totranslate YouTube videos into English subtitles or in other languages.

Key Features of Wondershare Virbo
- Translate Video with a few clicks: Easily translate your videos, which replicates your authentic voice and mannerisms, ensuring smooth delivery in different languages.
- Generate Script for Your Video: Generate AI scripts in a few seconds in various languages and tones.
- Generate Voice in Multiple Languages: Virbo allows you to select the accent, language, and gender according to your video.
- Cost-effective in Multiple Languages: Virbo offers a user-friendly interface under the budget. You can translate YouTube videos to English subtitles for free.
- Add AI avatars to the Video to Promote Your Brand: It provides 300+ real human avatars’ voices and languages.
Pros of Wondershare Virbo - Video Translator
- Accurate Translation: Virbo uses advanced translation technology to ensure accurate and reliable translation of video content from one language to another.
- Multiple Language Support: Virbo supports translation into multiple languages, allowing you to reach global audiences and expand your reach across different language-speaking regions.
- Ease of Use: The platform is designed to be user-friendly, with intuitive interfaces and simple controls, making it easy for you to upload, translate, and manage your video content.
- Quick Turnaround: Virbo offers fast turnaround times for video translation, allowing you to efficiently localize your content and reach international audiences in a timely manner.
- Proofread Video Script: Virbo supports proofreading for both the original and translated video scripts to ensure accuracy.
Translate Video Online Download APP Now Free Download
Part 2: Step Guidance to Translate YouTube Video to English
If you are watching YouTube videos in another language and you only understand the English language, what will happen? You will miss the overall conversation from the YouTube video. This step-by-step guidance will help you to translate YouTube videos into English.
1.Auto-translate YouTube video
Step 1: Open the YouTube and play your desired video
When you play your favorite video, go to the right bottom of the video. You will see an icon of CC that helps to translate YouTube videos into English . YouTube translate captions will automatically generate them in the English language.

Step 2: Go to the settings of the YouTube video to translate it
If CC(closed-caption) does not generate the captions in English language, then go to the settings in the bottom right corner.

Step 3: Change the language of your subtitles
You will see an option of subtitles, click on the auto-translate option. A list of languages appears, and select the English language to translate a YouTube video to English subtitles for free.

2.Translate YouTube Video to English Without CC
Sometimes, YouTube auto-translate does not provide accurate results. Due to lack of accuracy, it produces wrong translations. In this case, you will need a trusted translation service that will ensure you translate error-free translations. Whether it’s about translating titles, videos, and subtitles of YouTube videos in English or any other language, try Virbo. We will look at a few simple steps that translate your video in a few seconds.
Step 1: Open the software or download it
Virbo is available online, on desktop, and on iOS/Android devices, which means you can access it on almost various devices. Create an account on it to translate your YouTube videos.
Get Started Online Free Download
Step 2: Open the interface of Virbo
After the installation process, open the interface of Virbo. Go to the Home tab and select the option of Video translator .

Step 3: Upload the YouTube video or choose a language
You will see a new box will appear where you have to upload your desired video from the device. Make sure the voice-overs are clear in the video.
Select the original language of the video and the translated video. You can also enable the option of subtitles, its advanced AI technology will show subtitles along with the video.

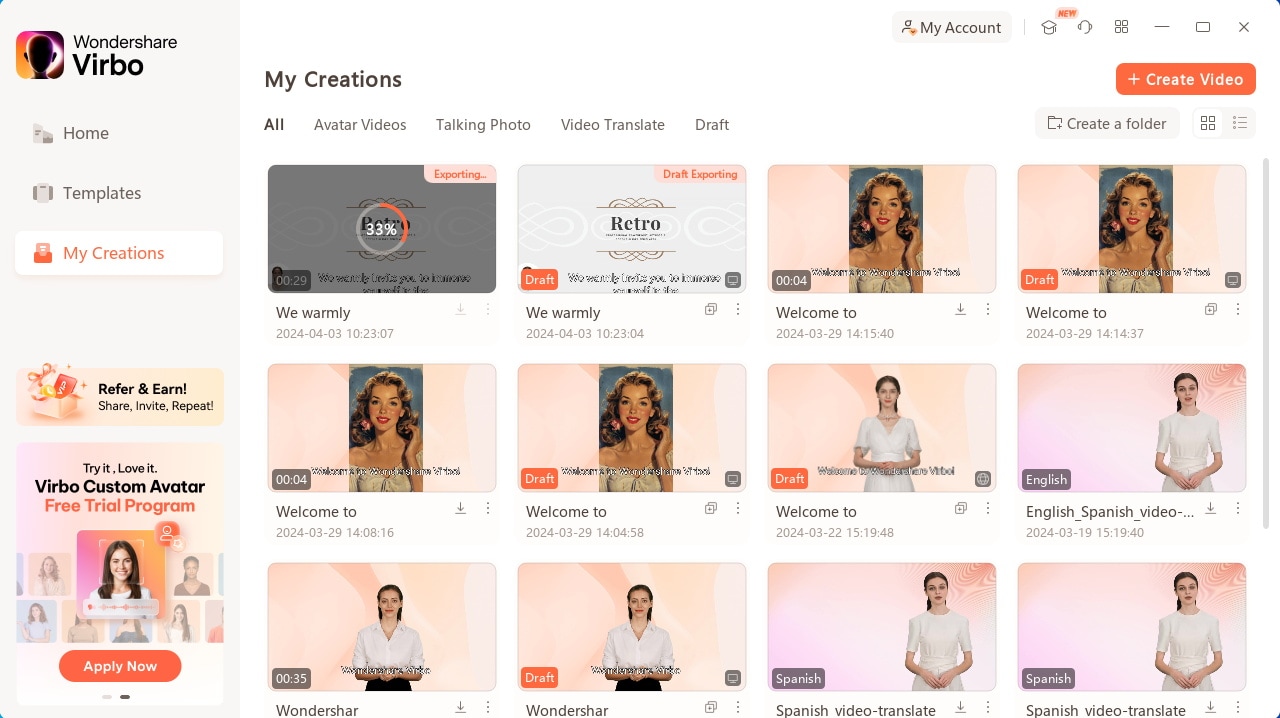
Step 4: Go to My Creations to download the video
Click on the translate button to translate your video. You will see your video in the My Creations tab. Click on the download icon and choose the location to download the video to your device.

Translate Video Online Download APP Now Free Download
3. A Video Guide to Translate YouTube Video to English With A Few Clicks
Translate Video Online Download APP Now Free Download
Part 3: FAQs related to Translating YouTube Videos into English
1. Is there any tool available that translates YouTube videos to English without requiring technical expertise?
Yes, Wondershare Virbo is one of the best AI video generators that provides a user-friendly interface to translate YouTube videos into English. Beginners and professionals can easily enjoy its latest features.
2. How to translate YouTube videos into English with accuracy for free?
Accurate results are the main thing that a user wants. The video translator feature of Virbo ensures the perfect delivery of the translation of the video. This tool is integrated with the latest machine learning algorithms to enhance the quality of overall video.
3. Which software offers translations in multiple languages for free?
Virbo provides a variety of languages to the users for free, so they can choose the original language of the video or translated languages.
Original Video Languages: English, Chinese, Spanish, Arabic, Portuguese, Indonesian, French, Russian, German, Japanese, Italian, Korean, Thai, Filipino, Bengali, Turkish, Dutch, Swedish, Croatian, Romanian, Czech, Hindi, Ukrainian, Vietnamese, Malay, Slovak, Danish, Tamil, Polish, Greek, Finnish, Burmese, Urdu
Translated Languages: English, Spanish, German, Portuguese, Italian, Indonesian, Chinese, Japanese, Arabic, Filipino, Korean, Hindi, Russian, French, Dutch, Turkish, Polish, Swedish, Bulgarian, Romanian, Czech, Greek, Finnish, Malay, Slovak, Danish, Tamil, Ukrainian.
More features and languages for translations will be updated in the future.
Conclusion
Whether you are watching YouTube videos or creating them, sometimes you may need to translate your videos into a specific language to remove the communication barrier. YouTube allows users to enjoy the original video with subtitles and captions. Sometimes, it produces the wrong subtitles of the videos because of the distortions. The best way to avoid this problem is to choose the best tool that allows you to translate the video into your desired language.
Virbo is an AI video generator that provides high-quality videos in specific languages. If you are a content creator and your viewers understand English, give Virbo a try to Virbo. It will translate YouTube videos into English or many other languages.
Translate Video Online Download APP Now Free Download
What Is ChatGPT? | Wondershare Virbo Glossary
What is ChatGPT?
Developed by OpenAI, it’s a cutting-edge language model designed to engage in natural and dynamic conversations with users. Let’s dive into the intricacies of ChatGPT, its capabilities, and the world it opens up.
What Can I Do With ChatGPT?
Users can interact with ChatGPT by asking a wide array of questions and sharing prompts. It’s not just about straightforward queries; ChatGPT is designed to engage in creative, informative, and entertaining discussions. Users can seek explanations, brainstorm ideas, get writing assistance, create conversational agents, and much more.
ChatGPT serves as a versatile tool for a myriad of applications:
- Content Generation: Create articles, stories, and essays with ChatGPT’s assistance, exploring various writing styles and tones.
- Learning Aid: Receive explanations and clarifications on complex topics, making learning more interactive and accessible.
- Idea Exploration: Brainstorm ideas for projects, products, or creative endeavors by conversing with ChatGPT.
- Programming Help: Receive coding suggestions, debug assistance, and explanations for programming-related queries.
- Language Translation: Translate phrases and sentences into different languages, bridging communication gaps.
What are the limitations of ChatGPT?
While ChatGPT is a remarkable achievement, it’s important to acknowledge its limitations:
- Lack of Context: ChatGPT doesn’t have memory of past interactions in a conversation, leading to occasional context gaps.
- Generating Inaccuracies: It can sometimes provide incorrect or nonsensical answers that sound plausible.
- Sensitive Content: ChatGPT’s responses might inadvertently contain biased or offensive content despite efforts to prevent it.
- Over-Reliance on Prompts: The quality of responses can vary depending on how prompts are phrased.
What are the alternatives to ChatGPT?
Several alternatives to ChatGPT exist for various purposes:
- DialoGPT: Another OpenAI creation, DialoGPT specializes in engaging in more coherent and context-rich conversations.
- Rasa: A framework for building conversational AI, allowing customization of chatbots for specific needs.
- IBM Watson Assistant: An AI-powered chatbot platform that integrates with various business applications.
Conclusion
ChatGPT, the brainchild of OpenAI’s innovation, is transforming the way we interact with AI. From creative brainstorming to educational support, it opens doors to endless possibilities. However, it’s crucial to approach its insights with discernment, understanding its limitations. As technology evolves, ChatGPT and its alternatives continue to shape the landscape of AI-driven conversations, bridging the gap between human and machine communication.
Top 5 TikTok Voice Generators You Should Try
TikTok text to speech generators are becoming a more widely used tool for producing voiceovers in a variety of applications. These computer systems transform written text to speech that may be altered to seem younger, older, or more accented. TikTok voice generator are commonly used to make speech simulations for virtual assistants, audiobooks, and videos because to their capacity to produce realistic voice simulations.
Fortunately, you no longer need to record your own or other people’s speech. Now, text can be directly converted into speech using AI voice generator. You may utilize a variety of AI voice generators for your personal or professional needs. However, some are superior than others. In this article, we’ll evaluate the overall effectiveness, usability, and features of three top AI voice generation software.
Taking this further, here are the finest five AI based TikTok voice over generators. Let’s get to know these tools so you can decide the best fit.
Part 1. Use Text to Speech Generator on TikTok
If you’ve ever navigated through TikTok, you may have noticed the artificial voice that sometimes goes with subtitles. The text-to-speech option is a fantastic method to give your movies some more context, utilize a voiceover if you’re not confident narrating yourself, and more. As an accessibility tool, text-to-speech enables TikTok producers to add an automatic voice to read aloud subtitles that have been typed down.
Steps to Use Text to Speech Generator on TikTok:
Let’s delve into the steps required to use TikTok’s text to speech generator:
Step 1. To use text-to-speech on your next TikTok, just record or submit a video as normal up to the point of editing. For text to be added to your video, use the “+” symbol.
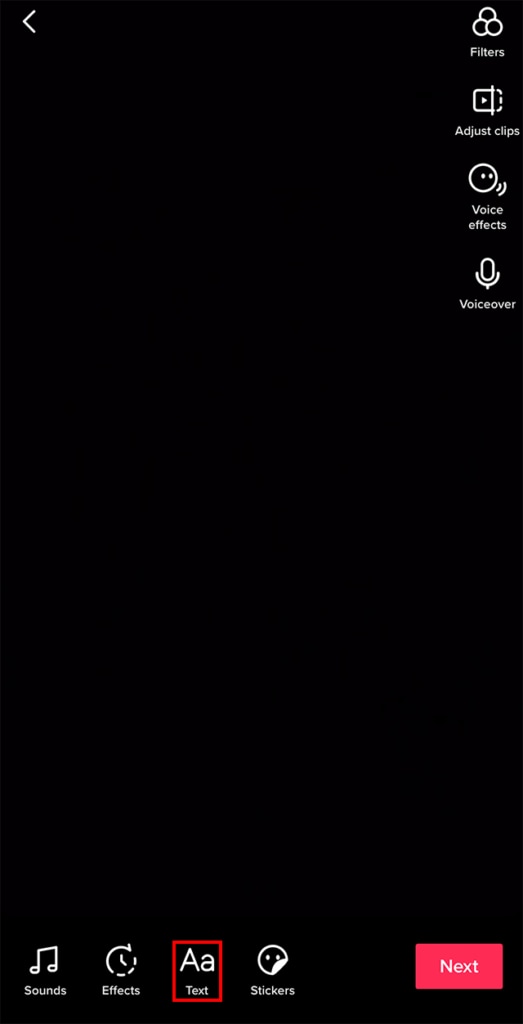
Step 2. In the next step, click the symbol from the left that resembles a talking head to choose text-to-speech. Once you’ve chosen the symbol, a little tick should appear next to it to show that text-to-speech has been implemented.

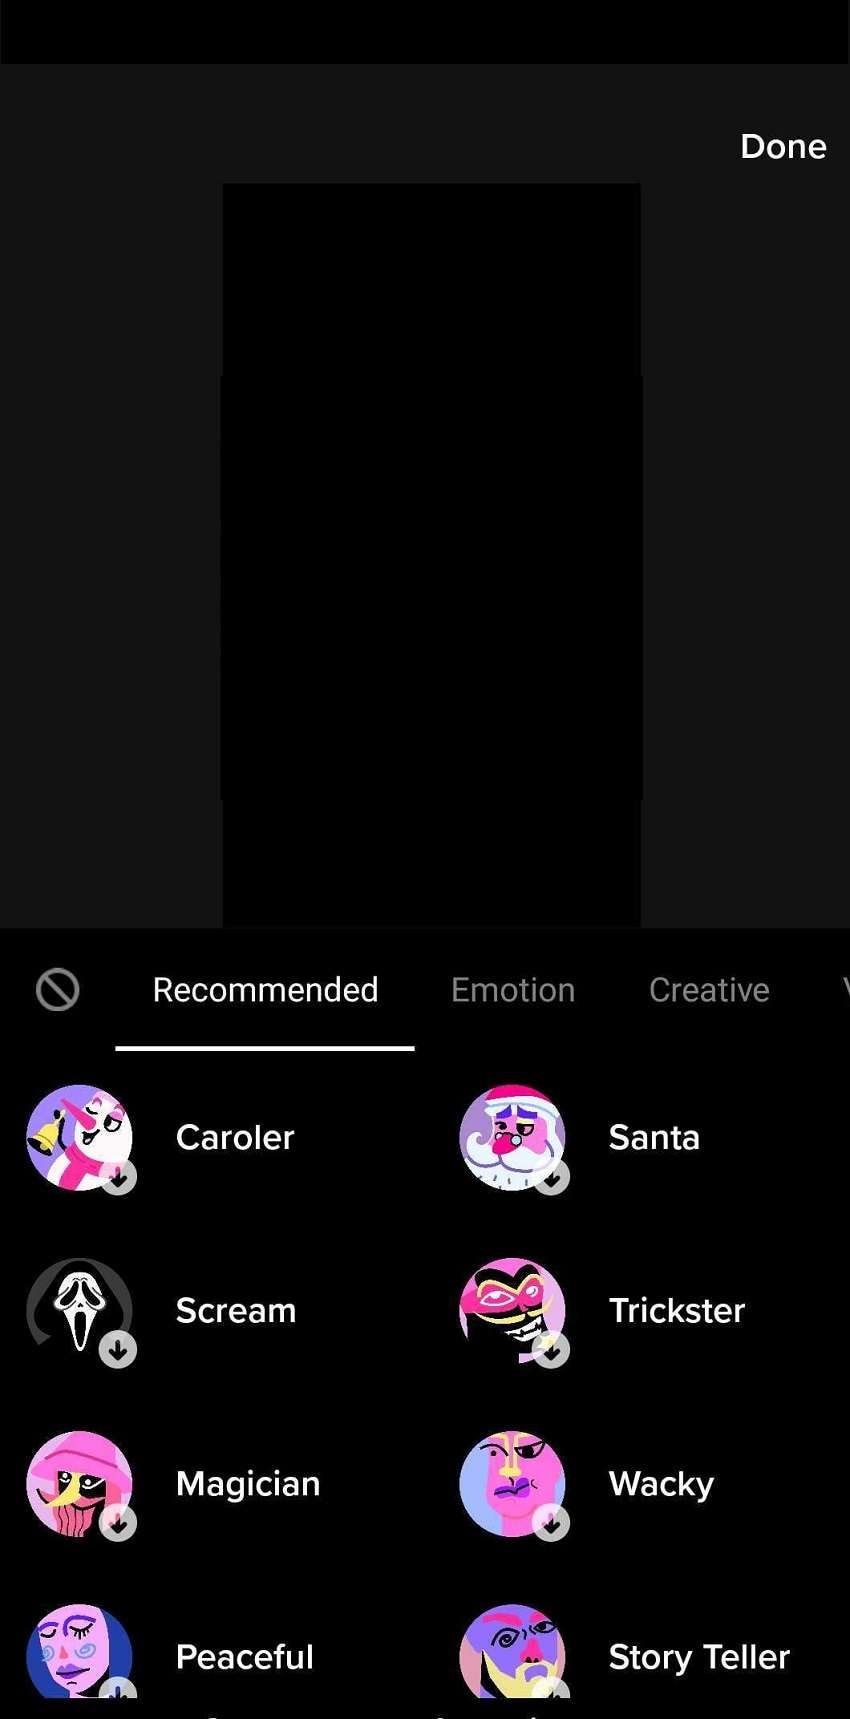
Step 3. After selecting your text, pick Change voice from the drop-down menu. Then, you’ll witness a collection of the most well-known voices.
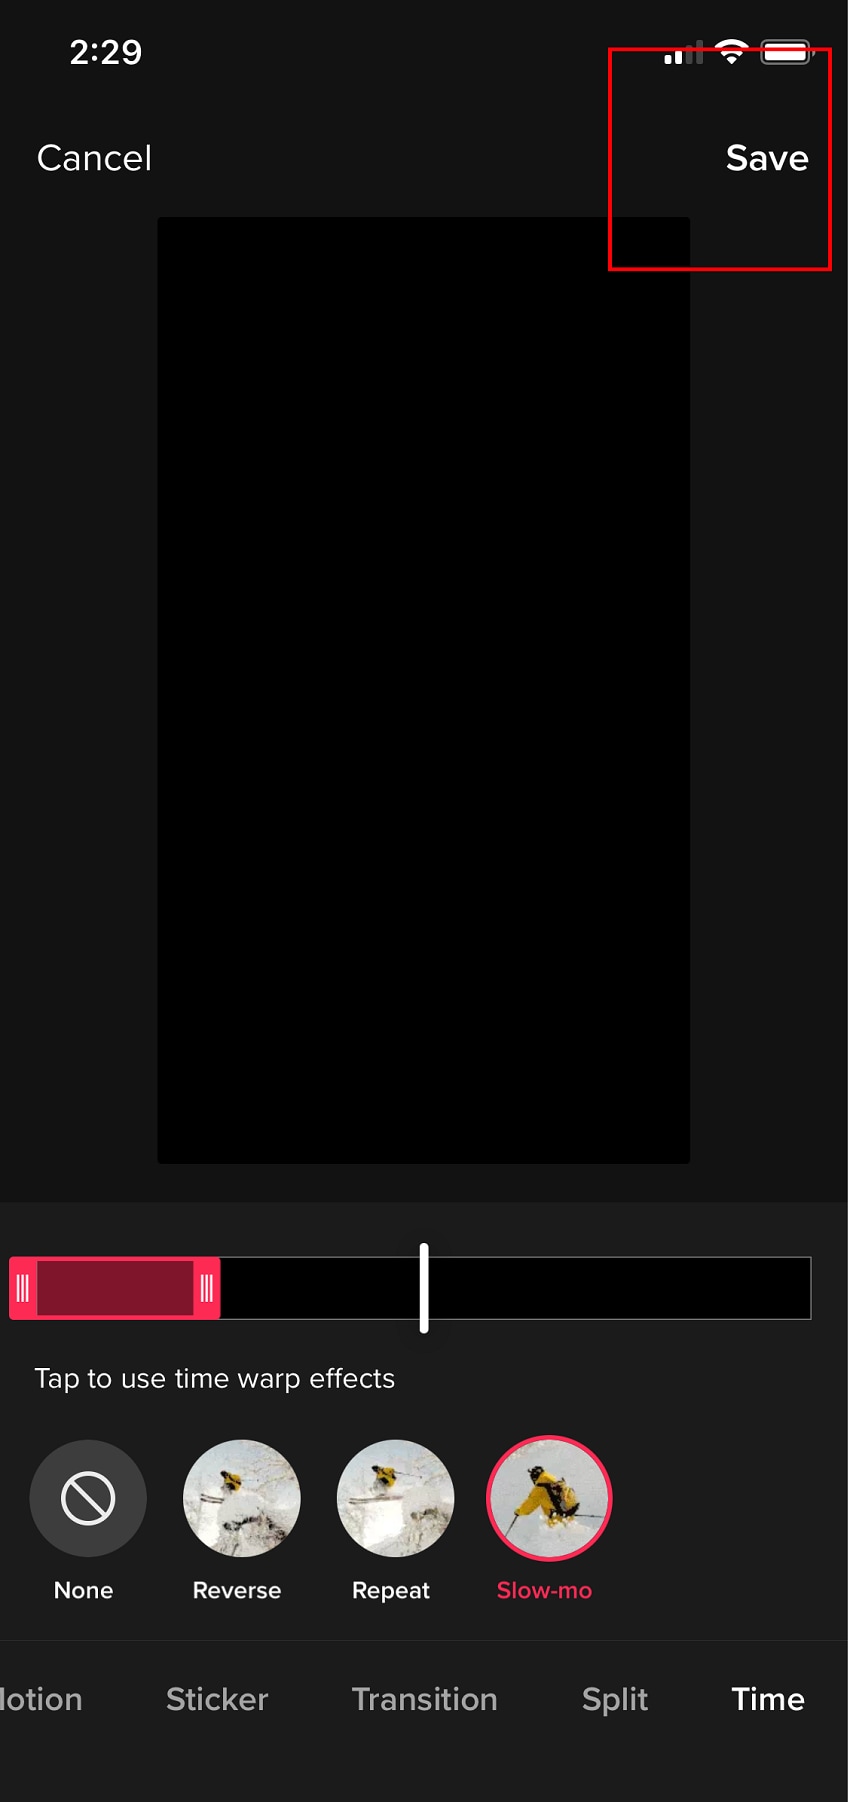
Step 4: After choosing your preferred voice, clickSave in the upper right corner. Save the audio clip if you like the way it sounds so you may use it in next videos.
Part 2. Try best 5 TikTok voice generators
Are you curious as to how you may utilize this functionality. We have five excellent examples that demonstrate how businesses just like yours are currently using TikTok text-to-speech.
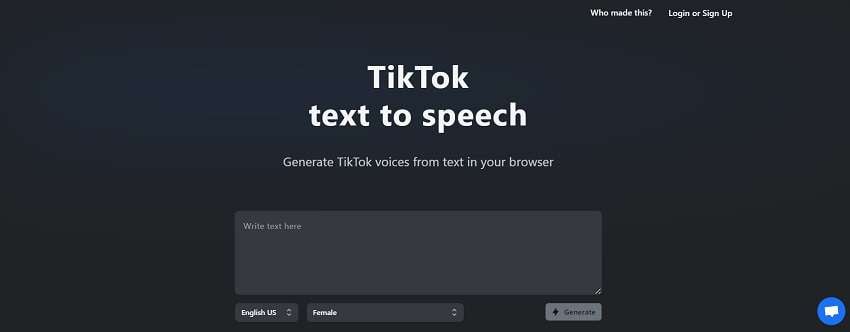
1. TikTokTTS
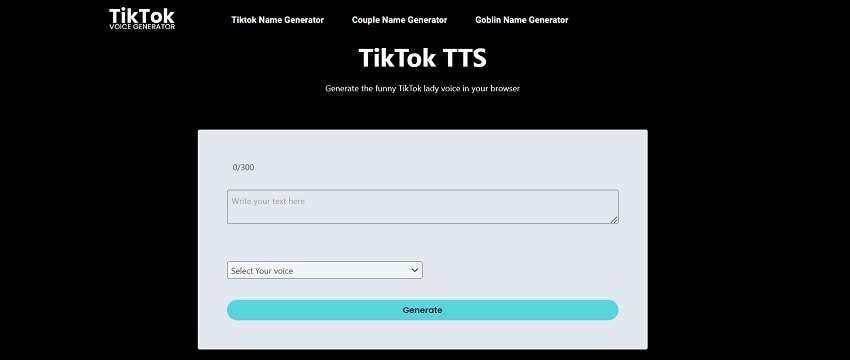
The Text-to-Speech function on TikTok is a fantastic accessibility feature for persons who have reading and vision problems as well as a tool for producing entertaining video. It’s not as difficult as it seems to add text-to-speech to a TikTok video, and it only takes a few minutes of your time. Just make use of the TikTok smartphone app. If you’re searching for an AI speech generation tool, TikTok is a fantastic solution.
Its robust online text-to-speech editor makes it simple to turn your content into audio. The audio may then be modified by adding different speech patterns and pronunciations. The process of converting input text into audio is often real-time, requiring just a few minutes. In addition, TikTok gives users the option to customize pre-existing speech models or choose from a library of them to get the desired outcomes.
Key Features
- You can create conversation-like voiceovers by using different voices;
- TikTokTTS has a large library of languages, accents, and AI voices;
- You can customize and use emotional speaking styles;
- With TikTokTTS, you can turn your text into audio and video with an AI presenter;
- You can also listen to the AI voice narrating your text before creating the audio and video;
2. TikTok Voice Generator
TikTok Voice Generator is ideal for you if you’re interested in utilizing AI for voiceover projects but still want to utilize your own voice. You may upload, write, talk, and create your very own AI voice using the web-based platform, which is built from your genuine voice. While it does provide a variety of voices for you to choose from, TikTok Voice Generator may assist you in creating a voice that is genuinely distinctive.
From text or your own speech, you may create your own AI voice using TikTok Voice Generator. You may generate unique and customized audio for your next piece of content using their editor, which enables you to add inflections, emotions, and language conversions.
Key Features
- TikTok Voice Generator supports unlimited projects, users, and audio downloads,
- It has a quick voice cloning online,
- It supports real-time caption generation for more accessible videos.
- You can generate and produce unique AI voices using your audio recordings.
3. Speechify
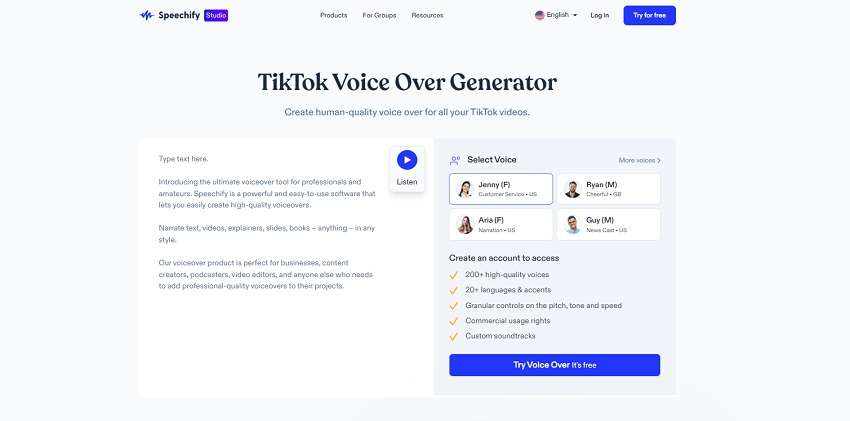
Speechify converts written text into high-quality, natural-sounding audio. Voice speed may be changed, and you can choose from a number of voices and dialects, among other options. Speechify can import documents from a variety of sources. It allows you a great deal of control over the voices themselves in addition to enabling you to create believable AI voices.
Additionally, Speechify merges many Voice AI technologies into a single, user-friendly program for robotic voices. The Speechify platform can highlight text while it is being read, if that is what you prefer. You have complete control over every aspect of speech, including language choice, accent, pace, and intonation. Additionally, the UI is user-friendly, so getting started won’t be difficult.
Key Features
- Speechify produces voiceovers of the highest caliber in a variety of languages;
- It is compatible with Apple and Android devices as well as Chrome;
- Speechify has advanced tools for highlighting, taking notes, and importing
- You can also generate robotic voices using AI-based cutting-edge technology.
- Speechify can modify playback and listening rates to boost output
4. Text to Speech Robot

For individuals seeking excellent AI-generated voice, Text to Speech Robot is a fantastic solution. The tool is simple to use and delivers excellent outcomes. Additionally, it provides a wealth of customizing possibilities, enabling users to produce synthetic voices that sound authentic and genuine. The user interface is simple to use and contains all the tools you want for editing both audio and visual content.
Using Text to Speech Robot, you can choose from a variety of male and female voices on Robot platform to create the ideal voice for your project. In order to convert text into computer-generated audio recordings that may be utilized for podcasts, videos, and other media, it makes use of advanced artificial intelligence technologies.
Key Features
- Text to Speech Robot enables you to adjust the synthesized voice’s pitch and pace.
- Both the editor and app are simple to use.
- The generated voice quality by Text to Speech Robot is really good.
- It regularly refreshes its voice collection, giving you access to the newest and best voices.
5. Wavel.AI
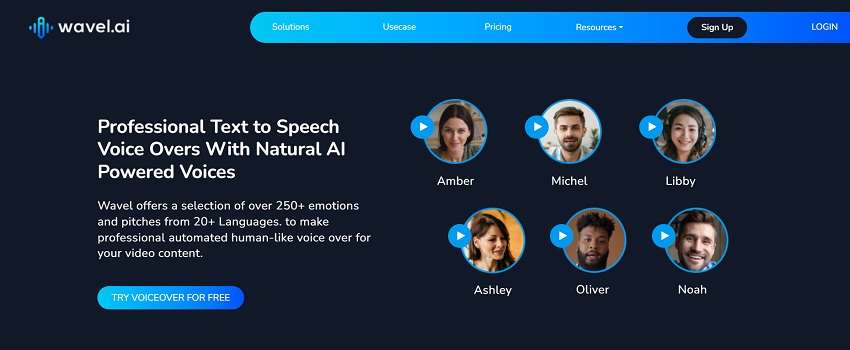
One of the greatest tools for AI voice generating in video making is Wavel.ai. From the convenience of your online browser, the editor enables you to cut, combine, import, and record video clips. Their text-to-speech function lets you input text and create AI-generated voiceovers for your video projects in addition to editing videos. You can also modify the speed, cut, and clip the audio created after inputting your text in the Wavel.ai editor.
To assist you make accessible videos for your audience, you may also use your voice to produce subtitles. The most sophisticated tools for modifying and utilizing AI voices are not available on Wavel.ai since it is not a platform that generates AI voices independently. However, the platform might help individuals who want the option of AI-generated voiceovers for their videos.
Key Features
- It can control voice speed, style, pitch, and volume.
- ai has 250+ emotions pre-installed and ready-to-use in voiceovers
- ai provides real-time feedback is provided through the Speaker Coach tool to enhance voiceovers.
- It can generate real-time subtitles to make videos that are more accessible.
Part 3. Impacts on TikTok Content Creation
AI voice generators will only grow and broaden as AI technology develops more. By include the TikTok voice generator in your video marketing plan, you’re making an investment in a flexible, scalable solution.
1. Virality and Trending Content
Utilizing the TikTok voice generator, you may modify your voiceovers to better appeal to the tastes of your target audience. Around 88% of users, according to TikTok research, believe that sound is a crucial component of the TikTok experience. Hence paving the way to create a viral content using TikTok text to speech generator.
2. Influencer and Creator Utilization
TikTok’s voiceover generator feature makes it simple for content producers to make sure their videos appeal to a larger audience while also offering a more inclusive experience overall. With the use of TikTok’s voice over feature, users may offer an instruction or narrate a tale via their video without having to actually talk. It works well as a means of conveying a message without manually documenting it.
3. Accessibility and User Experience
The text to speech tool on TikTok enables producers to produce material in a variety of languages and dialects as well as to add various voice effects to make the video more engaging and interesting. This enables content producers to reach a larger audience and make their work more accessible and enjoyable for all users.
Bonus Tips – Your best text to speech generator for TikTok
Considering the bonus top to create text to speech using the easiest tool, Virbo is your best bet. The Virbo Text-to-Speech is one of them. Because it saves video makers from having to record their own voiceovers or utilize third-party text-to-speech applications, TikTok is one of the most popular editing tools. You don’t need any training or specialized expertise to utilize Virbo Text to Speech because of its user-friendly interface.
Get Started Online Free Download
If you often have difficulties with TikTok’s native text-to-speech feature, then Virbo is the tool you should look for. It is an AI-based software available for both Windows and Mac OS. In addition to text to speech generator, Virbo provides you additional functionality and freedom to record innovative voiceovers for your TikTok videos that are of a high quality.
Key Features
Here are some of the top-notch features of Virbo that makes it stand out from the competitors:
- Accessibility:
It is accessible on different devices. Virbo makes sure that users who may have trouble recording their own voiceovers or those with speech-related problems can still participate in content production by offering an automated voice function.
- Engagement:
Virbo text-to-speech generator can offer a distinctive element to your TikTok text to speech videos thereby boosting engagement and shareability.
- Productivity:
By instantaneously converting text input into voice, Virbo’s text-to-speech function streamlines the video production process, saving you a ton of time.
- Handy Usage:
With Virbo, you can utilize the ready-to-use voiceover templates to generate your favorite TikTok voiceover. It has a variety of genres as well as characters to be chosen from.
- Creativity:
Virbo TikTok voice generator gives you the option to choose from a variety of voices and accents in place of your own voice, giving you more creative options.
- Video Editing:
Virbo enables you to edit your TikTok videos in addition to TikTok voiceovers. It has Avatar editor as well as text editor to polish your TikTok videos handily.
Generate Engaging
AI Video in Minutes!
Easily convert text into professional spokesperson videos in over 120+ voices & languages in minutes.
Generate AI Video Free Generate AI Video Now
google-play ](https://app.adjust.com/1187btki%5F11xz9mlt ) app-store ](https://app.adjust.com/1187btki%5F11xz9mlt )

Conclusion
The sophistication of AI speech generators is rising, and a number of businesses claim that their AI is appropriate for voice cloning. TikTok currently boasts more than one billion monthly active users, making it one of the most widely used social media platforms globally. Even while the technology is still in its infancy, it’s not impossible to picture a day when artificial intelligence-generated sounds are almost indistinguishable from human voices!
Although there are numerous AI speech generators available, the ones we’ve selected here have the greatest functionality, adaptability, and usability. It might be challenging to choose the best solution given the wide range of choices. Virbo is superior than the other two TikTok voice generators because of its adaptability, wealth of AI voices and resources, and simplicity of sharing.
[Ultimate Guide] How to Live Stream on Facebook?
A lot of people consume Facebook Live content as it provides a fun experience for the audience. Today, Facebook Live is being displayed across all genres. From gaming, vlogging, and sports, to basically anything under the Sun, going live on Facebook has become a new trend.
However, even to this date, a lot of users are confused about how to livestream on Facebook. That is why we have created this guide so you canlivestream on Facebook without any hassle.
Part 1: Easy-to-follow Step Guidance to Start Facebook Live
Facebook Live video is one of the most sought-after features of all time. Not only does it help creators connect with their audience but it lets them generate more revenue, ultimately bringing more money to their account.
Moreover, it is an awesome way to reach a broader audience and let people discover your content in real-time. A lot of people are confused abouthow to use Facebook Live because the methods to use it on the mobile app, the web, and Creator Studio are all different.
So, let’s talk about how togo live on Facebook. Before you start, you should understand that you can live stream to your page, group, profile, and event using the Facebook app or using a camera and streaming software.
01 How to go live on Facebook using a phone
As we have already discovered, you can go live on your Facebook page, group, profile, and event from anywhere in the world. The best way to go about life in the modern world is to use the Facebook app which is available on both Android and iOS.
Here is a complete guide on how to useFacebook Live streaming services on your mobile.
Step 1 Choosing where to go live (Personal Profile, Group, or Page)
The first step is choosing where you want to live. Ask yourself where are you trying to go live. Is it on your personal profile, a Facebook page that you own, or in some group? Navigate to wherever you want to go live.
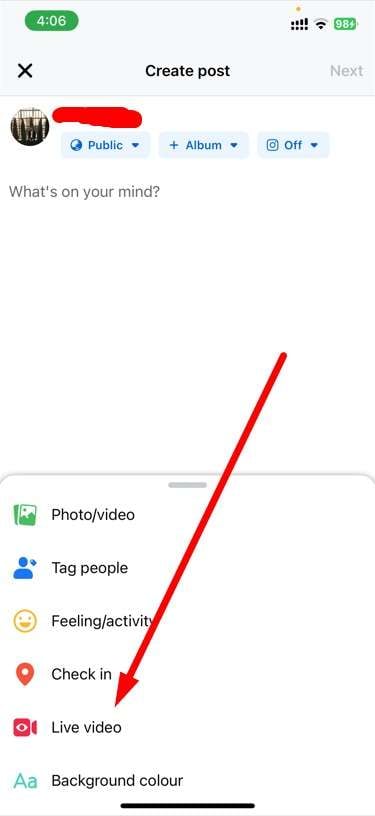
Step 2 Going live
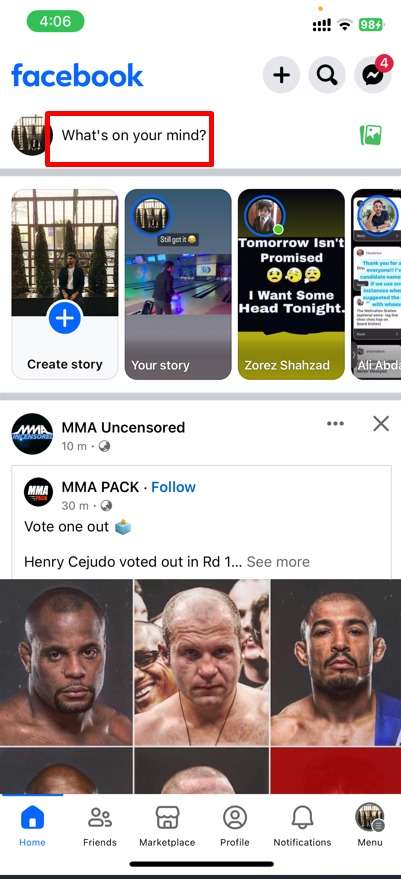
Let’s say that you want to go live on your personal Facebook profile. Then, you need to click on the Facebook app, and click onWhat’s on your mind? SelectLive Video which will be an option available. Now, you will start to see that new features will appear and you will need to set details about your livestreams in the next step.
Step 3 Setting live stream details and going live
Now you will need to give Facebook access to your camera and microphone, add a description to your video, set effects of your liking, and adjust everything accordingly. You can also invite your friends to join and watch the live video. So set those options and click onGo Live.
Step 4 Finishing the live stream
Once you have completed the live stream, simply click theFinish button to end your broadcast. In just a couple of minutes, your livestream will be ready in the form of a video.
02 How to go live on Facebook using the web
When you use the web version of Facebook, you will be redirected toLive Producer , which is a tool that allows you to use higher-end production equipment and streaming software. This happens on both laptops and PCs.
If you are aFacebook live streamer and want to go live using the web, then follow these steps.
Step 1 Find the Live video option on Facebook
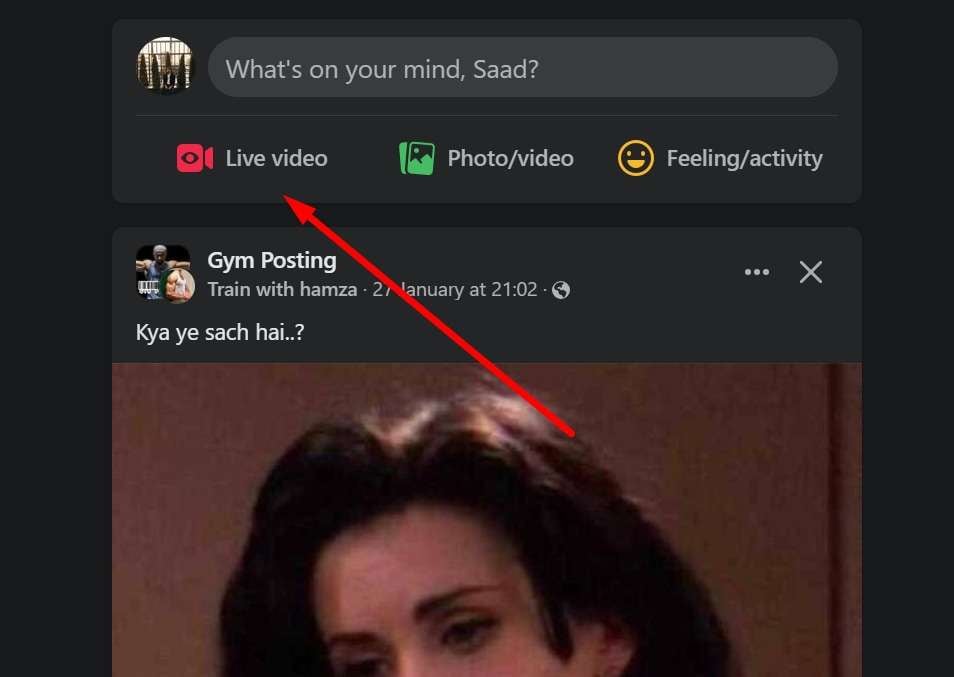
Firstly, you will need to be logged in to your Facebook account. Once you are logged in, at the top of the News Feed, click on theWhat’s on your mind section and click on the three dots action button. There, you will findLive Video which will ultimately redirect you to Live Producer. So click on it.
Step 2 Setting up livestream
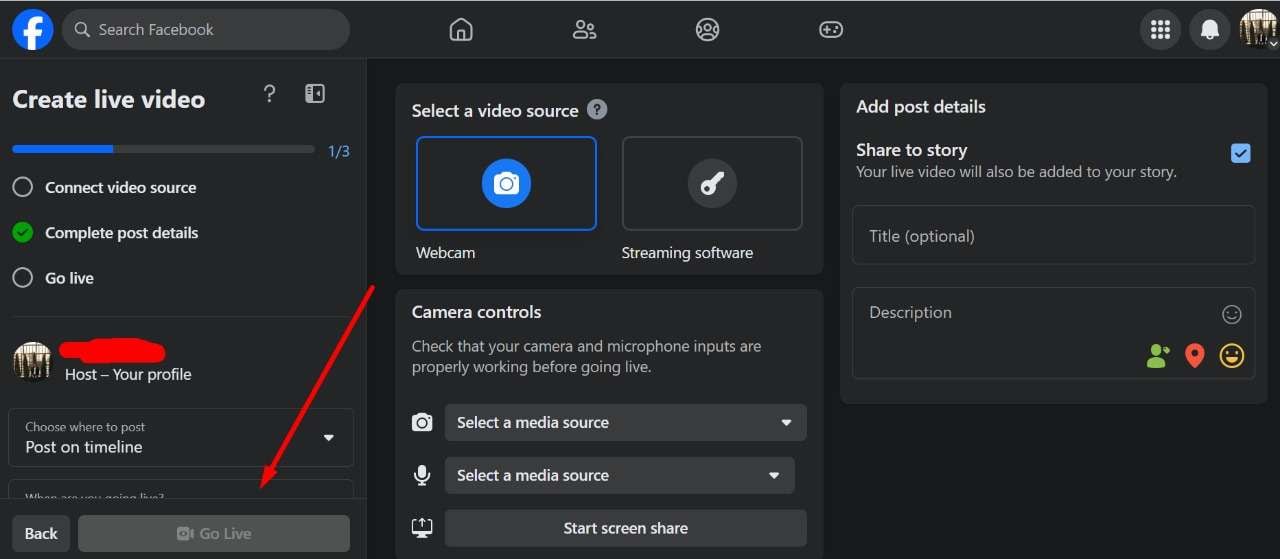
Once you are on Facebook Live Producer, you can add your title, and description, choose the equipment, and set a lot of things right on your Facebook account. You can do this before the live stream starts which is great because you can start live in a professional manner.
Step 3 Start your live stream on Web
Once everything is good to go, simply click onGo Live and you will be able to share your story with the rest of the world. You can also end the live stream whenever you like.
Part 2: Selected Tool to Elevate Your Facebook Live Experience
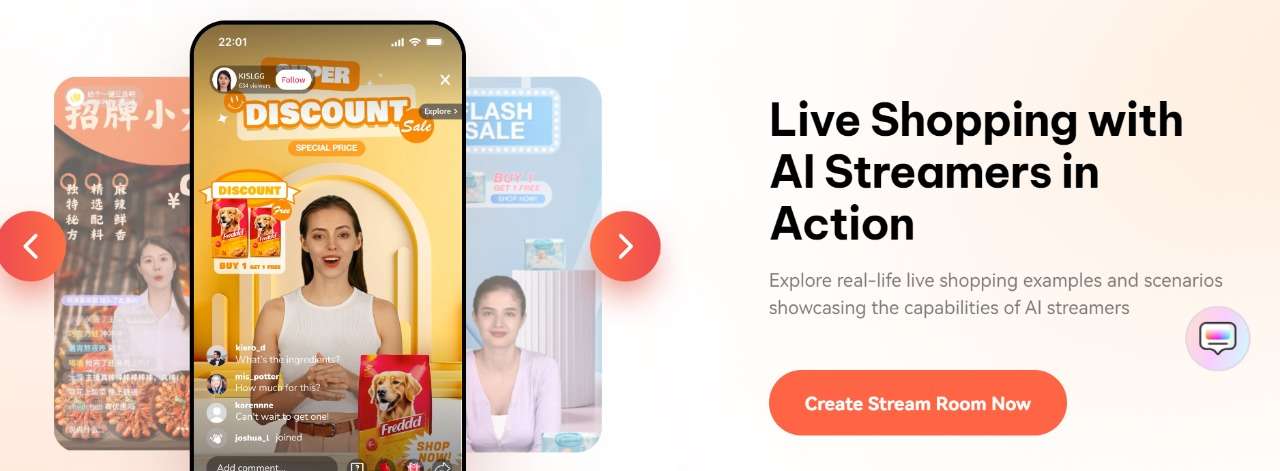
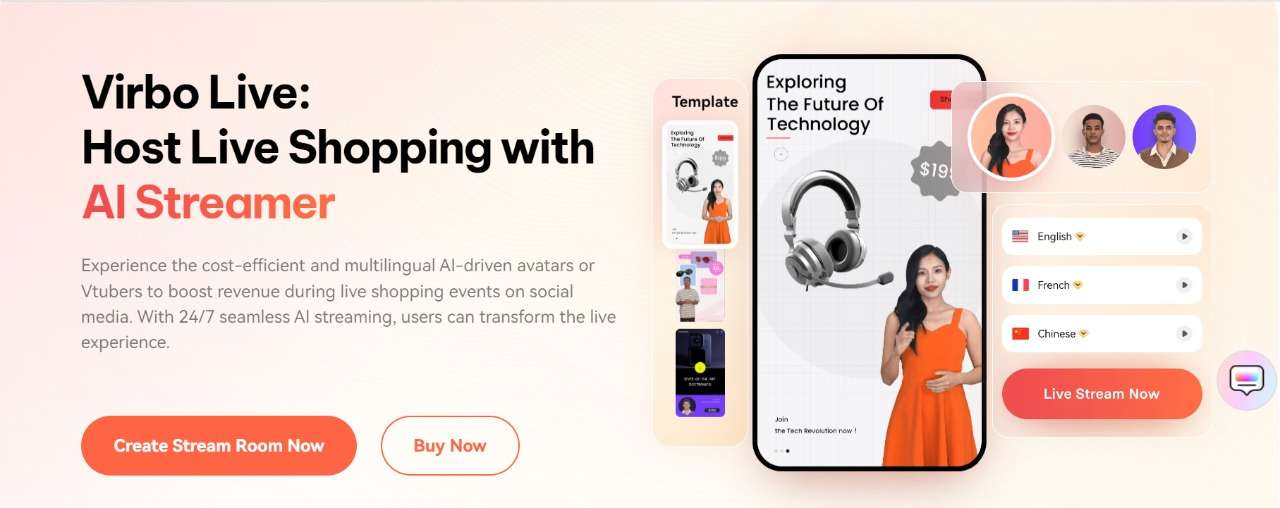
If you want to take yourFacebook streaming to the next level, then you should try Virbo Live . Virbo is an all-in-one AI platform that allows users to create high-quality content with 300+ voices and a plethora of powerful features.
Virbo Live aims to transform the live experience by adding AI into play and improving traditional Facebook live streaming. Using Virbo Live is simple. You need to create a live shopping room where you can create a room or simply select a template. Then, you can choose the AI models and background. You can also choose the text and the voice that you want to be played during the live stream. And lastly, you can interact with your audience in the most user-friendly way possible.
For Facebook live streaming,Virbo Live is one of the most amazing tools that is transforming traditional boring live shopping into an AI-driven shopping experience. Let’s discover some of the features related to Facebook Live.
Features of Virbo Live
- Cost-effective: When it comes to going live on Facebook using the traditional method, you will need a lot of equipment like a camera, mic, and more. With Virbo Live, you don’t need anything because everything is handled by AI.
- 24/7 broadcasting: The regular Facebook live stream can be interrupted but with Virbo Live, you get continuous 24/7 broadcasting without interruptions.
- Live shopping made it easier: Virbo Live makes it easier for brands to showcase their products in the most user-friendly way possible. You can have the AI describe everything as your product gets bought by the audience.
Part 3: FAQs about Facebook Live
1. How do you get to Facebook Live?
You geta live stream on Facebook by using the live streaming feature. To do that, you either need to have a PC, Android, or iOS device. If you are on PC, you can simply log in to Facebook Web. But on mobile devices, you need to have the Facebook app or the Creators app downloaded to go live.
2. Can you watch Facebook Live without an account?
Facebook live videos are public, meaning you can watch them on any device as long as you have the internet. Moreover, Facebook live videos don’t require an active Facebook account to be played as they are usually public.
3. Is Facebook Live stream free?
Yes,Facebook live streaming is 100% free, meaning you don’t have to pay a penny to use any of the features. However, if you use a third-party tool, then you might need to pay to get some features unlocked.
4. Is YouTube Live better than Facebook Live?
Both YouTube Live and Facebook Live are perfect for streaming. However, if your goal is monetization and making money, then using YouTube Live would be better. However, if you want to interact with your audience and make your community grow, then Facebook Live is the best choice.
Conclusion
Facebook streams are a fun and engaging way to interact with the audience. In this guide, we have covered a complete guide that you can follow to get live on your Facebook and reach a broader audience.
And if you want to take your Facebook live streaming to the next level, then a tool like Virbo AI will be perfect for businesses that want to bring in more revenue and reach a bigger audience.
Easy Steps To Create Talking Memoji on iPhone [Free]
If you are an iPhone user, you must have been familiar with Memoji – the digital avatars you often see in your messages. iPhone users usually use Memoji to match their personality and mood, then send them to their contacts.
While Memojis are often seen as static images, you can also record a message using animated Memojis. This will give your friends a delightful surprise when they receive a video of your voice synced perfectly with your Memoji’s expressions.
So, next time you want to send a message to your friends, try to use animated Memojis. First,learnhow to make your Memoji talk here.
Part 1. What is Memoji on iPhone?
Memoji is a digital avatar feature introduced by Apple, available on iPhone and iPad models as long as they support FaceID. You can create your own personalized Memoji that closely resembles your appearance, down to specific details like facial features, hairstyles, accessories, and more.
Once you’ve crafted your Memoji, you can use it across various Apple platforms and apps. For instance, you can use them in FaceTime calls to replace your face with your Memoji or in Messages to send either Memoji ortalking Memoji recordings.
Memoji compatibilities:
Memoji’s compatibility is supported on iOS 12 and newer operating systems, including the iPhone X, iPhone 11, iPhone 12, and later. As for iPads, Memoji functionality is available on the iPad Pro 11-inch or the iPad Pro 12.9-inch (3rd generation) and newer models.

Part 2. How To Easily Make Your Own Memoji on iPhone
Before we get intohow to make your Memoji talk , let’s prepare and make your own Memoji on iPhone first. To create your own Memoji that truly captures your essence, you’ll want to customize it to closely resemble yourself or any characters you had in mind.
Here’s how to make and customize your own Memoji on iPhone:
Step 1: Open the Messages app on your iPhone. Then, compose a new message or open a conversation.
Step 2: In the message, tap the Plus button located to the left of the text field and tap “More” from the list of options.
Step 3: Now, tap the Memoji button and select “New Memoji” from the next menu.
Step 4: This is where the fun begins! Customize the various features of your Memoji to your heart’s content. You have the flexibility to adjust elements such as skin tone, hairstyle, eyes, facial hair, accessories, and more to ensure that your Memoji is a true reflection of yourself.

Take your time to fine-tune each detail until you’re satisfied with the result. Once you’ve completed customizing your Memoji, you’re ready to show its charm across your Apple devices.
Part 3. How To Record and Send Your Memoji on iPhone
Now that you’ve created my personalized Memoji, you may want to ask “how do I make my Memoji talk ”. You can do so by recording with your Memoji and sharing it with your friends. Recording with Memoji can be a fun and creative way to express yourself in your communication.
Follow these straightforward steps on how to record and send your Memoji on iPhone:
Step 1: Make sure that you have a compatible iPhone device as mentioned in Part 1 to access the Memoji feature.
Step 2: Open the Messages app on your iPhone device, and start a new message by tapping Compose. You can also locate and select an existing conversation.
Step 3: While composing your message, tap the Plus button and select “More” from the menu.
Step 4: Locate and tap the Memoji button (which looks like a smiling face). Swipe left to choose the Memoji you want to use for recording.
Step 5: After selecting your Memoji, tap the Record button to start recording your message. You have up to 30 seconds to express yourself. Tap Stop when finished, then send it to your friend. They will receive your Memoji message as an animated video, complete with your voice recording.

But if you want to share yourtalking Memoji outside of the Messages app, you can save the recording to your camera roll and then share it through other messaging apps or social media platforms.
Part 4. How To Make Your Memoji Image Talks
Besides recording your Memoji, you can also animate and maketalking Memoji from a photo using Wondershare Virbo. This is the perfect way if you find recording and sending your own Memoji awkward. Just toss in your Memoji image, and Virbo will do the rest.
Virbo is a multi-purpose video editing tool tailored for producing short videos featuring lifelike avatars using AIGC technology. One of its key features is the ability to generate speaking avatars from images with its Photo Talking feature.
Virbo Photo Talking features include:
- Extensive collection of more than 300 AI avatars for free
- A diverse selection of more than 300 AI voices
- Take advantage of user-friendly tutorials
- Cross-platform compatibility on online, desktop, and mobile applications
- Natural animation and lip synchronization
How to make Memoji talk on iPhone with Wondershare Virbo:
Step 1: Create a new project
After installing Wondershare Virbo , launch the application and select the Talking Photo feature to make yourtalking Memoji .

Get Started Online Free Download
Step 2: Import your Memoji photo
Tap on “Upload a photo” and select the Memoji picture saved on your camera roll.

Step 3: Customize and export your talking Memoji video
Input your desired text and select a voiceover from the options provided below to generate the audio for your video. Alternatively, you can also record your own voice by selecting “record audio”. After completing the video editing process, click on “Generate Video” to export your creation.

If you need help with how to make your Memoji talk , you can refer to the video tutorial.
Conclusion
Memoji is a feature introduced by Apple that allows you to create personalized animated characters, or “Memoji,” which can your facial expressions and movements. These Memojis can be created to resemble you or any character you desire. You can use it in Messages, FaceTime calls, and even as stickers in other apps.
In case you wonder, “How to make my Memoji talk ?” you can achieve it by either recording a video with the Memoji while speaking or you can turn your Memoji image and make it talk using Wondershare Virbo. Virbo’s Photo Talking feature is a user-friendly tool that lets you animate your Memoji image with ease by syncing it with recorded audio.
Get Started Online Free Download
Create Video With PPT
Create Video With PPT
Wondershare Virbo is a comprehensive video-making facility offering a wide set of possibilities to its users. It has recently extended its productivity by offering the option of creating videos out of PPT. With such diverse options to convert PowerPoint to video, you can develop the best visuals for your audience from the available content. Following is a comprehensive step-by-step guide to converting PPT to video with Virbo.
02 Add Avatars and Voiceover To the PPT Video
03 Perform Other Edits to Video
04 Preview And Export Final PPT Video From Virbo
Step 1. Start By Importing Your PPT File
After launching Wondershare Virbo on your desktop, continue to select the “Create Video“ button. As this opens a pop-up, select the “Import PPT“ option on the bottom-left to add your PowerPoint file.
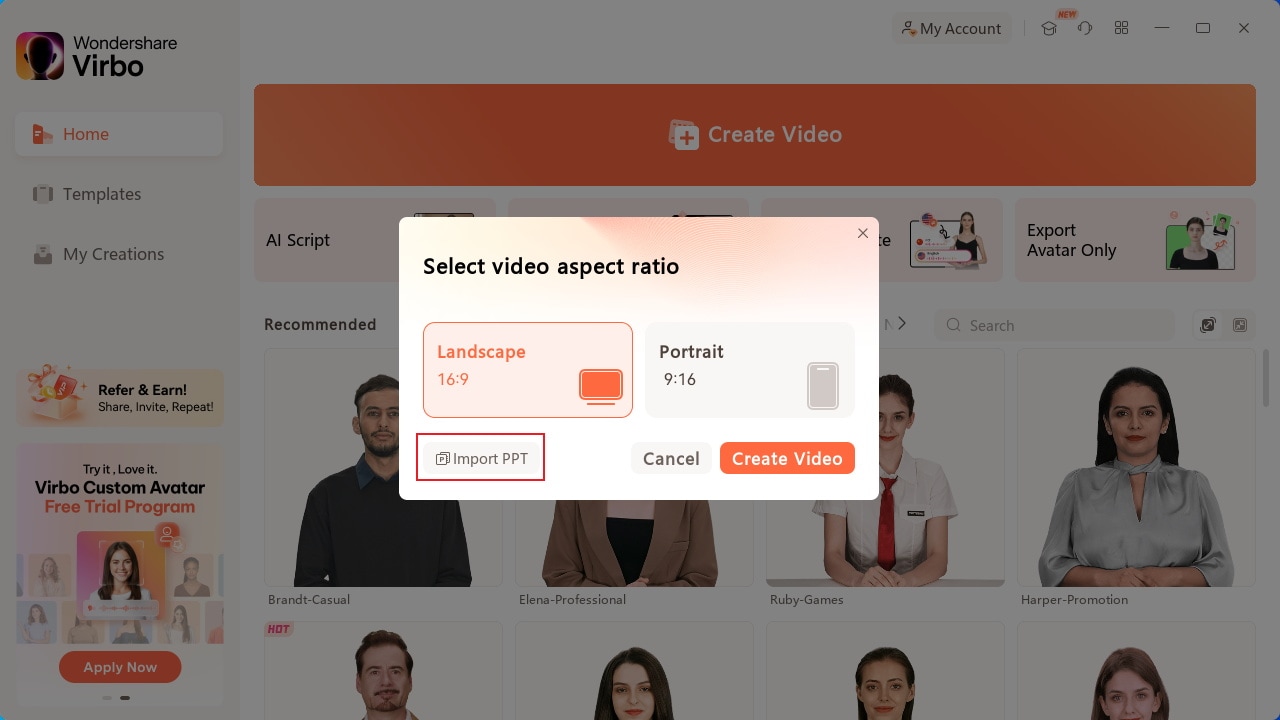
Choose Import PPT
Step 2. Add Avatars and Voiceover To the PPT Video
As you’ve imported your PPT file successfully, define whether you want to extract your script from the file or not. Click “Create Video” to redirect to the next window, which outlines the PowerPoint file as a video.
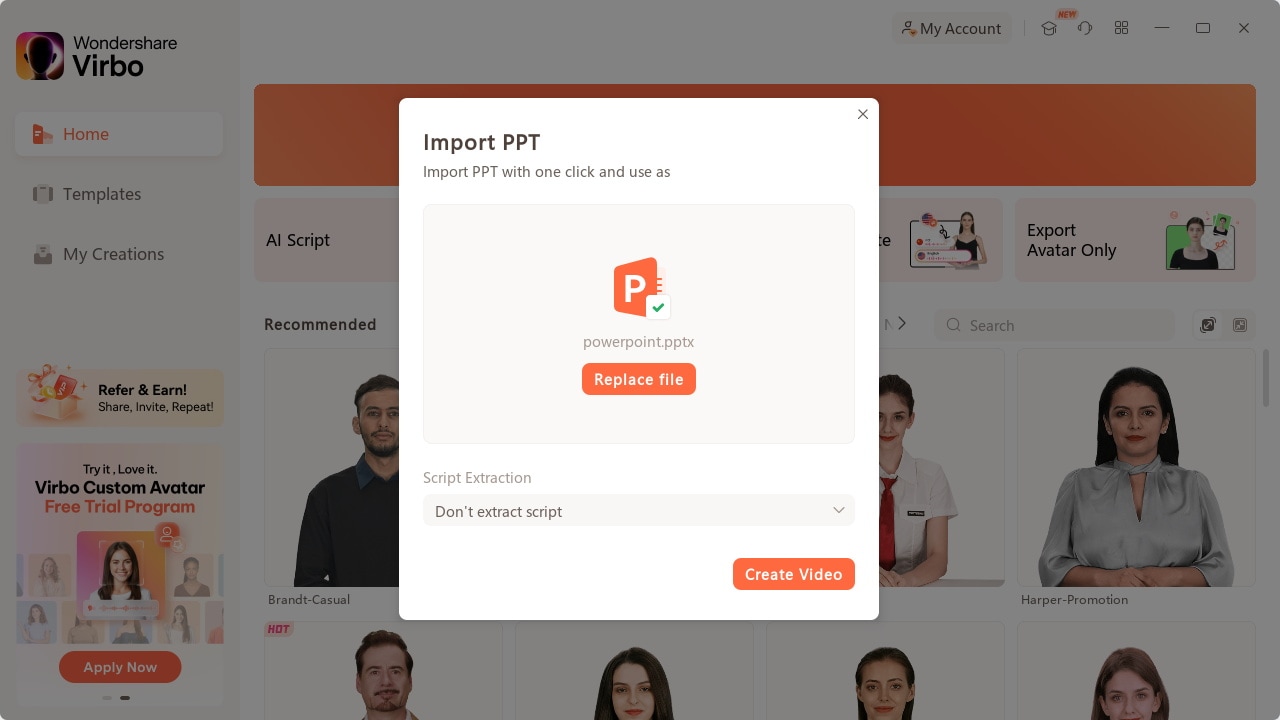
Import PPT
Here, you need to define a proper avatar according to your video, which can be done using the “Avatars“ button on the top toolbar.
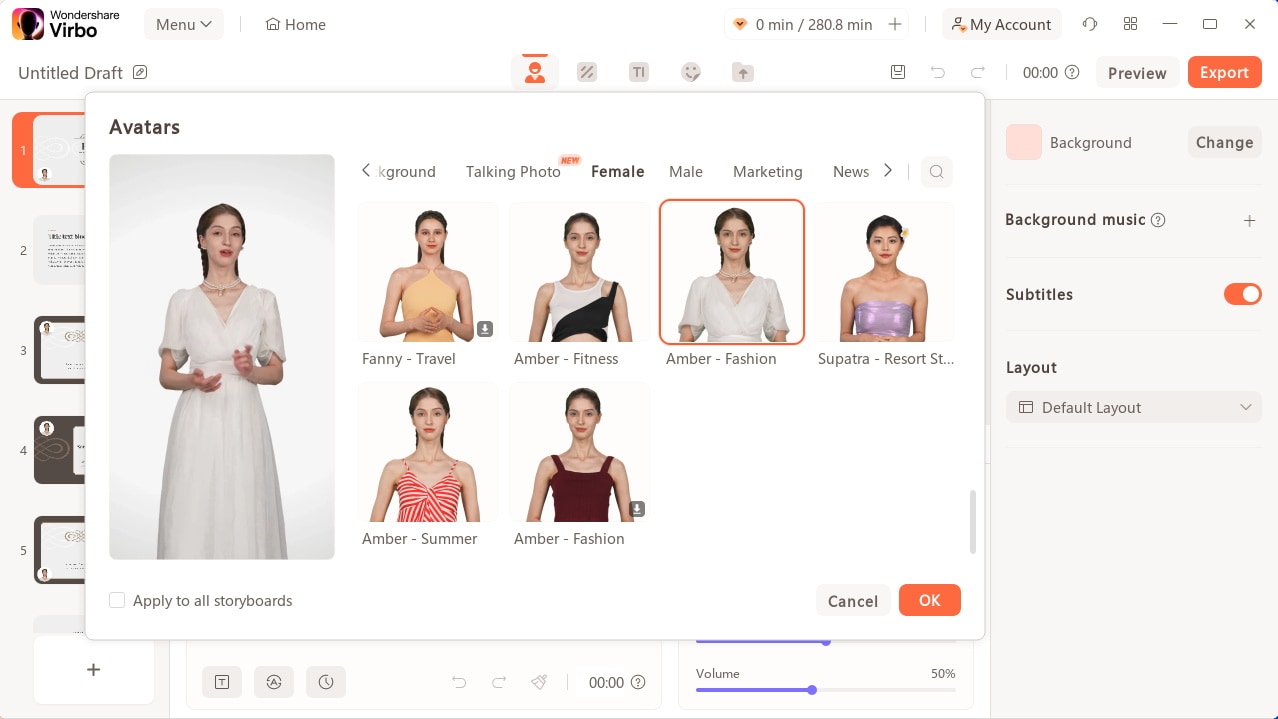
Select Avatars
Consequently, you need to add a proper voiceover that will assist you in explaining the PowerPoint file within the video. For that, lead to the “Text Script” or “Audio Upload” section to add the appropriate voiceover. Define your voice from the available list and set its parameters, or upload your pre-recorded voice to add along with the avatar.
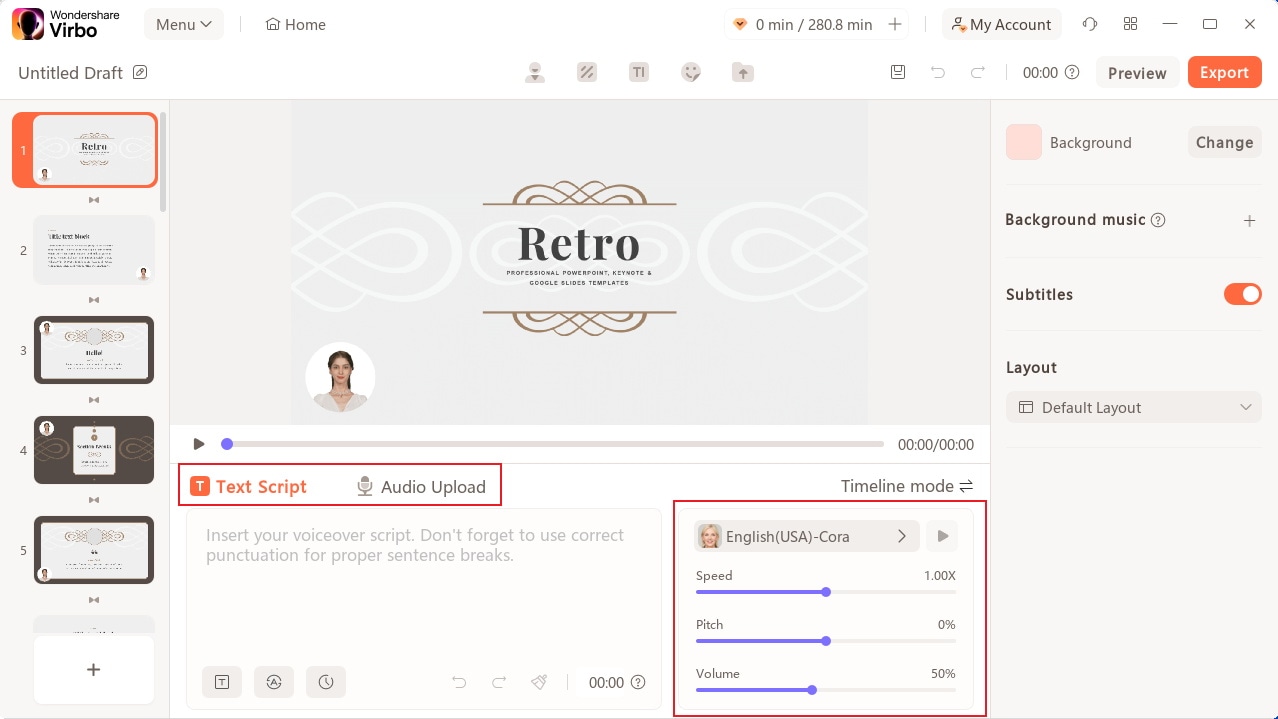
Add Voiceover
Step 3. Perform Other Edits to Video
After selecting the avatar and voiceover for the video, you can perform other edits as well. Change the background of the video or add music in the background according to your choice. If you want to display the subtitles across the video, enable the “Subtitle“ option. Furthermore, for more advanced settings in your video, you can define a proper “Layout“ or add stickers and edit text style on the top toolbar.
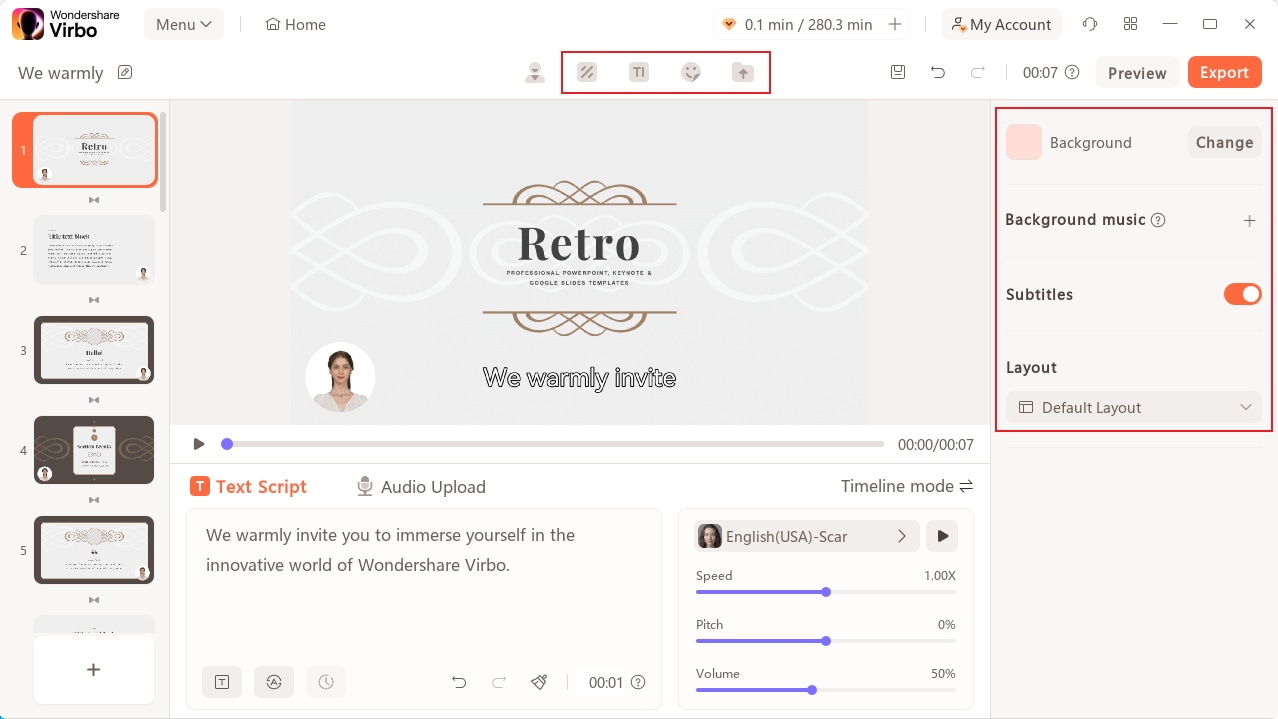
Edit Video
Step 4. Preview And Export Final PPT Video From Virbo
Once you finish all the edits, click the “Preview“ button on the top right corner to preview the video.
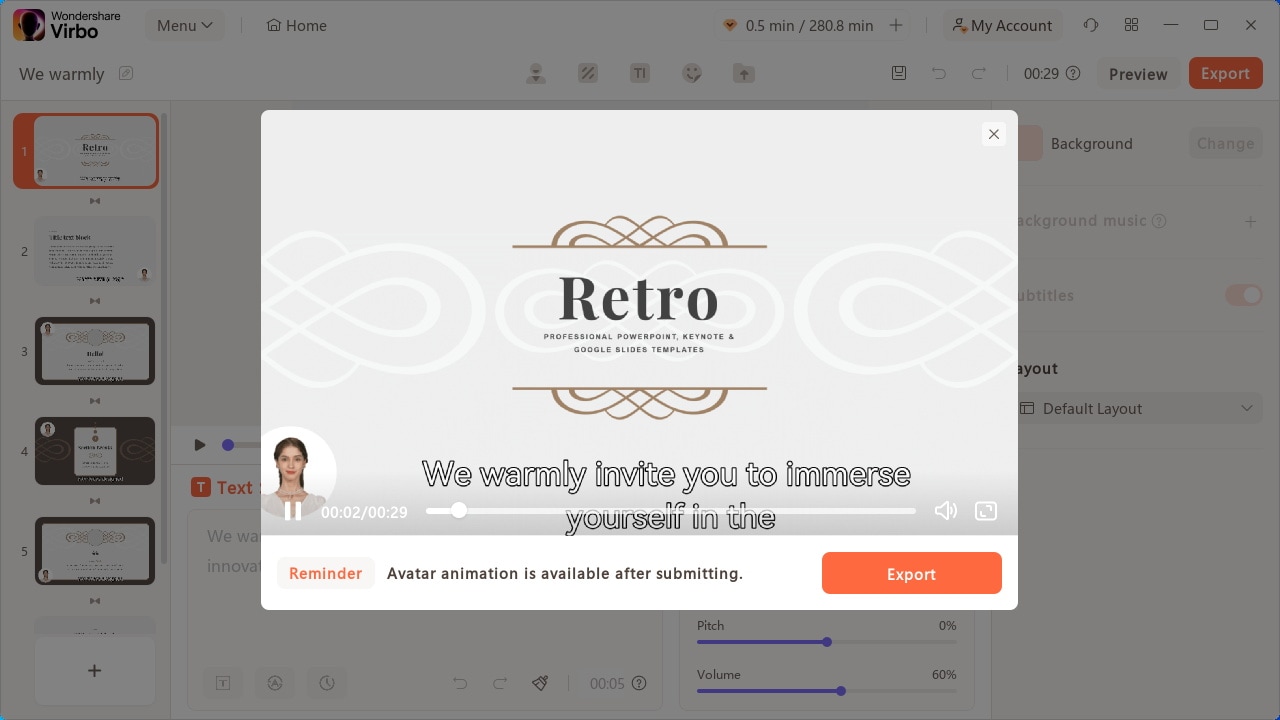
Preview Video
If you are satisfied with the video after previewing, click the “Export“ button to save this video.
Export Video
02 Add Avatars and Voiceover To the PPT Video
03 Perform Other Edits to Video
04 Preview And Export Final PPT Video From Virbo
Step 1. Start By Importing Your PPT File
After launching Wondershare Virbo on your desktop, continue to select the “Create Video“ button. As this opens a pop-up, select the “Import PPT“ option on the bottom-left to add your PowerPoint file.
Choose Import PPT
Step 2. Add Avatars and Voiceover To the PPT Video
As you’ve imported your PPT file successfully, define whether you want to extract your script from the file or not. Click “Create Video” to redirect to the next window, which outlines the PowerPoint file as a video.
Import PPT
Here, you need to define a proper avatar according to your video, which can be done using the “Avatars“ button on the top toolbar.
Select Avatars
Consequently, you need to add a proper voiceover that will assist you in explaining the PowerPoint file within the video. For that, lead to the “Text Script” or “Audio Upload” section to add the appropriate voiceover. Define your voice from the available list and set its parameters, or upload your pre-recorded voice to add along with the avatar.
Add Voiceover
Step 3. Perform Other Edits to Video
After selecting the avatar and voiceover for the video, you can perform other edits as well. Change the background of the video or add music in the background according to your choice. If you want to display the subtitles across the video, enable the “Subtitle“ option. Furthermore, for more advanced settings in your video, you can define a proper “Layout“ or add stickers and edit text style on the top toolbar.
Edit Video
Step 4. Preview And Export Final PPT Video From Virbo
Once you finish all the edits, click the “Preview“ button on the top right corner to preview the video.
Preview Video
If you are satisfied with the video after previewing, click the “Export“ button to save this video.
Export Video
Also read:
- [New] In-Depth Analysis Complete Revamp of Facetune App for 2024
- [Updated] 2024 Approved Spotlight on Shared Screen Space
- [Updated] Becoming a Master of Instagram's Video Dialogue Dynamics
- 2024 Approved Finest Text-to-Speech Male Voice Tools for Natural Output
- 2024 Approved The Ultimate Camera Showdown Top Camcorders Reviewed
- Cómo Convertir Archivos M4A Y M4B a Formato De Video M4V Con Gratis Convertidor Online De Movavi
- How to Bypass Apple iPhone 11 Pro Max Passcode Easily Video Inside
- In 2024, How To Translate Videos in Tamil for a Wider Reach
- New In 2024, Descript Overdub Controlling the Audio in Video
- Updated In 2024, Power of AI Thumbnail Generators
- Title: New Best Toolbox to Translate YouTube Videos to English Subtitles
- Author: Sam
- Created at : 2025-01-30 20:56:26
- Updated at : 2025-01-31 20:25:43
- Link: https://ai-voice-clone.techidaily.com/new-best-toolbox-to-translate-youtube-videos-to-english-subtitles/
- License: This work is licensed under CC BY-NC-SA 4.0.