
In 2024, Update 6 Best Voice Changers You Cant Miss
[Update] 6 Best Voice Changers You Can’t Miss
AI voice changer is a modern software trained using machine learning to modify and mimic authentic human voices in live or pre-recorded audio. A voice-changing app can help you sound like a robot, cartoon character, celebrity, monster, and more. Therefore, these programs can be handy in industries like video gaming, telecommunications, podcasting, and more.
Sadly, finding the perfect tool could be challenging in a world filled withAI voice changers . But worry not because we have done some deep research to help you find the most advanced AI voice-changing apps to use. We will review these apps based on their key attributes and the ability to generate varying AI voices. Keep scrolling!
Part 1. Why do you need AI voice changers?
First, let’s start by listing some reasons why you need an AI voice changer app. As mentioned, there are many reasons to use an AI-powered voice changer as this program can unlock endless possibilities.
Below are some of the uses:
- Privacy and security: Assume you’re a journalist who wants to record audio about important information, but you don’t want to disclose your subject’s voice. Or, you can be a video gamer looking for the perfect AI voice that matches your video game personality.
- Entertainment and fun: Are your friends often pranking you with videos and audio recordings? You can score one against them by recording a prank audio or video using an AI voice changer tool.
- Content creator: Are you a content creator on YouTube, TikTok, Reels, and other platforms? You can use AI voice to create high-quality content with fun and engaging narrations. AI voices can also help create top-quality podcasts.
- Accessibility: Not everyone is blessed with a celebrity voice. It’s even more challenging to create content for those with voice challenges. But with AI voice transformers, you can convert text to audio before adding your preferred voice effect.
Part 2. Explore realistic AI voice generator
The AI voice generators listed above are undoubtedly helpful in what they do. However, considerWondershare Virbo to enjoy more features when transforming your voice.
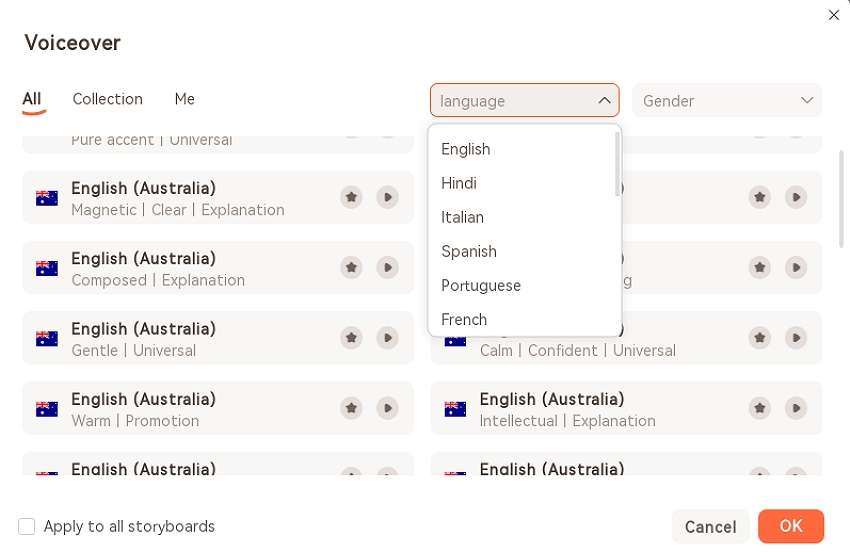
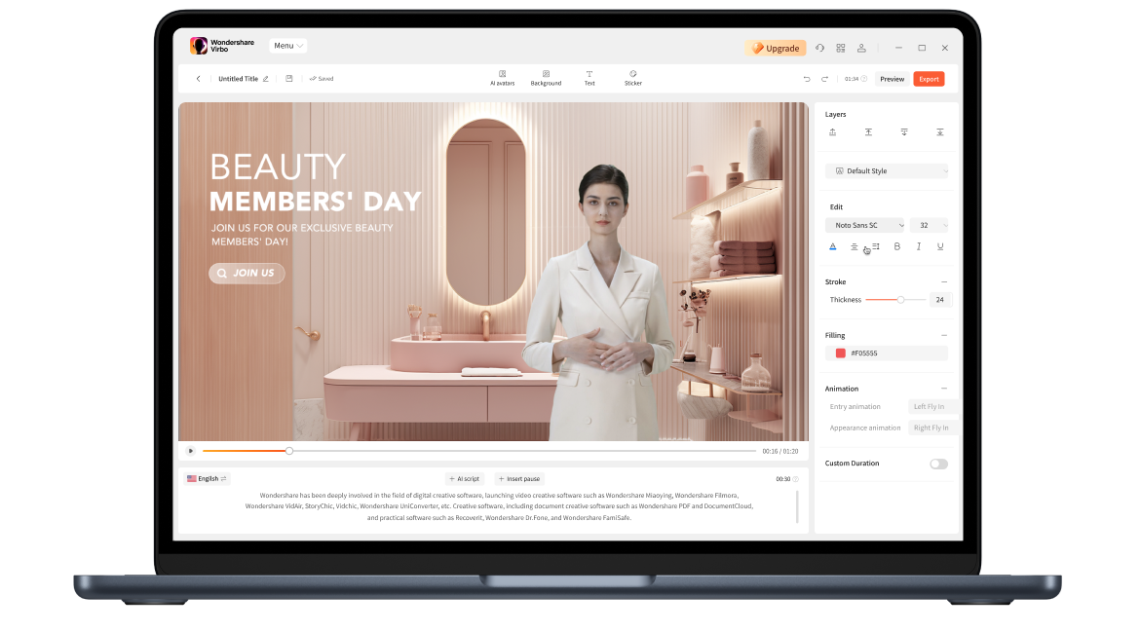
This program allows you to convert text into professional voice narrations with 120+ voiceovers and several multi-national AI characters. Enter the text you want to transform into voice, then enter the speed, pitch, and volume settings. You can also create AI voices in English, Italian, Spanish, Portuguese, etc. The new Talking Photo feature lets Wondershare Virbo bring pictures to life. Give it a try!
Below are the steps to generate AI voiceovers withWondershare Virbo :
Step 1. Install Wondershare Virbo on your computer, then choose an avatar video template.
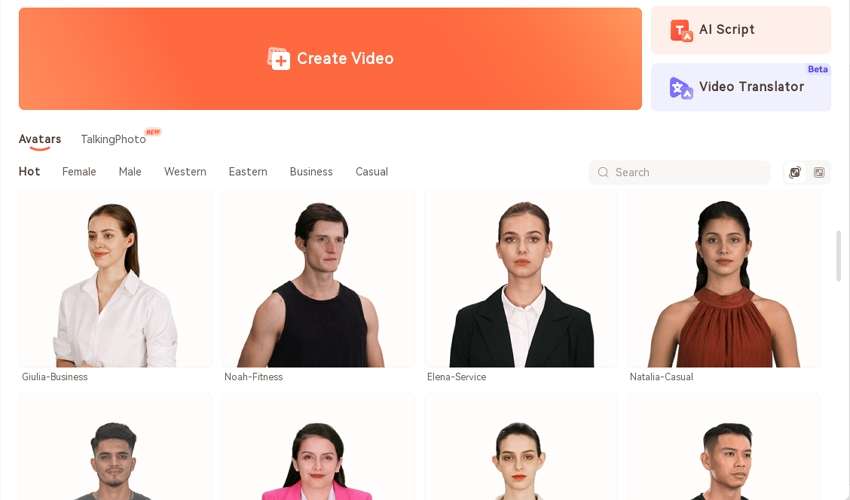
Get Started Online Free Download
Step 2. After loading up the video, enter the text you wish to convert into audio. The text can be as long as 2,000 characters.
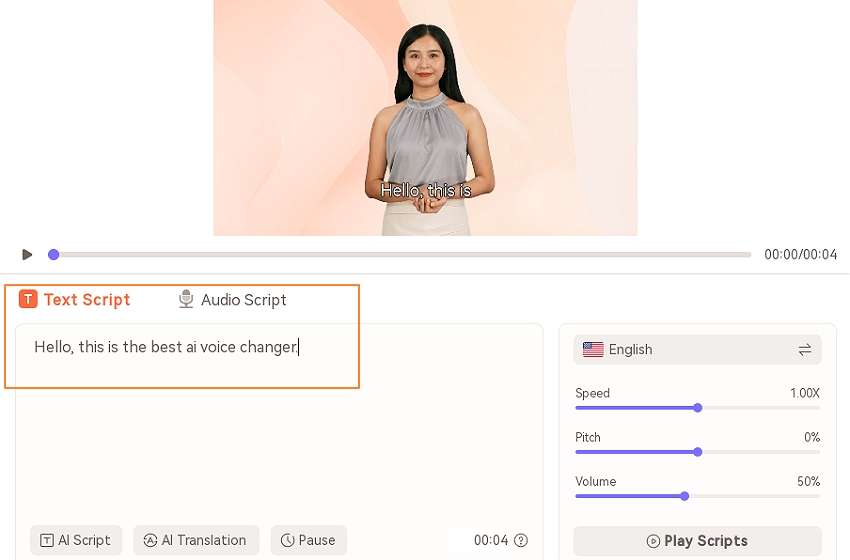
Step 3. Next, choose the voiceover language, speed, pitch, and volume before clickingPlay Scripts to preview the sound. Adjust the effects until you find a voice effect that fits your preference.
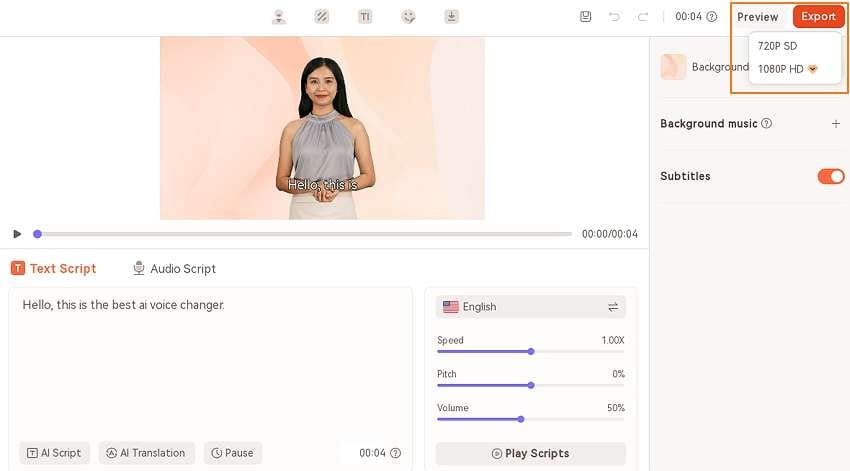
Step 4. Continue customizing your video template by adding a background image template and audio. You can also turn off the subtitle overlays. If satisfied, clickExport to save the video with AI voice in 720p or 1080p resolution.
Part 3. A look at the top 6 AI voice changers
Tool 1: Voicemod
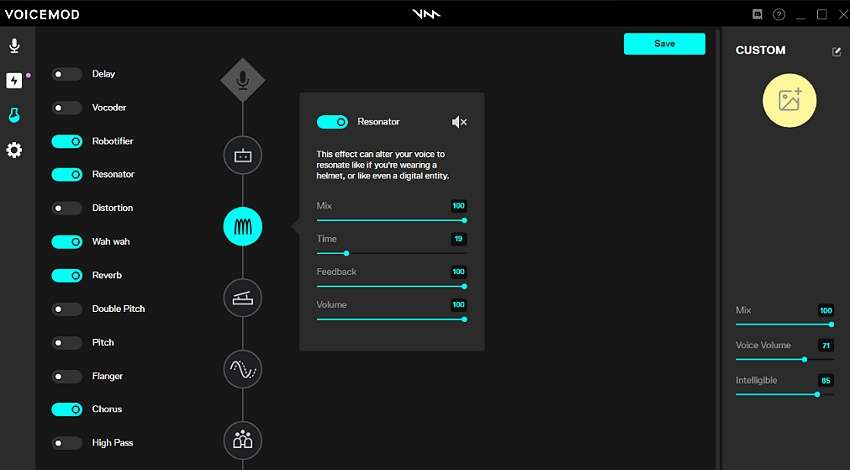
Voicemod is a leading voice changer for Windows 10/11 and Mac PCs. This tool lets you express yourself in real-time on a connected microphone and build a solid identity on platforms like OBS, Discord, Roblox, Steam, and more. It can add custom sounds on game apps like League of Legends, Overwatch, Valorant, Dota 2, etc. You can be a robot, demon, man, woman, and other characters.
Pros:
- Available on Windows, Mac, and Chromebook.
- Tens of voice-changing effects.
- Upload MP3 and WAV files.
Cons:
- Intimidating features for a beginner.
Tool 2: Voice.ai

The good thing about Voice.ai is that you don’t need to install any program on your computer to change voices. It’s an online tool that allows you to upload 15-second audio in formats like WAV, FLAC, and MP3. You can also record live voices like politicians and pop stars. Moreover, you won’t find those annoying ads on this program.
Pros:
- Multiple upload formats are supported.
- Live record voices with up to 12 effects.
- Simple to use.
Cons:
- Short audio recordings.
Tool 3: Genny by Lovo.ai

Here is anotherAI voice changer online tool to generate AI voices quickly and easily. After creating a profile, you only have to enter the text you want to convert to AI voices, and this program will do the rest. This voice changer comes with multiple effects for males and females. You can filter the AI voice effects by age, such as mature or young adult.
Pros:
- Simple text-to-speech converter.
- Numerous voice effect characters.
- It supports English, Estonian, Filipino, and Finnish.
Cons:
- Limited voice customization features.
Tool 4. HitPaw Voice Changer
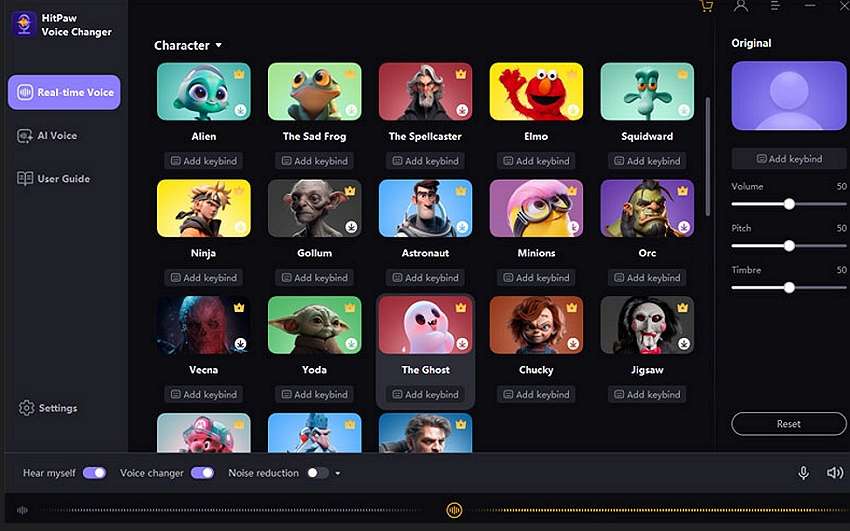
HitPaw Voice Changer is a Mac/Win app that handles voice-changing tasks perfectly. For example, this simple-to-use program lets you sound like your favorite video game character in titles like League of Legends, Call of Duty, Rocket League, and more. It also works with voice apps like WhatsApp, Zoom, Skype, VR Chat, etc. Moreover, it’s embedded with a noise remover to ensure you create crisp-clear audio.
Pros:
- Multiple celebrity voice effects.
- It works with most live-streaming apps.
- Internal noise-reduction capabilities.
Cons:
- It can take a while to set up.
Tool 5: Voice Changer Plus
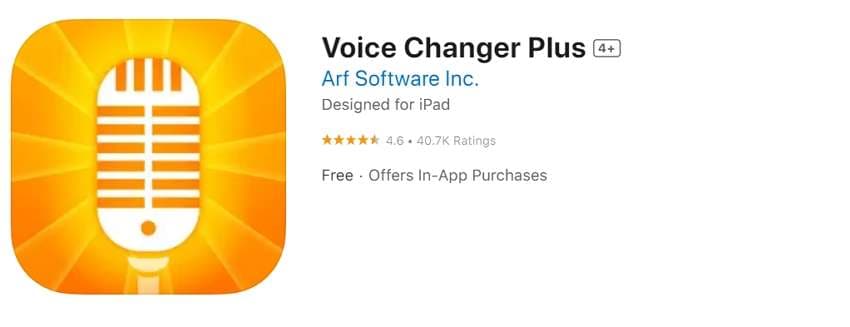
iPhone and iPad users should consider Voice Changer Plus. It’s a top-rated app that will change your voice with fun and unique effects. You can choose from 50+ sound effects and background sounds. Even more interesting is that all the changed voice effects and sounds are free to save and download.
Pros:
- 50+ voice effects.
- Open saved recordings.
- Intuitive trim control.
Cons:
- The ads can be annoying.
Tool 6: Voice Changer with Effects
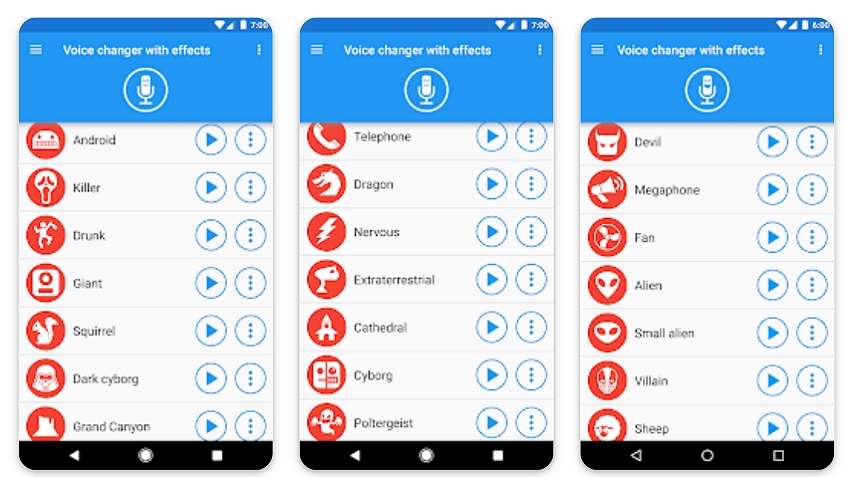
Lastly, Android users can explore thisvoice changer voice AI to transform their voices with unique sound effects. With it, you can remotely record your voice and apply effects like monster, zombie, alien, giant, robot, and more. It also lets you add AI sound effects on pre-recorded audio before sharing it to WhatsApp, email, and other apps.
Pros:
- Adjustable audio quality.
- Create voice from text.
- Set the AI voice as ringtone or notification.
Cons:
- It contains annoying ads.
Conclusion
Up to here, we hope that you have found thebest AI voice changer for your needs. Remember that using the AI voices is free, and no one will sue you for copyright infringement. And don’t forget to use Wondershare Virbo to create unique avatar content for your YouTube and social media tutorials or any other video.
Cloning Voices With Hugging Face: Features, Guidance, Alternatives
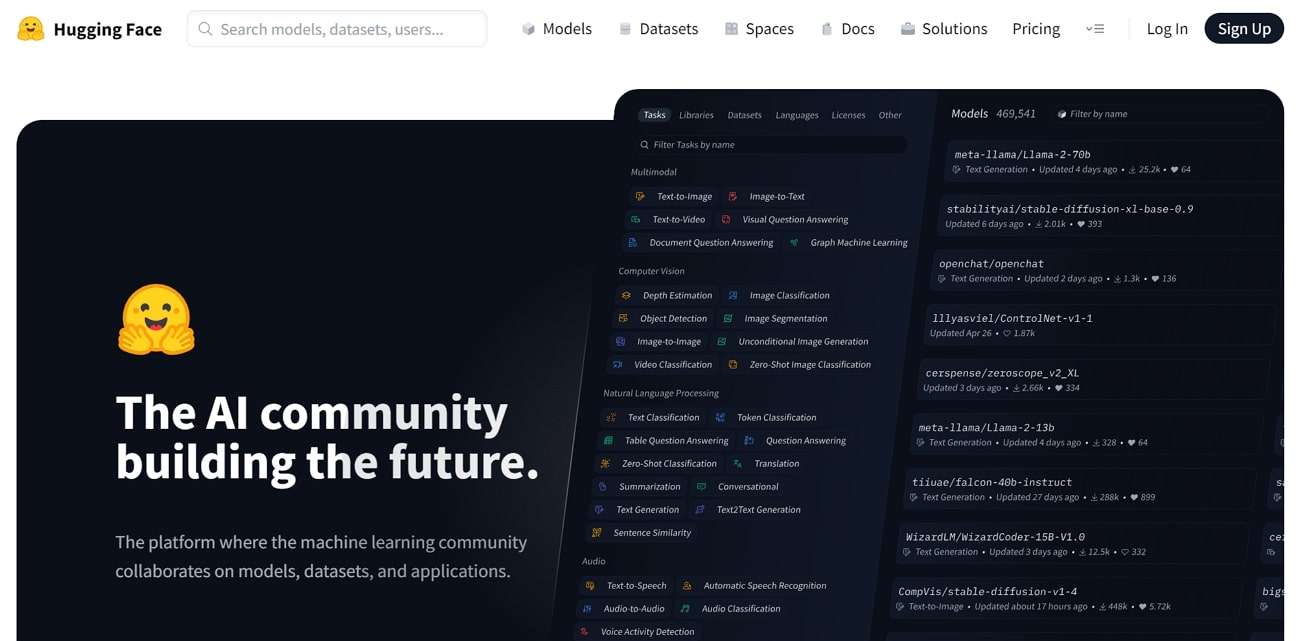
Artificial intelligence has reached certain heights in the field of technology. Users not only develop dedicated AI tools but can also build a platform for sharing them. Thus, what better place to collaborate on models, datasets, and spaces than on the Hugging Face voice cloning tool?
This platform provides you with different spaces that people can browse and share. In this article, we’ll focus our attention on the HuggingFace voice cloning tool.
Get Started Online Free Download
Part 1: Hugging Face: Reviewing The AI Community
Are you looking to build a community on AI machine learning where you can collaborate, share, and create new ideas? For this, Hugging Face documentation provides 350k+ models, 75k+ applications, and 150k+ datasets. You can experiment with open-source ML that includes diffusers, Python Library, and more. It is the perfect space where people share their knowledge and resources to improve AI.
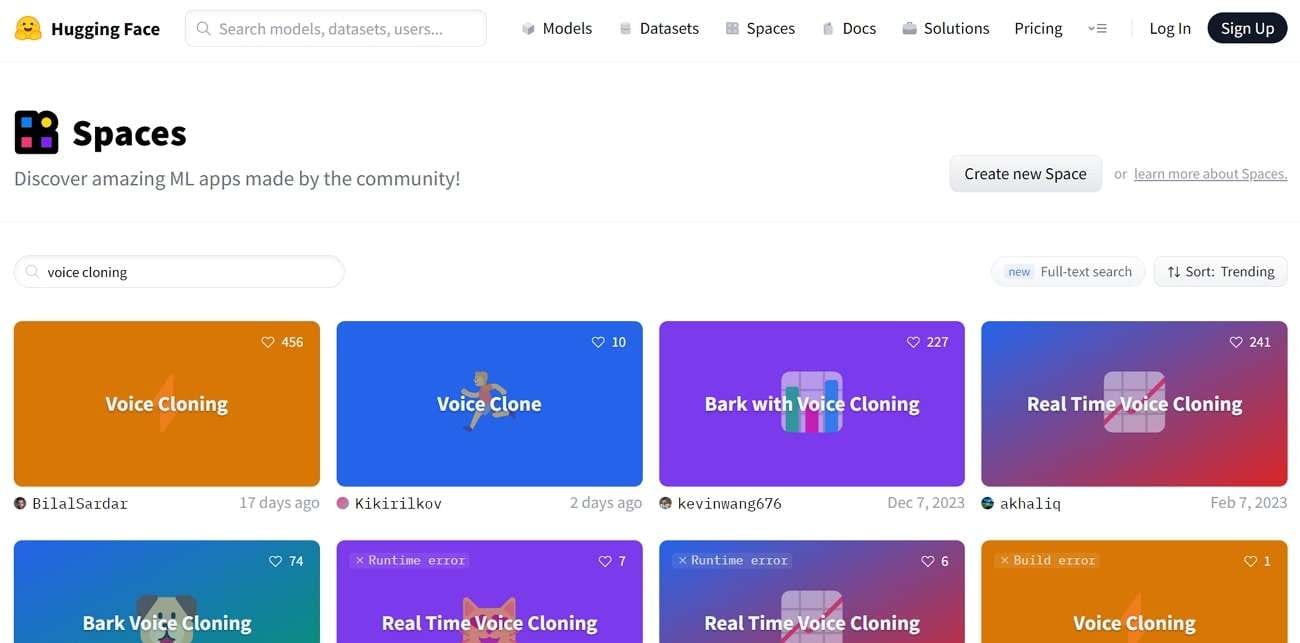
With its vast space libraries, you can also access the Hugging Face voice cloning tool. It not only provides you with one amazing ML app on voice cloning tool but offers several options. These options include voice cloning demos, real-time voice cloning, and many more. The voice cloning Hugging Face tools provide a space where you can transform your voice with AI.
Key Features
There is much more to Hugging Face voice cloning tools than this single function. Are you interested in finding out what other features this platform provides? In the below section, we have given you some of the key functionalities of this tool:
1. Models
Hugging Face contains a vast collection of pre-trained models shared by the community. It is equipped with a Model Card that informs users of each model’s limitations. Users can add an interface widget to their model that allows everyone to play their model on the browser. Also, you can explore various model documentation, like Transformers, Asteroid, and ESPnet.
2. Spaces
The “Spaces” feature of this tool lets you host ML demo apps on the Hub with ease. If you want to make your mark in the ML community, you can build an impressive ML portfolio. You can include your projects and showcase them to your collaborators. It supports two Pythons SDKs, Gradio and Streamlit, that let you build apps. Plus, you can also create static Spaces with HTML/CSS/JavaScript.
3. Datasets
If you, as a coder, want to explore a dataset library that allows you to interact with your datasets, use Hugging Face. The datasets library offers you a diverse collection of datasets for NLP tasks. There are over 5000 datasets available in 100+ languages for Computer Vision tasks. You can explore the data on the browser with Dataset Cards and Dataset Preview options.
4. Docs
Hugging Face’s documentation is a useful resource for developers and researchers. You can explore various types of documentation, such as inference endpoints, PEFT, and hub Python library. There are various datasets, pythons, models, and ML tasks. It assists users in understanding how to implement various tools offered by Hugging Face.
Get Started Online Free Download
Pricing Plans
Users and organizations can use this Hub as a collaboration platform where they can share their ideas. Thus, you can utilize this tool and its advanced features at a small price given below:
| Plans | Price |
|---|---|
| Pro Plan | $9 per month |
| Enterprise Hub | $20 per user per month |
Generate Engaging
AI Video in Minutes!
Easily convert text into professional spokesperson videos in over 120+ voices & languages in minutes.
Generate AI Video Free Generate AI Video Now


Part 2: Voice Cloning Feature Through Hugging Face: A Step-by-Step Guide
If you want to create a personalized voice assistant for effective communication, you can use voice cloning. In this way, you can generate various speech samples for different situations. Hugging Face voice cloning tool provides a straightforward process to get a natural-sounding voice. Let’s go through the easy-to-follow steps to create different versions of your voices:
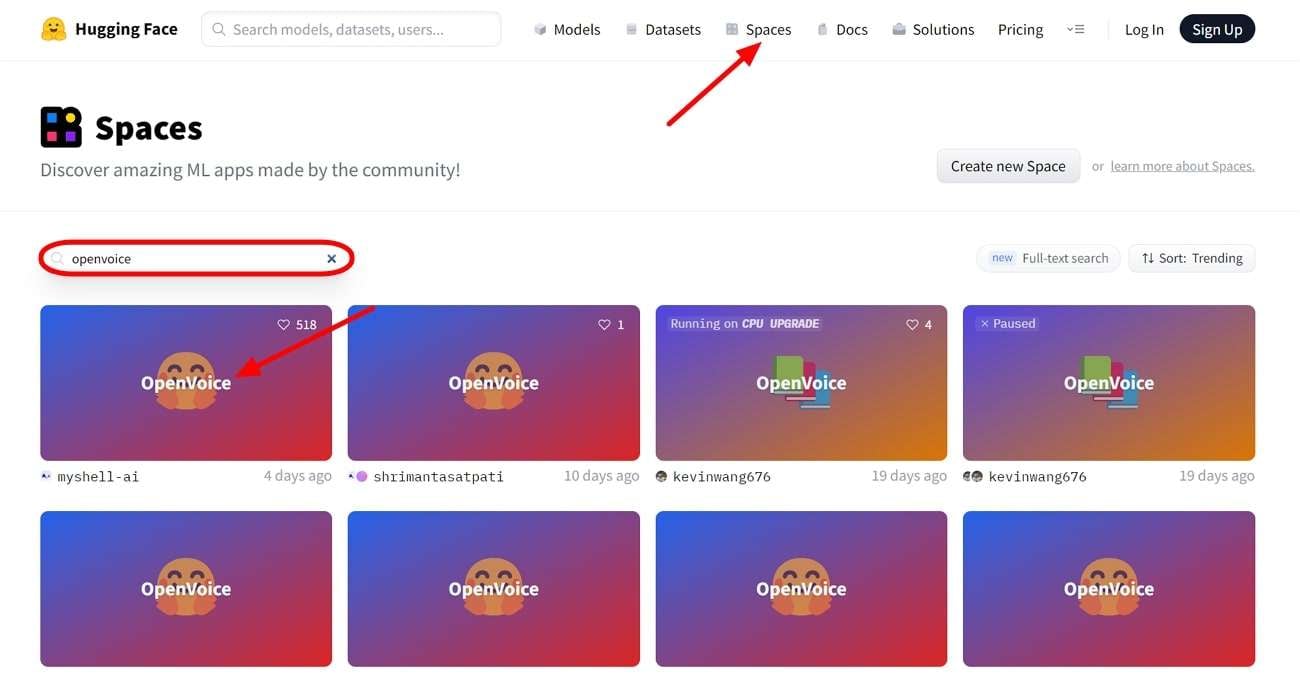
Step 1 Look For Voice Cloning Tool in Hugging Face
Begin the process of Hugging Face voice cloning by visiting its official website. Within this window, head to the top and tap on “Spaces” to access the Spaces window. Here, in the “Search Spaces” box, type “OpenVoice,” and from the output results, opt for the “OpenVoice by myshell-ai.” This action will proceed you to a new window to make a clone of your voice.
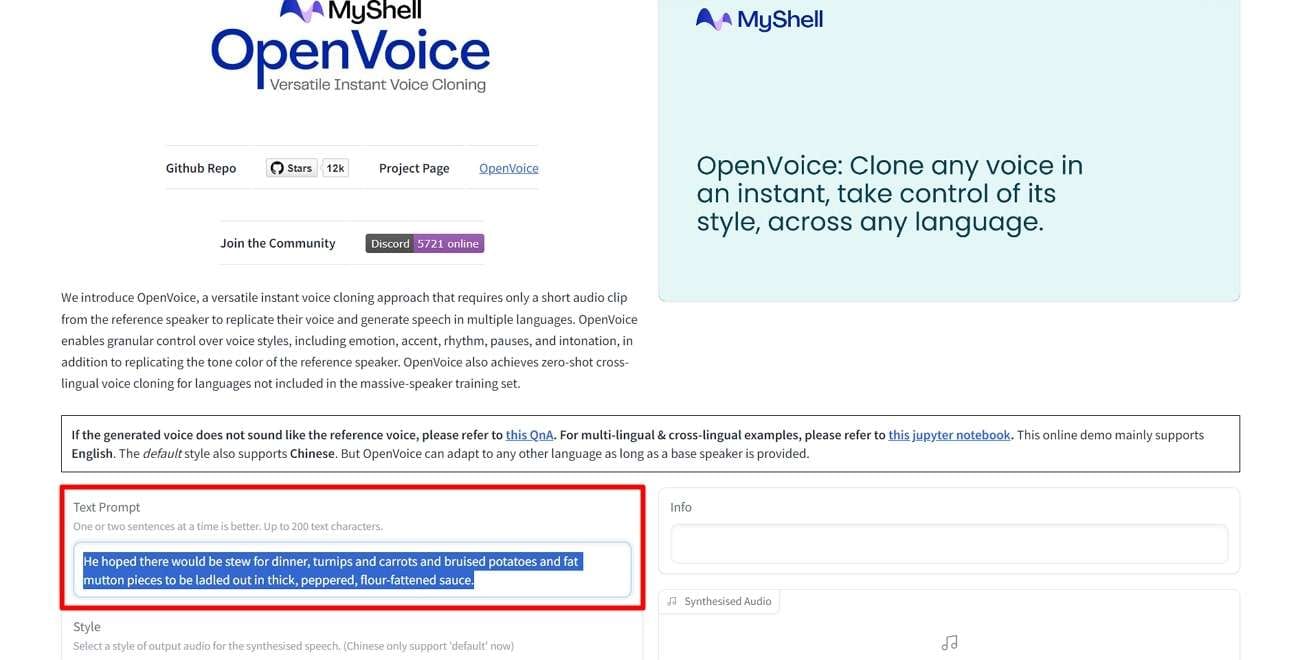
Step 2 Add The Script as Prompt
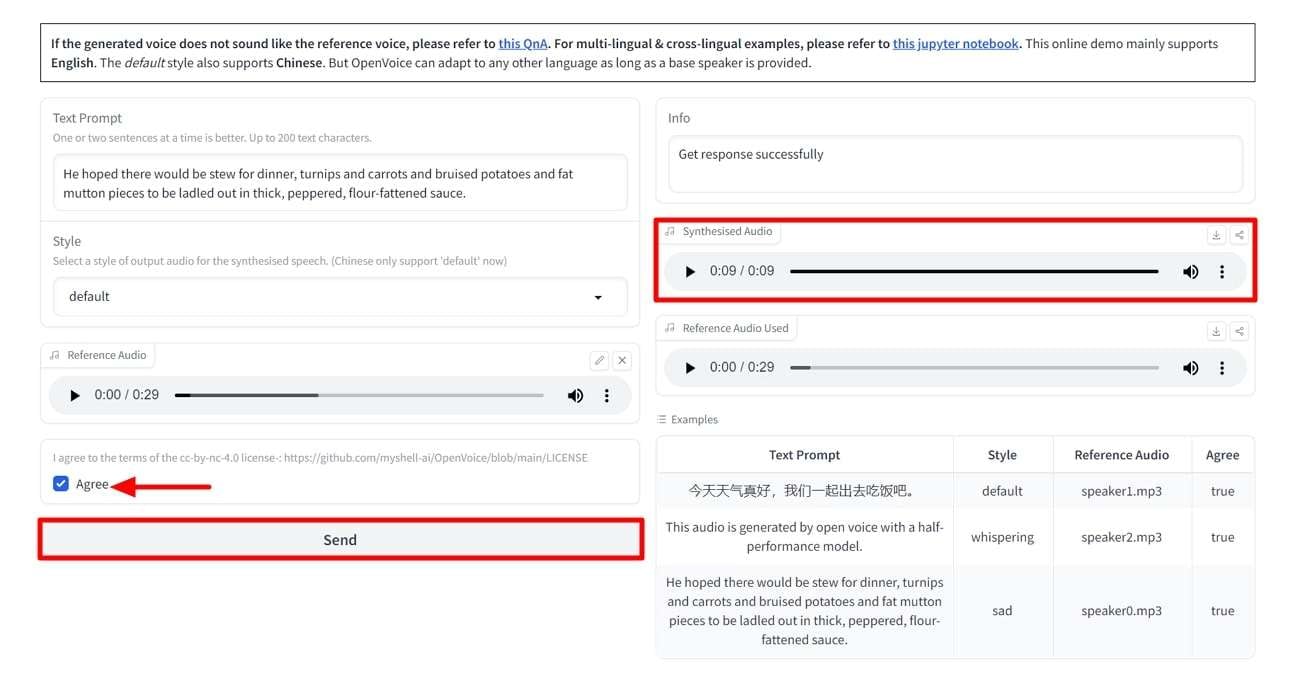
In the upcoming window, write the script you want to convert into a voice in the “Text Prompt” box. Here, you can type in any kind of script, from professional to personal, to use in different scenarios.
Step 3 Set Style and Include Reference
From the “Style” dropdown menu, choose your desired tone. Next, in the “Reference Audio” section, press “Click to Upload.” It opens a dialogue box to let you upload the required file on the tool.
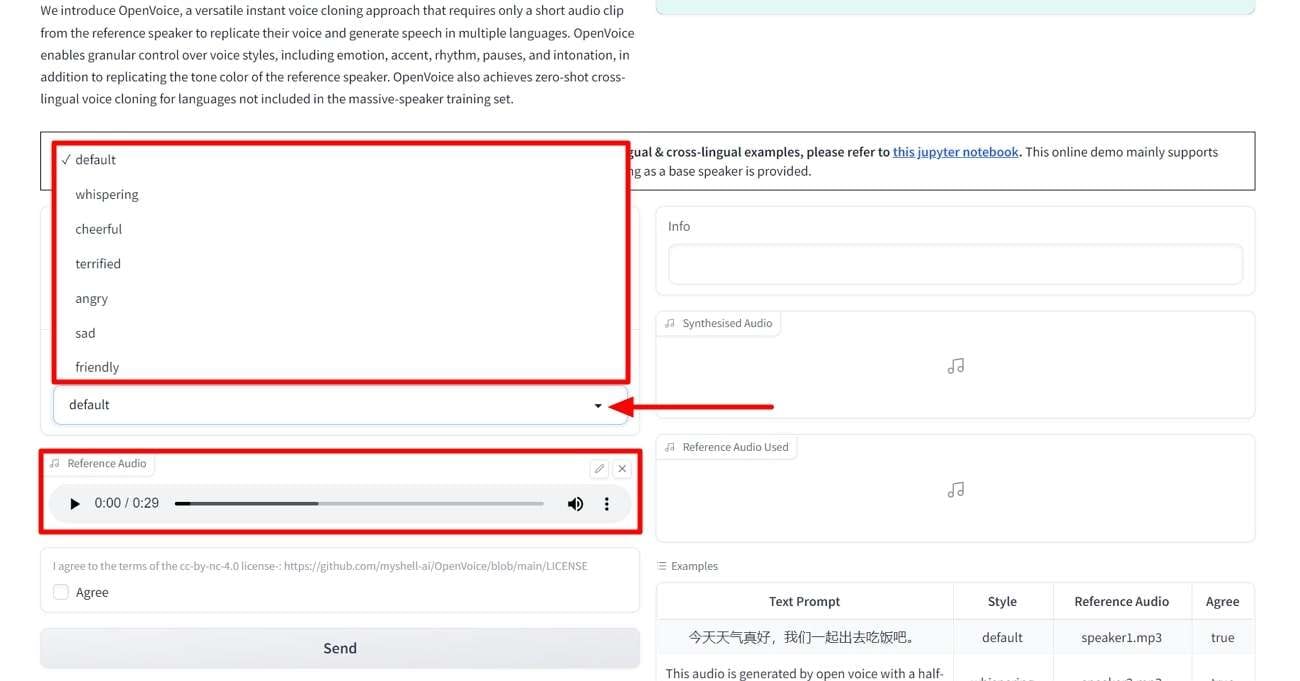
Step 4 Check Synthesized Results
After uploading the reference audio on the tool, approve the terms by checking “Agree.” Later, proceed with hitting the “Send” button to allow the tool to assess the audio and make clones of it. You can see the results in the “Synthesized Audio” section on the right side of the screen. Now, enjoy listening to different variants of your voice and use it for different content.
Conclusion
In conclusion, Hugging Face aids users with various ML applications, datasets, and more. Among these spaces, the HuggingFace voice cloning spaces can clone your voice within a few easy steps. Any individual seeking such services can go across this comprehensive platform to dissect the best voice cloning content.
Create AI Videos Using Synthesia Avatar and Voices
In this busy world, every person wishes to save as much time as they can. Along with this, people want their social media to grow more through videos but don’t want to invest much time in video creation. Thus, most users wish to create videos for both professional and personal use without compromising their spare time. It’s a genuine wish which can be true thanks to AI-powered tools.
Tons of AI tools are present on the web, but today, we will be discussing the best one. The outclass tool that can help you create professionally-looking videos isSynthesia io . Not many users know about this premium-grade tool. That is why there is a review article onSynthesia AI video that you can rely upon. So, scroll below and know what you are waiting for.
Part 1: What is Synthesia AI Video Generator
Synthesia.io is an AI-powered tool that aims to simplify the video production procedure. You can create the videos automatically without manually adjusting all the metrics. It can help you make videos for several purposes, such as e-learning, marketing, entertainment, and more. Above all,Synthesia AI is an easy-to-use tool with a well-structured interface.
It also offers blazing-fast processing speed, which never fails to amaze users. You can even use this AI video generator without having any prior experience in video editing. It also works as an all-in-one video editor for all platforms. You can even use this AI-powered tool for creating tutorials, marketing, sales, and educational videos.
Part 2: What Are The Features of Synthesia AI Video Creator
The number of key features is not restricted in this premium-grade tool. Furthermore, it is very important for you to discover the features ofSynthesia AI before getting into it. Don’t worry if you don’t know how to find its features because we covered you in this part. The key features ofSynthesia.io which you should be aware of are listed below:
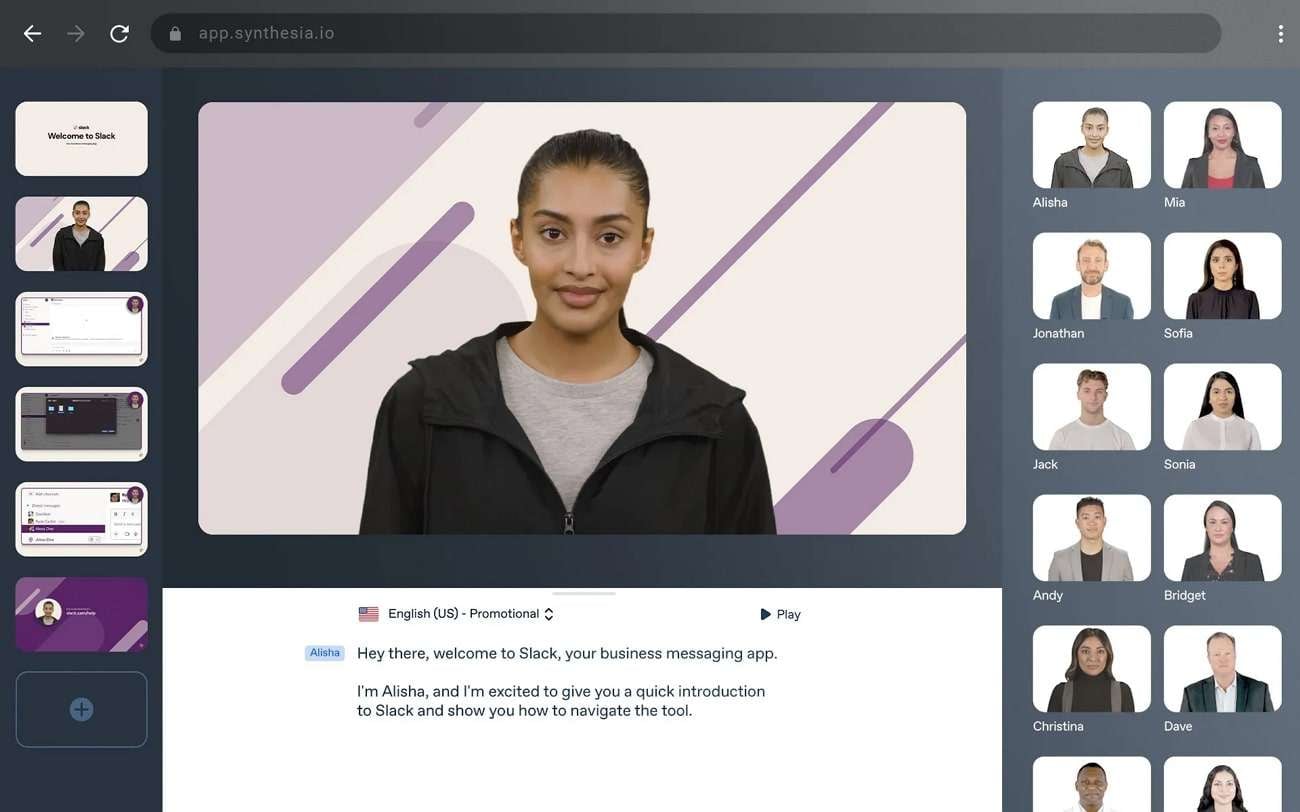
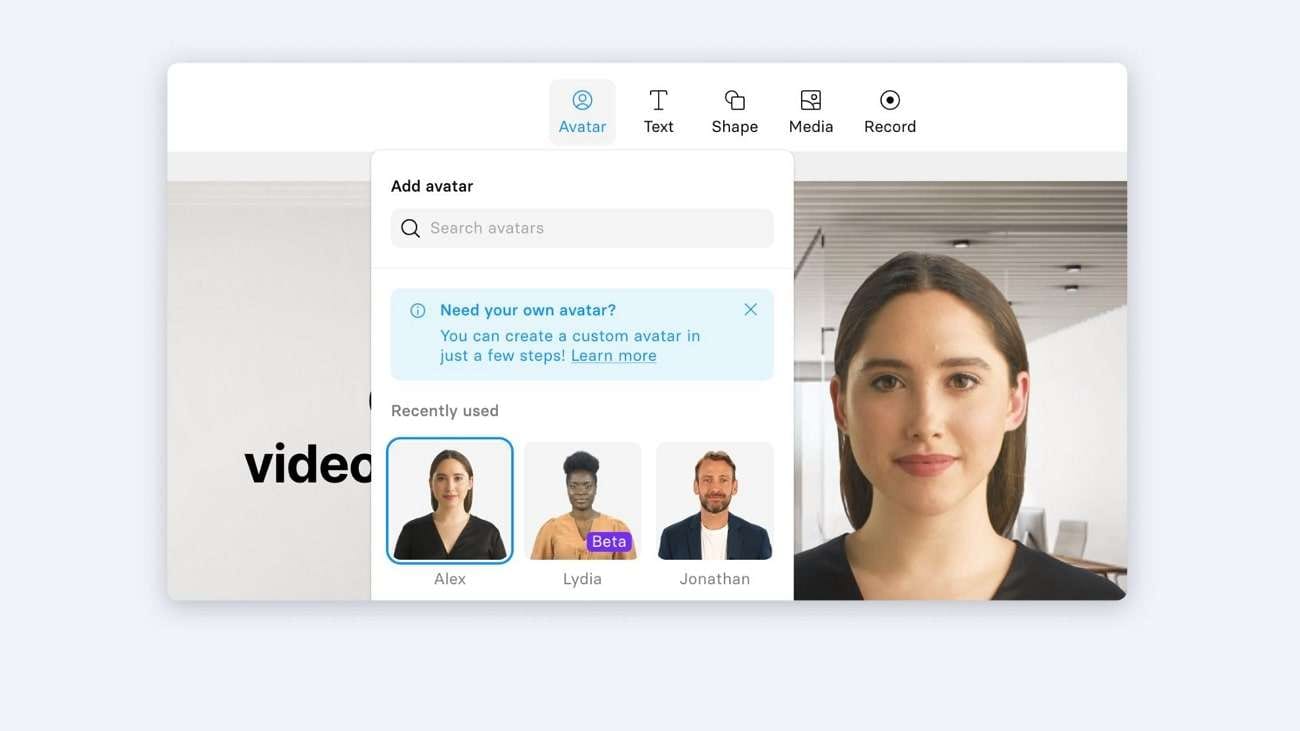
1. AI Avatars
Synthesia integrates over 150 AI avatars. You can also search and select the AI avatars based on their ethnicity and looks. Moreover, for easy selection, you can also manage the attire and age of avatars. To eliminate the risk of mistakes, this tool lets you preview AI avatars before selecting them.
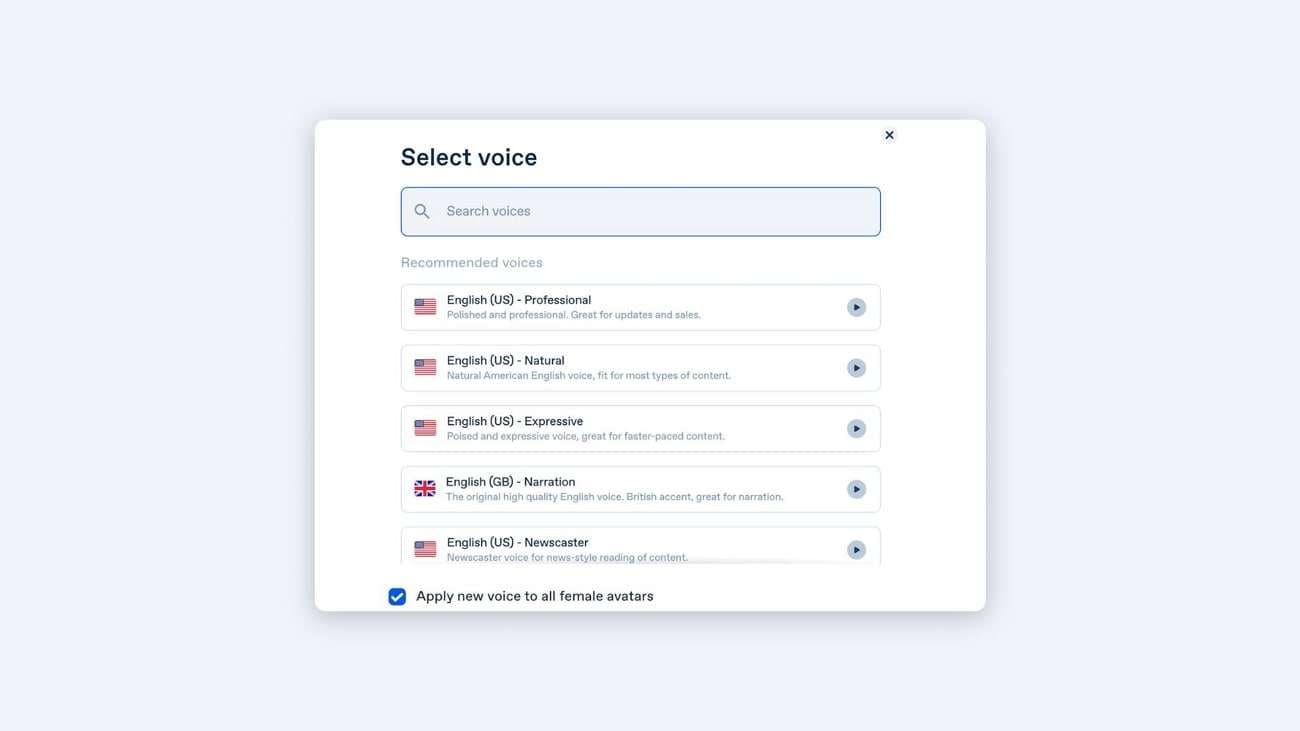
2. Language Support
This AI-integrated AI video tool supports 120+ languages, voice tones, and accents also. This is inclusive of Arabic, Bengali, Burmese, Basque, and more. You can also select the voices based on female and male voices. As all the voices are dynamic and natural, you can also select them for professional purposes.
3. Text to Speech
Through this intuitive feature ofSynthesia AI , you can turn simple text into professional voiceovers. This AI tool helps you in doing this without waiting for an hour. You just have to input the text prompts, and it can create a voiceover without any pronunciation mistakes.
4. Lip Syncing and Control
While making videos with AI avatars, you can also synchronize the lip movement of avatars with the spoken text. It helps in giving a more natural and realistic look to speech. Moreover, you also have an opportunity to control other gestures, such as facial expressions, hand movements, and more.
5. Templates and Customization
There are almost 60+ predesigned templates inSynthesia video creator , which you can access for video creation. Above all, you can also customize the AI avatars in it. You can create customized avatars just like your identical twin.
6. Subtitles and Captions
While working on the videos, you can also create automated subtitles and captions. This makes your videos more understandable and approachable. In addition to this, you can also attract a broader audience and boost comprehension through this.
7. Export Options and Integrations
Synthesia AI video creator shows integration with other software and platforms such as Shopify, Lectora, Eduflow, ETU, and 360Learning. It makes the incorporation and workflow easier. Above all, it also supports a wide array of export options and shows compatibility with various formats, which is extremely helpful.
Part 3: The Pricing Plan of Synthesia AI Video Generator
Synthesia.io can help you scale your video production without spending many dollars. It is a cost-effective tool that always places users’ needs before anything. Here is theSynthesia.io pricing plan, which can help you understand its higher functionality:
| Plan Name | Pricing |
|---|---|
| Personal | $22.50 |
| Enterprise | Based on the number of seats |
Part 4: How to Use Synthesia AI Video Generator to Create Avatar Videos Efficiently
By now, you have gained significant information about Synthesia. You must be wondering about the Synthesia AI video generator procedure. No need to worry because this part is specifically designed to help you in this matter. The procedure for making a Synthesia AI avatar video is described here for you:
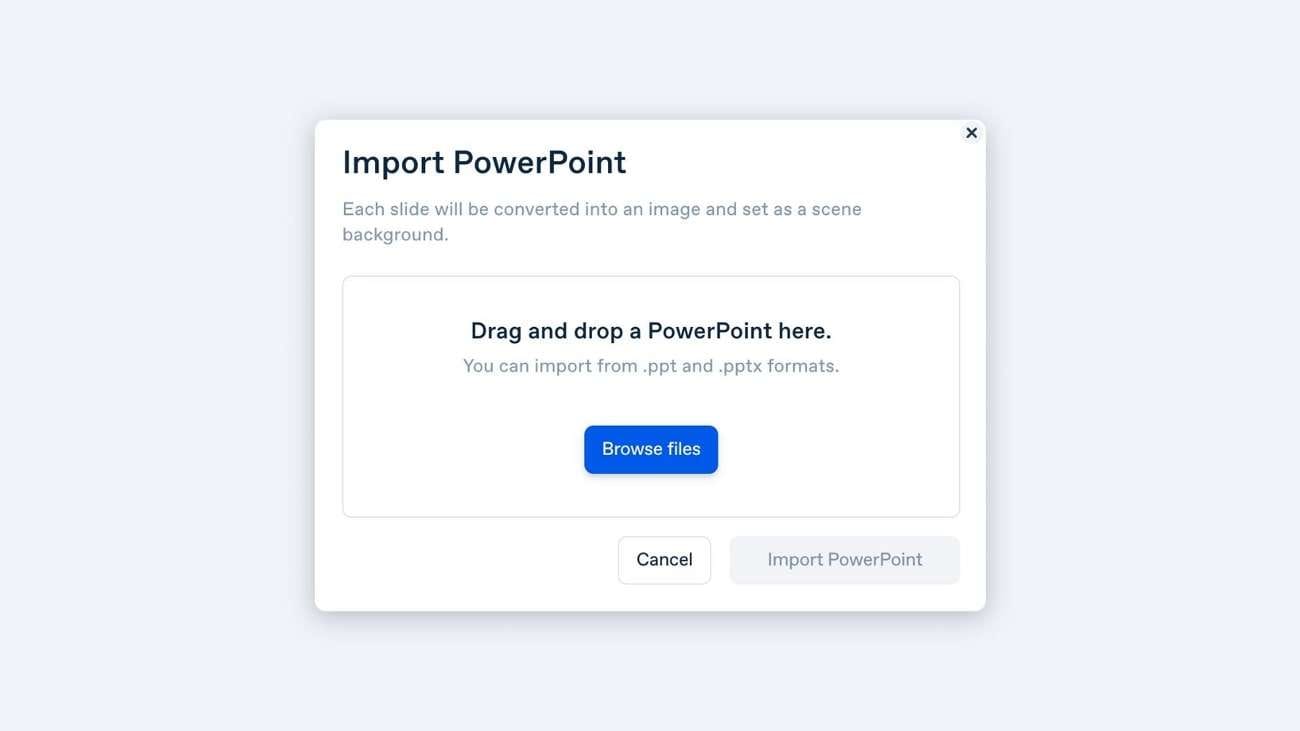
Step 1: Initially, access Synthesia and click the “New Video” button from the right corner of the screen. Next, tap the “Blank” slate or select one template from the predesigned templates. Once done, hit the “Import PowerPoint” button and choose the presentation of your choice. To add the latest scenes, you can press the “+” icon.
Step 2: Once you add all the scenes related to the video, select the one to start editing. Afterward, click the “Avatars” feature from the top and choose the AI avatar that fits your needs. To adjust the characteristics of AI avatars, you can click on the avatar in the video. You can also select the visual dimensions of avatars, along with changing “Full Body,” “Circle,” and “Voice.”
Step 3: After making all the layout adjustments, go to “Script Box” and paste your script there. Make sure you paste the scripts in a scene-by-scene manner. To change the language, go to the “Voice Selector” option in the top-right corner. You can also make videos more modified by adding multiple metrics.
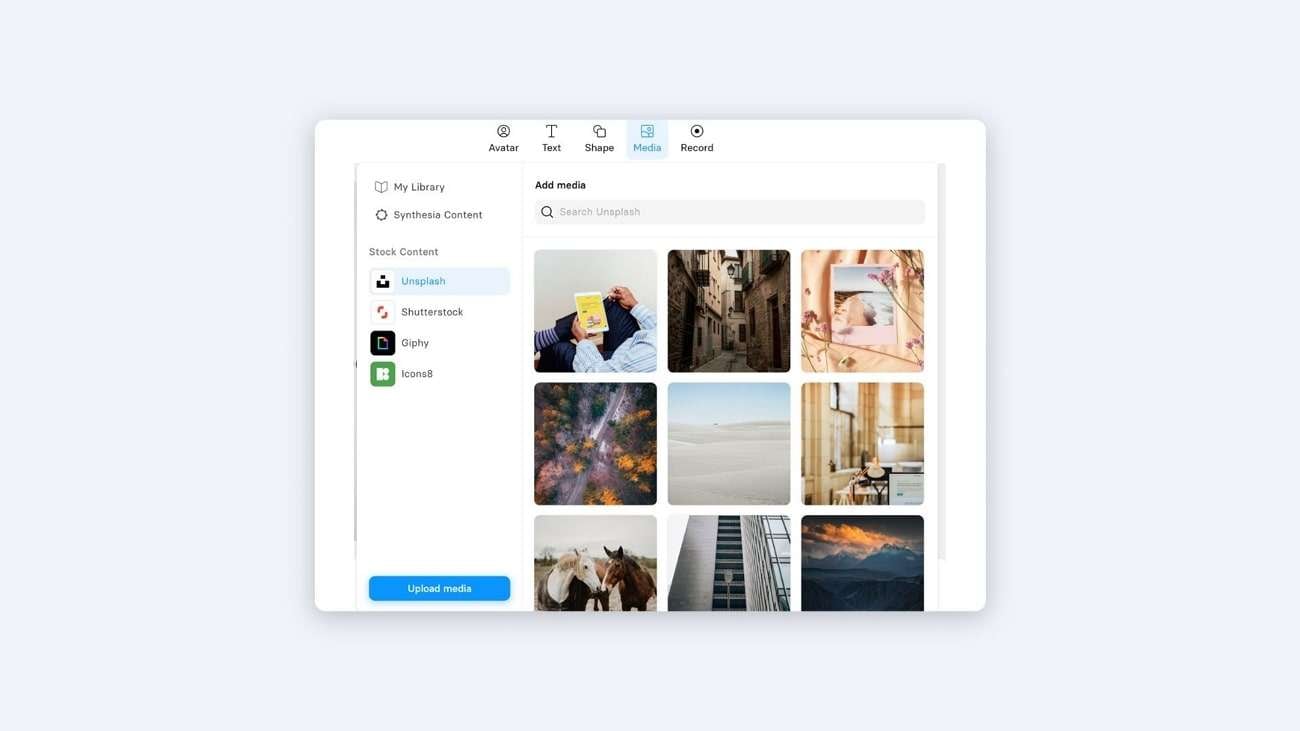
Step 4: For instance, click “Text” and select the text prompt you want to add to the video. Moreover, you can also add shapes by clicking on “Shapes,” and by clicking on “Media,” you can insert images, icons, and videos. If you are creating software tutorial videos and want to record the screen, tap the “Record’ button.
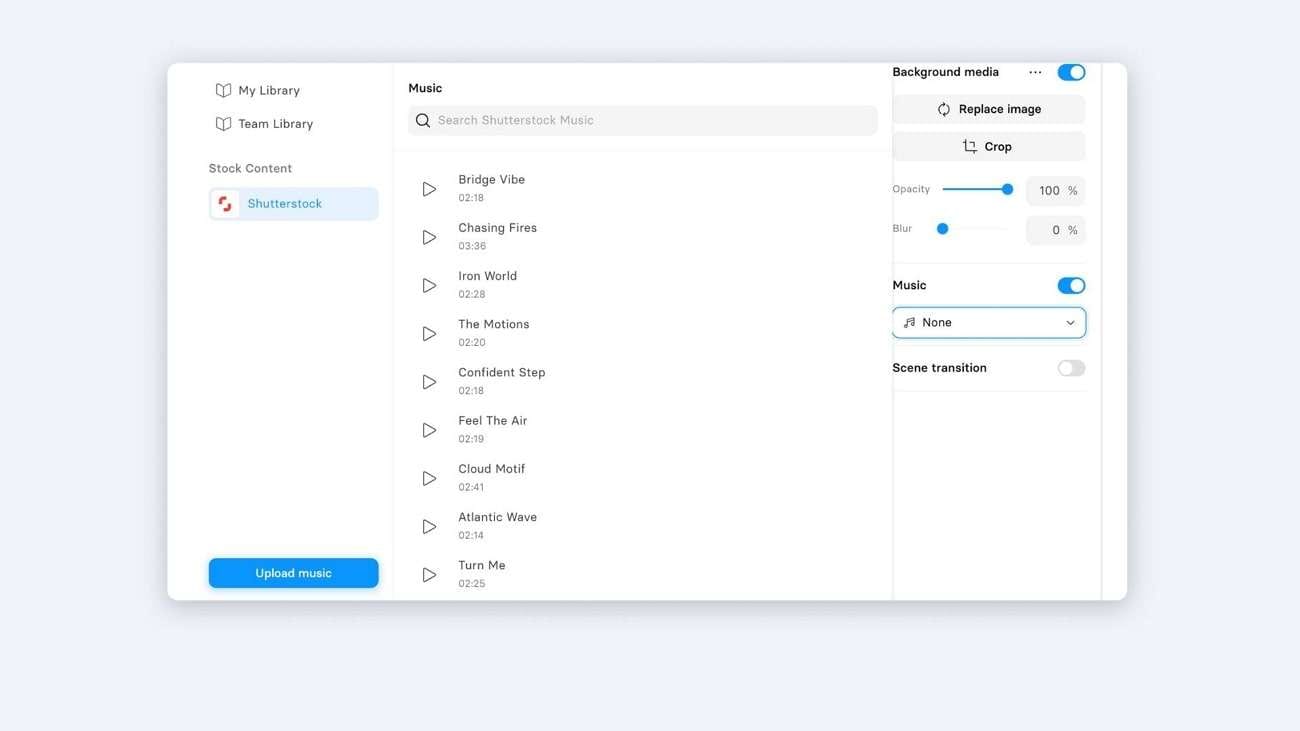
Step 5: Following this, you also have a chance to add animations, transitions, and music tracks in videos. Hereafter, tap the “Play” icon and see the video results. Once satisfied with the results, add a Title, Description, and enable the “Include Captions” option. Finally, hit the “Generate” button, and after this, you can click “Download” to save the AI avatar video on your device.
Part 5: The Most Reliable Alternatives to Synthesia AI Video Creator
Undoubtedly, the Synthesia video creator is a great AI tool. However, it’s essential to know about the tools through which you can create reliable AI avatar-integrated videos. A few are discussed here in this part in case you need them to become more creative.
1.Virbo
Virbo is one of the top-grade AI-integrated tools through which you can create optimized-level videos. It has a user-friendly and unique interface along with fast video creation speed. You can also use it for creating videos for professional use. Furthermore, Virbo supports over 150 AI avatars which show its greatness.
You can also select avatars based on gender, age, and ethnicity. One of the best things is finding avatars based on their specialty, such as makeup, designer, manager, professional, etc. In short, it is a one-stop solution for creating perfect AI avatar-integrated videos.
Get Started Online Free Download
Key Points
- Virbo is pretty cost-friendly because it allows you to use one premium account on all the supported devices and store your projects on the cloud.
- Using the Virboio alternative, you can turn the text prompts into descriptive speech videos without compromising quality.
- It also helps in creating AI scripts with the help of its integration with ChatGPT. Furthermore, you can even optimize already-written scripts on your Windows PC using Virbo.
2. HeyGen
With over 100+ AI avatars, this fantastic tool never fails to amaze users with its higher functionality. It also gives you the opportunity to create videos by adding text prompts. Moreover, HeyGen supports 300+ voices along with 40+ languages. You can scroll through both language and voices and select the one that fits your video requirement.
Key Points
- By using HeyGen, you can customize the AI avatars and can also choose the outfit of your choice to act as a main character.
- You can also unleash the full potential of avatar customizing and choose your own voice to use with an avatar.
- ThisSynthesia AI alternative also has the potential to bring photos to life with the help of its talking photo feature.
3. DeepBrain AI
If you wish to create videos with the help of scripts, this amazing tool got you covered. Through this, you can turn text into videos in a few taps. You can also do this with the help of photo-realistic avatars. There are tons of unique AI avatars in it, and you can also customize them as needed. Moreover, it also ensures that you save time and cost by 80%.

Key Points
- ThisSynthesia AI alternative can help in automated resume screening and can also create 10 questions for the interview.
- You can access both 2D and 3D human avatars and can use them in multiple use cases.
- It can support you in several use cases, such as education, media, retail, communication, financial services, etc.
Conclusion
In a nutshell, you can use theSynthesia AI video tool for generating AI avatar-integrated videos. This article has covered the inclusive review of Synthesia.io. From its key features to its working, you have discovered all the information. Moreover, the top 3 alternatives of Synthesia.io are also provided in this article. If you wish to know the best alternative to Synthesia video creator, the answer is Virbo.
Launching Your Live Room
Launching Your Live Room
Explore step-by-step instructions on decorating your space, uploading local images and videos, adding engaging AI interactions, etc. Elevate your streaming experience and captivate your audience with a seamlessly executed live room. Dive into our comprehensive guide now!
02Uploading Local Images and Videos
07AI Intelligent Script Generation
11Starting/Ending the Live Broadcast
Decorating Your Live Room
Decoration Guidance
- Click on the product homepage and create a blank live room to initiate a new live session.

Create a blank live room
- Upon creating a blank live room, the live room editing page will open. The left side serves as the operation area, the right side as the canvas area, and the materials area is located above.

Livestream room navigation
- Click on the templates to use pre-designed combinations of background, virtual hosts, and stickers.

Select a template
- Customize the background from the background library. During the live broadcast, only one background can be used.

Livestream room customization
- Choose a virtual host from the virtual host library. Only one virtual host can be used during the live session.
![]()
Choose a virtual host
- Add stickers from the sticker library. Multiple stickers can be used during the live broadcast.
- After selecting materials, adjust their position and size in the canvas area. Right-click to modify layers, copy, or delete materials.
Uploading Local Images and Videos
Upload background images or videos
- Upload: Click Background -> Upload Background -> Select file to upload. Materials will be displayed in “My Background” after uploading.

Upload Background
- Apply: Click Background -> My Background, then click on the material to use it on the canvas.
- Delete: Hover over the material and click the delete icon to remove it.

Delete Background
Note
Background upload requirements:
- Image and video dimensions should be 9:16
- Image formats: JPG/JPEG/PNG
- Video formats: MP4/MOV
- Resolution should not exceed 1080P
- Video duration should not exceed 30 minutes
- File size should not exceed 1GB
Upload sticker images or videos
- Upload: Click Sticker -> Upload Sticker -> Select file to upload. Materials will be displayed in “My Sticker” after uploading.

Upload Sticker
- Apply: Click Sticker -> My Sticker, then click on the material to use it on the canvas.
- Delete: Click Sticker -> My Sticker, hover over the material, click the delete icon to remove it.

Delete Sticker
Note
Sticker upload requirements:
- Image and video dimensions are flexible.
- Image formats: JPG/JPEG/PNG
- Video formats: MP4/MOV
- Resolution should not exceed 1080P
- Video duration should not exceed 30 minutes
- File size should not exceed 1GB
Text-Driven Live Room
Script Guidance
- Input script text: Copy and paste your script into the script dialogue box.

Text Scripts Inset
- Choose a matching tone: Click the voice-over entrance above, select a suitable tone, and preview it.
- Preview: Click the “Preview” button below the text to listen.
Audio-Driven Live Room
Audio Guidance
- Upload audio: Click Script -> Audio -> Upload local voice and upload the local file.

Upload Audio
- Preview audio: After uploading, click to preview the audio.

Preview Audio
- Audio sorting: Hold and drag to sort the audio files.

Audio sorting
- Audio sorting: Hold and drag to sort the audio files.

Modifying Live Room Name
Method Guidance
- Method 1: Click the edit button in the upper-left corner of the edit page to rename the live room.

Rename Livestream Room
- Method 2: Product homepage -> My Live Rooms -> Click on the more options for an individual live room -> Choose Rename.
Adding AI Identification
Step Guidance
- On the live room editing page, click on the checkbox before the AI identification to enable or disable it.
AI Intelligent Script Generation
Generation Guidance
- Click the “AI Intelligent Script” button below the script, a popup will appear.
- Enter your product name (mandatory), selling points (optional), promotional information (optional), select language and style, then click generate.

AI Script
- The generated result can be further modified, click “Use” to add it to the script dialogue box.
AI Translation
Translation Guidance
- Click the “AI Translation” button below the script, a popup will appear.
- Place the text to be translated on the left, click the middle arrow to select the language for translation (e.g., English), and click translate.

AI Translation
- The generated result can be further modified, click “Use” to add it to the script dialogue box.

AI Translation Result
Manual Interaction
Microphone Interaction
- Operational Flow:
- Click Manual Interaction -> Microphone, and select the microphone device.
- Speak into the microphone and observe the sound wave status.
- Open “Start Live,” wait for the appearance of the virtual host image, and click “Open Mic Takeover.” The virtual host’s mouth will be closed, and your voice will drive the virtual host to speak.
- After speaking, click “End Takeover,” and the virtual host will resume reading the scripted dialogue.
- Click Manual Interaction -> Microphone, and select the microphone device.
- Grant Browser Microphone Access:
- Google Chrome:
*Open Chrome, click the settings icon in the top right.
* Click “Settings,” open the settings page. Select “Privacy and Security” and then click “Site Settings.”
*Enter the site settings page, click “Microphone.”
* On the microphone authorization page, select that the site can request the use of your microphone.
* After these settings, when the browser needs to use the camera or microphone, a device request box will pop up on the page. Select “Allow.” - Mozilla Firefox:
*Open Firefox, click the settings icon in the top right, and click “Settings.”
* Open the settings page, click “Privacy & Security,” and find “Microphone Permissions.” Click “Settings” next to “Microphone.”
*Enter the settings page, add the site that requests the use of your microphone to the list, and click “Save Changes.”
* After these settings, when the browser needs to use the camera or microphone, a device request box will pop up on the page. Select “Allow.” - Sogou Browser:
*Open Sogou Browser, click the settings icon in the top right, and click “Options.”
* Open the options page, click “Advanced,” find “Privacy - Browsers on the Mac System:
*Locate “System Preferences” on your Mac dock and click the icon. Once opened, find “Security & Privacy” and click to open.
* On the “Security & Privacy” page, select “Privacy,” then click on “Microphone” and set the applications that need to use the microphone to “Allow.”
- Google Chrome:
Text Interaction
- Click on “Artificial Interaction” and enter interaction scripts in the input box below.
- Click “Add Text” to add it to the interaction list. After starting the live broadcast, each interaction script will have a send button.

Text Interactionn
- Click “Send” to trigger the AI to speak according to the interaction script.
Intelligent Interaction
Note
The current intelligent interaction feature only supports Alibaba International. If you are streaming on other platforms, you can skip this step.
Setting Entrance
- On the live broadcast page, click on “Intelligent Interaction,” select the live platform, and the supported intelligent interaction features will be randomly displayed.
Q&A Library Settings
- Creating a New Q&A:
- On the product homepage, click on Q&A Library - Add Q&A, and a popup window will appear.
- Fill in the rule name, keywords, reply text, and upload a reply video. Click Save.
Note
Rule Name: Name the rule for easy identification.
Keywords: If a viewer’s question in the live room contains any of these keywords, it will trigger the AI to answer.
Reply Content: You can add up to 5 replies. Include variables like [Viewer’s Nickname] and [Viewer’s Country] for personalized responses.
Sequential Reply: Replies in sequence when triggered.
Random Reply: Randomly selects a reply when triggered.
Reply Video: If configured, the video will be displayed at the specified position until the AI’s reply ends.
- Adjusting Q&A Activation Status:
- Click Q&A Library - Switch to close or open the Q&A rule. When closed, the Q&A rule will not take effect after the live broadcast starts.
- Turning on Q&A Library Switch in the Live Room:
- On the live broadcast editing page, click Intelligent Interaction - Platform, select “Alibaba International,” and turn on the Q&A Library switch. This must be done after starting the live broadcast and capturing the barrage for the function to work.
Greeting Rules Settings
- Greeting Content: You can add up to 5 replies, including variables like [Viewer’s Nickname] and [Viewer’s Country].
- Sequential Reply: Replies in sequence when triggered.
- Random Reply: Randomly selects a reply when triggered.
- On the live broadcast editing page, click Intelligent Interaction - Platform, select “Alibaba International,” turn on the Greeting switch, and click the edit icon to open the editing window. Fill in the reply text and click Save.
Sending Business Cards and Product Catalogs
- On the live broadcast editing page, click Intelligent Interaction - Platform, select “Alibaba International,” turn on the “Send Business Cards” switch, and turn on the “Send Product Catalogs” switch.
Note
These functions will only take effect after starting the live broadcast and capturing the barrage.
How to Start Live Barrage Capture
- Start Broadcasting in Virbo Live
- Follow the steps for “Start/End Broadcast” on the live broadcast editing page.
- Install the Plugin in Chrome
- Ensure Chrome is up to date, then download the plugin from the provided link . After downloading, unzip locally.
- Configure the Plugin in Chrome
- Open Chrome, go to Settings - Extensions - Manage Extensions, enable Developer mode, click “Load Unpacked,” and select the unzipped folder. Enable “Allow in incognito mode” in the plugin details.
- Copy the Live Control Page Link
- Copy the link of your live control page (web version) from the live platform. Paste the link into the live broadcast editing page under Intelligent Interaction - Live Room Link Input, then click “Start Capturing.”
Note
Alibaba International currently supports automatic Q&A, automatic greetings, automatic business card sending, and automatic product catalog sending. You can turn on the corresponding switches and then configure the detailed settings for each item.
Starting/Ending the Live Broadcast
Starting the Live Broadcast
- On the live broadcast editing page, click “Start Broadcasting.”
- The AI live broadcast window will appear shortly after, displaying the AI live broadcast.
Using Your Broadcasting Partner or OBS
Note
Keep the AI live broadcast window open on the desktop during the broadcast, or it will not broadcast properly.
- Open your broadcasting partner or OBS, add a window, select the Wondershare VVB (Live Version) live window.
- Click “Start Broadcasting.” Use Alt + mouse to crop out the web bar or use the zoom function to remove it.
- During the live broadcast, you can only modify the “Artificial Interaction” function; other broadcast settings cannot be changed.
Ending the Broadcast
- When concluding the live broadcast, initiate the termination of the live stream on the platform’s broadcasting partner first, followed by clicking the “End Live” button on Virbo Live to finalize the shutdown process.
02Uploading Local Images and Videos
07AI Intelligent Script Generation
11Starting/Ending the Live Broadcast
Decorating Your Live Room
Decoration Guidance
- Click on the product homepage and create a blank live room to initiate a new live session.
Create a blank live room
- Upon creating a blank live room, the live room editing page will open. The left side serves as the operation area, the right side as the canvas area, and the materials area is located above.
Livestream room navigation
- Click on the templates to use pre-designed combinations of background, virtual hosts, and stickers.
Select a template
- Customize the background from the background library. During the live broadcast, only one background can be used.
Livestream room customization
- Choose a virtual host from the virtual host library. Only one virtual host can be used during the live session.
![]()
Choose a virtual host
- Add stickers from the sticker library. Multiple stickers can be used during the live broadcast.
- After selecting materials, adjust their position and size in the canvas area. Right-click to modify layers, copy, or delete materials.
Uploading Local Images and Videos
Upload background images or videos
- Upload: Click Background -> Upload Background -> Select file to upload. Materials will be displayed in “My Background” after uploading.
Upload Background
- Apply: Click Background -> My Background, then click on the material to use it on the canvas.
- Delete: Hover over the material and click the delete icon to remove it.
Delete Background
Note
Background upload requirements:
- Image and video dimensions should be 9:16
- Image formats: JPG/JPEG/PNG
- Video formats: MP4/MOV
- Resolution should not exceed 1080P
- Video duration should not exceed 30 minutes
- File size should not exceed 1GB
Upload sticker images or videos
- Upload: Click Sticker -> Upload Sticker -> Select file to upload. Materials will be displayed in “My Sticker” after uploading.
Upload Sticker
- Apply: Click Sticker -> My Sticker, then click on the material to use it on the canvas.
- Delete: Click Sticker -> My Sticker, hover over the material, click the delete icon to remove it.
Delete Sticker
Note
Sticker upload requirements:
- Image and video dimensions are flexible.
- Image formats: JPG/JPEG/PNG
- Video formats: MP4/MOV
- Resolution should not exceed 1080P
- Video duration should not exceed 30 minutes
- File size should not exceed 1GB
Text-Driven Live Room
Script Guidance
- Input script text: Copy and paste your script into the script dialogue box.
Text Scripts Inset
- Choose a matching tone: Click the voice-over entrance above, select a suitable tone, and preview it.
- Preview: Click the “Preview” button below the text to listen.
Audio-Driven Live Room
Audio Guidance
- Upload audio: Click Script -> Audio -> Upload local voice and upload the local file.
Upload Audio
- Preview audio: After uploading, click to preview the audio.
Preview Audio
- Audio sorting: Hold and drag to sort the audio files.
Audio sorting
- Audio sorting: Hold and drag to sort the audio files.
Modifying Live Room Name
Method Guidance
- Method 1: Click the edit button in the upper-left corner of the edit page to rename the live room.
Rename Livestream Room
- Method 2: Product homepage -> My Live Rooms -> Click on the more options for an individual live room -> Choose Rename.
Adding AI Identification
Step Guidance
- On the live room editing page, click on the checkbox before the AI identification to enable or disable it.
AI Intelligent Script Generation
Generation Guidance
- Click the “AI Intelligent Script” button below the script, a popup will appear.
- Enter your product name (mandatory), selling points (optional), promotional information (optional), select language and style, then click generate.
AI Script
- The generated result can be further modified, click “Use” to add it to the script dialogue box.
AI Translation
Translation Guidance
- Click the “AI Translation” button below the script, a popup will appear.
- Place the text to be translated on the left, click the middle arrow to select the language for translation (e.g., English), and click translate.
AI Translation
- The generated result can be further modified, click “Use” to add it to the script dialogue box.
AI Translation Result
Manual Interaction
Microphone Interaction
- Operational Flow:
- Click Manual Interaction -> Microphone, and select the microphone device.
- Speak into the microphone and observe the sound wave status.
- Open “Start Live,” wait for the appearance of the virtual host image, and click “Open Mic Takeover.” The virtual host’s mouth will be closed, and your voice will drive the virtual host to speak.
- After speaking, click “End Takeover,” and the virtual host will resume reading the scripted dialogue.
- Click Manual Interaction -> Microphone, and select the microphone device.
- Grant Browser Microphone Access:
- Google Chrome:
*Open Chrome, click the settings icon in the top right.
* Click “Settings,” open the settings page. Select “Privacy and Security” and then click “Site Settings.”
*Enter the site settings page, click “Microphone.”
* On the microphone authorization page, select that the site can request the use of your microphone.
* After these settings, when the browser needs to use the camera or microphone, a device request box will pop up on the page. Select “Allow.” - Mozilla Firefox:
*Open Firefox, click the settings icon in the top right, and click “Settings.”
* Open the settings page, click “Privacy & Security,” and find “Microphone Permissions.” Click “Settings” next to “Microphone.”
*Enter the settings page, add the site that requests the use of your microphone to the list, and click “Save Changes.”
* After these settings, when the browser needs to use the camera or microphone, a device request box will pop up on the page. Select “Allow.” - Sogou Browser:
*Open Sogou Browser, click the settings icon in the top right, and click “Options.”
* Open the options page, click “Advanced,” find “Privacy - Browsers on the Mac System:
*Locate “System Preferences” on your Mac dock and click the icon. Once opened, find “Security & Privacy” and click to open.
* On the “Security & Privacy” page, select “Privacy,” then click on “Microphone” and set the applications that need to use the microphone to “Allow.”
- Google Chrome:
Text Interaction
- Click on “Artificial Interaction” and enter interaction scripts in the input box below.
- Click “Add Text” to add it to the interaction list. After starting the live broadcast, each interaction script will have a send button.
Text Interactionn
- Click “Send” to trigger the AI to speak according to the interaction script.
Intelligent Interaction
Note
The current intelligent interaction feature only supports Alibaba International. If you are streaming on other platforms, you can skip this step.
Setting Entrance
- On the live broadcast page, click on “Intelligent Interaction,” select the live platform, and the supported intelligent interaction features will be randomly displayed.
Q&A Library Settings
- Creating a New Q&A:
- On the product homepage, click on Q&A Library - Add Q&A, and a popup window will appear.
- Fill in the rule name, keywords, reply text, and upload a reply video. Click Save.
Note
Rule Name: Name the rule for easy identification.
Keywords: If a viewer’s question in the live room contains any of these keywords, it will trigger the AI to answer.
Reply Content: You can add up to 5 replies. Include variables like [Viewer’s Nickname] and [Viewer’s Country] for personalized responses.
Sequential Reply: Replies in sequence when triggered.
Random Reply: Randomly selects a reply when triggered.
Reply Video: If configured, the video will be displayed at the specified position until the AI’s reply ends.
- Adjusting Q&A Activation Status:
- Click Q&A Library - Switch to close or open the Q&A rule. When closed, the Q&A rule will not take effect after the live broadcast starts.
- Turning on Q&A Library Switch in the Live Room:
- On the live broadcast editing page, click Intelligent Interaction - Platform, select “Alibaba International,” and turn on the Q&A Library switch. This must be done after starting the live broadcast and capturing the barrage for the function to work.
Greeting Rules Settings
- Greeting Content: You can add up to 5 replies, including variables like [Viewer’s Nickname] and [Viewer’s Country].
- Sequential Reply: Replies in sequence when triggered.
- Random Reply: Randomly selects a reply when triggered.
- On the live broadcast editing page, click Intelligent Interaction - Platform, select “Alibaba International,” turn on the Greeting switch, and click the edit icon to open the editing window. Fill in the reply text and click Save.
Sending Business Cards and Product Catalogs
- On the live broadcast editing page, click Intelligent Interaction - Platform, select “Alibaba International,” turn on the “Send Business Cards” switch, and turn on the “Send Product Catalogs” switch.
Note
These functions will only take effect after starting the live broadcast and capturing the barrage.
How to Start Live Barrage Capture
- Start Broadcasting in Virbo Live
- Follow the steps for “Start/End Broadcast” on the live broadcast editing page.
- Install the Plugin in Chrome
- Ensure Chrome is up to date, then download the plugin from the provided link . After downloading, unzip locally.
- Configure the Plugin in Chrome
- Open Chrome, go to Settings - Extensions - Manage Extensions, enable Developer mode, click “Load Unpacked,” and select the unzipped folder. Enable “Allow in incognito mode” in the plugin details.
- Copy the Live Control Page Link
- Copy the link of your live control page (web version) from the live platform. Paste the link into the live broadcast editing page under Intelligent Interaction - Live Room Link Input, then click “Start Capturing.”
Note
Alibaba International currently supports automatic Q&A, automatic greetings, automatic business card sending, and automatic product catalog sending. You can turn on the corresponding switches and then configure the detailed settings for each item.
Starting/Ending the Live Broadcast
Starting the Live Broadcast
- On the live broadcast editing page, click “Start Broadcasting.”
- The AI live broadcast window will appear shortly after, displaying the AI live broadcast.
Using Your Broadcasting Partner or OBS
Note
Keep the AI live broadcast window open on the desktop during the broadcast, or it will not broadcast properly.
- Open your broadcasting partner or OBS, add a window, select the Wondershare VVB (Live Version) live window.
- Click “Start Broadcasting.” Use Alt + mouse to crop out the web bar or use the zoom function to remove it.
- During the live broadcast, you can only modify the “Artificial Interaction” function; other broadcast settings cannot be changed.
Ending the Broadcast
- When concluding the live broadcast, initiate the termination of the live stream on the platform’s broadcasting partner first, followed by clicking the “End Live” button on Virbo Live to finalize the shutdown process.
AI Translation | Wondershare Virbo Online
AI Translation (Online Version)
Embark on a journey into the world of AI Translation with our intuitive guide.
Explore the seamless integration of advanced language transformation designed for global communicators, language enthusiasts, and businesses expanding their reach.
Step 1. Input Text
- Begin by entering your text into the caption box. Then simply click “AI Translation” above the box.
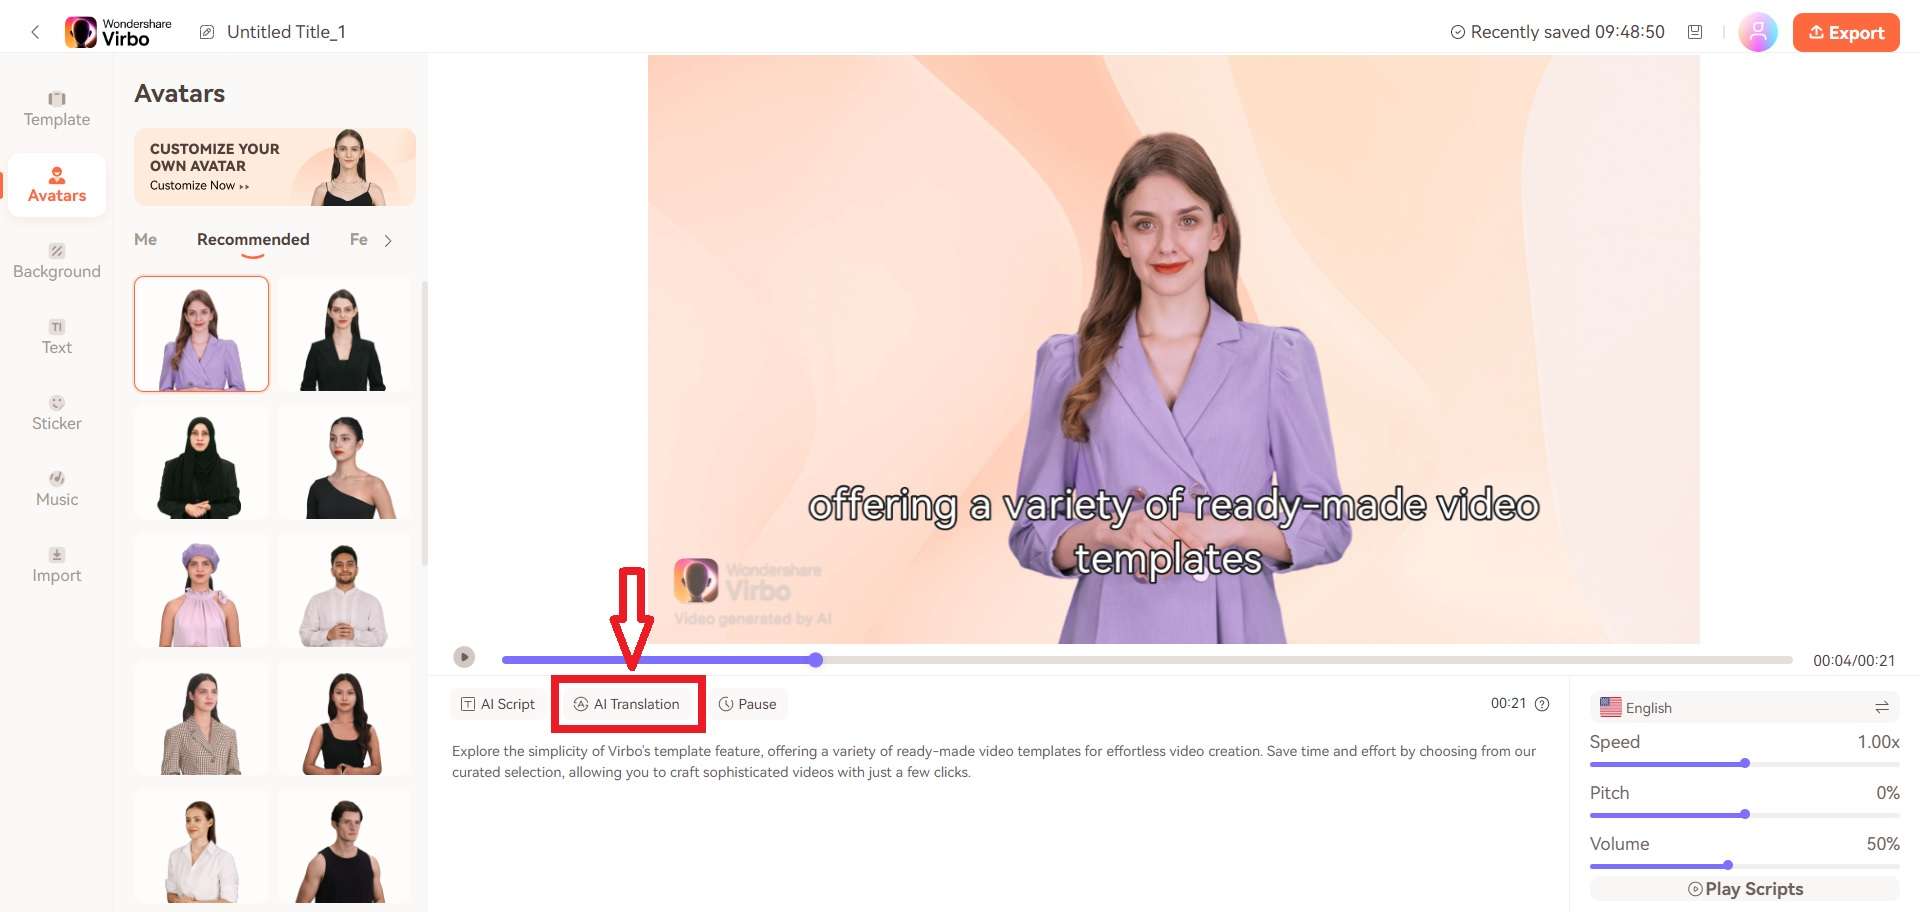
Input Text
Step 2. Choose Language
- AI translation will auto-detect your source language; simply choose the target language from the drop-down box.
- Click “Apply” to finalize the AI translation.
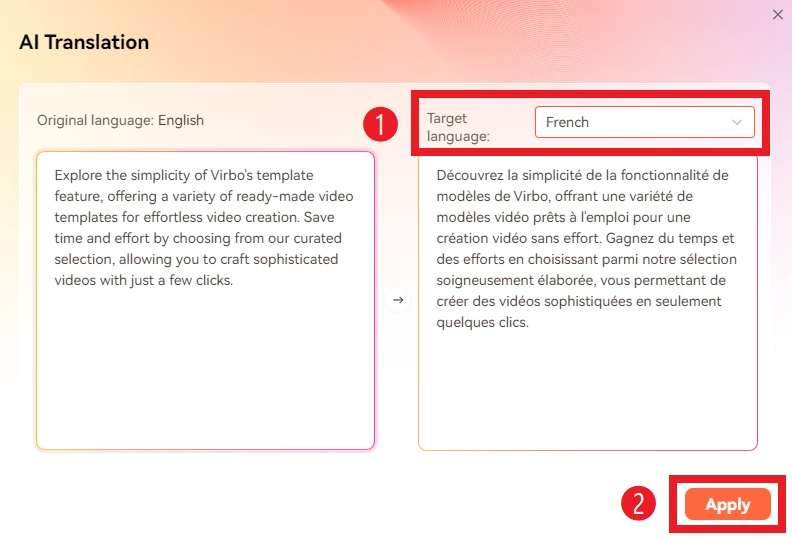
Choose Language
Note
AI Translation supports unlimited characters and can translate the following 16 languages: Chinese, English, Japanese, German, French, Russian, Portuguese, Spanish, Italian, Arabic, Filipino, Vietnamese, Burmese, Malay, Indonesian, and Thai.
Step 3. Output Text and Subtitles
- Upon accurate translation, subtitles are displayed in both the caption area and on the video preview screen.
- You have the flexibility to modify subtitles as needed.
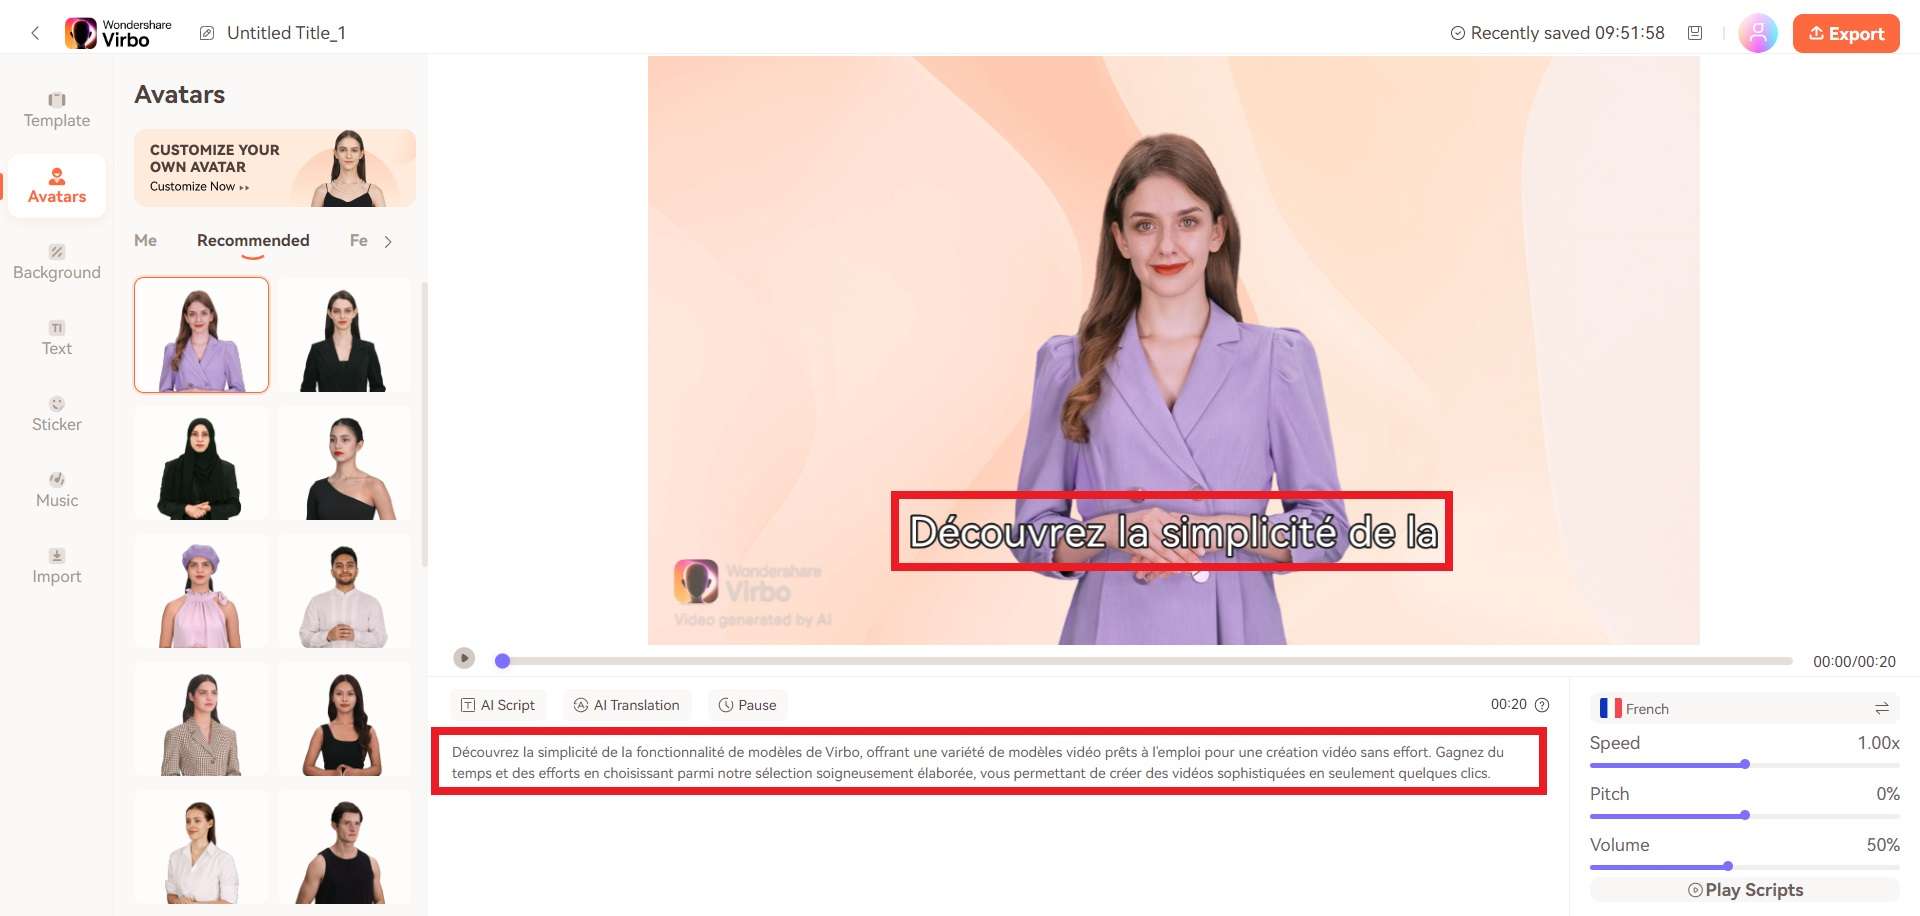
Output Text and Subtitles
FAQs about AI Translation
1Is it free to use the Virbo AI Translation feature?
Yes, you can use the AI Translation feature of Wondershare Virbo for free. However, you can only use it for 20 times. For more information, please refer to the Virbo Subscription Plan>
2Is Virbo AI Translation 100% accurate?
The Vribo AI Translation feature boasts exceptionally high translation accuracy, powered by cutting-edge AI technology. Leveraging advanced algorithms and machine learning, the system delivers precise and contextually relevant translations, elevating the quality of the translated content.
Step 1. Input Text
- Begin by entering your text into the caption box. Then simply click “AI Translation” above the box.
Input Text
Step 2. Choose Language
- AI translation will auto-detect your source language; simply choose the target language from the drop-down box.
- Click “Apply” to finalize the AI translation.
Choose Language
Note
AI Translation supports unlimited characters and can translate the following 16 languages: Chinese, English, Japanese, German, French, Russian, Portuguese, Spanish, Italian, Arabic, Filipino, Vietnamese, Burmese, Malay, Indonesian, and Thai.
Step 3. Output Text and Subtitles
- Upon accurate translation, subtitles are displayed in both the caption area and on the video preview screen.
- You have the flexibility to modify subtitles as needed.
Output Text and Subtitles
FAQs about AI Translation
1Is it free to use the Virbo AI Translation feature?
Yes, you can use the AI Translation feature of Wondershare Virbo for free. However, you can only use it for 20 times. For more information, please refer to the Virbo Subscription Plan>
2Is Virbo AI Translation 100% accurate?
The Vribo AI Translation feature boasts exceptionally high translation accuracy, powered by cutting-edge AI technology. Leveraging advanced algorithms and machine learning, the system delivers precise and contextually relevant translations, elevating the quality of the translated content.
Top 10 Free Video Translators to Mitigate Translation Risks
Translating videos using AI can be a valuable asset to a company. With so manyfree video translators on the market, there are many tools to choose from. However, these free tools can often cause many problems, drastically increasing the risk.
So, what are these risks, and how do we mitigate these risks? Let’s find out.
Part 1. Potential Risks and Fixes of Translating Videos
Nowadays, companies are looking less and less to hire translators and leaning more towards AI. But it isn’t because of the fact that AI is more accurate. It’s because AI just takes a fraction of the time a real human has. So, what are the potential risks of translating videos? Let’s find out.
1. Accuracy
One of the biggest issues with using free video translators is theaccuracy . Video translation software uses machine translation and machine learning, which can sometimes produce unpredictable and inaccurate results. Moreover, misleading translations can mess up a translated video and can potentially cause problems in the long run. This can be especially problematic for videos that contain important information, such as news broadcasts or educational content.
The fix for accuracy is to get it reviewed by a translator who can then finally confirm whether the translation was done perfectly or not. Or, you should use a tool that is known for its high accuracy, which we will discover in the next part.
2. Cultural Sensitivity
Videos often containcultural references and humor that may not translate well into other languages. If not handled carefully, video translation can result in offensive or insensitive content. For example, we might not fully understand slang or jokes in one culture. To fix this issue, you can either simplify a video so it is understandable by everyone or use human review to explain it perfectly.
3. Technical Problems
Most free tools have problems processing a video that is mildly complex to process. If your video contains complex audio or visual elements, you might not get the most out of translation, and the tool might not even work.
Another problem is that if a video has too much background noise, then the translation tool might not even detect certain words or phrases. In other words, you should aim for a video that is high-quality and even do some pre-translation editing to make sure that the translator can do its job perfectly.
Part 2. 10 Best Free Video Translation Services
1. Wondershare Virbo
Virbo is wondershare’sfree video translator that lets youtranslate video to English free . You can choose a plethora of video sources in various languages, and the platform will get the job done for you. For example, if you have a video in French and you want it to be translated into English, then Virbo will accurately do the job for you.
Virbo is also easy to use and effective, which means that the output you will get will be of a high quality. You can also generate an AI video with Virbo avatars that support more than 300 voices and various dialects.
Virbo is also available for Windows and Android, but if you want to use it online, you have that choice, too. Here are some of the key features of Virbo:

Get Started Online Free Download
Key Features
- Supports advanced AI features like AI Avatars, AI Voice, and AI Script Generator
- Over 300+ voices with multiple languages supported
- Easy and fast translation experience
2. Flixier

Flixier is one of the best free video translation software that allows free translations in up to 30 different languages. It helps you make your videos more accessible and you can make your videos translated within a couple of seconds of just uploading them on the platform.
Moreover, unlike many other translation tools that have the possibility of messing up, Flixier is advanced and can get the job done fairly quickly and efficiently. But the biggest benefit of using this tool is that you can edit any video right on your browser. Moreover, make a greattranslate video to English subtitles free app that you can use right now.
Key Features
- Translate in 30 different languages on your browser
- Fast language translator
- Allows video-to-text translation for free.
3. VEED.IO

If you are looking for the accuracy king of translation, thenVeed IO will be your new best friend. It has a translation accuracy rate of a whopping 98.5%, meaning that the error margin is already too low. However, that’s not where the fun subsides. You see, Veed IO also supports a whopping list of 125+ languages that it can translate into, and the results are instant.
Looking at all these features, it’s no wonder that brands like Facebook, P&G, Hublot, and Pinterest use Veed IO to make their marketing better and their brand voice accessible to the masses.
Key Features
- Allows you to download and manipulate subtitles for further enhancements
- Highest accuracy in any video translation tool
- Over 125+ languages supported
4. HappyScribe

HappyScribe is for people who are looking to translate videos from one language to another in the most professional and effective way. The software is being used by some of the biggest companies like BBC, Forbes, Spotify, and more. From here, we can speculate that HappyScribe is mostly popular with media companies.
One of the key features of HappyScribe is that it supports various video and audio formats that are perfect for all devices. HappyScribe also makes it easier for you to translate videos since it makes the whole process easier for you.
Key Features
- A good client portfolio
- Supports over 40 video and audio formats
- Easy 4-step video translation
5. Keevi

Keevi is a perfect way to translatevideo to English subtitles for free. It supports over 118 languages and allows you to download these subtitles to use them for your videos later on. Keevi also provides you with valuable knowledge on how you can get ahead of the competitors by creating content that is diverse enough for the audience.
So, if you’re looking to translate any language in the world into English and then download the subtitles for your business needs, consider trying Keevi out.
Key Features
- Supports 119 languages worldwide
- Easy to use and flexible
- Supports other tools like YouTube Transcription, Chroma Key, and Video Transcription
6. CapCut

CapCut is an all-in-one video editor that is available online and on mobile operating systems as well. However, not a lot of people know that it has its own video translation tool that works efficiently. You can translate any video online for free in most languages that are popular in today’s world.
The translation tool is so famous that it is being used by companies like TikTok, Nvidia, and Mobile Legends. So, if you are looking for a translator that claims to have 100% accuracy, CapCut might be the perfect tool for you.
Key Features
- 100% video translation accuracy
- Multilingual subtitle translation
- Play, delete, and replace subtitles as you need
7. StreamLabs

StreamLabs’ Podcast Editor is one of the best tools to translate your videos online. It supports over 30+ languages with Podcast Editor and is ideal for platforms like YouTube with closed captions.
The video translation tool is faster and comes with the highest accuracy. It also supports most formats that can be then used to generate SRT, VTT, or TXT files for your translation. All in all, if you’re looking for a great free video-to-subtitle translator, then StreamLabs is a great tool for you.
Key Features
- Accurate translation of videos
- Supports most video formats
- Increase the reach and engagement of your content
8. Maestra

Maestra is another popular AI video translator software that puts ease of use at its forefront. It specializes in making things easy for you every step of the way. It does not require any credit card or even an account to work.
With Maestra, you can get your videos translated easily and effectively. That is one of the reasons why HP, ZHealth, and many other big brands use it. In just three steps, you can translate your videos from one language to another for free, with minimal effort required.
Key Features
- Get instant subtitles
- Accurate transcriptions
- Automatic AI Voiceovers
9. Kapwing

Kapwing allows you to instantly translate videos with just a few clicks. It is easy and doesn’t require any software to be installed onto your computer. Moreover, Kapwing also translates in over 70+ languages so it is highly unlikely that your language won’t be present in the list.
However, with video translations, you also get highly accurate translated subtitles. The software also grants you a fully-working video editing tool so you can add future touch-ups and enjoy them to the fullest.
Key Features
- Save time and cost to translate videos
- Automatic translations for videos, audio, and text
- Fast and highly-accurate video translations with AI
10. Media.io

Media.io is anotherfree video translator that does its job perfectly. It automatically translates videos from one language to another without you having to do anything. Moreover, it is a free tool that isn’t too technical for an average user.
It is also the perfect tool to translate video to text but there’s also another feature that most creators use it for. With the AI power, Media IO can transform long form content into shorts so you can upload them on your platform to leverage the power of shorts.
Key Features
- Transforms long form content into short
- Easy three step video conversion
- Used by some of the biggest digital brands in the world
Part 3. Generate Free AI Video using Virbo
But what if you are looking beyond just video conversion? In that case,Virbo provides you with the most advanced AI video tool that lets you generate AI videos for free. With Virbo, you can generate AI video in minutes. All you need is well-written text, and the Virbo will turn it into a professional spokesperson that will look natural and sound all human.
Interestingly enough, the tool also offers more than 300 voices in various languages that you can leverage and take your business to the next level. Virbo is great for media companies, employees who want to present in an engaging way, educational institutions, and influencers.
It comes with multinational AI avatars, a range of natural voices, royalty-free assets & templates, and cross-platform support.
Get Started Online Free Download
Features of Virbo for Generation AI Video

- AI Avatar:
Virbo offers virtual AI avatars that will add a human touch to your videos with lifelike AI. Whether you’re doing marketing campaigns, educational videos, or more, the tool will be a landmark for the success of your business. There are 300+ real human avatars, natural human voices, 300+ voices & languages, and it also supports all age ranges.
- AI Video Translator:
As we have already discussed, Virbo offers an AI-cloning video translator with 20+ languages and solid results. It is also free for the first 3 minutes, so you can try out a project to see if it works for you. Moreover, the pricing is affordable for companies who are looking to leverage AI and take their brand to the next level.
- AI Voice:
An underrated feature of Virbo is its ability to generate AI voice from text. It uses the same expression AI and brings you AI-generated script without having to spend a lot of time getting a professional voiceover done.
Guide to Promoting Music Videos on YouTube
YouTube is one of the well-known platforms that has a promising audience globally. Many musicians and artists use YouTube for self-promotion. The influencing power of YouTube helps musicians to reach their targeted audience from all over the world. Therefore, it’s important topromote music videos on YouTube. By doing so, viewers can interact and enjoy your music videos through comments, likes, and shares.
If you are willing topromote music on YouTube , you are at the right place. This article will discuss a comprehensive guide to promoting music videos on YouTube to gain maximum viewership. Thus, keep reading this article to fetch authentic guidelines and tools for promoting music videos on YouTube.
Part 1: Why Promoting Music Video is Important?
Music video promotion on YouTube is essential for musicians and artists. This platform can provide musicians an excellent opportunity to showcase their talent through music videos. To learn the benefits of promoting music videos on YouTube, read the following points:
1. Attracts Vast Audience Through Visuals
Without a second thought, it can be stated that YouTube is a massive platform worldwide. It has a vast audience, as this platform is recognized in many countries. Therefore, you can connect with diverse people through your music videos on YouTube. This will help you in connecting with many people without going anywhere.
Moreover, the chances of gaining viewership on your music videos increase on YouTube to a great extent. The reason is that you can present your music videos through attractive visual storytelling. A well-produced music video can hook your audience thoroughly.
2. Financial Opportunities
YouTube also helps artists to get financial benefits. You can not only pursue your passion through YouTube but also gain monetary benefits. Once you have gained sufficient subscribers and viewership on the YouTube channel, you can earn money through it. WithYouTube ads music , you can generate a handsome income by sitting at home. Thus, YouTube helps people to become financially independent and strong.
3. Easy to Discover
YouTube algorithms function to promote music videos to people regularly. Once you have posted a music video on YouTube, it can be visible to various viewers. This platform lets you insert relevant keywords in your YouTube titles and descriptions for effective promotion. Thus, you can gain viewership on your music videos regularly.
4. Analytics and Feedback
Do you know that YouTube offers data and analytics on every music video performance? With data and analytics, you can analyze audience demographics on your YouTube channel. This will help you understand the current preferences of your viewers. Moreover, YouTube provides relevant information about watch times on your YouTube channel to help you modify your content.
Furthermore, you can generate feedback from your audience through comments. It will assist you in enhancing your music videos. Resultantly, you can engage more viewers through your music videos by bringing constant improvements.
5. Create Trends and Ensures Cross Promotion
You can become a trendsetter if you successfully showcase your unique talent throughmusic video promotion . YouTube displays trending videos separately to get a spotlight from a maximum number of people. Moreover, YouTube videos can be shared on multiple platforms like Facebook, Instagram, WhatsApp, etc. Thus, you can create a strong fan base by posting music videos on YouTube.
Part 2: Ultimate Guide to Promoting Music Videos on YouTube
Do you want topromote music videos on YouTube successfully? Read this section carefully to learn the valuable tactics for effective music video promotion on YouTube.
1. Reach Your Audience
Targeting your audience is essential to ensure high viewership on your music video. To do so, you have to research your audience demographics, such as age, gender, and location. It would help to understand your audience’s preferences, current demands, and interests. You can use the YouTube Analytics tool to analyze your audience’s behavior.
After knowing the needs of your viewers, ensure to produce relevant content. Furthermore, you should construct a schedule to upload your YouTube videos. You can pick a time when most people are free and want entertainment. This will help in reaching your targeted audience at the right time.
2. Create a Compelling Profile
Apart frompromoting music videos , creating an attractive profile on YouTube is also significant. To make your identity highlighted and accepted, it would be ideal to generate a complete YouTube profile. First, select a unique yet relevant YouTube channel name. The name should compellingly display your true identity. Afterward, you should pay attention to your channel art by uploading attractive banners.
Your YouTube profile picture also plays a key role in attracting viewers. Thus, select a high-quality profile picture that matches the personality of your YouTube channel. Afterward, you can produce a channel trailer to intrigue your viewers. You should also create engaging custom thumbnails for YouTube videos to get click baits. Moreover, provide complete information in your channel’s “About” section.
3. Apply Proficient Video Editing Skills
Once you have produced a music video, it’s time to edit the raw footage. To cast a professional impression, you should know how to experiment with video editing. Thus, you should learn the basics of video editing through online classes or professional help. This will help you adjust your video’s settings to remove flaws from your music videos.
Most importantly, you should try reliable video editing software. To achieve quality results, you can try Wondershare Filmora . This tool has multiple AI features that can boost editing efficiency by automating manual tasks. Moreover, it has a friendly interface that can help beginners and inexperienced individuals. Thus, you can practice on Filmora to edit your YouTube music videos.

4. Add Engaging Elements
For effectiveYouTube music promotion , you should add engaging elements to your video. Your video should engage the viewers so that they can share it on other platforms. If you are hesitant to present your music video, you can use virtual YouTube presenters. For this, the best available tool isVirbo . This tool contains tons of AI Avatars with different attires that can present your music videos with natural human voices.
Virbo can produce engaging AI videos within a few minutes. This video avatar creator is compatible with Windows, Android, iOS, and Web Browsers. It uses advanced AI technology to complete your given tasks automatically. With cost-effective resources on this tool, you can make your music videos engaging through this tool. Therefore, you must try Virbo to get instant results without putting in a manual effort.

Get Started Online Free Download
Key Features
- Multi-National AI Avatars: Virbo comprises more than 150 AI Avatars of multiple nationalities. The avatars are available in both genders with different age ranges and attires.
- Various Supported AI Voices: You can select AI voices for your avatar from more than 120 options. The AI voices are available in all common languages and diverse accents. You can also choose the tone of the AI voice.
- Generate YouTube Titles and Descriptions: With the integration of ChatGPT in Virbo, you can create YouTube titles and descriptions automatically. By inserting relevant keywords and product details, the tool can produce attractive YouTube descriptions.
- Free Assets and Templates: This AI-powered tool consists of built-in templates and free assets that you can utilize for your videos. Moreover, they are free and can easily be used for video enhancement.
5. Make Connection with Your Viewers
Bridging the gap with your viewers helps in building a strong YouTube community. You should respond to the comments under your video to communicate with your viewers. You can also create a Q&A video to answer the common queries of your audience. Live chats and sessions also play a key role in effective communication.
Furthermore, you can collaborate with other YouTubers to connect with more people. You can plan exciting activities with other YouTubers so that viewers can enjoy them to their fullest. Also, you should post your other social media links, such as Instagram, Facebook, and Twitter, under the YouTube description. This will help you gain followers on all your social media platforms.
6. Enhance YouTube SEO
You should enhance your YouTube SEO game to gain maximum visibility for your music videos. By executing YouTube SEO strategies, you canpromote music videos effortlessly. First, research common keywords people use to find YouTube videos of their interest. You can get help from tools like TubeBuddy and Google Keyword Planner . Afterward, insert the famous keywords in YouTube titles and descriptions smartly.
Moreover, you should also use tags wisely so that YouTube can comprehend the context of your video. This will help YouTube algorithms to increase the visibility of your music video. You should also add closed captions to your music video, which can lead to improved YouTube SEO. Also, you should create playlists on your YouTube channel to organize your music videos. It will allow viewers to navigate to your content.
Conclusion
YouTube music promotion can help in reaching a maximum number of people globally. To become a famous musician, you should know the techniques to promote music videos on YouTube. This article taught you the importance of attractive storytelling, YouTube SEO, and other essential factors for music video promotion.
You can also add AI virtual presenters to your YouTube music videos through Virbo. Hence, consider this article to get complete guidelines for YouTube music video promotion.
You May Also Ask
1.Can you do free promotion of music videos on YouTube?
Yes, you can do free YouTube music video promotion by using organic methods. These methods include sharing music videos on social media, optimizing the SEO of titles and descriptions, and interacting with the audience in the comment section.
2. Should you buy likes and views to market YouTube music videos?
There are various ways of buying views and likes for YouTube music videos, but it is not recommended. This is because YouTube has powerful advanced algorithms to detect fake or purchased likes or views.
Also read:
- 2024 Approved How To Translate Videos in Tamil for a Wider Reach
- Review of LazLive Live Selling Platform With Guide for 2024
- New Top 9 Choices for Video Auto Translate
- New Best 12 AI Voice Cloning Tools Online & Offline
- How To Access and Watch Nonstop NBA Live Stream Free Online for 2024
- New The Best Tools to Convert Text to MP3 With the Best Natural Voices for 2024
- New What Is an AI Tool?
- New Create An AI Avatar Video
- New 12 Must-Try Best Voice Cloning Tools to Use for 2024
- Updated 7 Top Explainer Video Makers You May Like
- In 2024, Top 10 Free Football Streaming Websites for Live Matches
- What Is an AI Video Editor? | Wondershare Virbo Glossary for 2024
- Updated Guide to Generating Speech in Different Languages With the Best Tools for 2024
- New What Is AI Marketing, In 2024
- New What Is an AI Video Editor for 2024
- Updated In 2024, AI Avatar | Wondershare Virbo User Guide
- Updated The Ultimate Guide to Online Video Marketing for 2024
- New How to Define AI Video for 2024
- Updated In 2024, A Detailed Guide To Stream to Instagram With an RTMP
- New 2024 Approved Handling Exceptions | Virbo AI Live Stream
- New 2024 Approved How To Create Video From Text Easily Step-by-Step
- Cloning Voices With Hugging Face Features, Guidance, Alternatives
- New The Ultimate Guide to Generating Speech in Different Languages With the Best Tools for 2024
- Updated 2024 Approved Top 10 Free Football Streaming Websites for Live Matches
- New 2024 Approved Guide to Discovering the Voice Generators/Changers with the Most Anime
- 8 Types of Explainer Videos with Best Examples
- Updated Right Moves to Use TTS in Descript for 2024
- Updated 2024 Approved Real-Time AI Voice Changer Revolutionizing Communication
- New 2024 Approved Best Video Translator App for PC You Cannot Miss
- New In 2024, A Detailed Review & Alternatives of VOCALOID6 Voice Generator
- In 2024, Easy Ways to Manage Your Google Pixel 8 Pro Location Settings | Dr.fone
- In 2024, How To Fix OEM Unlock Missing on Vivo T2 Pro 5G?
- 9 Best Free Android Monitoring Apps to Monitor Phone Remotely For your Vivo V30 Pro | Dr.fone
- In 2024, How To Use Special Features - Virtual Location On Nokia C32? | Dr.fone
- Google Play Services Wont Update? 12 Fixes are Here on Lava Yuva 2 | Dr.fone
- Edit and Send Fake Location on Telegram For your Honor X50 in 3 Ways | Dr.fone
- In 2024, Overview of the Best OnePlus Nord N30 5G Screen Mirroring App | Dr.fone
- In 2024, 4 Things You Must Know About Apple iPhone 13 Pro Activation Lock
- How to jailbreak iCloud locked Apple iPhone 6 Plus
- How Can I Catch the Regional Pokémon without Traveling On Apple iPhone 12 Pro | Dr.fone
- In 2024, Effective Ways To Fix Checkra1n Error 31 On Apple iPhone 14 Pro Max
- In 2024, How To Use Allshare Cast To Turn On Screen Mirroring On Nubia Z50 Ultra | Dr.fone
- How to Fix Android.Process.Media Has Stopped on Xiaomi Redmi Note 13 5G | Dr.fone
- Full Guide on Mirroring Your Vivo G2 to Your PC/Mac | Dr.fone
- In 2024, Android to Apple How To Transfer Photos From Tecno Camon 20 Pro 5G to iPad Easily | Dr.fone
- Top 5 Tracking Apps to Track Realme C53 without Them Knowing | Dr.fone
- In 2024, Complete Tutorial to Use GPS Joystick to Fake GPS Location On Apple iPhone 6s Plus | Dr.fone
- In 2024, How To Bypass the Required Apple Store Verification For iPhone X | Dr.fone
- In 2024, How to Get and Use Pokemon Go Promo Codes On Huawei P60 | Dr.fone
- In 2024, List of Pokémon Go Joysticks On Itel P55 | Dr.fone
- How to Unlock the Lock Screen on my Google
- In 2024, New Multiple Ways How To Remove iCloud Activation Lock From your iPhone 14
- In 2024, Hassle-Free Ways to Remove FRP Lock on Google Pixel Fold Phones with/without a PC
- How to unlock a disable iPhone 12 mini using icloud website
- In 2024, Top IMEI Unlokers for Your Samsung Galaxy M14 4G Phone
- Top 6 Apps/Services to Trace Any Samsung Galaxy A24 Location By Mobile Number | Dr.fone
- The Most Useful Tips for Pokemon Go Ultra League On Apple iPhone SE (2022) | Dr.fone
- Sim Unlock Vivo V29e Phones without Code 2 Ways to Remove Android Sim Lock
- Title: In 2024, Update 6 Best Voice Changers You Cant Miss
- Author: Sam
- Created at : 2024-05-19 03:35:01
- Updated at : 2024-05-20 03:35:01
- Link: https://ai-voice-clone.techidaily.com/in-2024-update-6-best-voice-changers-you-cant-miss/
- License: This work is licensed under CC BY-NC-SA 4.0.
